編輯:關於Android編程
ZXing是谷歌的一個開源庫,可以用來生成二維碼、掃描二維碼。本文所介紹的是第一部分。
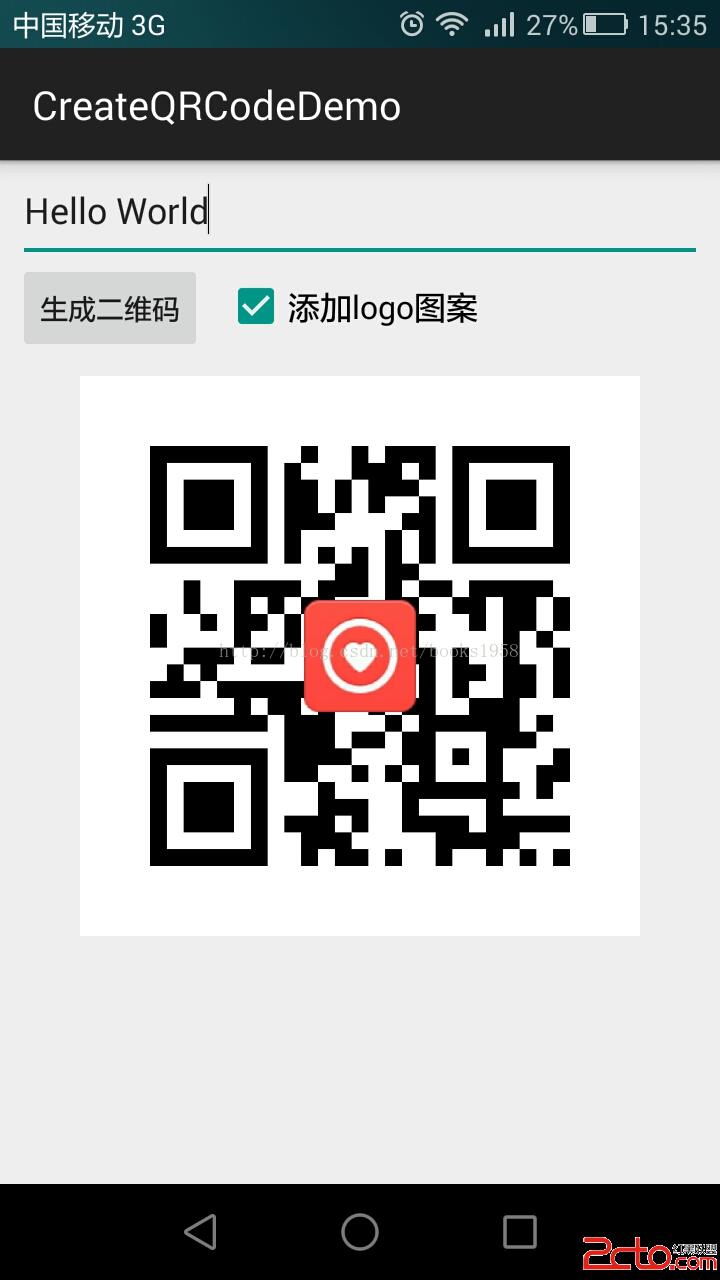
首先上效果圖:
ZXing相關各種文件官方下載地址:https://github.com/zxing/zxing/releases
或者在這裡下載(只有本項目所用的jar包,版本號:3.2.0):鏈接: http://pan.baidu.com/s/1hq3s5EW 密碼: mvg7
1.生成二維碼的工具類
/**
 * 二維碼生成工具類
 */
public class QRCodeUtil {
    /**
     * 生成二維碼Bitmap
     *
     * @param content   內容
     * @param widthPix  圖片寬度
     * @param heightPix 圖片高度
     * @param logoBm    二維碼中心的Logo圖標(可以為null)
     * @param filePath  用於存儲二維碼圖片的文件路徑
     * @return 生成二維碼及保存文件是否成功
     */
    public static boolean createQRImage(String content, int widthPix, int heightPix, Bitmap logoBm, String filePath) {
        try {
            if (content == null || "".equals(content)) {
                return false;
            }

            //配置參數
            Map hints = new HashMap<>();
            hints.put(EncodeHintType.CHARACTER_SET, "utf-8");
            //容錯級別
            hints.put(EncodeHintType.ERROR_CORRECTION, ErrorCorrectionLevel.H);
            //設置空白邊距的寬度
//            hints.put(EncodeHintType.MARGIN, 2); //default is 4

            // 圖像數據轉換,使用了矩陣轉換
            BitMatrix bitMatrix = new QRCodeWriter().encode(content, BarcodeFormat.QR_CODE, widthPix, heightPix, hints);
            int[] pixels = new int[widthPix * heightPix];
            // 下面這裡按照二維碼的算法,逐個生成二維碼的圖片,
            // 兩個for循環是圖片橫列掃描的結果
            for (int y = 0; y < heightPix; y++) {
                for (int x = 0; x < widthPix; x++) {
                    if (bitMatrix.get(x, y)) {
                        pixels[y * widthPix + x] = 0xff000000;
                    } else {
                        pixels[y * widthPix + x] = 0xffffffff;
                    }
                }
            }

            // 生成二維碼圖片的格式,使用ARGB_8888
            Bitmap bitmap = Bitmap.createBitmap(widthPix, heightPix, Bitmap.Config.ARGB_8888);
            bitmap.setPixels(pixels, 0, widthPix, 0, 0, widthPix, heightPix);

            if (logoBm != null) {
                bitmap = addLogo(bitmap, logoBm);
            }

            //必須使用compress方法將bitmap保存到文件中再進行讀取。直接返回的bitmap是沒有任何壓縮的,內存消耗巨大!
            return bitmap != null && bitmap.compress(Bitmap.CompressFormat.JPEG, 100, new FileOutputStream(filePath));
        } catch (WriterException | IOException e) {
            e.printStackTrace();
        }

        return false;
    }

    /**
     * 在二維碼中間添加Logo圖案
     */
    private static Bitmap addLogo(Bitmap src, Bitmap logo) {
        if (src == null) {
            return null;
        }

        if (logo == null) {
            return src;
        }

        //獲取圖片的寬高
        int srcWidth = src.getWidth();
        int srcHeight = src.getHeight();
        int logoWidth = logo.getWidth();
        int logoHeight = logo.getHeight();

        if (srcWidth == 0 || srcHeight == 0) {
            return null;
        }

        if (logoWidth == 0 || logoHeight == 0) {
            return src;
        }

        //logo大小為二維碼整體大小的1/5
        float scaleFactor = srcWidth * 1.0f / 5 / logoWidth;
        Bitmap bitmap = Bitmap.createBitmap(srcWidth, srcHeight, Bitmap.Config.ARGB_8888);
        try {
            Canvas canvas = new Canvas(bitmap);
            canvas.drawBitmap(src, 0, 0, null);
            canvas.scale(scaleFactor, scaleFactor, srcWidth / 2, srcHeight / 2);
            canvas.drawBitmap(logo, (srcWidth - logoWidth) / 2, (srcHeight - logoHeight) / 2, null);

            canvas.save(Canvas.ALL_SAVE_FLAG);
            canvas.restore();
        } catch (Exception e) {
            bitmap = null;
            e.getStackTrace();
        }

        return bitmap;
    }

}
2.在Activity中的使用:
/**
 * 二維碼生成
 */
public class MainActivity extends ActionBarActivity {

    @Override
    protected void onCreate(Bundle savedInstanceState) {
        super.onCreate(savedInstanceState);
        setContentView(R.layout.activity_main);

        //內容
        final EditText contentET = (EditText) findViewById(R.id.create_qr_content);
        //顯示二維碼圖片
        final ImageView imageView = (ImageView) findViewById(R.id.create_qr_iv);
        //是否添加Logo
        final CheckBox addLogoCB = (CheckBox) findViewById(R.id.create_qr_addLogo);
        Button createQrBtn = (Button) findViewById(R.id.create_qr_btn);

        createQrBtn.setOnClickListener(new View.OnClickListener() {

            @Override
            public void onClick(View v) {
                final String filePath = getFileRoot(MainActivity.this) + File.separator
                        + "qr_" + System.currentTimeMillis() + ".jpg";

                //二維碼圖片較大時,生成圖片、保存文件的時間可能較長,因此放在新線程中
                new Thread(new Runnable() {
                    @Override
                    public void run() {
                        boolean success = QRCodeUtil.createQRImage(contentET.getText().toString().trim(), 800, 800,
                                addLogoCB.isChecked() ? BitmapFactory.decodeResource(getResources(), R.mipmap.qr_logo) : null,
                                filePath);

                        if (success) {
                            runOnUiThread(new Runnable() {
                                @Override
                                public void run() {
                                    imageView.setImageBitmap(BitmapFactory.decodeFile(filePath));
                                }
                            });
                        }
                    }
                }).start();

            }
        });
    }

    //文件存儲根目錄
    private String getFileRoot(Context context) {
        if (Environment.getExternalStorageState().equals(Environment.MEDIA_MOUNTED)) {
            File external = context.getExternalFilesDir(null);
            if (external != null) {
                return external.getAbsolutePath();
            }
        }

        return context.getFilesDir().getAbsolutePath();
    }
}
3.本項目中圖片文件保存在
context.getExternalFilesDir(null)目錄之下的。按照官方的api文檔,從KitKat開始(Android 4.4),保存文件到這個目錄下將不需要SD卡讀寫權限。但是經過測驗表明,在紅米Note和魅族MX3上(系統均為android 4.4.4),的確不需要權限;但是在本人的華為P6上(Android 4.4.2),必須聲明權限才能成功的保存文件,即必須在manifest中添加如下內容:
因此,個人猜測,所謂的不需要權限是從 Android 4.4.4開始的。
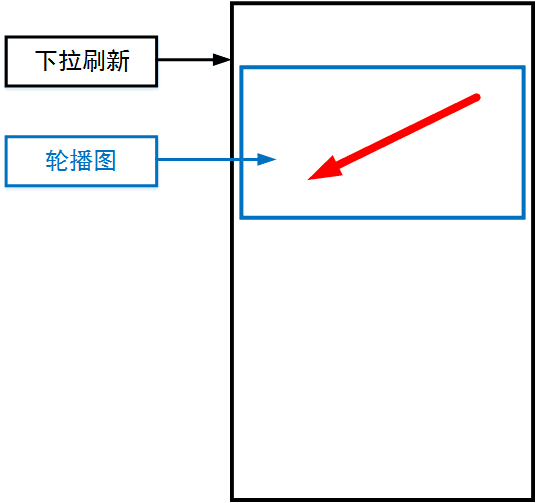 Android下拉刷新與輪播圖滑動沖突解決方案
最近在開發中遇到了這樣一個問題,在下拉刷新組件中包含了一個輪播圖組件,當左右滑動的圖片時很容易觸發下拉刷新,如下圖所示:如圖中紅色箭頭所示方向切換輪播圖,很容易觸發下拉刷
 android構建基本XMl動畫
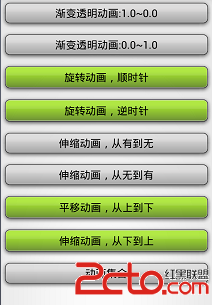
在res下新建一個文件夾,命名為anim,創建xml文件,例如創建了一個a1.xml //在這裡寫動畫 alpha:漸變透明度效果 rotate:旋轉動
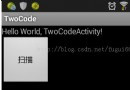 在Android用ZXing.jar識別二維碼的精簡版(簡化了配置和代碼)
最近公司做了一款OTP令牌激活的產品,由於之前激活手機令牌需要輸入很多的激活信息才能進行激活。經過一段使用後,發現易用性不是很強,考慮如果加入二維碼的的掃碼功能豈不是大大
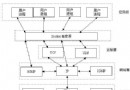 Android IPC機制(五)用Socket實現跨進程聊天程序
1.Socket簡介Socket也稱作“套接字“,是在應用層和傳輸層之間的一個抽象層,它把TCP/IP層復雜的操作抽象為幾個簡單的接口供應用層調用