編輯:關於Android編程
最近在搗鼓android 自定義控件屬性,學到了TypedArray以及attrs。在這其中看了一篇大神博客Android 深入理解Android中的自定義屬性。我就更加深入學習力一番。我就沿著這個學習,講一下流程吧,後續一篇還有應用。
<!--{cke_protected}{C}%3C!%2D%2D%3Fxml%20version%3D%221.0%22%20encoding%3D%22utf-8%22%3F%2D%2D%3E-->
<resources>

    <attr name="titleText" format="string">
    <attr name="titleTextColor" format="color">
    <attr name="titleTextSize" format="dimension">

    <declare-styleable name="AuthCodeView">
        <attr name="titleText">
        <attr name="titleTextColor">
        <attr name="titleTextSize">
    </attr></attr></attr></declare-styleable>

</attr></attr></attr></resources>
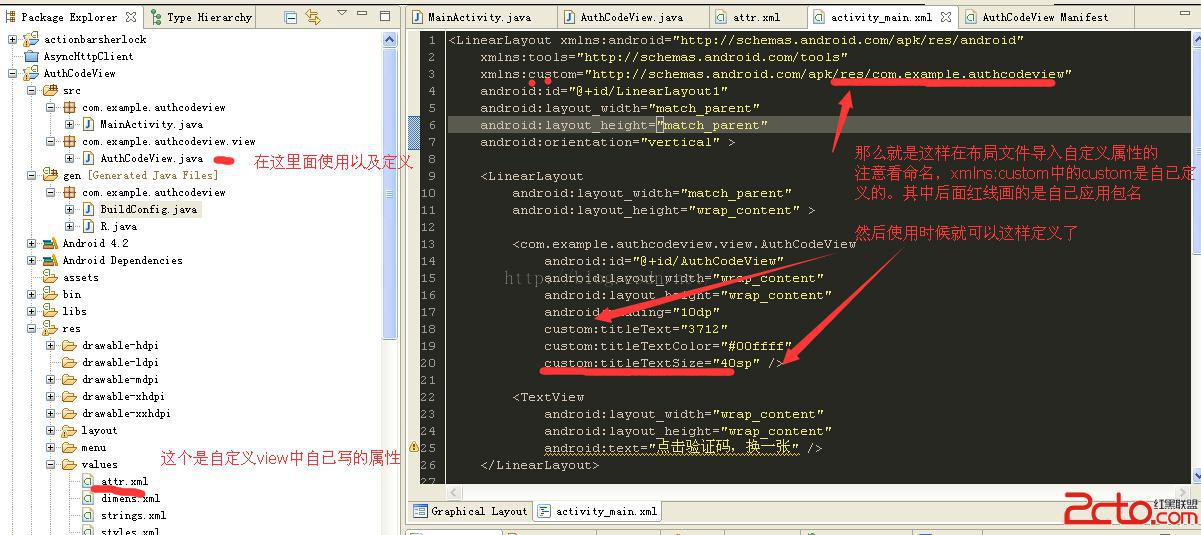
看到這上面的代碼有三個屬性,首先attr標簽是定義名字以及屬性。後面是一個declare-styleable組,這個組名字AuthCodeView,後面class中會用到。先看兩張圖,就了解大半了,也理解大半了。
a、自定義屬性的名字的引用
b、仔細看圖上說明以及a跟b圖的比較。你就知道屬性名改變,以及怎麼引用。
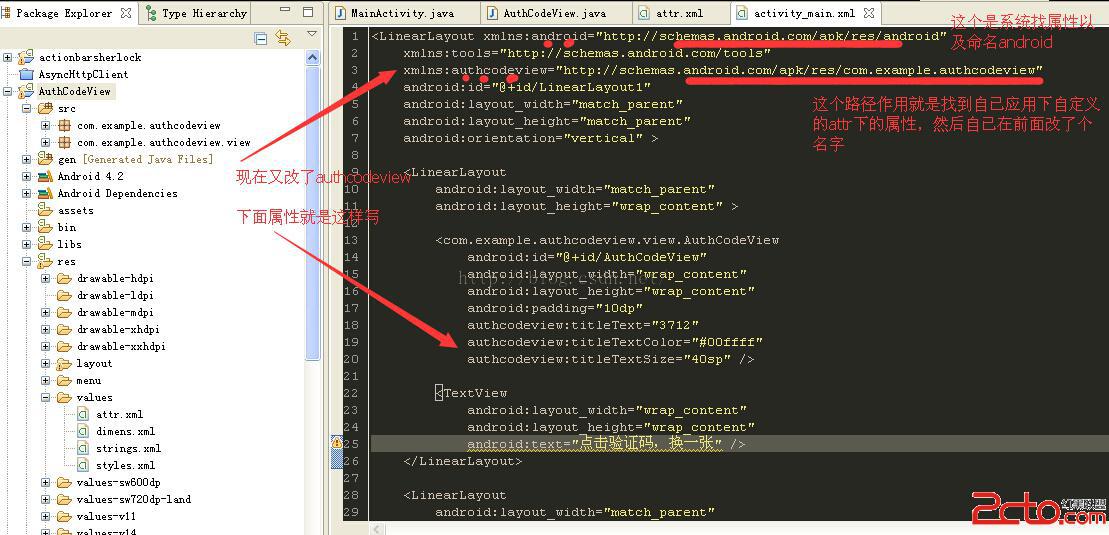
怕上面圖片看不清,附上部分xml代碼
<linearlayout xmlns:android="http://schemas.android.com/apk/res/android" xmlns:tools="http://schemas.android.com/tools" xmlns:authcodeview="http://schemas.android.com/apk/res/com.example.authcodeview" android:id="@+id/LinearLayout1" android:layout_width="match_parent" android:layout_height="match_parent" android:orientation="vertical">

    <linearlayout android:layout_width="match_parent" android:layout_height="wrap_content">

        <com.example.authcodeview.view.authcodeview android:id="@+id/AuthCodeView" android:layout_width="wrap_content" android:layout_height="wrap_content" android:padding="10dp" authcodeview:titletext="3712" authcodeview:titletextcolor="#00ffff" authcodeview:titletextsize="40sp">

        <textview android:layout_width="wrap_content" android:layout_height="wrap_content" android:text="點擊驗證碼,換一張">
    </textview></com.example.authcodeview.view.authcodeview></linearlayout>

    <linearlayout android:layout_width="match_parent" android:layout_height="wrap_content">

        <textview android:layout_width="wrap_content" android:layout_height="wrap_content" android:text="輸入驗證碼">

        <edittext android:id="@+id/editText1" android:layout_width="match_parent" android:layout_height="wrap_content" android:ems="10" android:inputtype="number">

            <requestfocus>
        </requestfocus></edittext>
    </textview></linearlayout><button android:id="@+id/button1" android:layout_width="match_parent" android:layout_height="wrap_content" android:text="驗證"></button></linearlayout>
重點看頭部layout中xmlns:android="http://schemas.android.com/apk/res/android"這是引用系統屬性的作用。
然而xmlns:authcodeview="http://schemas.android.com/apk/res/com.example.authcodeview"是引用自定義屬性。
xmlns:+名稱 ="http://schemas.android.com/apk/res/ + 應用的包名"
後面使用時候自定義屬性就是這樣啦
authcodeview:titleText="3712"
authcodeview:titleTextColor="#00ffff"
authcodeview:titleTextSize="40sp"
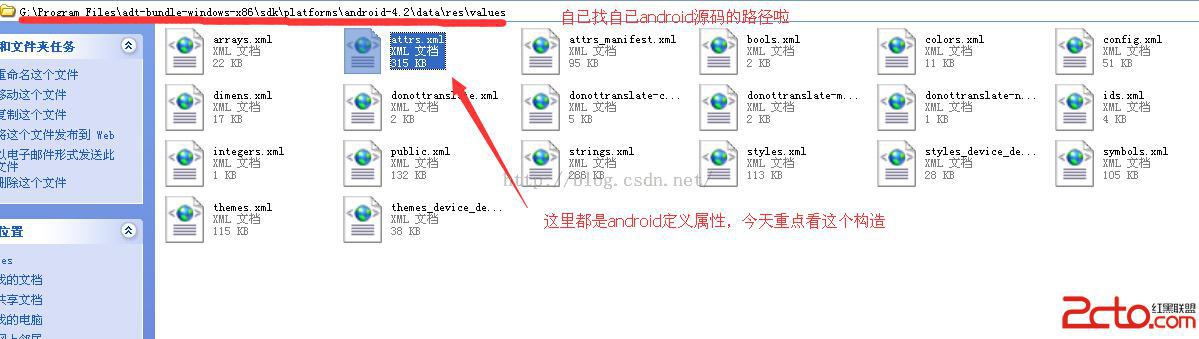
順便附上系統arrs自定義的路徑
看一段代碼先
	/**
	 * 獲得我自定義的樣式屬性
	 *
	 * @param context
	 * @param attrs
	 * @param defStyle
	 */
	public AuthCodeView(Context context, AttributeSet attrs, int defStyle)
	{
		super(context, attrs, defStyle);
		/**
		 * 獲得我們所定義的自定義樣式屬性
		 */
		TypedArray a = context.getTheme().obtainStyledAttributes(attrs, R.styleable.AuthCodeView, defStyle, 0);

		//獲取在attr文件下,名字為AuthCodeView的declare-styleable屬性有幾個
		int n = a.getIndexCount();
		for (int i = 0; i < n; i++)
		{
			int attr = a.getIndex(i);
			switch (attr)
			{
			//這個屬性可以不要,因為都是隨機產生
			case R.styleable.AuthCodeView_titleText:
				mTitleText = a.getString(attr);
				break;
			case R.styleable.AuthCodeView_titleTextColor:
				// 默認顏色設置為黑色
				mTitleTextColor = a.getColor(attr, Color.BLACK);
				break;
			case R.styleable.AuthCodeView_titleTextSize:
				// 默認設置為16sp,TypeValue也可以把sp轉化為px
				mTitleTextSize = a.getDimensionPixelSize(attr, (int) TypedValue.applyDimension(
						TypedValue.COMPLEX_UNIT_SP, 16, getResources().getDisplayMetrics()));
				break;

			}

		}
		a.recycle();
		}
這個TypedArray的作用就是資源的映射作用,寫法是這樣的。R.styleable.AuthCodeView這個是不是很熟悉。
還有R.styleable.AuthCodeView_titleText,後面就是名稱加上下橫線加上屬性。
這樣做就把自定義屬性在xml設置值映射到class,怎麼獲取都很簡單。
有空格看以去看看生成id的R文件。
這篇先到這裡結束,還有這篇的續集,自定義屬性控件,也是自定義view。隨機驗證碼demo學習。
 Android(線程二) 線程池詳解
我們在ListView中需要下載資源時,贊不考慮緩存機制,那麼每一個Item可能都需要開啟一個線程去下載資源(如果沒有線程池),如果Item很多,那麼我們可能就會無限制的
 Android基於監聽的事件處理機制
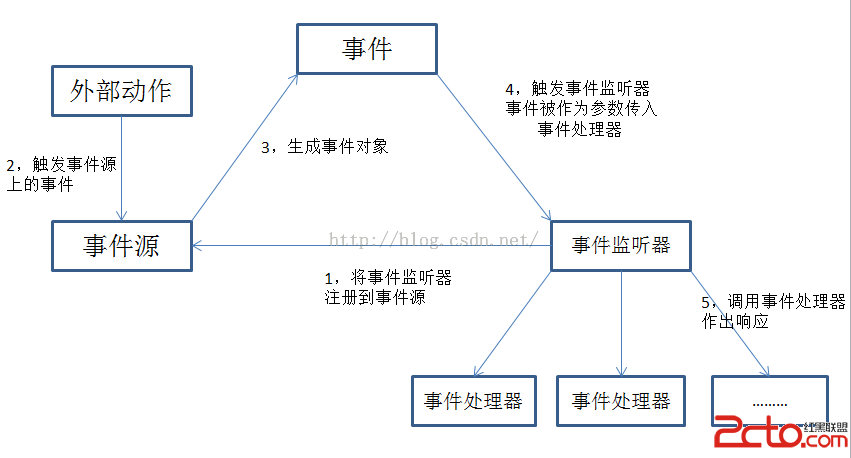
Android提供了強大的事件處理機制,主要包括兩大類:1,基於監聽的事件處理機制:主要做法是為Android界面組件綁定特定的事件監聽器2,基於回調的事件處理機制:主要
 AXML解析
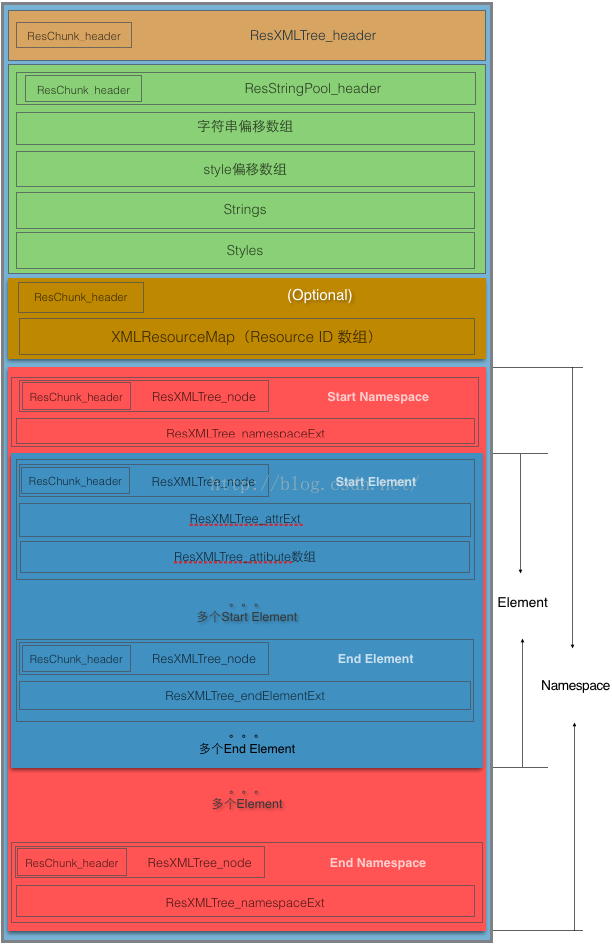
一、簡述AXML即Android Binary XML,是Android應用程序APK包中保存xml文件數據的一種方式,可以減小xml文件的大小。resources.ar
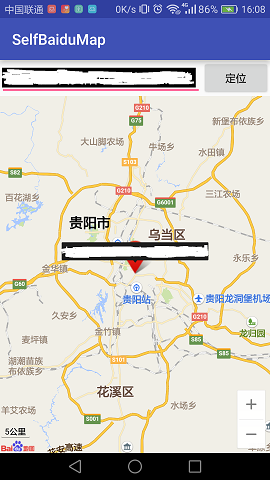 (Android 應用之路) 百度地圖API使用(4)
前言百度地圖的定位功能和基礎地圖功能是分開的,使用的是另外的jar包和so庫文件,詳情請關注官網:百度定位SDK配置下載對應的jar包和so庫,然後移動到lib目錄下AS