編輯:關於Android編程
好吧,終於要開始講解Activity的啟動流程了,Activity的啟動流程相對復雜一下,涉及到了Activity中的生命周期方法,涉及到了Android體系的CS模式,涉及到了Android中進程通訊Binder機制等等,
首先介紹一下Activity,這裡引用一下Android guide中對Activity的介紹:
An activity represents a single screen with a user interface. For example, an email application might have one activity that shows a list of new emails, another activity to compose an email, and another activity for reading emails. Although the activities work together to form a cohesive user experience in the email application, each one is independent of the others. As such, a different application can start any one of these activities (if the email application allows it). For example, a camera application can start the activity in the email application that composes new mail, in order for the user to share a picture.
英文不太好,這裡就不獻丑了,這裡介紹的Activity的大概意思就是說,activity在Android系統中代表的就是一個屏幕,一個App就是由許多個不同的Acitivty組成的,並且不同進程之間的Activity是可以相互調用的。
在介紹Activity的啟動流程之前,我們先介紹幾個概念:
Activity的生命周期Activity的啟動模式protected void onCreate(Bundle savedInstanceState);
protected void onRestart();
protected void onStart();
protected void onResume();
protected void onPause();
protected void onStop();
protected void onDestory();
以上為Activity生命周期中的各個時期的回調方法,在不同的方法中我們可以執行不同的邏輯。
Activity的啟動進程activity啟動時可以設置不同的啟動模式,主要是:standrand,singleTop,singleTask,instance等四種啟動模式,不同的啟動模式在啟動Activity時會執行不同的邏輯,系統會按不同的啟動模式將Activity存放到不同的activity棧中。
在Manifest.xml中定義Activity的時候,Activity默認是屬於進程名稱為包名的進程的,當然這時候是可以指定Activity的啟動進程,所以在Activity啟動時首先會檢測當前Activity所屬的進程是否已經啟動,若進程沒有啟動,則首先會啟動該進程,並在該進程啟動之後才會執行Activity的啟動過程。
Intent啟動Activity的方式
Intent啟動Activity分為兩種,顯示啟動和隱士啟動,顯示啟動就是在初始化Intent對象的時候直接引用需要啟動的Activity的字節碼,顯示引用的好處就是可以直接告訴Intent對象啟動的Activity對象不需要執行intent filter索引需要啟動哪一個Activity,但是顯示引用不能啟動其他進程的Activity對象,因為無法獲取其他進程的Activity對象的字節碼,而隱式啟動則可以通過配置Intent Filter啟動其他進程的Activity對象,因此在應用內,我們一般都是使用顯示啟動的方式啟動Activity,而如果需要啟動其他應用的Activity時,一般使用隱式啟動的方式。
Android Framework層的CS模式
通過前幾篇文章的介紹我們知道android系統在啟動過程中會執行這樣的邏輯:
Zygote進程 –> SystemServer進程 –> 各種系統服務 –> 應用進程
在Actvity啟動過程中,其實是應用進程與SystemServer進程相互配合啟動Activity的過程,其中應用進程主要用於執行具體的Activity的啟動過程,回調生命周期方法等操作,而SystemServer進程則主要是調用其中的各種服務,將Activity保存在棧中,協調各種系統資源等操作。
Android系統進程間通訊Binder機制
Android系統存了Zygote進程和SystemServer進程以及各種應用進程等,為了能夠實現各種進程之間的通訊,Android系統采用了自己的進程間通訊方式Binder機制。其中主要涉及到了四種角色:Binder Client,Binder Server,Binder Manager, Binder driver。各種角色之間的關系可以參考下面這張圖的介紹:

好吧,前面我們介紹了一些Activity啟動過程中需要的相關知識點,下面我們開始Activity啟動流程的講解。。。。
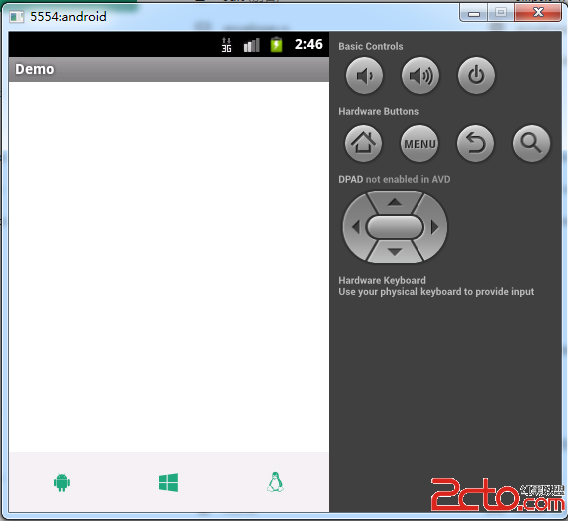
在這篇文章中我們說Launcher啟動之後會將各個應用包名和icon與app name保存起來,然後執行icon的點擊事件的時候調用startActivity方法:
@Override
    protected void onListItemClick(ListView l, View v, int position, long id) {
        Intent intent = intentForPosition(position);
        startActivity(intent);
    }

protected Intent intentForPosition(int position) {
        ActivityAdapter adapter = (ActivityAdapter) mAdapter;
        return adapter.intentForPosition(position);
    }

public Intent intentForPosition(int position) {
            if (mActivitiesList == null) {
                return null;
            }

            Intent intent = new Intent(mIntent);
            ListItem item = mActivitiesList.get(position);
            intent.setClassName(item.packageName, item.className);
            if (item.extras != null) {
                intent.putExtras(item.extras);
            }
            return intent;
        }
可以發現,我們在啟動Activity的時候,執行的邏輯就是創建一個Intent對象,然後初始化Intent對象,使用隱式啟動的方式啟動該Acvitity,這裡為什麼不能使用顯示啟動的方式呢?
這是因為Launcher程序啟動的Activity一般都是啟動一個新的應用進程,該進程與Launcher進程不是在同一個進程中,所以也就無法引用到啟動的Activity字節碼,自然也就無法啟動該Activity了。
繼續,我們查看startActivity方法的具體實現:
一:開始請求執行啟動Activity
MyActivity.startActivity()
Activity.startActivity()
Activity.startActivityForResult
Instrumentation.execStartActivty
ActivityManagerNative.getDefault().startActivityAsUser()
在我們的Activity中調用startActivity方法,會執行Activity中的startActivity
@Override
    public void startActivity(Intent intent) {
        this.startActivity(intent, null);
    }
然後在Activity中的startActivity方法體裡調用了startActivity的重載方法,這裡我們看一下其重載方法的實現:
@Override
    public void startActivity(Intent intent, @Nullable Bundle options) {
        if (options != null) {
            startActivityForResult(intent, -1, options);
        } else {
            // Note we want to go through this call for compatibility with
            // applications that may have overridden the method.
            startActivityForResult(intent, -1);
        }
    }
由於在上一步驟中我們傳遞的Bunde對象為空,所以這裡我們執行的是else分支的邏輯,所以這裡調用了startActivityForResult方法,並且傳遞的參數為intent和-1.
注意:通過這裡的代碼我們可以發現,其實我們在Activity中調用startActivity的內部也是調用的startActivityForResult的。那麼為什麼調用startActivityForResult可以在Activity中回調onActivityResult而調用startActivity則不可以呢?可以發現其主要的區別是調用startActivity內部調用startActivityForResult傳遞的傳輸requestCode值為-1,也就是說我們在Activity調用startActivityForResult的時候傳遞的requestCode值為-1的話,那麼onActivityResult是不起作用的。
實際上,經測試requestCode的值小於0的時候都是不起作用的,所以當我們調用startActivityForResult的時候需要注意這一點。
好吧,我們繼續往下看,startActivityForResult方法的具體實現:
public void startActivityForResult(Intent intent, int requestCode, @Nullable Bundle options) {
        if (mParent == null) {
            Instrumentation.ActivityResult ar =
                mInstrumentation.execStartActivity(
                    this, mMainThread.getApplicationThread(), mToken, this,
                    intent, requestCode, options);
            if (ar != null) {
                mMainThread.sendActivityResult(
                    mToken, mEmbeddedID, requestCode, ar.getResultCode(),
                    ar.getResultData());
            }
            if (requestCode >= 0) {
                // If this start is requesting a result, we can avoid making
                // the activity visible until the result is received.  Setting
                // this code during onCreate(Bundle savedInstanceState) or onResume() will keep the
                // activity hidden during this time, to avoid flickering.
                // This can only be done when a result is requested because
                // that guarantees we will get information back when the
                // activity is finished, no matter what happens to it.
                mStartedActivity = true;
            }

            cancelInputsAndStartExitTransition(options);
            // TODO Consider clearing/flushing other event sources and events for child windows.
        } else {
            if (options != null) {
                mParent.startActivityFromChild(this, intent, requestCode, options);
            } else {
                // Note we want to go through this method for compatibility with
                // existing applications that may have overridden it.
                mParent.startActivityFromChild(this, intent, requestCode);
            }
        }
    }
可以發現由於我們是第一次啟動Activity,所以這裡的mParent為空,所以會執行if分之,然後調用mInstrumentation.execStartActivity方法,並且這裡需要注意的是,有一個判斷邏輯:
if (requestCode >= 0) {
    mStartedActivity = true;
}
通過注釋也驗證了我們剛剛的說法即,調用startActivityForResult的時候只有requestCode的值大於等於0,onActivityResult才會被回調。
然後我們看一下mInstrumentation.execStartActivity方法的實現。在查看execStartActivity方法之前,我們需要對mInstrumentation對象有一個了解?什麼是Instrumentation?Instrumentation是android系統中啟動Activity的一個實際操作類,也就是說Activity在應用進程端的啟動實際上就是Instrumentation執行的,那麼為什麼說是在應用進程端的啟動呢?實際上acitivty的啟動分為應用進程端的啟動和SystemServer服務進程端的啟動的,多個應用進程相互配合最終完成了Activity在系統中的啟動的,而在應用進程端的啟動實際的操作類就是Intrumentation來執行的,可能還是有點繞口,沒關系,隨著我們慢慢的解析大家就會對Instrumentation的認識逐漸加深的。
可以發現execStartActivity方法傳遞的幾個參數:
this,為啟動Activity的對象;
contextThread,為Binder對象,是主進程的context對象;
token,也是一個Binder對象,指向了服務端一個ActivityRecord對象;
target,為啟動的Activity;
intent,啟動的Intent對象;
requestCode,請求碼;
options,參數;
這樣就調用了Imstrument.execStartActivity方法了:
public ActivityResult execStartActivity(
            Context who, IBinder contextThread, IBinder token, Activity target,
            Intent intent, int requestCode, Bundle options) {
        ...
        try {
            intent.migrateExtraStreamToClipData();
            intent.prepareToLeaveProcess();
            int result = ActivityManagerNative.getDefault()
                .startActivity(whoThread, who.getBasePackageName(), intent,
                        intent.resolveTypeIfNeeded(who.getContentResolver()),
                        token, target != null ? target.mEmbeddedID : null,
                        requestCode, 0, null, options);
            checkStartActivityResult(result, intent);
        } catch (RemoteException e) {
            throw new RuntimeException("Failure from system", e);
        }
        return null;
    }
我們發現在這個方法中主要調用ActivityManagerNative.getDefault().startActivity方法,那麼ActivityManagerNative又是個什麼鬼呢?查看一下getDefault()對象的實現:
static public IActivityManager getDefault() {
        return gDefault.get();
    }
好吧,相當之簡單直接返回的是gDefault.get(),那麼gDefault又是什麼呢?
private static final Singleton gDefault = new Singleton() {
        protected IActivityManager create() {
            IBinder b = ServiceManager.getService("activity");
            if (false) {
                Log.v("ActivityManager", "default service binder = " + b);
            }
            IActivityManager am = asInterface(b);
            if (false) {
                Log.v("ActivityManager", "default service = " + am);
            }
            return am;
        }
    };
可以發現啟動過asInterface()方法創建,然後我們繼續看一下asInterface方法的實現:
static public IActivityManager asInterface(IBinder obj) {
        if (obj == null) {
            return null;
        }
        IActivityManager in =
            (IActivityManager)obj.queryLocalInterface(descriptor);
        if (in != null) {
            return in;
        }

        return new ActivityManagerProxy(obj);
    }
好吧,最後直接返回一個ActivityManagerProxy對象,而ActivityManagerProxy繼承與IActivityManager,到了這裡就引出了我們android系統中很重要的一個概念:Binder機制。我們知道應用進程與SystemServer進程屬於兩個不同的進程,進程之間需要通訊,android系統采取了自身設計的Binder機制,這裡的ActivityManagerProxy和ActivityManagerNative都是繼承與IActivityManager的而SystemServer進程中的ActivityManagerService對象則繼承與ActivityManagerNative。簡單的表示:
Binder接口 –> ActivityManagerNative/ActivityManagerProxy –> ActivityManagerService;
這樣,ActivityManagerNative與ActivityManagerProxy相當於一個Binder的客戶端而ActivityManagerService相當於Binder的服務端,這樣當ActivityManagerNative調用接口方法的時候底層通過Binder driver就會將請求數據與請求傳遞給server端,並在server端執行具體的接口邏輯。需要注意的是Binder機制是單向的,是異步的,也就是說只能通過client端向server端傳遞數據與請求而不同等待服務端的返回,也無法返回,那如果SystemServer進程想向應用進程傳遞數據怎麼辦?這時候就需要重新定義一個Binder請求以SystemServer為client端,以應用進程為server端,這樣就是實現了兩個進程之間的雙向通訊。
好了,說了這麼多我們知道這裡的ActivityManagerNative是ActivityManagerService在應用進程的一個client就好了,通過它就可以滴啊用ActivityManagerService的方法了。
繼續往下卡,我們調用的是:
int result = ActivityManagerNative.getDefault()
                .startActivity(whoThread, who.getBasePackageName(), intent,
                        intent.resolveTypeIfNeeded(who.getContentResolver()),
                        token, target != null ? target.mEmbeddedID : null,
                        requestCode, 0, null, options);
這裡通過我們剛剛的分析,ActivityManagerNative.getDefault()方法會返回一個ActivityManagerProxy對象,那麼我們看一下ActivityManagerProxy對象的startActivity方法:
public int startActivity(IApplicationThread caller, String callingPackage, Intent intent,
            String resolvedType, IBinder resultTo, String resultWho, int requestCode,
            int startFlags, ProfilerInfo profilerInfo, Bundle options) throws RemoteException {
        Parcel data = Parcel.obtain();
        Parcel reply = Parcel.obtain();
        data.writeInterfaceToken(IActivityManager.descriptor);
        data.writeStrongBinder(caller != null ? caller.asBinder() : null);
        data.writeString(callingPackage);
        intent.writeToParcel(data, 0);
        data.writeString(resolvedType);
        data.writeStrongBinder(resultTo);
        data.writeString(resultWho);
        data.writeInt(requestCode);
        data.writeInt(startFlags);
        if (profilerInfo != null) {
            data.writeInt(1);
            profilerInfo.writeToParcel(data, Parcelable.PARCELABLE_WRITE_RETURN_VALUE);
        } else {
            data.writeInt(0);
        }
        if (options != null) {
            data.writeInt(1);
            options.writeToParcel(data, 0);
        } else {
            data.writeInt(0);
        }
        mRemote.transact(START_ACTIVITY_TRANSACTION, data, reply, 0);
        reply.readException();
        int result = reply.readInt();
        reply.recycle();
        data.recycle();
        return result;
    }
這裡就涉及到了具體的Binder數據傳輸機制了,我們不做過多的分析,知道通過數據傳輸之後就會調用SystemServer進程的ActivityManagerService的startActivity就好了。
以上其實都是發生在應用進程中,下面開始調用的ActivityManagerService的執行時發生在SystemServer進程。
二:ActivityManagerService接收啟動Activity的請求
ActivityManagerService.startActivity()
ActvityiManagerService.startActivityAsUser()
ActivityStackSupervisor.startActivityMayWait()
ActivityStackSupervisor.startActivityLocked()
ActivityStackSupervisor.startActivityUncheckedLocked()
ActivityStackSupervisor.startActivityLocked()
ActivityStackSupervisor.resumeTopActivitiesLocked()
ActivityStackSupervisor.resumeTopActivityInnerLocked()
好吧,代碼量比較大,慢慢看,首先看一下ActivityManagerService.startActivity的具體實現;
@Override
    public final int startActivity(IApplicationThread caller, String callingPackage,
            Intent intent, String resolvedType, IBinder resultTo, String resultWho, int requestCode,
            int startFlags, ProfilerInfo profilerInfo, Bundle options) {
        return startActivityAsUser(caller, callingPackage, intent, resolvedType, resultTo,
            resultWho, requestCode, startFlags, profilerInfo, options,
            UserHandle.getCallingUserId());
    }
可以看到,該方法並沒有實現什麼邏輯,直接調用了startActivityAsUser方法,我們繼續看一下startActivityAsUser方法的實現:
@Override
    public final int startActivityAsUser(IApplicationThread caller, String callingPackage,
            Intent intent, String resolvedType, IBinder resultTo, String resultWho, int requestCode,
            int startFlags, ProfilerInfo profilerInfo, Bundle options, int userId) {
        enforceNotIsolatedCaller("startActivity");
        userId = handleIncomingUser(Binder.getCallingPid(), Binder.getCallingUid(), userId,
                false, ALLOW_FULL_ONLY, "startActivity", null);
        // TODO: Switch to user app stacks here.
        return mStackSupervisor.startActivityMayWait(caller, -1, callingPackage, intent,
                resolvedType, null, null, resultTo, resultWho, requestCode, startFlags,
                profilerInfo, null, null, options, false, userId, null, null);
    }
可以看到這裡只是進行了一些關於userid的邏輯判斷,然後就調用mStackSupervisor.startActivityMayWait方法,下面我們來看一下這個方法的具體實現:
final int startActivityMayWait(IApplicationThread caller, int callingUid,
            String callingPackage, Intent intent, String resolvedType,
            IVoiceInteractionSession voiceSession, IVoiceInteractor voiceInteractor,
            IBinder resultTo, String resultWho, int requestCode, int startFlags,
            ProfilerInfo profilerInfo, WaitResult outResult, Configuration config,
            Bundle options, boolean ignoreTargetSecurity, int userId,
            IActivityContainer iContainer, TaskRecord inTask) {
            ...

            int res = startActivityLocked(caller, intent, resolvedType, aInfo,
                    voiceSession, voiceInteractor, resultTo, resultWho,
                    requestCode, callingPid, callingUid, callingPackage,
                    realCallingPid, realCallingUid, startFlags, options, ignoreTargetSecurity,
                    componentSpecified, null, container, inTask);
            ...
            return res;
    }
這個方法中執行了啟動Activity的一些其他邏輯判斷,在經過判斷邏輯之後調用startActivityLocked方法:
final int startActivityLocked(IApplicationThread caller,
            Intent intent, String resolvedType, ActivityInfo aInfo,
            IVoiceInteractionSession voiceSession, IVoiceInteractor voiceInteractor,
            IBinder resultTo, String resultWho, int requestCode,
            int callingPid, int callingUid, String callingPackage,
            int realCallingPid, int realCallingUid, int startFlags, Bundle options,
            boolean ignoreTargetSecurity, boolean componentSpecified, ActivityRecord[] outActivity,
            ActivityContainer container, TaskRecord inTask) {
        int err = ActivityManager.START_SUCCESS;

        ...
        err = startActivityUncheckedLocked(r, sourceRecord, voiceSession, voiceInteractor,
                startFlags, true, options, inTask);

        ...
        return err;
    }
這個方法中主要構造了ActivityManagerService端的Activity對象–>ActivityRecord,並根據Activity的啟動模式執行了相關邏輯。然後調用了startActivityUncheckedLocked方法:
final int startActivityUncheckedLocked(final ActivityRecord r, ActivityRecord sourceRecord,
            IVoiceInteractionSession voiceSession, IVoiceInteractor voiceInteractor, int startFlags,
            boolean doResume, Bundle options, TaskRecord inTask) {
        ...
        ActivityStack.logStartActivity(EventLogTags.AM_CREATE_ACTIVITY, r, r.task);
        targetStack.mLastPausedActivity = null;
        targetStack.startActivityLocked(r, newTask, doResume, keepCurTransition, options);
        if (!launchTaskBehind) {
            // Don't set focus on an activity that's going to the back.
            mService.setFocusedActivityLocked(r, "startedActivity");
        }
        return ActivityManager.START_SUCCESS;
    }
startActivityUncheckedLocked方法中只要執行了不同啟動模式不同棧的處理,並最後調用了startActivityLocked的重載方法:
final void startActivityLocked(ActivityRecord r, boolean newTask,
            boolean doResume, boolean keepCurTransition, Bundle options) {
        ...
        if (doResume) {
            mStackSupervisor.resumeTopActivitiesLocked(this, r, options);
        }
    }
這個startActivityLocked方法主要執行初始化了windowManager服務,然後調用resumeTopActivitiesLocked方法:
boolean resumeTopActivitiesLocked(ActivityStack targetStack, ActivityRecord target,
            Bundle targetOptions) {
        if (targetStack == null) {
            targetStack = mFocusedStack;
        }
        // Do targetStack first.
        boolean result = false;
        if (isFrontStack(targetStack)) {
            result = targetStack.resumeTopActivityLocked(target, targetOptions);
        }

        for (int displayNdx = mActivityDisplays.size() - 1; displayNdx >= 0; --displayNdx) {
            final ArrayList stacks = mActivityDisplays.valueAt(displayNdx).mStacks;
            for (int stackNdx = stacks.size() - 1; stackNdx >= 0; --stackNdx) {
                final ActivityStack stack = stacks.get(stackNdx);
                if (stack == targetStack) {
                    // Already started above.
                    continue;
                }
                if (isFrontStack(stack)) {
                    stack.resumeTopActivityLocked(null);
                }
            }
        }
        return result;
    }
可以發現經過循環邏輯判斷之後,最終調用了resumeTopActivityLocked方法:
final boolean resumeTopActivityLocked(ActivityRecord prev) {
        return resumeTopActivityLocked(prev, null);
    }
然後調用:
final boolean resumeTopActivityLocked(ActivityRecord prev, Bundle options) {
        if (mStackSupervisor.inResumeTopActivity) {
            // Don't even start recursing.
            return false;
        }

        boolean result = false;
        try {
            // Protect against recursion.
            mStackSupervisor.inResumeTopActivity = true;
            if (mService.mLockScreenShown == ActivityManagerService.LOCK_SCREEN_LEAVING) {
                mService.mLockScreenShown = ActivityManagerService.LOCK_SCREEN_HIDDEN;
                mService.updateSleepIfNeededLocked();
            }
            result = resumeTopActivityInnerLocked(prev, options);
        } finally {
            mStackSupervisor.inResumeTopActivity = false;
        }
        return result;
    }
繼續調用resumeTopActivityInnerLocked方法:
private boolean resumeTopActivityInnerLocked(ActivityRecord prev, Bundle options) {

        ...
        if (mResumedActivity != null) {
            if (DEBUG_STATES) Slog.d(TAG_STATES,
                    "resumeTopActivityLocked: Pausing " + mResumedActivity);
            pausing |= startPausingLocked(userLeaving, false, true, dontWaitForPause);
        }        ...
        return true;
    }
經過一系列處理邏輯之後最終調用了startPausingLocked方法,這個方法作用就是讓系統中棧中的Activity執行onPause方法。
三:執行棧頂Activity的onPause方法
ActivityStack.startPausingLocked()
IApplicationThread.schudulePauseActivity()
ActivityThread.sendMessage()
ActivityThread.H.sendMessage();
ActivityThread.H.handleMessage()
ActivityThread.handlePauseActivity()
ActivityThread.performPauseActivity()
Activity.performPause()
Activity.onPause()
ActivityManagerNative.getDefault().activityPaused(token)
ActivityManagerService.activityPaused()
ActivityStack.activityPausedLocked()
ActivityStack.completePauseLocked()
ActivityStack.resumeTopActivitiesLocked()
ActivityStack.resumeTopActivityLocked()
ActivityStack.resumeTopActivityInnerLocked()
ActivityStack.startSpecificActivityLocked
好吧,方法比較多也比較亂,首先來看startPausingLocked方法:
final boolean startPausingLocked(boolean userLeaving, boolean uiSleeping, boolean resuming,
            boolean dontWait) {
        ...
        if (prev.app != null && prev.app.thread != null) {
            if (DEBUG_PAUSE) Slog.v(TAG_PAUSE, "Enqueueing pending pause: " + prev);
            try {
                EventLog.writeEvent(EventLogTags.AM_PAUSE_ACTIVITY,
                        prev.userId, System.identityHashCode(prev),
                        prev.shortComponentName);
                mService.updateUsageStats(prev, false);
                prev.app.thread.schedulePauseActivity(prev.appToken, prev.finishing,
                        userLeaving, prev.configChangeFlags, dontWait);
            } catch (Exception e) {
                // Ignore exception, if process died other code will cleanup.
                Slog.w(TAG, "Exception thrown during pause", e);
                mPausingActivity = null;
                mLastPausedActivity = null;
                mLastNoHistoryActivity = null;
            }
        } else {
            mPausingActivity = null;
            mLastPausedActivity = null;
            mLastNoHistoryActivity = null;
        }
        ...
    }
可以看到這裡執行了pre.app.thread.schedulePauseActivity方法,通過分析不難發現這裡的thread是一個IApplicationThread類型的對象,而在ActivityThread中也定義了一個ApplicationThread的類,其繼承了IApplicationThread,並且都是Binder對象,不難看出這裡的IAppcation是一個Binder的client端而ActivityThread中的ApplicationThread是一個Binder對象的server端,所以通過這裡的thread.schedulePauseActivity實際上調用的就是ApplicationThread的schedulePauseActivity方法。
這裡的ApplicationThread可以和ActivityManagerNative對於一下:
通過ActivityManagerNative –> ActivityManagerService實現了應用進程與SystemServer進程的通訊
通過AppicationThread <– IApplicationThread實現了SystemServer進程與應用進程的通訊
然後我們繼續看一下ActivityThread中schedulePauseActivity的具體實現:
public final void schedulePauseActivity(IBinder token, boolean finished,
                boolean userLeaving, int configChanges, boolean dontReport) {
            sendMessage(
                    finished ? H.PAUSE_ACTIVITY_FINISHING : H.PAUSE_ACTIVITY,
                    token,
                    (userLeaving ? 1 : 0) | (dontReport ? 2 : 0),
                    configChanges);
        }
發送了PAUSE_ACTIVITY_FINISHING消息,然後看一下sendMessage的實現方法:
private void sendMessage(int what, Object obj, int arg1, int arg2) {
        sendMessage(what, obj, arg1, arg2, false);
    }
調用了其重載方法:
private void sendMessage(int what, Object obj, int arg1, int arg2, boolean async) {
        if (DEBUG_MESSAGES) Slog.v(
            TAG, "SCHEDULE " + what + " " + mH.codeToString(what)
            + ": " + arg1 + " / " + obj);
        Message msg = Message.obtain();
        msg.what = what;
        msg.obj = obj;
        msg.arg1 = arg1;
        msg.arg2 = arg2;
        if (async) {
            msg.setAsynchronous(true);
        }
        mH.sendMessage(msg);
    }
最終調用了mH的sendMessage方法,mH是在ActivityThread中定義的一個Handler對象,主要處理SystemServer進程的消息,我們看一下其handleMessge方法的實現:
public void handleMessage(Message msg) {
            if (DEBUG_MESSAGES) Slog.v(TAG, ">>> handling: " + codeToString(msg.what));
            switch (msg.what) {
                ...
                case PAUSE_ACTIVITY_FINISHING:
                    Trace.traceBegin(Trace.TRACE_TAG_ACTIVITY_MANAGER, "activityPause");
                    handlePauseActivity((IBinder)msg.obj, true, (msg.arg1&1) != 0, msg.arg2,
                            (msg.arg1&1) != 0);
                    Trace.traceEnd(Trace.TRACE_TAG_ACTIVITY_MANAGER);
                    break;
                ...
}
可以發現其調用了handlePauseActivity方法:
private void handlePauseActivity(IBinder token, boolean finished,
            boolean userLeaving, int configChanges, boolean dontReport) {
        ActivityClientRecord r = mActivities.get(token);
        if (r != null) {
            //Slog.v(TAG, "userLeaving=" + userLeaving + " handling pause of " + r);
            if (userLeaving) {
                performUserLeavingActivity(r);
            }

            r.activity.mConfigChangeFlags |= configChanges;
            performPauseActivity(token, finished, r.isPreHoneycomb());

            // Make sure any pending writes are now committed.
            if (r.isPreHoneycomb()) {
                QueuedWork.waitToFinish();
            }

            // Tell the activity manager we have paused.
            if (!dontReport) {
                try {
                    ActivityManagerNative.getDefault().activityPaused(token);
                } catch (RemoteException ex) {
                }
            }
            mSomeActivitiesChanged = true;
        }
    }
然後在方法體內部通過調用performPauseActivity方法來實現對棧頂Activity的onPause生命周期方法的回調,可以具體看一下他的實現:
final Bundle performPauseActivity(IBinder token, boolean finished,
            boolean saveState) {
        ActivityClientRecord r = mActivities.get(token);
        return r != null ? performPauseActivity(r, finished, saveState) : null;
    }
然後調用其重載方法:
final Bundle performPauseActivity(ActivityClientRecord r, boolean finished,
            boolean saveState) {
        ...
        mInstrumentation.callActivityOnPause(r.activity);
        ...

        return !r.activity.mFinished && saveState ? r.state : null;
    }
這樣回到了mInstrumentation的callActivityOnPuase方法:
public void callActivityOnPause(Activity activity) {
        activity.performPause();
    }
呵呵,原來最終回調到了Activity的performPause方法:
final void performPause() {
        mDoReportFullyDrawn = false;
        mFragments.dispatchPause();
        mCalled = false;
        onPause();
        mResumed = false;
        if (!mCalled && getApplicationInfo().targetSdkVersion
                >= android.os.Build.VERSION_CODES.GINGERBREAD) {
            throw new SuperNotCalledException(
                    "Activity " + mComponent.toShortString() +
                    " did not call through to super.onPause()");
        }
        mResumed = false;
    }
終於,太不容易了,回調到了Activity的onPause方法,哈哈,Activity生命周期中的第一個生命周期方法終於被我們找到了。。。。也就是說我們在啟動一個Activity的時候最先被執行的是棧頂的Activity的onPause方法。記住這點吧,面試的時候經常會問到類似的問題。
然後回到我們的handlePauseActivity方法,在該方法的最後面執行了ActivityManagerNative.getDefault().activityPaused(token);方法,這是應用進程告訴服務進程,棧頂Activity已經執行完成onPause方法了,通過前面我們的分析,我們知道這句話最終會被ActivityManagerService的activityPaused方法執行。
@Override
    public final void activityPaused(IBinder token) {
        final long origId = Binder.clearCallingIdentity();
        synchronized(this) {
            ActivityStack stack = ActivityRecord.getStackLocked(token);
            if (stack != null) {
                stack.activityPausedLocked(token, false);
            }
        }
        Binder.restoreCallingIdentity(origId);
    }
可以發現,該方法內部會調用ActivityStack的activityPausedLocked方法,好吧,繼續看一下activityPausedLocked方法的實現:
final void activityPausedLocked(IBinder token, boolean timeout) {
            ...
                if (DEBUG_STATES) Slog.v(TAG_STATES, "Moving to PAUSED: " + r
                        + (timeout ? " (due to timeout)" : " (pause complete)"));
                completePauseLocked(true);
            ...
    }
然後執行了completePauseLocked方法:
private void completePauseLocked(boolean resumeNext) {
        ...

        if (resumeNext) {
            final ActivityStack topStack = mStackSupervisor.getFocusedStack();
            if (!mService.isSleepingOrShuttingDown()) {
                mStackSupervisor.resumeTopActivitiesLocked(topStack, prev, null);
            } else {
                mStackSupervisor.checkReadyForSleepLocked();
                ActivityRecord top = topStack.topRunningActivityLocked(null);
                if (top == null || (prev != null && top != prev)) {
                    // If there are no more activities available to run,
                    // do resume anyway to start something.  Also if the top
                    // activity on the stack is not the just paused activity,
                    // we need to go ahead and resume it to ensure we complete
                    // an in-flight app switch.
                    mStackSupervisor.resumeTopActivitiesLocked(topStack, null, null);
                }
            }
        }
        ...
    }
經過了一系列的邏輯之後,又調用了resumeTopActivitiesLocked方法,又回到了第二步中解析的方法中了,這樣經過
resumeTopActivitiesLocked –>
ActivityStack.resumeTopActivityLocked() –>
resumeTopActivityInnerLocked –>
startSpecificActivityLocked
好吧,我們看一下startSpecificActivityLocked的具體實現:
void startSpecificActivityLocked(ActivityRecord r,
            boolean andResume, boolean checkConfig) {
        // Is this activity's application already running?
        ProcessRecord app = mService.getProcessRecordLocked(r.processName,
                r.info.applicationInfo.uid, true);

        r.task.stack.setLaunchTime(r);

        if (app != null && app.thread != null) {
            try {
                if ((r.info.flags&ActivityInfo.FLAG_MULTIPROCESS) == 0
                        || !"android".equals(r.info.packageName)) {
                    // Don't add this if it is a platform component that is marked
                    // to run in multiple processes, because this is actually
                    // part of the framework so doesn't make sense to track as a
                    // separate apk in the process.
                    app.addPackage(r.info.packageName, r.info.applicationInfo.versionCode,
                            mService.mProcessStats);
                }
                realStartActivityLocked(r, app, andResume, checkConfig);
                return;
            } catch (RemoteException e) {
                Slog.w(TAG, "Exception when starting activity "
                        + r.intent.getComponent().flattenToShortString(), e);
            }

            // If a dead object exception was thrown -- fall through to
            // restart the application.
        }

        mService.startProcessLocked(r.processName, r.info.applicationInfo, true, 0,
                "activity", r.intent.getComponent(), false, false, true);
    }
可以發現在這個方法中,首先會判斷一下需要啟動的Activity所需要的應用進程是否已經啟動,若啟動的話,則直接調用realStartAtivityLocked方法,否則調用startProcessLocked方法,用於啟動應用進程。
這樣關於啟動Activity時的第三步驟就已經執行完成了,這裡主要是實現了對棧頂Activity執行onPause
方法,而這個方法首先判斷需要啟動的Activity所屬的進程是否已經啟動,若已經啟動則直接調用啟動Activity的方法,否則將先啟動Activity的應用進程,然後在啟動該Activity。
四:啟動Activity所屬的應用進程
ActivityManagerService.startProcessLocked()
Process.start()
ActivityThread.main()
ActivityThread.attach()
ActivityManagerNative.getDefault().attachApplication()
ActivityManagerService.attachApplication()
好吧,首先看一下startProcessLocked()方法的具體實現:
private final void startProcessLocked(ProcessRecord app,
            String hostingType, String hostingNameStr) {
        startProcessLocked(app, hostingType, hostingNameStr, null /* abiOverride */,
                null /* entryPoint */, null /* entryPointArgs */);
    }
然後回調了其重載的startProcessLocked方法:
private final void startProcessLocked(ProcessRecord app, String hostingType,
            String hostingNameStr, String abiOverride, String entryPoint, String[] entryPointArgs) {
            ...
            boolean isActivityProcess = (entryPoint == null);
            if (entryPoint == null) entryPoint = "android.app.ActivityThread";
            Trace.traceBegin(Trace.TRACE_TAG_ACTIVITY_MANAGER, "Start proc: " +
                    app.processName);
            checkTime(startTime, "startProcess: asking zygote to start proc");
            Process.ProcessStartResult startResult = Process.start(entryPoint,
                    app.processName, uid, uid, gids, debugFlags, mountExternal,
                    app.info.targetSdkVersion, app.info.seinfo, requiredAbi, instructionSet,
                    app.info.dataDir, entryPointArgs);
            checkTime(startTime, "startProcess: returned from zygote!");
            ...
    }
可以發現其經過一系列的初始化操作之後調用了Process.start方法,並且傳入了啟動的類名“android.app.ActivityThread”:
public static final ProcessStartResult start(final String processClass,
                                  final String niceName,
                                  int uid, int gid, int[] gids,
                                  int debugFlags, int mountExternal,
                                  int targetSdkVersion,
                                  String seInfo,
                                  String abi,
                                  String instructionSet,
                                  String appDataDir,
                                  String[] zygoteArgs) {
        try {
            return startViaZygote(processClass, niceName, uid, gid, gids,
                    debugFlags, mountExternal, targetSdkVersion, seInfo,
                    abi, instructionSet, appDataDir, zygoteArgs);
        } catch (ZygoteStartFailedEx ex) {
            Log.e(LOG_TAG,
                    "Starting VM process through Zygote failed");
            throw new RuntimeException(
                    "Starting VM process through Zygote failed", ex);
        }
    }
然後調用了startViaZygote方法:
private static ProcessStartResult startViaZygote(final String processClass,
                                  final String niceName,
                                  final int uid, final int gid,
                                  final int[] gids,
                                  int debugFlags, int mountExternal,
                                  int targetSdkVersion,
                                  String seInfo,
                                  String abi,
                                  String instructionSet,
                                  String appDataDir,
                                  String[] extraArgs)
                                  throws ZygoteStartFailedEx {
        synchronized(Process.class) {
            ...

            return zygoteSendArgsAndGetResult(openZygoteSocketIfNeeded(abi), argsForZygote);
        }
    }
繼續查看一下zygoteSendArgsAndGetResult方法的實現:
private static ProcessStartResult zygoteSendArgsAndGetResult(
            ZygoteState zygoteState, ArrayList args)
            throws ZygoteStartFailedEx {
        try {
            /**
             * See com.android.internal.os.ZygoteInit.readArgumentList()
             * Presently the wire format to the zygote process is:
             * a) a count of arguments (argc, in essence)
             * b) a number of newline-separated argument strings equal to count
             *
             * After the zygote process reads these it will write the pid of
             * the child or -1 on failure, followed by boolean to
             * indicate whether a wrapper process was used.
             */
            final BufferedWriter writer = zygoteState.writer;
            final DataInputStream inputStream = zygoteState.inputStream;

            writer.write(Integer.toString(args.size()));
            writer.newLine();

            int sz = args.size();
            for (int i = 0; i < sz; i++) {
                String arg = args.get(i);
                if (arg.indexOf('\n') >= 0) {
                    throw new ZygoteStartFailedEx(
                            "embedded newlines not allowed");
                }
                writer.write(arg);
                writer.newLine();
            }

            writer.flush();

            // Should there be a timeout on this?
            ProcessStartResult result = new ProcessStartResult();
            result.pid = inputStream.readInt();
            if (result.pid < 0) {
                throw new ZygoteStartFailedEx("fork() failed");
            }
            result.usingWrapper = inputStream.readBoolean();
            return result;
        } catch (IOException ex) {
            zygoteState.close();
            throw new ZygoteStartFailedEx(ex);
        }
    }
可以發現其最終調用了Zygote並通過socket通信的方式讓Zygote進程fork除了一個新的進程,並根據我們剛剛傳遞的”android.app.ActivityThread”字符串,反射出該對象並執行ActivityThread的main方法。這樣我們所要啟動的應用進程這時候其實已經啟動了,但是還沒有執行相應的初始化操作。
為什麼我們平時都將ActivityThread稱之為ui線程或者是主線程,這裡可以看出,應用進程被創建之後首先執行的是ActivityThread的main方法,所以我們將ActivityThread成為主線程。
好了,這時候我們看一下ActivityThread的main方法的實現邏輯。
public static void main(String[] args) {
        ...
        Process.setArgV0("");

        Looper.prepareMainLooper();

        ActivityThread thread = new ActivityThread();
        thread.attach(false);

        if (sMainThreadHandler == null) {
            sMainThreadHandler = thread.getHandler();
        }

        if (false) {
            Looper.myLooper().setMessageLogging(new
                    LogPrinter(Log.DEBUG, "ActivityThread"));
        }

        // End of event ActivityThreadMain.
        Trace.traceEnd(Trace.TRACE_TAG_ACTIVITY_MANAGER);
        Looper.loop();

        throw new RuntimeException("Main thread loop unexpectedly exited");
    }
在main方法中主要執行了一些初始化的邏輯,並且創建了一個UI線程消息隊列,這也就是為什麼我們可以在主線程中隨意的創建Handler而不會報錯的原因,這裡提出一個問題,大家可以思考一下:子線程可以創建Handler麼?可以的話應該怎麼做?
然後執行了ActivityThread的attach方法,這裡我們看一下attach方法執行了那些邏輯操作。
private void attach(boolean system) {
    ...
    final IActivityManager mgr = ActivityManagerNative.getDefault();
            try {
                mgr.attachApplication(mAppThread);
            } catch (RemoteException ex) {
                // Ignore
            }
    ...
}
剛剛我們已經分析過ActivityManagerNative是ActivityManagerService的Binder client,所以這裡調用了attachApplication實際上就是通過Binder機制調用了ActivityManagerService的attachApplication,具體調用的過程,我們看一下ActivityManagerService是如何實現的:
@Override
    public final void attachApplication(IApplicationThread thread) {
        synchronized (this) {
            int callingPid = Binder.getCallingPid();
            final long origId = Binder.clearCallingIdentity();
            attachApplicationLocked(thread, callingPid);
            Binder.restoreCallingIdentity(origId);
        }
    }
可以發現其回調了attachApplicationLocked方法,我們看一下這個方法的實現邏輯。
private final boolean attachApplicationLocked(IApplicationThread thread,
            int pid) {

        ...
        // See if the top visible activity is waiting to run in this process...
        if (normalMode) {
            try {
                if (mStackSupervisor.attachApplicationLocked(app)) {
                    didSomething = true;
                }
            } catch (Exception e) {
                Slog.wtf(TAG, "Exception thrown launching activities in " + app, e);
                badApp = true;
            }
        }
        ...

        return true;
    }
該方法執行了一系列的初始化操作,這樣我們整個應用進程已經啟動起來了。終於可以開始activity的啟動邏輯了,O(∩_∩)O哈哈~
五:執行啟動Acitivity
ActivityStackSupervisor.attachApplicationLocked()
ActivityStackSupervisor.realStartActivityLocked()
IApplicationThread.scheduleLauncherActivity()
ActivityThread.sendMessage()
ActivityThread.H.sendMessage()
ActivityThread.H.handleMessage()
ActivityThread.handleLauncherActivity()
ActivityThread.performLauncherActivity()
Instrumentation.callActivityOnCreate()
Activity.onCreate()
ActivityThread.handleResumeActivity()
ActivityThread.performResumeActivity()
Activity.performResume()
Instrumentation.callActivityOnResume()
Activity.onResume()
ActivityManagerNative.getDefault().activityResumed(token)
首先看一下attachApplicationLocked方法的實現:
boolean attachApplicationLocked(ProcessRecord app) throws RemoteException {
        final String processName = app.processName;
        boolean didSomething = false;
        for (int displayNdx = mActivityDisplays.size() - 1; displayNdx >= 0; --displayNdx) {
            ArrayList stacks = mActivityDisplays.valueAt(displayNdx).mStacks;
            for (int stackNdx = stacks.size() - 1; stackNdx >= 0; --stackNdx) {
                final ActivityStack stack = stacks.get(stackNdx);
                if (!isFrontStack(stack)) {
                    continue;
                }
                ActivityRecord hr = stack.topRunningActivityLocked(null);
                if (hr != null) {
                    if (hr.app == null && app.uid == hr.info.applicationInfo.uid
                            && processName.equals(hr.processName)) {
                        try {
                            if (realStartActivityLocked(hr, app, true, true)) {
                                didSomething = true;
                            }
                        } catch (RemoteException e) {
                            Slog.w(TAG, "Exception in new application when starting activity "
                                  + hr.intent.getComponent().flattenToShortString(), e);
                            throw e;
                        }
                    }
                }
            }
        }
        if (!didSomething) {
            ensureActivitiesVisibleLocked(null, 0);
        }
        return didSomething;
    }
可以發現其內部調用了realStartActivityLocked方法,通過名字可以知道這個方法應該就是用來啟動Activity的,看一下這個方法的實現邏輯:
final boolean realStartActivityLocked(ActivityRecord r,
            ProcessRecord app, boolean andResume, boolean checkConfig)
            throws RemoteException {

        ...
            app.forceProcessStateUpTo(mService.mTopProcessState);
            app.thread.scheduleLaunchActivity(new Intent(r.intent), r.appToken,
                    System.identityHashCode(r), r.info, new Configuration(mService.mConfiguration),
                    new Configuration(stack.mOverrideConfig), r.compat, r.launchedFromPackage,
                    task.voiceInteractor, app.repProcState, r.icicle, r.persistentState, results,
                    newIntents, !andResume, mService.isNextTransitionForward(), profilerInfo);
        ...
        return true;
    }
可以發現與第三步執行棧頂Activity onPause時類似,這裡也是通過調用IApplicationThread的方法實現的,這裡調用的是scheduleLauncherActivity方法,所以真正執行的是ActivityThread中的scheduleLauncherActivity,所以我們看一下ActivityThread中的scheduleLauncherActivity的實現:
@Override
        public final void scheduleLaunchActivity(Intent intent, IBinder token, int ident,
                ActivityInfo info, Configuration curConfig, Configuration overrideConfig,
                CompatibilityInfo compatInfo, String referrer, IVoiceInteractor voiceInteractor,
                int procState, Bundle state, PersistableBundle persistentState,
                List pendingResults, List pendingNewIntents,
                boolean notResumed, boolean isForward, ProfilerInfo profilerInfo) {

            updateProcessState(procState, false);

            ActivityClientRecord r = new ActivityClientRecord();

            r.token = token;
            r.ident = ident;
            r.intent = intent;
            r.referrer = referrer;
            r.voiceInteractor = voiceInteractor;
            r.activityInfo = info;
            r.compatInfo = compatInfo;
            r.state = state;
            r.persistentState = persistentState;

            r.pendingResults = pendingResults;
            r.pendingIntents = pendingNewIntents;

            r.startsNotResumed = notResumed;
            r.isForward = isForward;

            r.profilerInfo = profilerInfo;

            r.overrideConfig = overrideConfig;
            updatePendingConfiguration(curConfig);

            sendMessage(H.LAUNCH_ACTIVITY, r);
        }
好吧,還是那套邏輯,ActivityThread接收到SystemServer進程的消息之後會通過其內部的Handler對象分發消息,經過一系列的分發之後調用了ActivityThread的handleLaunchActivity方法:
private void handleLaunchActivity(ActivityClientRecord r, Intent customIntent) {

        Activity a = performLaunchActivity(r, customIntent);

        if (a != null) {
            r.createdConfig = new Configuration(mConfiguration);
            Bundle oldState = r.state;
            handleResumeActivity(r.token, false, r.isForward,
                    !r.activity.mFinished && !r.startsNotResumed);


        }
        ...
    }
可以發現這裡調用了performLauncherActivity,看名字應該就是執行Activity的啟動操作了。。。
private Activity performLaunchActivity(ActivityClientRecord r, Intent customIntent) {
        ...

Activity activity = null;
        try {
            java.lang.ClassLoader cl = r.packageInfo.getClassLoader();
            activity = mInstrumentation.newActivity(
                    cl, component.getClassName(), r.intent);
            StrictMode.incrementExpectedActivityCount(activity.getClass());
            r.intent.setExtrasClassLoader(cl);
            r.intent.prepareToEnterProcess();
            if (r.state != null) {
                r.state.setClassLoader(cl);
            }
        } catch (Exception e) {
            if (!mInstrumentation.onException(activity, e)) {
                throw new RuntimeException(
                    "Unable to instantiate activity " + component
                    + ": " + e.toString(), e);
            }
        }
        ...

        activity.mCalled = false;
        if (r.isPersistable()) {
           mInstrumentation.callActivityOnCreate(activity, r.state, r.persistentState);
        } else {
           mInstrumentation.callActivityOnCreate(activity, r.state);
        }
        ...
        if (!r.activity.mFinished) {
                    activity.performStart();
                    r.stopped = false;
                }
        ...
        return activity;
    }
可以發現這裡我們需要的Activity對象終於是創建出來了,而且他是以反射的機制創建的,現在還不太清楚為啥google要以反射的方式創建Activity,先不看這些,然後在代碼中其調用Instrumentation的callActivityOnCreate方法。
public void callActivityOnCreate(Activity activity, Bundle icicle,
            PersistableBundle persistentState) {
        prePerformCreate(activity);
        activity.performCreate(icicle);
        postPerformCreate(activity);
    }
然後執行activity的performCreate方法。。。。好吧,都轉暈了。。。
final void performCreate(Bundle icicle) {
        onCreate(icicle);
        mActivityTransitionState.readState(icicle);
        performCreateCommon();
    }
O(∩_∩)O哈哈~,第二個生命周期方法出來了,onCreate方法。。。。
在回到我們的performLaunchActivity方法,其在調用了mInstrumentation.callActivityOnCreate方法之後又調用了activity.performStart();方法,好吧,看一下他的實現方式:
final void performStart() {
        mActivityTransitionState.setEnterActivityOptions(this, getActivityOptions());
        mFragments.noteStateNotSaved();
        mCalled = false;
        mFragments.execPendingActions();
        mInstrumentation.callActivityOnStart(this);
        if (!mCalled) {
            throw new SuperNotCalledException(
                "Activity " + mComponent.toShortString() +
                " did not call through to super.onStart()");
        }
        mFragments.dispatchStart();
        mFragments.reportLoaderStart();
        mActivityTransitionState.enterReady(this);
    }
好吧,還是通過Instrumentation調用callActivityOnStart方法:
public void callActivityOnStart(Activity activity) {
        activity.onStart();
    }
然後是直接調用activity的onStart方法,第三個生命周期方法出現了,O(∩_∩)O哈哈~
還是回到我們剛剛的handleLaunchActivity方法,在調用完performLaunchActivity方法之後,其有吊用了handleResumeActivity方法,好吧,看名字應該是回調Activity的onResume方法的。
final void handleResumeActivity(IBinder token,
            boolean clearHide, boolean isForward, boolean reallyResume) {
        // If we are getting ready to gc after going to the background, well
        // we are back active so skip it.
        unscheduleGcIdler();
        mSomeActivitiesChanged = true;

        // TODO Push resumeArgs into the activity for consideration
        ActivityClientRecord r = performResumeActivity(token, clearHide);

        if (r != null) {
            final Activity a = r.activity;

            if (localLOGV) Slog.v(
                TAG, "Resume " + r + " started activity: " +
                a.mStartedActivity + ", hideForNow: " + r.hideForNow
                + ", finished: " + a.mFinished);

            final int forwardBit = isForward ?
                    WindowManager.LayoutParams.SOFT_INPUT_IS_FORWARD_NAVIGATION : 0;

            // If the window hasn't yet been added to the window manager,
            // and this guy didn't finish itself or start another activity,
            // then go ahead and add the window.
            boolean willBeVisible = !a.mStartedActivity;
            if (!willBeVisible) {
                try {
                    willBeVisible = ActivityManagerNative.getDefault().willActivityBeVisible(
                            a.getActivityToken());
                } catch (RemoteException e) {
                }
            }
            if (r.window == null && !a.mFinished && willBeVisible) {
                r.window = r.activity.getWindow();
                View decor = r.window.getDecorView();
                decor.setVisibility(View.INVISIBLE);
                ViewManager wm = a.getWindowManager();
                WindowManager.LayoutParams l = r.window.getAttributes();
                a.mDecor = decor;
                l.type = WindowManager.LayoutParams.TYPE_BASE_APPLICATION;
                l.softInputMode |= forwardBit;
                if (a.mVisibleFromClient) {
                    a.mWindowAdded = true;
                    wm.addView(decor, l);
                }

            // If the window has already been added, but during resume
            // we started another activity, then don't yet make the
            // window visible.
            } else if (!willBeVisible) {
                if (localLOGV) Slog.v(
                    TAG, "Launch " + r + " mStartedActivity set");
                r.hideForNow = true;
            }

            // Get rid of anything left hanging around.
            cleanUpPendingRemoveWindows(r);

            // The window is now visible if it has been added, we are not
            // simply finishing, and we are not starting another activity.
            if (!r.activity.mFinished && willBeVisible
                    && r.activity.mDecor != null && !r.hideForNow) {
                if (r.newConfig != null) {
                    r.tmpConfig.setTo(r.newConfig);
                    if (r.overrideConfig != null) {
                        r.tmpConfig.updateFrom(r.overrideConfig);
                    }
                    if (DEBUG_CONFIGURATION) Slog.v(TAG, "Resuming activity "
                            + r.activityInfo.name + " with newConfig " + r.tmpConfig);
                    performConfigurationChanged(r.activity, r.tmpConfig);
                    freeTextLayoutCachesIfNeeded(r.activity.mCurrentConfig.diff(r.tmpConfig));
                    r.newConfig = null;
                }
                if (localLOGV) Slog.v(TAG, "Resuming " + r + " with isForward="
                        + isForward);
                WindowManager.LayoutParams l = r.window.getAttributes();
                if ((l.softInputMode
                        & WindowManager.LayoutParams.SOFT_INPUT_IS_FORWARD_NAVIGATION)
                        != forwardBit) {
                    l.softInputMode = (l.softInputMode
                            & (~WindowManager.LayoutParams.SOFT_INPUT_IS_FORWARD_NAVIGATION))
                            | forwardBit;
                    if (r.activity.mVisibleFromClient) {
                        ViewManager wm = a.getWindowManager();
                        View decor = r.window.getDecorView();
                        wm.updateViewLayout(decor, l);
                    }
                }
                r.activity.mVisibleFromServer = true;
                mNumVisibleActivities++;
                if (r.activity.mVisibleFromClient) {
                    r.activity.makeVisible();
                }
            }

            if (!r.onlyLocalRequest) {
                r.nextIdle = mNewActivities;
                mNewActivities = r;
                if (localLOGV) Slog.v(
                    TAG, "Scheduling idle handler for " + r);
                Looper.myQueue().addIdleHandler(new Idler());
            }
            r.onlyLocalRequest = false;

            // Tell the activity manager we have resumed.
            if (reallyResume) {
                try {
                    ActivityManagerNative.getDefault().activityResumed(token);
                } catch (RemoteException ex) {
                }
            }

        } else {
            // If an exception was thrown when trying to resume, then
            // just end this activity.
            try {
                ActivityManagerNative.getDefault()
                    .finishActivity(token, Activity.RESULT_CANCELED, null, false);
            } catch (RemoteException ex) {
            }
        }
    }
可以發現其resumeActivity的邏輯調用到了performResumeActivity方法,我們來看一下performResumeActivity是如何實現的。
public final ActivityClientRecord performResumeActivity(IBinder token,
            boolean clearHide) {
        ActivityClientRecord r = mActivities.get(token);
        if (localLOGV) Slog.v(TAG, "Performing resume of " + r
                + " finished=" + r.activity.mFinished);
        if (r != null && !r.activity.mFinished) {
            if (clearHide) {
                r.hideForNow = false;
                r.activity.mStartedActivity = false;
            }
            try {
                r.activity.onStateNotSaved();
                r.activity.mFragments.noteStateNotSaved();
                if (r.pendingIntents != null) {
                    deliverNewIntents(r, r.pendingIntents);
                    r.pendingIntents = null;
                }
                if (r.pendingResults != null) {
                    deliverResults(r, r.pendingResults);
                    r.pendingResults = null;
                }
                r.activity.performResume();

                EventLog.writeEvent(LOG_AM_ON_RESUME_CALLED,
                        UserHandle.myUserId(), r.activity.getComponentName().getClassName());

                r.paused = false;
                r.stopped = false;
                r.state = null;
                r.persistentState = null;
            } catch (Exception e) {
                if (!mInstrumentation.onException(r.activity, e)) {
                    throw new RuntimeException(
                        "Unable to resume activity "
                        + r.intent.getComponent().toShortString()
                        + ": " + e.toString(), e);
                }
            }
        }
        return r;
    }
在方法體中,最終調用了r.activity.performResume();方法,好吧,這個方法是Activity中定義的方法,我們需要在Activity中查看這個方法的具體實現:
final void performResume() {
        ...
        mInstrumentation.callActivityOnResume(this);
        ...
    }
好吧,又是熟悉的味道,通過Instrumentation來調用了callActivityOnResume方法。。。
public void callActivityOnResume(Activity activity) {
        activity.mResumed = true;
        activity.onResume();

        if (mActivityMonitors != null) {
            synchronized (mSync) {
                final int N = mActivityMonitors.size();
                for (int i=0; i
O(∩_∩)O哈哈~,第四個生命周期方法出現了,onResume方法。。。
終於回調onResume方法了,這時候我們的界面應該已經展示出來了,照理來說我們的Activity應該已經啟動完成了,但是還沒有,哈哈,別著急。
有一個問題,Activity a 啟動 Activity b 會觸發那些生命周期方法?

你可能會回答?b的onCreate onStart方法,onResume方法 a的onPause方法和onStop方法,咦?對了onStop方法還沒回調呢,O(∩_∩)O哈哈~,對了缺少的就是對onStop方法的回調啊。
好吧,具體的邏輯我們下一步再說
六:棧頂Activity執行onStop方法
Looper.myQueue().addIdleHandler(new Idler())

	Idler.queueIdle()

	ActivityManagerNative.getDefault().activityIdle()

	ActivityManagerService.activityIdle()

	ActivityStackSupervisor.activityIdleInternalLocked()

	ActivityStack.stopActivityLocked()

	IApplicationThread.scheduleStopActivity()

	ActivityThread.scheduleStopActivity()

	ActivityThread.sendMessage()

	ActivityThread.H.sendMessage()

	ActivityThread.H.handleMessage()

	ActivityThread.handleStopActivity()

	ActivityThread.performStopActivityInner()

	ActivityThread.callCallActivityOnSaveInstanceState()

	Instrumentation.callActivityOnSaveInstanceState()

	Activity.performSaveInstanceState()

	Activity.onSaveInstanceState()

	Activity.performStop()

	Instrumentation.callActivityOnStop()

	Activity.onStop()
回到我們的handleResumeActivity方法,在方法體最後有這樣的一代碼:
Looper.myQueue().addIdleHandler(new Idler());
這段代碼是異步消息機制相關的代碼,我們可以看一下Idler對象的具體實現:
private class Idler implements MessageQueue.IdleHandler {
        @Override
        public final boolean queueIdle() {
            ActivityClientRecord a = mNewActivities;
            boolean stopProfiling = false;
            if (mBoundApplication != null && mProfiler.profileFd != null
                    && mProfiler.autoStopProfiler) {
                stopProfiling = true;
            }
            if (a != null) {
                mNewActivities = null;
                IActivityManager am = ActivityManagerNative.getDefault();
                ActivityClientRecord prev;
                do {
                    if (localLOGV) Slog.v(
                        TAG, "Reporting idle of " + a +
                        " finished=" +
                        (a.activity != null && a.activity.mFinished));
                    if (a.activity != null && !a.activity.mFinished) {
                        try {
                            am.activityIdle(a.token, a.createdConfig, stopProfiling);
                            a.createdConfig = null;
                        } catch (RemoteException ex) {
                            // Ignore
                        }
                    }
                    prev = a;
                    a = a.nextIdle;
                    prev.nextIdle = null;
                } while (a != null);
            }
            if (stopProfiling) {
                mProfiler.stopProfiling();
            }
            ensureJitEnabled();
            return false;
        }
    }
這樣當Messagequeue執行add方法之後就會回調其queueIdle()方法,我們可以看到在方法體中其調用了ActivityManagerNative.getDefault().activityIdle(),好吧,熟悉了Binder機制以後我們知道這段代碼會執行到ActivityManagerService的activityIdle方法:
@Override
    public final void activityIdle(IBinder token, Configuration config, boolean stopProfiling) {
        final long origId = Binder.clearCallingIdentity();
        synchronized (this) {
            ActivityStack stack = ActivityRecord.getStackLocked(token);
            if (stack != null) {
                ActivityRecord r =
                        mStackSupervisor.activityIdleInternalLocked(token, false, config);
                if (stopProfiling) {
                    if ((mProfileProc == r.app) && (mProfileFd != null)) {
                        try {
                            mProfileFd.close();
                        } catch (IOException e) {
                        }
                        clearProfilerLocked();
                    }
                }
            }
        }
        Binder.restoreCallingIdentity(origId);
    }
然後在activityIdle方法中又調用了ActivityStackSupervisor.activityIdleInternalLocked方法:
final ActivityRecord activityIdleInternalLocked(final IBinder token, boolean fromTimeout,
            Configuration config) {
        ...

        // Stop any activities that are scheduled to do so but have been
        // waiting for the next one to start.
        for (int i = 0; i < NS; i++) {
            r = stops.get(i);
            final ActivityStack stack = r.task.stack;
            if (stack != null) {
                if (r.finishing) {
                    stack.finishCurrentActivityLocked(r, ActivityStack.FINISH_IMMEDIATELY, false);
                } else {
                    stack.stopActivityLocked(r);
                }
            }
        }

        ...

        return r;
    }
可以發現在其中又調用了ActivityStack.stopActivityLocked方法:
final void stopActivityLocked(ActivityRecord r) {
        if (DEBUG_SWITCH) Slog.d(TAG_SWITCH, "Stopping: " + r);
        if ((r.intent.getFlags()&Intent.FLAG_ACTIVITY_NO_HISTORY) != 0
                || (r.info.flags&ActivityInfo.FLAG_NO_HISTORY) != 0) {
            ...
                r.app.thread.scheduleStopActivity(r.appToken, r.visible, r.configChangeFlags);
             ...
        }
    }
好吧,又是相同的邏輯通過IApplicationThread.scheduleStopActivity,最終調用了ActivityThread.scheduleStopActivity()方法。。。。
public final void scheduleStopActivity(IBinder token, boolean showWindow,
                int configChanges) {
           sendMessage(
                showWindow ? H.STOP_ACTIVITY_SHOW : H.STOP_ACTIVITY_HIDE,
                token, 0, configChanges);
        }
然後執行sendMessage方法,最終執行H(Handler)的sendMessage方法,並被H的handleMessge方法接收執行handleStopActivity方法。。。
private void handleStopActivity(IBinder token, boolean show, int configChanges) {
        ...
        performStopActivityInner(r, info, show, true);
        ...
    }
然後我們看一下performStopActivityInner的實現邏輯:
private void performStopActivityInner(ActivityClientRecord r,
            StopInfo info, boolean keepShown, boolean saveState) {
            ...
            // Next have the activity save its current state and managed dialogs...
            if (!r.activity.mFinished && saveState) {
                if (r.state == null) {
                    callCallActivityOnSaveInstanceState(r);
                }
            }

            if (!keepShown) {
                try {
                    // Now we are idle.
                    r.activity.performStop();
                } catch (Exception e) {
                    if (!mInstrumentation.onException(r.activity, e)) {
                        throw new RuntimeException(
                                "Unable to stop activity "
                                + r.intent.getComponent().toShortString()
                                + ": " + e.toString(), e);
                    }
                }
                r.stopped = true;
            }
        }
    }
好吧,看樣子在這個方法中執行了兩個邏輯,一個是執行Activity的onSaveInstance方法一個是執行Activity的onStop方法,我們先看一下callCallActivityOnSaveInstanceState的執行邏輯:
private void callCallActivityOnSaveInstanceState(ActivityClientRecord r) {
        r.state = new Bundle();
        r.state.setAllowFds(false);
        if (r.isPersistable()) {
            r.persistentState = new PersistableBundle();
            mInstrumentation.callActivityOnSaveInstanceState(r.activity, r.state,
                    r.persistentState);
        } else {
            mInstrumentation.callActivityOnSaveInstanceState(r.activity, r.state);
        }
    }
好吧,又是通過Instrumentation來執行。。。
public void callActivityOnSaveInstanceState(Activity activity, Bundle outState,
            PersistableBundle outPersistentState) {
        activity.performSaveInstanceState(outState, outPersistentState);
    }
又間接調用了Activity的performSaveInstanceState方法:
final void performSaveInstanceState(Bundle outState) {
        onSaveInstanceState(outState);
        saveManagedDialogs(outState);
        mActivityTransitionState.saveState(outState);
        if (DEBUG_LIFECYCLE) Slog.v(TAG, "onSaveInstanceState " + this + ": " + outState);
    }
呵呵,這裡調用到了,我們以前經常會重寫的onSaveInstanceState方法。
然後我們看一下performStopActivityInner中調用到的Activity方法的performStop方法:
final void performStop() {
        mDoReportFullyDrawn = false;
        mFragments.doLoaderStop(mChangingConfigurations /*retain*/);

        if (!mStopped) {
            if (mWindow != null) {
                mWindow.closeAllPanels();
            }

            if (mToken != null && mParent == null) {
                WindowManagerGlobal.getInstance().setStoppedState(mToken, true);
            }

            mFragments.dispatchStop();

            mCalled = false;
            mInstrumentation.callActivityOnStop(this);
            if (!mCalled) {
                throw new SuperNotCalledException(
                    "Activity " + mComponent.toShortString() +
                    " did not call through to super.onStop()");
            }

            synchronized (mManagedCursors) {
                final int N = mManagedCursors.size();
                for (int i=0; i
還是通過Instrumentation來實現的,調用了它的callActivityOnStop方法。。
public void callActivityOnStop(Activity activity) {
        activity.onStop();
    }
O(∩_∩)O哈哈~,最後一個生命周期方法終於出來了,onStop()…..
總結:
Activity的啟動流程一般是通過調用startActivity或者是startActivityForResult來開始的
startActivity內部也是通過調用startActivityForResult來啟動Activity,只不過傳遞的requestCode小於0
Activity的啟動流程涉及到多個進程之間的通訊這裡主要是ActivityThread與ActivityManagerService之間的通訊
ActivityThread向ActivityManagerService傳遞進程間消息通過ActivityManagerNative,ActivityManagerService向ActivityThread進程間傳遞消息通過IApplicationThread。
ActivityManagerService接收到應用進程創建Activity的請求之後會執行初始化操作,解析啟動模式,保存請求信息等一系列操作。
ActivityManagerService保存完請求信息之後會將當前系統棧頂的Activity執行onPause操作,並且IApplication進程間通訊告訴應用程序繼承執行當前棧頂的Activity的onPause方法;
ActivityThread接收到SystemServer的消息之後會統一交個自身定義的Handler對象處理分發;
ActivityThread執行完棧頂的Activity的onPause方法之後會通過ActivityManagerNative執行進程間通訊告訴ActivityManagerService,棧頂Actiity已經執行完成onPause方法,繼續執行後續操作;
ActivityManagerService會繼續執行啟動Activity的邏輯,這時候會判斷需要啟動的Activity所屬的應用進程是否已經啟動,若沒有啟動則首先會啟動這個Activity的應用程序進程;
ActivityManagerService會通過socket與Zygote繼承通訊,並告知Zygote進程fork出一個新的應用程序進程,然後執行ActivityThread的mani方法;
在ActivityThead.main方法中執行初始化操作,初始化主線程異步消息,然後通知ActivityManagerService執行進程初始化操作;
ActivityManagerService會在執行初始化操作的同時檢測當前進程是否有需要創建的Activity對象,若有的話,則執行創建操作;
ActivityManagerService將執行創建Activity的通知告知ActivityThread,然後通過反射機制創建出Activity對象,並執行Activity的onCreate方法,onStart方法,onResume方法;
ActivityThread執行完成onResume方法之後告知ActivityManagerService onResume執行完成,開始執行棧頂Activity的onStop方法;
ActivityManagerService開始執行棧頂的onStop方法並告知ActivityThread;
ActivityThread執行真正的onStop方法;
 Android中實現Bitmap在自定義View中的放大與拖動
一基本實現思路:基於View類實現自定義View –MyImageView類。在使用View的Activity類中完成OnTouchListener接口,實現
 Android如何保證一個線程最多只能有一個Looper?
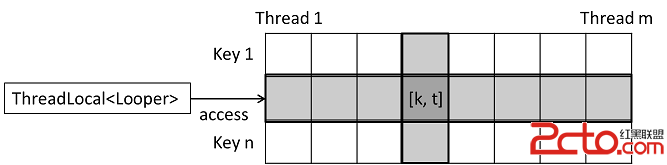
1. 如何創建Looper?Looper的構造方法為private,所以不能直接使用其構造方法創建。private Looper(boolean quitAllowed)
 Android SDK Manager國內無法更新的解決方案
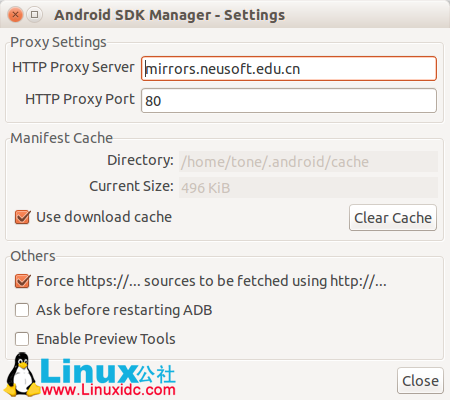
現在由於GWF,google基本和咱們說咱見了,就給現在在做Android&nbs
 Android中XML數據解析
XML初步今天我們來學習另一種非常重要的數據交換格式-XML。XML(Extensible Markup Language的縮寫,意為可擴展的標記語言),它是一種元標記