編輯:關於Android編程
最近需求sama聯合美工娘娘又改了界面,整體的界面是華麗了不少,但是大神何必為難弱智兒童的我呢,下面先看看新界面~
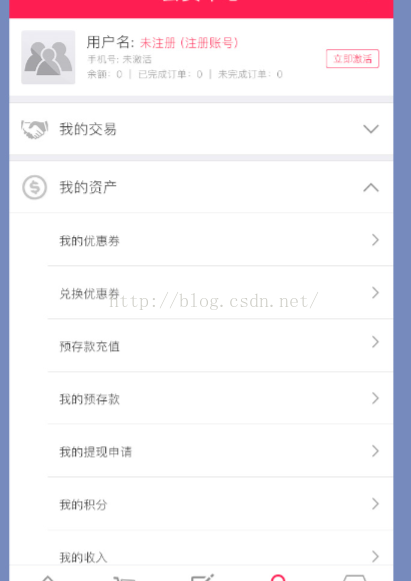
很經典的菜單設計,不過畢竟是版本更迭,不適合在原有基礎上大修改改,菜單總共分了4個父菜單和若干個子菜單,點擊父菜單會隱藏子菜單,其中還要有收起展開動畫,這個首先令我想起了expanedlistview。說動手就動手,花了幾分鐘先寫個demo測試以下吧。
這個很簡單的布局代碼,不必多說了~
然後定義一個實體類,包含父子菜單所必需的內容
public class Bean {
public Bean(String title, List childBeans) {
this.title = title;
this.childBeans = childBeans;
}
public Bean() {
}
public String getTitle() {
return title;
}
public void setTitle(String title) {
this.title = title;
}
public List getChildBeans() {
return childBeans;
}
public void setChildBeans(List childBeans) {
this.childBeans = childBeans;
}
private String title;
private List childBeans;
public static class childBean{
private String title;
public childBean(String title) {
this.title = title;
}
public String getTitle() {
return title;
}
public void setTitle(String title) {
this.title = title;
}
}
}
這幾行代碼也不必多說,一目了然,如果需要添加其他的 自然也可以自己添加~
最後開始寫自定義adapter了,也很簡單不是嗎?
public class TestAdapter extends BaseExpandableListAdapter {
private List groups;
private Context context;
public TestAdapter( Context context, List groups){
this.context=context;
this.groups=groups;
}
@Override
public int getGroupCount() {
return groups.size();
}
@Override
public int getChildrenCount(int groupPosition) {
return groups.get(groupPosition).getChildBeans().size();
}
@Override
public Object getGroup(int groupPosition) {
return groups.get(groupPosition);
}
@Override
public Object getChild(int groupPosition, int childPosition) {
return groups.get(groupPosition).getChildBeans().get(childPosition);
}
@Override
public long getGroupId(int groupPosition) {
return groupPosition;
}
@Override
public long getChildId(int groupPosition, int childPosition) {
return childPosition;
}
@Override
public boolean hasStableIds() {
return false;
}
@Override
public View getGroupView(int groupPosition, boolean isExpanded, View convertView, ViewGroup parent) {
View view= LayoutInflater.from(context).inflate(R.layout.item_a,null);
TextView tv= (TextView) view.findViewById(R.id.a_text);
tv.setText(groups.get(groupPosition).getTitle());
return view;
}
@Override
public View getChildView(int groupPosition, int childPosition, boolean isLastChild, View convertView, ViewGroup parent) {
View view= LayoutInflater.from(context).inflate(R.layout.item_a,null);
TextView tv= (TextView) view.findViewById(R.id.a_text);
tv.setText(groups.get(groupPosition).getChildBeans().get(childPosition).getTitle());
return view;
}
@Override
public boolean isChildSelectable(int groupPosition, int childPosition) {
return false;
}
}
很簡單的代碼,畢竟只是demo,大家就將就一下看看,最後在activity裡調用一下,我們來看效果吧~
public class MainActivity extends AppCompatActivity {
private ExpandableListView listView;
private List mList=new ArrayList<>();
private List childList=new ArrayList<>();
@Override
protected void onCreate(Bundle savedInstanceState) {
super.onCreate(savedInstanceState);
setContentView(R.layout.activity_main);
listView= (ExpandableListView) findViewById(R.id.exlistview);
Bean.childBean childBean;
for(int j=0;j<3;j++){
childBean=new Bean.childBean("aaaa"+j);
childList.add(childBean);
}
for(int i=0;i<3;i++){
mList.add(new Bean(i+"",childList));
}
TestAdapter adapter=new TestAdapter(MainActivity.this,mList);
listView.setAdapter(adapter);
listView.setGroupIndicator(null);
}
}
最後 上動圖看效果:
太粗糙了,而且沒有收起展開的動畫,沒辦法,繼續百度吧,然後找到了一個叫animationExpanedListView的東東,但是我感覺比較久遠了,上次更新已經2年之前了,有想實驗的小伙伴可以去這裡---->https://github.com/idunnololz/AnimatedExpandableListView。
怎麼辦呢,看來只有自己想辦法了。首先屢清楚思路,模仿listview的效果可以試試,所以首先寫一個自定義的adapter出來~
public abstract class SettingsAdapter {
private Context context;
private List mList;
public SettingsAdapter(Context context, List mList){
this.context=context;
this.mList=mList;
}
public SettingsAdapter(T[] mDatas){
mList=new ArrayList(Arrays.asList(mDatas));
}
public int getCount(){
return mList==null?0:mList.size();
}
public T getItem(int position){
return mList.get(position);
}
public void notifyDataSetChanged(){
onDataChanged.changed();
}
public abstract View getView(SettingView parent, int position);
public interface onDataChanged {
void changed();
}
public void setOnDataChanged(onDataChanged onDataChanged) {
this.onDataChanged = onDataChanged;
}
public onDataChanged onDataChanged;
}
這一段代碼很容易理解,跟普通的adapter沒有啥不一樣的~繼續向下我們要實現子菜單的布局,首先我們繼承linearlayout,因為菜單畢竟是自上向下的嘛~
public class SettingView extends LinearLayout implements SettingsAdapter.onDataChanged{
private Context context;
private SettingsAdapter adapter;
public SettingView(Context context) {
this(context, null);
}
public SettingView(Context context, AttributeSet attrs) {
this(context, attrs, 0);
}
public SettingView(Context context, AttributeSet attrs, int defStyleAttr) {
super(context, attrs, defStyleAttr);
this.context=context;
setOrientation(VERTICAL);
}
接下來我們公開一個adapter調用的方法用法調用adapter;
public void setAdapter(SettingsAdapter adapter){
this.adapter=adapter;
changeAdapter();
}
這依然是很簡單的代碼。我們接下來看changeAdapter裡面的內容
private void changeAdapter() {
removeAllViews();
SettingsAdapter settingsAdapter = this.adapter;
for(int i=0;i
一目了然是不是,如果看不懂沒關系,那就多看幾遍,如果多看幾遍還是看不懂,也沒關系,其實我也不懂。
最後我們通過接口回調將接口公布出去,這是我們的接口以及實現的adapter中接口:
public interface OnItemClick {
void click(View v,int i);
}
public void setOnItemClick(OnItemClick onItemClick) {
this.onItemClick = onItemClick;
}
private OnItemClick onItemClick;
@Override
public void changed() {
changeAdapter();
}
最後在xml中的布局就是這樣子的:
Textview暫時充當的是父菜單,settingview就是子菜單咯~
tv= (TextView) findViewById(R.id.tv1);
sv= (SettingView) findViewById(R.id.test_layout);
for(int i=0;i<5;i++){
mList.add(i+"");
}
SettingsAdapter adapter=new SettingsAdapter(MainActivity.this,mList) {
@Override
public View getView(SettingView parent, int position) {
View view=getLayoutInflater().inflate(R.layout.item_a,null);
TextView tv= (TextView) view.findViewById(R.id.a_text);
tv.setText(mList.get(position));
return view;
}
};
sv.setAdapter(adapter);
sv.setOnItemClick(new SettingView.OnItemClick() {
@Override
public void click(View v,int i) {
Toast.makeText(MainActivity.this,mList.get(i),Toast.LENGTH_SHORT).show();
}
});
}
最後在activity裡敲這些很簡單的代碼,差不多第一步的自定義布局就算實現了。看效果

布局是寫好了,但是暫時還沒有任何的點擊效果和動畫效果,這時候想到了什麼呢,屬性動畫,當當當~不過objectAnimator裡並沒有對View高度的動畫,不過我們知道valueAnimator是可以實現這個的,不多說看代碼~
public static ValueAnimator DropAnim(final View view,int start,int end){
ValueAnimator animator=ValueAnimator.ofInt(start,end);
animator.addUpdateListener(new ValueAnimator.AnimatorUpdateListener() {
@Override
public void onAnimationUpdate(ValueAnimator animation) {
int value= (Integer) animation.getAnimatedValue();
ViewGroup.LayoutParams lp = view.getLayoutParams();
lp.height=value;
view.setLayoutParams(lp);
}
});
return animator;
}
首先,我們需要把target的view 和view的起始高度傳起來,最後通過動畫的listener實現對view高度的動態變化,看到這裡是不是有些思路了~~~
public static void animatorOpen(final View view, int height){
view.setVisibility(View.VISIBLE);
AnimatorSet set=new AnimatorSet();
set.setDuration(1000);
ValueAnimator animator = DropAnim(view, 0, height);
ObjectAnimator oa=ObjectAnimator.ofFloat(view, View.ALPHA, 0.0f, 1.0f);
set.playTogether(animator,oa);
set.setDuration(1000);
set.start();
}
public static void animatorClose(final View view, int height){
AnimatorSet set=new AnimatorSet();
set.setDuration(1000);
ValueAnimator animator = DropAnim(view, height,0);
ObjectAnimator oa=ObjectAnimator.ofFloat(view,View.ALPHA,1.0f,0.0f);
set.playTogether(animator,oa);
set.addListener(new AnimatorListenerAdapter() {
@Override
public void onAnimationEnd(Animator animation) {
super.onAnimationEnd(animation);
view.setVisibility(View.GONE);
}
});
set.start();
}
這是動畫開關的兩個方法,方法大致相同,我們不僅實現了高度的變化,而且加入了透明度的變化,當然你也可以加入一些其他的動畫,這裡就不多做介紹了。
最後在在點擊事件中通過判斷子菜單的vissable來判斷動畫的開合,是不是很簡單呢?最後的一個難點是獲取view的高度,我們並沒有在自定義的布局裡直接獲取到他的高度,當然你也可以在自定義view的時候直接通過 getMeasuredHeight() 的方法獲得出來,當然也可以通過post方法進行獲取
sv.post(new Runnable() {
@Override
public void run() {
height=sv.getHeight();
}
});
tv.setOnClickListener(new View.OnClickListener() {
@Override
public void onClick(View v) {
if(sv.getVisibility()==View.VISIBLE){
AnimUtils.animatorClose(sv,height);
}else{
AnimUtils.animatorOpen(sv,height);
}
}
});
最後大功告成~來看一下動畫效果吧~

是不是很炫呢?最後有一個小問題,就是如何在fragment中獲取控件的高度呢,起初我也是傻傻的post方法,然並卵的是然並卵啊~最後還是找到了答案~通過
ViewTreeObserver來獲取,然後在點擊或者初始化完成之後進行移除監聽,不然他會一直監聽控件的高度,切記,移除這個監聽,必須放在動畫之前,否則會出現意想不到的彩蛋呢~
 Android實現Banner界面廣告圖片循環輪播(包括實現手動滑動循環)
前言:經常會看到有一些app的banner界面可以實現循環播放多個廣告圖片和手動滑動循環。本以為單純的ViewPager就可以實現這些功能。但是蛋疼的事情來了
 Android 編程之入門開發文件夾管理器開發詳細講解-1
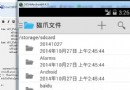
在我們的手持設備中,一般都會自帶設備公司自己開發的文件管理系統、拍照系統之類的東東,今天我給大伙說說入門級開發的文件夾管理器,代碼贼少 總共就6個類吧,沒有
 Java Socket 通信 (三)
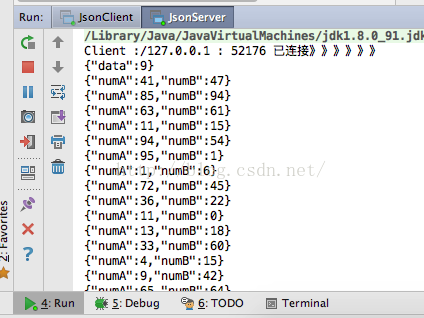
前言:經過昨天的學習,感覺對socket越來越熟悉了,但還是得多寫寫。業精於勤荒於嬉,行成於思毀於隨!今天我寫了一個與項目稍微接近的一個小程序。對socket越來越深入了
 android UI布局
一、設置重復背景 在drawable文件夾下建一個mybackground.xml文件 在文件中寫入: tileMode 屬性就是用於定義背景的顯示模式: