編輯:關於Android編程
自定義View通訊錄字母快速索引
在Android日常開發中,我們經常在聯系人界面看到一些字母導航欄,點擊字母的時候,會根據漢字的首拼音來查找是否存在相應的item,這種效果很常見,幾乎所有涉及到通訊的都會用到,包括qq,微信,微博等,今天我為大家帶來的就是這種自定義控件
源碼下載地址:https://github.com/gdutxiaoxu/QuickIndex.git
代碼其實不長,加上一些注釋總共才180多行,總體來說,思路分分為以下幾個步驟
/*** 博客地址:http://blog.csdn.net/gdutxiaoxu* 快速索引,根據字母的索引查找相應的聯系人** @author xujun* @time 2015/11/1 21:40.*/public class QuickIndexBar extends View {private static final String[] LETTERS = new String[]{"A", "B", "C", "D", "E", "F","G", "H", "I", "J", "K", "L","M", "N", "O", "P", "Q", "R","S", "T", "U", "V", "W", "X","Y", "Z"};private static final String TAG = "xujun";private Paint mPaint;//字母的寬度private int cellWidth;//字母的高度private float cellHeight;//記錄上一次觸摸的Indexprivate int mLastTouchIndex = -1;//字母被選中顯示的顏色private int mSelectColor = Color.GRAY;//字母正常顯示的顏色private int mNormalColor = Color.WHITE;private Context mContext;/*** 暴露一個字母的監聽*/public interface OnLetterUpdateListener {void onLetterUpdate(String letter);}private OnLetterUpdateListener listener;public OnLetterUpdateListener getListener() {return listener;}/*** 設置字母更新監聽** @param listener*/public void setListener(OnLetterUpdateListener listener) {this.listener = listener;}public QuickIndexBar(Context context) {this(context, null);}public QuickIndexBar(Context context, AttributeSet attrs) {this(context, attrs, 0);}public QuickIndexBar(Context context, AttributeSet attrs, int defStyle) {super(context, attrs, defStyle);mContext = context;//初始化自定義屬性obtainAttrs(attrs);// 初始化畫筆mPaint = new Paint(Paint.ANTI_ALIAS_FLAG);float textSize = UIUtils.dip2px(15, mContext);mPaint.setTextSize(textSize);mPaint.setTypeface(Typeface.DEFAULT_BOLD);}private void obtainAttrs(AttributeSet attrs) {TypedArray typedArray = mContext.obtainStyledAttributes(attrs, R.styleable.QuickIndexBar);int selectColor = typedArray.getColor(R.styleable.QuickIndexBar_select_color, -1);if (selectColor != -1) {mSelectColor = selectColor;}int normalColor = typedArray.getColor(R.styleable.QuickIndexBar_normal_color, -1);if (normalColor != -1) {mNormalColor = normalColor;}typedArray.recycle();}@Overrideprotected void onDraw(Canvas canvas) {for (int i = 0; i < LETTERS.length; i++) {String text = LETTERS[i];// 計算坐標int x = (int) (cellWidth / 2.0f - mPaint.measureText(text) / 2.0f);// 獲取文本的高度Rect bounds = new Rect();// 矩形mPaint.getTextBounds(text, 0, text.length(), bounds);int textHeight = bounds.height();int y = (int) (cellHeight / 2.0f + textHeight / 2.0f + i * cellHeight);// 根據按下的字母, 設置畫筆顏色mPaint.setColor(mLastTouchIndex == i ? mSelectColor : mNormalColor);// 繪制文本A-Zcanvas.drawText(text, x, y, mPaint);}}@Overridepublic boolean onTouchEvent(MotionEvent event) {int index = -1;switch (MotionEventCompat.getActionMasked(event)) {case MotionEvent.ACTION_DOWN:// 獲取當前觸摸到的字母索引index = (int) (event.getY() / cellHeight);if (index >= 0 && index < LETTERS.length) {// 判斷是否跟上一次觸摸到的一樣,不一樣才進行回調if (index != mLastTouchIndex) {if (listener != null) {//listener.onLetterUpdate(LETTERS[index]);}Log.d(TAG, "onTouchEvent: " + LETTERS[index]);//記錄上一次觸摸的Index為當前的index;mLastTouchIndex = index;}}break;case MotionEvent.ACTION_MOVE:index = (int) (event.getY() / cellHeight);if (index >= 0 && index < LETTERS.length) {// 判斷是否跟上一次觸摸到的一樣if (index != mLastTouchIndex) {if (listener != null) {listener.onLetterUpdate(LETTERS[index]);}Log.d(TAG, "onTouchEvent: " + LETTERS[index]);mLastTouchIndex = index;}}break;case MotionEvent.ACTION_UP:// 手指抬起的時候重置mLastTouchIndex = -1;break;default:break;}//調用這個方法會重新調用draw方法,重新繪制invalidate();return true;}/*** 當大小 改變的時候會回調這個方法,* 這裡我們就不主動調用measure()方法了** @param w* @param h* @param oldw* @param oldh*/@Overrideprotected void onSizeChanged(int w, int h, int oldw, int oldh) {super.onSizeChanged(w, h, oldw, oldh);// 獲取單元格的寬和高cellWidth = getMeasuredWidth();int mHeight = getMeasuredHeight();cellHeight = mHeight * 1.0f / LETTERS.length;}}public QuickIndexBar(Context context, AttributeSet attrs, int defStyle) {super(context, attrs, defStyle);mContext = context;//初始化自定義屬性obtainAttrs(attrs);// 初始化畫筆mPaint = new Paint(Paint.ANTI_ALIAS_FLAG);float textSize = UIUtils.dip2px(15, mContext);mPaint.setTextSize(textSize);mPaint.setTypeface(Typeface.DEFAULT_BOLD);}private void obtainAttrs(AttributeSet attrs) {TypedArray typedArray = mContext.obtainStyledAttributes(attrs, R.styleable.QuickIndexBar);int selectColor = typedArray.getColor(R.styleable.QuickIndexBar_select_color, -1);if (selectColor != -1) {mSelectColor = selectColor;}int normalColor = typedArray.getColor(R.styleable.QuickIndexBar_normal_color, -1);if (normalColor != -1) {mNormalColor = normalColor;}typedArray.recycle();}即可獲取到我們需要的寬度和高度。用起來比較方便,不過更多的是為了讓大家知道View有這一個方法存在以及怎麼使用它
順便我們來看一下google官方對onSizeChange方法的解釋
This is called during layout when the size of this view has changed. If you were just added to the view hierarchy, you're called with the old values of 0.
從官方的解釋我們可以知道這個方法是在onLayout方法中當大小改變的時候會調用這個方法,因此我們直接調用getMeasuredWidth();是可以獲取得到寬度的,因為onMeasure 是先於onLayout方法調用的。
3. 接著我們重寫onDraw方法,在onDraw方法我們所做的工作就是繪制 我們需要的26個字母
cellWidth = getMeasuredWidth();protected void onDraw(Canvas canvas) {for (int i = 0; i < LETTERS.length; i++) {String text = LETTERS[i];// 計算坐標int x = (int) (cellWidth / 2.0f - mPaint.measureText(text) / 2.0f);// 獲取文本的高度Rect bounds = new Rect();// 矩形mPaint.getTextBounds(text, 0, text.length(), bounds);int textHeight = bounds.height();int y = (int) (cellHeight / 2.0f + textHeight / 2.0f + i * cellHeight);// 根據按下的字母, 設置畫筆顏色mPaint.setColor(mLastTouchIndex == i ? mSelectColor : mNormalColor);// 繪制文本A-Zcanvas.drawText(text, x, y, mPaint);}}同時我們記錄下我們當前是觸摸或者按下哪一個字母
// 獲取當前觸摸到的字母索引index = (int) (event.getY() / cellHeight);mLastTouchIndex = index;並且提供了設置監聽器的方法,這樣我們就成功將我們的按下字母的信息提供給外界了
詳細代碼如下
到此 QuickBarView的源碼分析為止,下面我們來學習一下是怎樣結合ListView使用的
下面我貼出核心代碼,想仔細了解的請點擊源碼下載源碼下載地址
思路解析 如下
1. 在我們的List數據裡面查找是否有有相應的首字母是觸摸的字母,有的話返回相應的index,
2. 然後再調用ListView的setSelection(i)方法選中哪一個Item
至於有些item有顯示字母,有一些沒有顯示字母,其實就是判斷上一個item的首字母是不是跟當前的首字母是不是一樣的,不一樣的話,顯示當前item的字母,不過要注意一點,就是position等於0的時候,我們需要做特殊處理,代碼如下
源碼下載地址:https://github.com/gdutxiaoxu/QuickIndex.git
/*** 暴露一個字母的監聽*/public interface OnLetterUpdateListener {void onLetterUpdate(String letter);}public void setListener(OnLetterUpdateListener listener) {this.listener = listener;}int index = -1;switch (MotionEventCompat.getActionMasked(event)) {case MotionEvent.ACTION_DOWN:// 獲取當前觸摸到的字母索引index = (int) (event.getY() / cellHeight);if (index >= 0 && index < LETTERS.length) {// 判斷是否跟上一次觸摸到的一樣,不一樣才進行回調if (index != mLastTouchIndex) {if (listener != null) {//listener.onLetterUpdate(LETTERS[index]);}Log.d(TAG, "onTouchEvent: " + LETTERS[index]);//記錄上一次觸摸的Index為當前的index;mLastTouchIndex = index;}}break;case MotionEvent.ACTION_MOVE:index = (int) (event.getY() / cellHeight);if (index >= 0 && index < LETTERS.length) {// 判斷是否跟上一次觸摸到的一樣if (index != mLastTouchIndex) {if (listener != null) {listener.onLetterUpdate(LETTERS[index]);}Log.d(TAG, "onTouchEvent: " + LETTERS[index]);mLastTouchIndex = index;}}break;case MotionEvent.ACTION_UP:// 手指抬起的時候重置mLastTouchIndex = -1;break;default:break;}//調用這個方法會重新調用draw方法,重新繪制invalidate();return true;mQuickIndexBar.setListener(new OnLetterUpdateListener() {@Overridepublic void onLetterUpdate(String letter) {// UIUtils.showToast(getApplicationContext(), letter);showLetter(letter);// 根據字母定位ListView, 找到集合中第一個以letter為拼音首字母的對象,得到索引for (int i = 0; i < persons.size(); i++) {Person person = persons.get(i);String l = person.getPinyin().charAt(0) + "";if (TextUtils.equals(letter, l)) {// 匹配成功mListView.setSelection(i);break;}}}});mListView.setSelection(i);String str = null;String currentLetter = p.getPinyin().charAt(0) + "";// 根據上一個首字母,決定當前是否顯示字母if(position == 0){str = currentLetter;}else {// 上一個人的拼音的首字母String preLetter = persons.get(position - 1).getPinyin().charAt(0) + "";if(!TextUtils.equals(preLetter, currentLetter)){str = currentLetter;}}// 根據str是否為空,決定是否顯示索引欄mViewHolder.mIndex.setVisibility(str == null ? View.GONE : View.VISIBLE); android利用zbar二維碼掃描-(解決中文亂碼及掃描區域定義)
寫在最前(這是對上一篇博文的問題做的更新【android利用zbar二維碼掃描】) 前天早上登陸CSDN時候一條消息:一網友提出了兩點疑惑 &
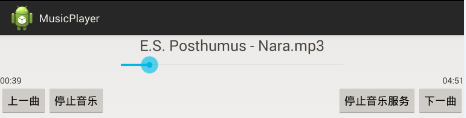 教你輕松制作Android音樂播放器
欣賞一下我們清爽的界面吧~如果是只用activity來制作這樣的東西簡直是太小兒科了,此處我們當然用的是service首先我們先上service的代碼:1、如果我們要訪問
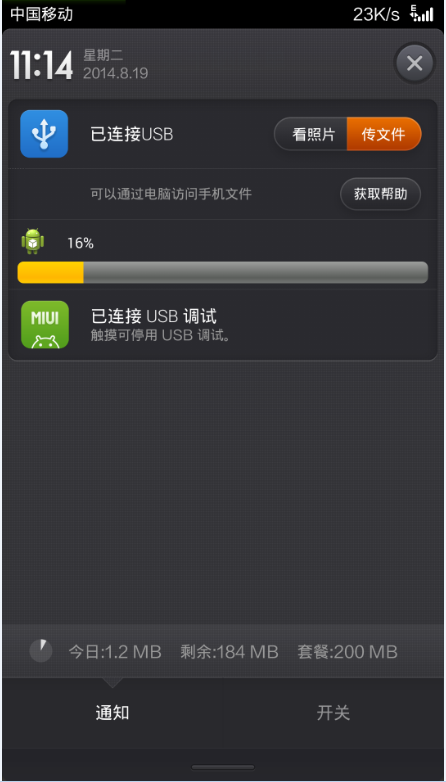 Android程序版本更新之通知欄更新下載安裝
Android應用檢查版本更新後,在通知欄下載,更新下載進度,下載完成自動安裝,效果圖如下:•檢查當前版本號AndroidManifest文件中的versio
 Android Studio接入Fabric- Crashlytics統計錯誤信息
前言昨日,公司討論用什麼工具來統計Crash信息時,有提出友盟,TalkingData,Crashlytics等等工具。鑒於之前其他兄弟部門有使用Crashlytics和