編輯:關於Android編程
我們發現去哪兒網app的首頁做的win8風格的方塊,然後按壓方塊後悔發現,這個圖片不但有縮放效果,而且還有顯示指紋的效果,感覺跟真的手指按上去一樣,很高逼格。今天我們就來看一下,這個是如何實現的。

由於透明的看不到效果,我就連背景圖片一起在這裡顯示了

import android.content.Context;
import android.graphics.Bitmap;
import android.graphics.BitmapFactory;
import android.graphics.Canvas;
import android.graphics.Matrix;
import android.graphics.drawable.BitmapDrawable;
import android.util.AttributeSet;
import android.view.MotionEvent;
import android.view.View;
import android.view.animation.Animation;
import android.view.animation.ScaleAnimation;
import android.widget.ImageView;

/**
 * 自定義仿去哪兒手指按下圖片縮放和顯示指紋的效果
 * Created by yuandl on 2016-10-31.
 */

public class TouchFingerImageView extends ImageView {

    /**
     * 指紋的圖片
     */
    private Bitmap fingerBitmap;
    /**
     * 圖片按下的狀態標識
     */
    private boolean state = false;
    /**
     * 點擊事件
     */
    private OnClickListener onClickListener;

    /**
     * 默認的構造函數
     *
     * @param context
     * @param attrs
     */
    public TouchFingerImageView(Context context, AttributeSet attrs) {
        super(context, attrs);
        /**獲取指紋圖片*/
        fingerBitmap = zoom(BitmapFactory.decodeResource(getResources(), R.mipmap.finger), 300, 300);

    }

    /**
     * 圖片的縮放方法
     *
     * @param bitmap    源圖片資源
     * @param newWidth  縮放後的寬
     * @param newHeight 縮放後的高
     * @return Bitmap    縮放後的圖片資源
     */
    public Bitmap zoom(Bitmap bitmap, int newWidth, int newHeight) {
        // 獲取這個圖片的寬和高
        float width = bitmap.getWidth();
        float height = bitmap.getHeight();
        // 計算寬高縮放率
        float rateWidth = ((float) newWidth) / width;
        float rateHeight = ((float) newHeight) / height;
        // 創建操作圖片用的matrix對象
        Matrix matrix = new Matrix();
        // 縮放圖片動作
        matrix.postScale(rateWidth, rateHeight);
        //創建一個新的縮放後的bitmap
        Bitmap zoomBitmap = Bitmap.createBitmap(bitmap, 0, 0, (int) width,
                (int) height, matrix, true);
        return zoomBitmap;
    }

    @Override
    protected void onDraw(Canvas canvas) {
        super.onDraw(canvas);
        /**獲取源資源圖片文件**/
        Bitmap bitmap = ((BitmapDrawable) this.getDrawable()).getBitmap();
        Matrix matrix0 = new Matrix();
        /**
         * 平移指紋圖片使指紋居中顯示
         */
        matrix0.postTranslate(this.getWidth() / 2 - fingerBitmap.getWidth() / 2,
                this.getHeight() / 2 - fingerBitmap.getHeight() / 2);
        /**繪制源資源圖片文件**/
        canvas.drawBitmap(zoom(bitmap, getWidth(), getHeight()), 0, 0, null);
        if (state) {
            Matrix matrix = new Matrix();
            /**
             * 平移指紋圖片使指紋居中顯示
             */
            matrix.postTranslate(this.getWidth() / 2 - fingerBitmap.getWidth() / 2,
                    this.getHeight() / 2 - fingerBitmap.getHeight() / 2);
            canvas.drawBitmap(fingerBitmap, matrix, null);
        }
    }

    @Override
    public boolean onTouchEvent(MotionEvent event) {
        float begin = 1.0f;
        float end = 0.95f;
        /** 收縮動畫**/
        Animation beginAnimation = new ScaleAnimation(begin, end, begin, end,
                Animation.RELATIVE_TO_SELF, 0.5f, Animation.RELATIVE_TO_SELF,
                0.5f);
        /** 伸展動畫**/
        Animation finishAnimation = new ScaleAnimation(end, begin, end, begin,
                Animation.RELATIVE_TO_SELF, 0.5f, Animation.RELATIVE_TO_SELF,
                0.5f);

        /** 設置動畫持續時間和保留動畫結果 **/
        beginAnimation.setDuration(200);
        /**設置動畫停留在最後一個的狀態**/
        beginAnimation.setFillAfter(true);
        finishAnimation.setDuration(200);
        finishAnimation.setFillAfter(true);

        switch (event.getAction()) {
            case MotionEvent.ACTION_DOWN://手指按下時
                startAnimation(beginAnimation);
                state = true;
                invalidate();
                if (onClickListener != null) {
                    onClickListener.onClick(this);
                }
                break;
            case MotionEvent.ACTION_UP:
                startAnimation(finishAnimation);
                state = false;
                invalidate();
                break;
            case MotionEvent.ACTION_CANCEL:
                startAnimation(finishAnimation);
                state = false;
                invalidate();
                break;
        }
        return true;
    }

    @Override
    public void setOnClickListener(OnClickListener onClickListener) {
        this.onClickListener = onClickListener;
    }
}
Activity中的用法
import android.os.Bundle;
import android.support.v7.app.AppCompatActivity;
import android.view.View;
import android.widget.Toast;

public class MainActivity extends AppCompatActivity {
    @Override
    protected void onCreate(Bundle savedInstanceState) {
        super.onCreate(savedInstanceState);
        setContentView(R.layout.activity_main);
        findViewById(R.id.tfiv1).setOnClickListener(new View.OnClickListener() {
            @Override
            public void onClick(View view) {
                Toast.makeText(MainActivity.this,"點擊了第一個",Toast.LENGTH_SHORT).show();
            }
        });
    }
}
 android創建桌面快捷鍵shortcut
有很多人也寫過創建桌面快捷鍵的blog,但是大部分都只講了怎麼用,其實技術使用起來都很簡單,但是你使用後下次還知道嗎? 根本原因還是不清楚原理,今天我就來講講shor
 Android新特性介紹,ConstraintLayout完全解析
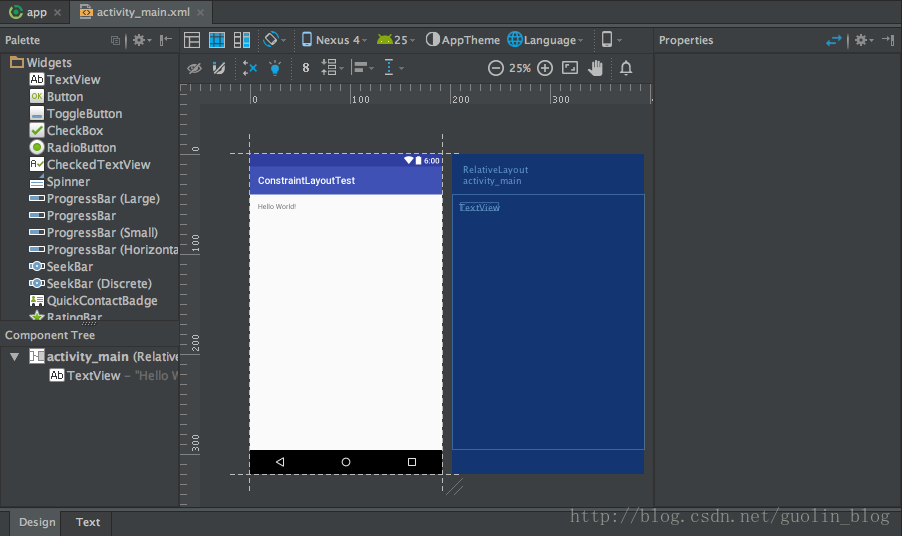
今天給大家帶來2017年的第一篇文章,這裡先祝大家新年好。本篇文章的主題是ConstraintLayout。其實ConstraintLayout是AndroidStudi
 Android啟動引導頁使用ViewPager實現
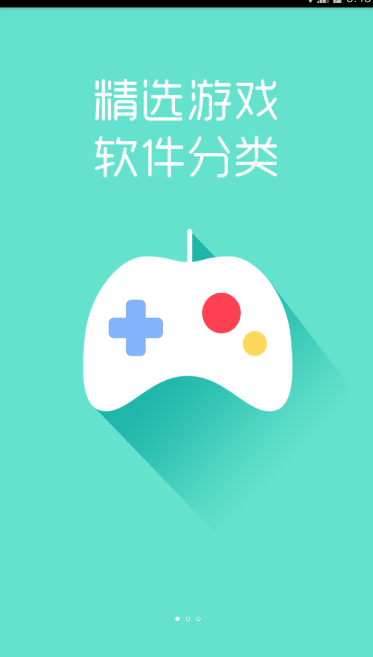
我們在安裝某個APP的時候,基本都會有一個引導頁的提示,他們可以打廣告,或者介紹新功能的加入和使用說明等。一般都支持滑動並且下面有幾個點,顯示共有多少頁和當前圖片的位置,
 RecyclerView的萬能分割線
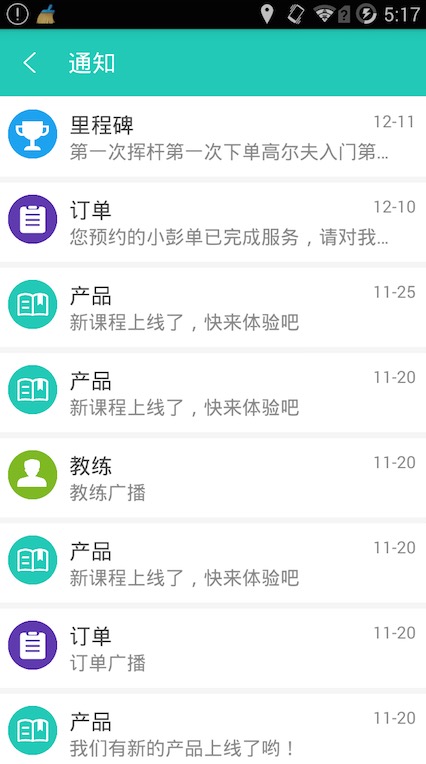
什麼是RecyclerViewRecyclerView是Android 5.0 materials design中的組件之一,相應的還有CardView、Palette等