編輯:關於Android編程
1 APP有時會使用到上下左右箭頭這類內容一樣,方向不同的圖片,可以只預置一張上的箭頭圖標,下左右箭頭可以使用代碼旋轉上箭頭圖標實現;這樣只需預置一張圖片,也減少了APP的大小。
在Google的官方文檔中,有如下說明:
You can also omitresources that are only a rotated equivalent of another resource. The followingcode snippet provides an example of turning an "expand" arrow into a"collapse" arrow icon by simply rotating the original image 180degrees:
(https://developer.android.com/topic/performance/reduce-apk-size.html)
如下圖兩個圖標箭頭都是朝右的:
對應的XML代碼如下:
android:layout_width="80dp"
android:layout_height="wrap_content"
app:srcCompat="@drawable/arrow_right_red"
android:id="@+id/imageView" />
android:layout_width="80dp"
android:layout_height="wrap_content"
app:srcCompat="@drawable/arrow_right_red"
android:id="@+id/imageViewLeft"/>
如果想把第二個改成箭頭向左的圖標,可按如下方式實現:
//定義旋轉功能的XML代碼
android:fromDegrees="0"
android:pivotX="50%"
android:pivotY="50%"
android:toDegrees="180" />
//具體實現代碼
Animation
rotateAnimation= AnimationUtils.loadAnimation(this, R.anim.rotate);
ImageView
imageViewLeft= (ImageView) findViewById(R.id.imageViewLeft);
imageViewLeft.startAnimation(rotateAnimation);
//圖片旋轉後,不恢復原狀
rotateAnimation.setFillAfter(true);
結果如下,只用一張圖,通過代碼,實現了兩種顯示效果:
2 使用tint和tintmode屬性減少預置的圖片資源。當只是要改變圖片內容的顏色,而不改變圖片內容時,以往做法是預置幾張不同顏色的圖片,使用這兩個屬性,只需預置一張圖片就可以了,程序運行時,動態改變圖片的顏色。
在Google的官方文檔中,有如下說明:
You can include a separate resourcefor variations of an image, such as tinted, shaded, or rotated versions of thesame image. We recommend, however, that you reuse the same set of resources,customizing them as needed at runtime.
Android provides several utilities tochange the color of an asset, either usingtheandroid:tintandtintModeattributes on Android 5.0(API level 21) and higher. For lower versions of the platform, use theColorFilterclass.
(https://developer.android.com/topic/performance/reduce-apk-size.html)
如下界面:
對應的XML代碼如下:
android:id="@+id/login_image"
android:layout_width="match_parent"
android:layout_height="200dp"
android:layout_marginTop="8dp"
android:src="@drawable/login"/>
可以使用tint屬性設置圖片裡顯示的內容不變,但顏色改變,如下所示:
android:id="@+id/login_image"
android:layout_width="match_parent"
android:layout_height="200dp"
android:layout_marginTop="8dp"
android:src="@drawable/login"
android:tint="#EEEEEE"/>
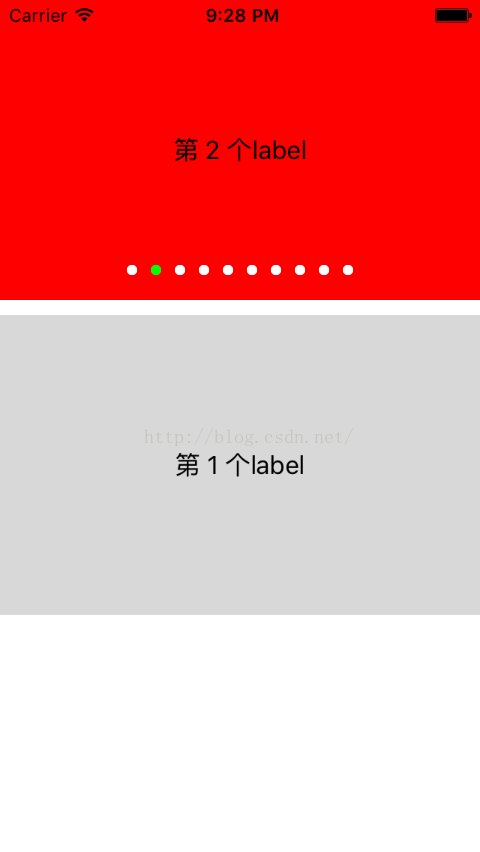
此時界面變成如下所示:
也可以通過代碼動態設置,代碼如下:
ImageViewimageView = (ImageView) findViewById(R.id.login_image);
imageView.setColorFilter(Color.GRAY);
在許多APP輸入密碼的編輯框右邊都有一個圖標,反復點擊圖標,圖標會顯示不同的顏色,同時密碼會以明文或密文形式顯示。傳統方式也是預置兩張不同顏色的圖片,使用tint和tintmode屬性只需預置一張圖片就可以了,程序運行時,動態改變圖片的顏色。
如下所示界面:
對應的XML代碼如下:
android:id="@+id/login_eye_et"
android:layout_width="wrap_content"
android:layout_height="wrap_content"
android:layout_gravity="right|center"
android:layout_marginRight="12dp"
android:background="@drawable/login_eye_first"
android:gravity="center"/>
設置tint和tintmode屬性:
android:id="@+id/login_eye_et"
android:layout_width="wrap_content"
android:layout_height="wrap_content"
android:layout_gravity="right|center"
android:layout_marginRight="12dp"
android:background="@drawable/login_eye_first"
android:gravity="center"
android:backgroundTint="@color/colorAccent"
android:backgroundTintMode="screen" />
界面如下:
也可以通過代碼動態設置,代碼如下:
privatevoid setDisplayPassword() {
mIsDisplayPassword =!mIsDisplayPassword;
if (mIsDisplayPassword){
ViewCompat.setBackgroundTintList(mLoginEyeEt,ColorStateList.valueOf(Color.parseColor("#FF4081")));
ViewCompat.setBackgroundTintMode(mLoginEyeEt, PorterDuff.Mode.SCREEN);
mEditPassword.setTransformationMethod(PasswordTransformationMethod.getInstance());
} else {
ViewCompat.setBackgroundTintList(mLoginEyeEt,ColorStateList.valueOf(Color.parseColor("#CCCCCC")));
ViewCompat.setBackgroundTintMode(mLoginEyeEt, PorterDuff.Mode.SCREEN);
mEditPassword.setTransformationMethod(HideReturnsTransformationMethod.getInstance());
}
}
使用AppCompatTextView控件是為了在低於Android 5.0 (APIlevel 21)的系統中也可以使用tint和tintmode屬性。
 通過實例簡單講解Android App中的Activity組件
Activity是Android應用中,最直接與用戶接觸的組件,它負責加載View組件,使其展現給用戶,並保持與用戶的交互。所有的Activity組件均需要繼承Activ
 android中選中菜單的顯示跳轉和隱式跳轉的實例介紹
查了好多資料,現發還是不全,干脆自己整理吧,至少保證在我的做法正確的,以免誤導讀者,也是給自己做個記錄吧!簡介android供給了三種菜單類型,分別為options me
 android事件攔截處理機制詳解
前段時間剛接觸過android手機開發,對它的事件傳播機制不是很了解,雖然網上也查了相關的資料,但是總覺得理解模模糊糊,似是而非,於是自己就寫個小demo測試了一下。總算
 Unity3D —— protobuf網絡框架
前言:protobuf是google的一個開源項目,主要的用途是:1.數據存儲(序列化和反序列化),這個功能類似xml和json等;2.制作網絡通信協議;一、資源下載:1