編輯:關於Android編程
是不是一直有這樣的疑問?很懵逼對不對 - - ,那我們就站在巨人的丁丁上來解決一下這些問題,如果文中出現一些錯誤,還望指正,互相學習
大家都知道 Android是基於Linux系統的,而在Linux中,所有的進程都是由init進程直接或者是間接fork出來的,當我開機的時候init進程就會fork出一個Android的第一個新的進程
Zygote,中文翻譯過來要”受精卵”,一個很有意識的名字。為什麼這麼說呢,當我們Zygote進程跑起來後,Android為了實現實現資源共用和更快的啟動速度,通過Zygote進程直接去fork出一些子進程,這就是為什麼要”受精卵”的原因,也就是我們的app全部都是基於Zygote上的 ,沒有Zygote就沒有我們,當Zygote初始化完成之後,首先會fork它的第一個子進程SystemServer,這個類非常的重要,為什麼這麼說呢?因為系統裡面重要的服務都是在這個進程裡面開啟的,比如ActivityManagerService、PackageManagerService、WindowManagerService等等,有木有覺得似曾相識
當SystemServer跑起來後,這些重要的服務也會隨之創建,系統初始化完成之後我們就會進到系統桌面->Launcher,其實Launcher也是一個app,它繼承自Activity,當我們點擊桌面上的app後,系統就會為我們的app創建一個進程,然後啟動我們App的第一個類ActivityThread,其實說到底我們的app就是一個main函數,也就是啟動了ActivityThread.main()。我們重點來看下這個類
都說主線程更新ui,主線程不能有耗時操作,主線程是在哪裡創建的呢?我們來看下ActivityThread.main()。
public static void main(String[] args) {
    ....
    final File configDir = Environment.getUserConfigDirectory(UserHandle.myUserId());
    TrustedCertificateStore.setDefaultUserDirectory(configDir);

    Process.setArgV0("");
    //創建主線程Looper
    Looper.prepareMainLooper();

    ActivityThread thread = new ActivityThread();
    thread.attach(false);

    if (sMainThreadHandler == null) {
        sMainThreadHandler = thread.getHandler();
    }

    if (false) {
        Looper.myLooper().setMessageLogging(new
                LogPrinter(Log.DEBUG, "ActivityThread"));
    }

    // End of event ActivityThreadMain.
    Trace.traceEnd(Trace.TRACE_TAG_ACTIVITY_MANAGER);
    //主線程消息循環
    Looper.loop();

    throw new RuntimeException("Main thread loop unexpectedly exited");
}
首先我們要明白一點,主線程也是一個線程,也是有他的生命周期的,當我們new Thread()後執行完裡面的代碼也就意味著這個線程的結束,剛說了主線程也是線程,如果我們的代碼一下就執行完了,那麼我們這個app的功能還能執行嗎? 我還沒開始呢,你咋就結束了?這樣多不持久,Android為了解決這個問題,使用的Looper循環,了解Handler的機制的童鞋,會知道在處理消息的時候使用了Looper.loop()方法,並且在該方法中進入了一個死循環
同時Looper.loop()方法是在主線程中調用的,那麼為什麼沒有造成阻塞呢?
首先我們要明白線程它也是有生命周期的,它的生命周期在於這個線程裡面所要執行的代碼執行完成,這個線程的使命也就完成了
其次我們要明白我們主線程是如何跟子線程通信(發消息)的
public class MainActivity extends AppCompatActivity {
    Handler mHandler;

    @Override
    protected void onCreate(Bundle savedInstanceState) {
        super.onCreate(savedInstanceState);
        setContentView(R.layout.activity_main);
        new Thread(new Runnable() {
            @Override
            public void run() {
                //初始化Looper對象 一個線程對應一個looper
                Looper.prepare();
                mHandler = new Handler() {
                    @Override
                    public void handleMessage(Message msg) {
                        super.handleMessage(msg);
                        Log.i("test", "do somethings");
                    }
                };
                //開啟消息循環
                Looper.loop();
            }

        }).start();
        findViewById(R.id.btn).setOnClickListener(new View.OnClickListener() {
            @Override
            public void onClick(View v) {
                mHandler.sendEmptyMessage(1);
            }
        });
    }

}
我們主線程跟子線程就是這樣通信的,可是為什麼要 先Looper.prepare(),然後執行處理邏輯,最後Looper.loop();
我們先來看看Looper.prepare()
public static void prepare() {
        prepare(true);
    }

    private static void prepare(boolean quitAllowed) {
        if (sThreadLocal.get() != null) {
            throw new RuntimeException("Only one Looper may be created per thread");
        }
        sThreadLocal.set(new Looper(quitAllowed));
    }
sThreadLocal你可以理解成一個hashmap鍵值對,key就是我們當前的Thread線程,value就是new Lopper出來的對象,sThreadLocal.get()如果不等於空的話 表示直接調用了prepare已經set進去了,就會拋出一個異常。也就是說一個線程只能對應一個looper,人家可是很專一的~,在來看看
 /**
     * Run the message queue in this thread. Be sure to call
     * {@link #quit()} to end the loop.
     */
    public static void loop() {
        //獲取當前線程對應的Looper對象
        final Looper me = myLooper();
        if (me == null) {
            //沒有調用Looper.prepare()
            throw new RuntimeException("No Looper; Looper.prepare() wasn't called on this thread.");
        }
        final MessageQueue queue = me.mQueue;

        // Make sure the identity of this thread is that of the local process,
        // and keep track of what that identity token actually is.
        Binder.clearCallingIdentity();
        final long ident = Binder.clearCallingIdentity();
        //死循環,不斷從消息隊列取消息,有消息就直接處理消息
        for (;;) {
            //取出下一個消息
            Message msg = queue.next(); // might block
            if (msg == null) {
                // No message indicates that the message queue is quitting.
                //當前沒有消息,直接返回
                return;
            }

            // This must be in a local variable, in case a UI event sets the logger
            final Printer logging = me.mLogging;
            if (logging != null) {
                logging.println(">>>>> Dispatching to " + msg.target + " " +
                        msg.callback + ": " + msg.what);
            }

            final long traceTag = me.mTraceTag;
            if (traceTag != 0) {
                Trace.traceBegin(traceTag, msg.target.getTraceName(msg));
            }
            try {
                //能走到這裡,表示msg不為空,有消息要處理
                //調用handler.dispatchMessage()處理消息
                msg.target.dispatchMessage(msg);
            } finally {
                if (traceTag != 0) {
                    Trace.traceEnd(traceTag);
                }
            }

            if (logging != null) {
                logging.println("<<<<< Finished to " + msg.target + " " + msg.callback);
            }

            // Make sure that during the course of dispatching the
            // identity of the thread wasn't corrupted.
            final long newIdent = Binder.clearCallingIdentity();
            if (ident != newIdent) {
                Log.wtf(TAG, "Thread identity changed from 0x"
                        + Long.toHexString(ident) + " to 0x"
                        + Long.toHexString(newIdent) + " while dispatching to "
                        + msg.target.getClass().getName() + " "
                        + msg.callback + " what=" + msg.what);
            }

            msg.recycleUnchecked();
        }
    }
代碼上注釋也寫的比較清楚了,我們剛說了線程也是有生命周期的,我們在線程裡面創建了looper對象之後,new Handler()然後去處理消息,假如我們Looper.loop()沒有這個死循環,這個線程任務就執行完成了,那Handler裡面還能收到消息嗎?所以我就需要調用Looper.loop()一個死循環,不斷去消息隊列去取,然後我們主線程發了消息後,Looper取到了消息,子線程裡面的Handler也就自然能夠處理消息這就是這個調用Looper.loop()的作用
我們在來看看AcivityThread源碼
ActivityThread.java
public static void main(String[] args) {
        ...
        Looper.prepareMainLooper();

        ActivityThread thread = new ActivityThread();
        thread.attach(false);

        if (sMainThreadHandler == null) {
            sMainThreadHandler = thread.getHandler();
        }

        if (false) {
            Looper.myLooper().setMessageLogging(new
                    LogPrinter(Log.DEBUG, "ActivityThread"));
        }

        // End of event ActivityThreadMain.
        Trace.traceEnd(Trace.TRACE_TAG_ACTIVITY_MANAGER);
        Looper.loop();
        ...
}
看到木有,在我們app啟動的時候,ActivityThread已經幫我們做好了Looper消息循環,所以我們在主線程new Handler()的時候就不用創建Looper,反而你再次調用Looper.prepare()還會報錯,已經主線程已經創建了Looper對象了。
理解了上面幾個問題我們就比較好理解了,首先,主線程也是線程,只不過這個線程是被系統創建的(就好比我們自己創建了子線程一樣),其次 Looper是不斷的去消息隊列裡面取,取到消息就去處理消息,只要處理消息的操作不是耗時操作,就不會引起卡頓也就是我們所說的ANR,其實Android的交互都是基於消息機制的分發,handler 可以發送消息,然後loop 裡就分發消息然後就發給handler, 然後就執行到 H(Handler )裡的對應代碼。所以這些代碼就不會卡死~,也就說循環消息並不會使起卡死,而真正會卡死的是我們的處理消息,這也就是我們主線程為什麼不能執行耗時操作的原因。
講到這裡你可能還不是很能理解,那我們就來舉一個栗子~
我們去做地鐵或者做火車的時候都要去過安檢,這個安檢的機器就好比我們的Looper對象,機器內部檢測違禁品就好比是Handler,因為我們要依次排隊去放到機器上去檢查,我們一個人的行李物品就比作一個Message,多個人所以就組成了一個MessageQueue, 好,有了這些東西我們就可以腦補整個運行過程了,首先如果要運行機器首先你的插插頭吧?不然怎麼通電->(Looper.prepare),通完點後你得按開關吧?(Looper.loop),因為運行很早,這個時候還沒有人來安檢,此時消息隊列(MessageQueue)是空的,這個時候我過來安檢,因為我是出去玩,所以帶的東西比較少,這個時候我把我的包包(MessageQueue)放到了安檢機器的韌帶上面了,此時MessageQueue消息隊列裡面就有我的包包了,機器此時正在運轉,
然後機器自動檢測我的是否有違禁品(Handler.handleMessage),這個時候來了位大叔,帶著很大一包東西(Message),放到了MessageQueue裡,這個安檢機器還在循環(Looper),當循環到這個大叔的大件後,大叔在另一頭等待了好久發現怎麼都不出來,因為太大,檢測需要時間(假設機器比較low),而這個等待的時間就是我們所說的做了耗時操作導致ui卡頓。如果等了很久會導致很多乘客不滿(ANR)。這個比喻可能不是很形象,但是話粗理不粗,這個只是我的個人理解
回歸上一個話題,執行main函數的時候new ActivityThread(),執行了它的attach方法,我們來看下attach方法
private void attach(boolean system) {
    sCurrentActivityThread = this;
    mSystemThread = system;
    if (!system) {
       ...

       final IActivityManager mgr =ActivityManagerNative.getDefault();
        try {
            mgr.attachApplication(mAppThread);
        } catch (RemoteException ex) {
            throw ex.rethrowFromSystemServer();
        }
        // Watch for getting close to heap limit.
        BinderInternal.addGcWatcher(new Runnable() {
            @Override public void run() {
                if (!mSomeActivitiesChanged) {
                    return;
                }
                Runtime runtime = Runtime.getRuntime();
                long dalvikMax = runtime.maxMemory();
                long dalvikUsed = runtime.totalMemory() - runtime.freeMemory();
                if (dalvikUsed > ((3*dalvikMax)/4)) {
                    if (DEBUG_MEMORY_TRIM) Slog.d(TAG, "Dalvik max=" + (dalvikMax/1024)
                            + " total=" + (runtime.totalMemory()/1024)
                            + " used=" + (dalvikUsed/1024));
                    mSomeActivitiesChanged = false;
                    try {
                        mgr.releaseSomeActivities(mAppThread);
                    } catch (RemoteException e) {
                        throw e.rethrowFromSystemServer();
                    }
                }
            }
        });
    } else {
        // Don't set application object here -- if the system crashes,
        // we can't display an alert, we just want to die die die.
        android.ddm.DdmHandleAppName.setAppName("system_process",
                UserHandle.myUserId());
        try {
            mInstrumentation = new Instrumentation();
            ContextImpl context = ContextImpl.createAppContext(
                    this, getSystemContext().mPackageInfo);
            mInitialApplication = context.mPackageInfo.makeApplication(true, null);
            mInitialApplication.onCreate();
        } catch (Exception e) {
            throw new RuntimeException(
                    "Unable to instantiate Application():" + e.toString(), e);
        }
    }
}
首先attach方法有一個boolean的變量system,傳過來的是false,聰明的你一看就是這個意思,是否是系統應用 ,當然我們不是,然後我們會走到if裡面,裡面有一行比較關鍵的代碼
final IActivityManager mgr = ActivityManagerNative.getDefault();
我點進去看下getDefault()函數
ActivityManagerNative.java
/**
 * Retrieve the system's default/global activity manager.
 */
static public IActivityManager getDefault() {
    return gDefault.get();
}
看注釋說返回一個系統全局的ActivityManager,調用了gDefault.get(),我們來看下這個gDefault變量看看是在哪裡初始化的
private static final SingletongDefault = new Singleton () { protected IActivityManager create() { IBinder b = ServiceManager.getService("activity"); if (false) { Log.v("ActivityManager", "default service binder = " + b); } IActivityManager am = asInterface(b); if (false) { Log.v("ActivityManager", "default service = " + am); } return am; } };
ServiceManager.getService(“activity”)返回一個IBinder 這個Binder對象是誰呢?既然有getService,那麼肯定有addService,並且這個key是“activity”,我們來看下是在哪個類添加的
ActivityManagerService.java
public void setSystemProcess() {
    try {
        ServiceManager.addService(Context.ACTIVITY_SERVICE, this, true);
        ServiceManager.addService(ProcessStats.SERVICE_NAME, mProcessStats);
        ServiceManager.addService("meminfo", new MemBinder(this));
        ServiceManager.addService("gfxinfo", new GraphicsBinder(this));
        ServiceManager.addService("dbinfo", new DbBinder(this));
        if (MONITOR_CPU_USAGE) {
            ServiceManager.addService("cpuinfo", new CpuBinder(this));
        }
        ServiceManager.addService("permission", new PermissionController(this));
        ServiceManager.addService("processinfo", new ProcessInfoService(this));

        ApplicationInfo info = mContext.getPackageManager().getApplicationInfo(
                "android", STOCK_PM_FLAGS | MATCH_SYSTEM_ONLY);
        mSystemThread.installSystemApplicationInfo(info, getClass().getClassLoader());

        synchronized (this) {
            ProcessRecord app = newProcessRecordLocked(info, info.processName, false, 0);
            app.persistent = true;
            app.pid = MY_PID;
            app.maxAdj = ProcessList.SYSTEM_ADJ;
            app.makeActive(mSystemThread.getApplicationThread(), mProcessStats);
            synchronized (mPidsSelfLocked) {
                mPidsSelfLocked.put(app.pid, app);
            }
            updateLruProcessLocked(app, false, null);
            updateOomAdjLocked();
        }
    } catch (PackageManager.NameNotFoundException e) {
        throw new RuntimeException(
                "Unable to find android system package", e);
    }
}
我們看這一行代碼
ServiceManager.addService(Context.ACTIVITY_SERVICE, this, true);
看下這個Context這個常量:
public static final String ACTIVITY_SERVICE = “activity”;
正好是剛才ServiceManager.getService()傳過去的key, addService()的時候傳過去一個this,也就是ActivityManagerService自己,那麼getService()的時候返回的毫無疑問就是ActivityManagerService
我們在回來看下ActivityThread.attach()方法
ActivityThread.java
final IActivityManager mgr = ActivityManagerNative.getDefault();
        try {
            mgr.attachApplication(mAppThread);
        } catch (RemoteException ex) {
            throw ex.rethrowFromSystemServer();
        }
我們搞清楚調用ActivityManagerNative.getDefault()返回了IActivityManager類型的mgr,也就是ActivityManagerService之後 ,它調用了attachApplication,並傳入了一個mAppThread我們首先來看下這個變量是什麼類型
final ApplicationThread mAppThread = new ApplicationThread();
是ApplicationThread,我們在來看看調用了ActivityManagerService.attachApplication做了什麼事情
ActivityManagerService.java
@Override
public final void attachApplication(IApplicationThread thread) {
    synchronized (this) {
        int callingPid = Binder.getCallingPid();
        final long origId = Binder.clearCallingIdentity();
        attachApplicationLocked(thread, callingPid);
        Binder.restoreCallingIdentity(origId);
    }
}
調用了attachApplicationLocked(),繼續看下做了啥
這個方法比較長,我就只取關鍵的部分貼出來
private final boolean attachApplicationLocked(IApplicationThread thread,
        int pid) {
....

try {
    ...
    ProfilerInfo profilerInfo = profileFile == null ? null
            : new ProfilerInfo(profileFile, profileFd, samplingInterval, profileAutoStop);
    thread.bindApplication(processName, appInfo, providers, app.instrumentationClass,
            profilerInfo, app.instrumentationArguments, app.instrumentationWatcher,
            app.instrumentationUiAutomationConnection, testMode,
            mBinderTransactionTrackingEnabled, enableTrackAllocation,
            isRestrictedBackupMode || !normalMode, app.persistent,
            new Configuration(mConfiguration), app.compat,
            getCommonServicesLocked(app.isolated),
            mCoreSettingsObserver.getCoreSettingsLocked());
    updateLruProcessLocked(app, false, null);
    app.lastRequestedGc = app.lastLowMemory = SystemClock.uptimeMillis();
} catch (Exception e) {
    // todo: Yikes!  What should we do?  For now we will try to
    // start another process, but that could easily get us in
    // an infinite loop of restarting processes...
    Slog.wtf(TAG, "Exception thrown during bind of " + app, e);

    app.resetPackageList(mProcessStats);
    app.unlinkDeathRecipient();
    startProcessLocked(app, "bind fail", processName);
    return false;
}

....
執行完判斷和賦值的操作後最後調用了thread.bindApplication(),剛才看到是ApplicationThread,所以我來看看ApplicationThread.bindApplication
ActivityThread.java
private class ApplicationThread extends ApplicationThreadNative {
    private static final String DB_INFO_FORMAT = "  %8s %8s %14s %14s  %s";

    private int mLastProcessState = -1;

...
public final void bindApplication(String processName, ApplicationInfo appInfo,
        List providers, ComponentName instrumentationName,
        ProfilerInfo profilerInfo, Bundle instrumentationArgs,
        IInstrumentationWatcher instrumentationWatcher,
        IUiAutomationConnection instrumentationUiConnection, int debugMode,
        boolean enableBinderTracking, boolean trackAllocation,
        boolean isRestrictedBackupMode, boolean persistent, Configuration config,
        CompatibilityInfo compatInfo, Map services, Bundle coreSettings) {

    if (services != null) {
        // Setup the service cache in the ServiceManager
        ServiceManager.initServiceCache(services);
    }

    setCoreSettings(coreSettings);

    AppBindData data = new AppBindData();
    data.processName = processName;
    data.appInfo = appInfo;
    data.providers = providers;
    data.instrumentationName = instrumentationName;
    data.instrumentationArgs = instrumentationArgs;
    data.instrumentationWatcher = instrumentationWatcher;
    data.instrumentationUiAutomationConnection = instrumentationUiConnection;
    data.debugMode = debugMode;
    data.enableBinderTracking = enableBinderTracking;
    data.trackAllocation = trackAllocation;
    data.restrictedBackupMode = isRestrictedBackupMode;
    data.persistent = persistent;
    data.config = config;
    data.compatInfo = compatInfo;
    data.initProfilerInfo = profilerInfo;
    sendMessage(H.BIND_APPLICATION, data);

    ...
}
可以看到是ActivityThread的內部類,我去!你在玩我呢?繞了這麼半天又繞回來了。
客官別急,我們繼續向下看,執行bindApplication的時候發了一個消息
sendMessage(H.BIND_APPLICATION, data);
這個H就是我們前面說的Handler,我們來看下handler做了哪些處理
private class H extends Handler {
.....
public void handleMessage(Message msg) {
    if (DEBUG_MESSAGES) Slog.v(TAG, ">>> handling: " + codeToString(msg.what));
    switch (msg.what) {
        case BIND_APPLICATION:
        Trace.traceBegin(Trace.TRACE_TAG_ACTIVITY_MANAGER, "bindApplication");
        AppBindData data = (AppBindData)msg.obj;
        handleBindApplication(data);
        Trace.traceEnd(Trace.TRACE_TAG_ACTIVITY_MANAGER);
        break;
}
看到它調用了handleBindApplication(),其主要作用是綁定我的的自定義的application,做一些初始化操作,我們繼續看
private void handleBindApplication(AppBindData data) {
   ...

    if (ii != null) {
        final ApplicationInfo instrApp = new ApplicationInfo();
        ii.copyTo(instrApp);
        instrApp.initForUser(UserHandle.myUserId());
        final LoadedApk pi = getPackageInfo(instrApp, data.compatInfo,
                appContext.getClassLoader(), false, true, false);
        final ContextImpl instrContext = ContextImpl.createAppContext(this, pi);

        try {
            final ClassLoader cl = instrContext.getClassLoader();
            mInstrumentation = (Instrumentation)
                cl.loadClass(data.instrumentationName.getClassName()).newInstance();
        } catch (Exception e) {
            throw new RuntimeException(
                "Unable to instantiate instrumentation "
                + data.instrumentationName + ": " + e.toString(), e);
        }

        final ComponentName component = new ComponentName(ii.packageName, ii.name);
        mInstrumentation.init(this, instrContext, appContext, component,
                data.instrumentationWatcher, data.instrumentationUiAutomationConnection);

        if (mProfiler.profileFile != null && !ii.handleProfiling
                && mProfiler.profileFd == null) {
            mProfiler.handlingProfiling = true;
            final File file = new File(mProfiler.profileFile);
            file.getParentFile().mkdirs();
            Debug.startMethodTracing(file.toString(), 8 * 1024 * 1024);
        }
    } else {
        mInstrumentation = new Instrumentation();
    }
 ....

    try {
        // If the app is being launched for full backup or restore, bring it up in
        // a restricted environment with the base application class.
        Application app = data.info.makeApplication(data.restrictedBackupMode, null);
        mInitialApplication = app;

        // don't bring up providers in restricted mode; they may depend on the
        // app's custom Application class
        if (!data.restrictedBackupMode) {
            if (!ArrayUtils.isEmpty(data.providers)) {
                installContentProviders(app, data.providers);
                // For process that contains content providers, we want to
                // ensure that the JIT is enabled "at some point".
                mH.sendEmptyMessageDelayed(H.ENABLE_JIT, 10*1000);
            }
        }

        // Do this after providers, since instrumentation tests generally start their
        // test thread at this point, and we don't want that racing.
        try {
            mInstrumentation.onCreate(data.instrumentationArgs);
        }
        catch (Exception e) {
            throw new RuntimeException(
                "Exception thrown in onCreate() of "
                + data.instrumentationName + ": " + e.toString(), e);
        }

        try {
            mInstrumentation.callApplicationOnCreate(app);
        } catch (Exception e) {
            if (!mInstrumentation.onException(app, e)) {
                throw new RuntimeException(
                    "Unable to create application " + app.getClass().getName()
                    + ": " + e.toString(), e);
            }
        }
        } finally {
            StrictMode.setThreadPolicy(savedPolicy);
        }
}
這裡有個比較重要的類,mInstrumentation 為什麼說它特別重要呢,我們先來看看它怎麼初始化的
final ClassLoader cl = instrContext.getClassLoader();
mInstrumentation=(Instrumentation)cl.loadClass(data.instrumentationName.getClassName()).newInstance();
通過反射創建mInstrumentation 然後給進行一系列初始化操作,然後執行了
Application app = data.info.makeApplication(data.restrictedBackupMode, null);
data.info是一個LoadeApk對象。
LoadeApk.java
public Application makeApplication(boolean forceDefaultAppClass,
        Instrumentation instrumentation) {
    if (mApplication != null) {
        return mApplication;
    }

    Trace.traceBegin(Trace.TRACE_TAG_ACTIVITY_MANAGER, "makeApplication");

    Application app = null;

    String appClass = mApplicationInfo.className;
    if (forceDefaultAppClass || (appClass == null)) {
        appClass = "android.app.Application";
    }

    try {
        java.lang.ClassLoader cl = getClassLoader();
        if (!mPackageName.equals("android")) {
            Trace.traceBegin(Trace.TRACE_TAG_ACTIVITY_MANAGER,
                    "initializeJavaContextClassLoader");
            initializeJavaContextClassLoader();
            Trace.traceEnd(Trace.TRACE_TAG_ACTIVITY_MANAGER);
        }
        ContextImpl appContext = ContextImpl.createAppContext(mActivityThread, this);
        app = mActivityThread.mInstrumentation.newApplication(
                cl, appClass, appContext);
        appContext.setOuterContext(app);
    } catch (Exception e) {
        if (!mActivityThread.mInstrumentation.onException(app, e)) {
            Trace.traceEnd(Trace.TRACE_TAG_ACTIVITY_MANAGER);
            throw new RuntimeException(
                "Unable to instantiate application " + appClass
                + ": " + e.toString(), e);
        }
    }
    mActivityThread.mAllApplications.add(app);
    mApplication = app;

    if (instrumentation != null) {
        try {
       //這裡不會執行,以為傳過來的是null,onCreate在上一層執行的
            instrumentation.callApplicationOnCreate(app);
        } catch (Exception e) {
            if (!instrumentation.onException(app, e)) {
                Trace.traceEnd(Trace.TRACE_TAG_ACTIVITY_MANAGER);
                throw new RuntimeException(
                    "Unable to create application " + app.getClass().getName()
                    + ": " + e.toString(), e);
            }
        }
    }
}
執行了
app = mActivityThread.mInstrumentation.newApplication(
cl, appClass, appContext);
Instrumentation.java
static public Application newApplication(Class clazz, Context context)
        throws InstantiationException, IllegalAccessException,
        ClassNotFoundException {
    Application app = (Application)clazz.newInstance();
    app.attach(context);
    return app;
}
同樣通過反射出一個application並且 調用其attach(),也就是說我的自定義application的時候attach就是在這裡調用的
接著上面ActivityThread.handleBindApplication()中,首先反射出mInstrumentation
和Application然後執行了下面一句代碼
try {
    mInstrumentation.callApplicationOnCreate(app);
} catch (Exception e) {
    if (!mInstrumentation.onException(app, e)) {
        throw new RuntimeException(
            "Unable to create application " + app.getClass().getName()
            + ": " + e.toString(), e);
    }
}
調用了mInstrumentation.callApplicationOnCreate(),我們的Application.oncreate()就是在這裡調用的,現在明白為什麼Instrumentation為什麼那麼重要了吧,它就像個管家婆一樣,負責家裡的大事小事,但是一般不拋頭露面,聽一家之主ActivityThread的安排。
好,搞清楚Application後我們在來看看activity在哪裡被初始化以及調用oncreate()方法的
前面說了ActivityThread.attach()調用了ActivityManagerService.attachApplication(),在代碼中看到通過調用ApplicationThread.bindApplication()綁定了application,我們在看看bindApplication()之後在干了什麼
ActivityManagerService.java
private final boolean attachApplicationLocked(IApplicationThread thread,
        int pid) {
    ...
    try {
    ...
    thread.bindApplication(processName, appInfo, providers, app.instrumentationClass,
            profilerInfo, app.instrumentationArguments, app.instrumentationWatcher,
            app.instrumentationUiAutomationConnection, testMode,
            mBinderTransactionTrackingEnabled, enableTrackAllocation,
            isRestrictedBackupMode || !normalMode, app.persistent,
            new Configuration(mConfiguration), app.compat,
            getCommonServicesLocked(app.isolated),
            mCoreSettingsObserver.getCoreSettingsLocked());
    ...
    }catch (Exception e) {
    ...
    }
    ...
    if (normalMode) {
        try {
            if (mStackSupervisor.attachApplicationLocked(app)) {
                didSomething = true;
            }
        } catch (Exception e) {
            Slog.wtf(TAG, "Exception thrown launching activities in " + app, e);
            badApp = true;
        }
}
調用了mStackSupervisor.attachApplicationLocked(app),mStackSupervisor是ActivityStackSupervisor類型,這個類也是非常重要的,它決定著我們app是否能啟動成功,我們看看做了什麼
ActivityStackSupervisor.java
boolean attachApplicationLocked(ProcessRecord app) throws RemoteException {
    final String processName = app.processName;
    boolean didSomething = false;
    for (int displayNdx = mActivityDisplays.size() - 1; displayNdx >= 0; --displayNdx) {
    //當前應用的整個activity堆信息
        ArrayList stacks = mActivityDisplays.valueAt(displayNdx).mStacks;
        for (int stackNdx = stacks.size() - 1; stackNdx >= 0; --stackNdx) {
            final ActivityStack stack = stacks.get(stackNdx);
            if (!isFocusedStack(stack)) {
                continue;
            }
            ActivityRecord hr = stack.topRunningActivityLocked();
            if (hr != null) {
                if (hr.app == null && app.uid == hr.info.applicationInfo.uid
                        && processName.equals(hr.processName)) {
                    try {
//啟動Activity
if (realStartActivityLocked(hr, app, true, true)) {
                            didSomething = true;
                        }
                    } catch (RemoteException e) {
                        Slog.w(TAG, "Exception in new application when starting activity "
                              + hr.intent.getComponent().flattenToShortString(), e);
                        throw e;
                    }
                }
            }
        }
    }
    if (!didSomething) {
        ensureActivitiesVisibleLocked(null, 0, !PRESERVE_WINDOWS);
    }
    return didSomething;
}
看到調用了realStartActivityLocked(hr, app, true, true)),繼續看
final boolean realStartActivityLocked(ActivityRecord r, ProcessRecord app,
        boolean andResume, boolean checkConfig) throws RemoteException {
    ...
    if (andResume) {
        app.hasShownUi = true;
        app.pendingUiClean = true;
    }
    app.forceProcessStateUpTo(mService.mTopProcessState);
    app.thread.scheduleLaunchActivity(new Intent(r.intent), r.appToken,
            System.identityHashCode(r), r.info, new Configuration(mService.mConfiguration),
            new Configuration(task.mOverrideConfig), r.compat, r.launchedFromPackage,
            task.voiceInteractor, app.repProcState, r.icicle, r.persistentState, results,
            newIntents, !andResume, mService.isNextTransitionForward(), profilerInfo);
    ...
}
看到了調用了app.thread.scheduleLaunchActivity(),這個app是上一層傳過來的ActivityRecord,它代表的就是要開啟的Activity對象裡面分裝了很多信息,比如所在的ActivityTask等,如果這是首次打開應用,那麼這個Activity會被放到ActivityTask的棧頂,那麼這個thread就是我們的ApplicationThread,我們回到ActivityThread
看下ApplicationThread.scheduleLaunchActivity()做了什麼
ActivityThread.java
private class ApplicationThread extends ApplicationThreadNative {
    @Override
    public final void scheduleLaunchActivity(Intent intent, IBinder token, int ident,
            ActivityInfo info, Configuration curConfig, Configuration overrideConfig,
            CompatibilityInfo compatInfo, String referrer, IVoiceInteractor voiceInteractor,
            int procState, Bundle state, PersistableBundle persistentState,
            List pendingResults, List pendingNewIntents,
            boolean notResumed, boolean isForward, ProfilerInfo profilerInfo) {
        ...
        updatePendingConfiguration(curConfig);

        sendMessage(H.LAUNCH_ACTIVITY, r);

    }
}
又用hanlder發了個消息,我們來看看hanlder怎麼處理的
public void handleMessage(Message msg) {
    if (DEBUG_MESSAGES) Slog.v(TAG, ">>> handling: " + codeToString(msg.what));
    switch (msg.what) {
        case LAUNCH_ACTIVITY: {
            Trace.traceBegin(Trace.TRACE_TAG_ACTIVITY_MANAGER, "activityStart");
            final ActivityClientRecord r = (ActivityClientRecord) msg.obj;

            r.packageInfo = getPackageInfoNoCheck(
                    r.activityInfo.applicationInfo, r.compatInfo);
            handleLaunchActivity(r, null, "LAUNCH_ACTIVITY");
            Trace.traceEnd(Trace.TRACE_TAG_ACTIVITY_MANAGER);
    }
    break;

}
Word天,幾經周折又回到ActivityThread自己,心好累。。我們繼續~
ActivityThread.java
    private void handleLaunchActivity(ActivityClientRecord r, Intent customIntent, String reason) {
        // If we are getting ready to gc after going to the background, well
        // we are back active so skip it.
        unscheduleGcIdler();
        mSomeActivitiesChanged = true;

        if (r.profilerInfo != null) {
            mProfiler.setProfiler(r.profilerInfo);
            mProfiler.startProfiling();
        }

        // Make sure we are running with the most recent config.
        handleConfigurationChanged(null, null);

        if (localLOGV) Slog.v(
            TAG, "Handling launch of " + r);

        // Initialize before creating the activity
        WindowManagerGlobal.initialize();
        //反射創建一個Activity
        Activity a = performLaunchActivity(r, customIntent);

        if (a != null) {
            r.createdConfig = new Configuration(mConfiguration);
            reportSizeConfigurations(r);
            Bundle oldState = r.state;
            //調用Activity.onResume
            handleResumeActivity(r.token, false, r.isForward,
                    !r.activity.mFinished && !r.startsNotResumed, r.lastProcessedSeq, reason);

            if (!r.activity.mFinished && r.startsNotResumed) {
                // The activity manager actually wants this one to start out paused, because it
                // needs to be visible but isn't in the foreground. We accomplish this by going
                // through the normal startup (because activities expect to go through onResume()
                // the first time they run, before their window is displayed), and then pausing it.
                // However, in this case we do -not- need to do the full pause cycle (of freezing
                // and such) because the activity manager assumes it can just retain the current
                // state it has.
                performPauseActivityIfNeeded(r, reason);

                // We need to keep around the original state, in case we need to be created again.
                // But we only do this for pre-Honeycomb apps, which always save their state when
                // pausing, so we can not have them save their state when restarting from a paused
                // state. For HC and later, we want to (and can) let the state be saved as the
                // normal part of stopping the activity.
                if (r.isPreHoneycomb()) {
                    r.state = oldState;
                }
            }
        } else {
            // If there was an error, for any reason, tell the activity manager to stop us.
            try {
                ActivityManagerNative.getDefault()
                    .finishActivity(r.token, Activity.RESULT_CANCELED, null,
                            Activity.DONT_FINISH_TASK_WITH_ACTIVITY);
            } catch (RemoteException ex) {
                throw ex.rethrowFromSystemServer();
            }
        }
    }
看到開頭 ,關鍵代碼調用了Activity a = performLaunchActivity(r, customIntent);
返回一個Activity,我們看看performLaunchActivity()
ActivityThread.java
    private Activity performLaunchActivity(ActivityClientRecord r, Intent customIntent) {
        // System.out.println("##### [" + System.currentTimeMillis() + "] ActivityThread.performLaunchActivity(" + r + ")");

        ActivityInfo aInfo = r.activityInfo;
        if (r.packageInfo == null) {
            r.packageInfo = getPackageInfo(aInfo.applicationInfo, r.compatInfo,
                    Context.CONTEXT_INCLUDE_CODE);
        }

        ComponentName component = r.intent.getComponent();
        if (component == null) {
            component = r.intent.resolveActivity(
                mInitialApplication.getPackageManager());
            r.intent.setComponent(component);
        }

        if (r.activityInfo.targetActivity != null) {
            component = new ComponentName(r.activityInfo.packageName,
                    r.activityInfo.targetActivity);
        }

        Activity activity = null;
        try {
            java.lang.ClassLoader cl = r.packageInfo.getClassLoader();
            //通過反射創建activity實例
            activity = mInstrumentation.newActivity(
                    cl, component.getClassName(), r.intent);
            StrictMode.incrementExpectedActivityCount(activity.getClass());
            r.intent.setExtrasClassLoader(cl);
            r.intent.prepareToEnterProcess();
            if (r.state != null) {
                r.state.setClassLoader(cl);
            }
        } catch (Exception e) {
            if (!mInstrumentation.onException(activity, e)) {
                throw new RuntimeException(
                    "Unable to instantiate activity " + component
                    + ": " + e.toString(), e);
            }
        }

        try {
            Application app = r.packageInfo.makeApplication(false, mInstrumentation);

            if (localLOGV) Slog.v(TAG, "Performing launch of " + r);
            if (localLOGV) Slog.v(
                    TAG, r + ": app=" + app
                    + ", appName=" + app.getPackageName()
                    + ", pkg=" + r.packageInfo.getPackageName()
                    + ", comp=" + r.intent.getComponent().toShortString()
                    + ", dir=" + r.packageInfo.getAppDir());

            if (activity != null) {
                //創建BaseContext
                Context appContext = createBaseContextForActivity(r, activity);
                CharSequence title = r.activityInfo.loadLabel(appContext.getPackageManager());
                Configuration config = new Configuration(mCompatConfiguration);
                if (r.overrideConfig != null) {
                    config.updateFrom(r.overrideConfig);
                }
                if (DEBUG_CONFIGURATION) Slog.v(TAG, "Launching activity "
                        + r.activityInfo.name + " with config " + config);
                Window window = null;
                if (r.mPendingRemoveWindow != null && r.mPreserveWindow) {
                    window = r.mPendingRemoveWindow;
                    r.mPendingRemoveWindow = null;
                    r.mPendingRemoveWindowManager = null;
                }
                //我們的activity.attach就在這裡被調用的
                activity.attach(appContext, this, getInstrumentation(), r.token,
                        r.ident, app, r.intent, r.activityInfo, title, r.parent,
                        r.embeddedID, r.lastNonConfigurationInstances, config,
                        r.referrer, r.voiceInteractor, window);

                if (customIntent != null) {
                    activity.mIntent = customIntent;
                }
                r.lastNonConfigurationInstances = null;
                activity.mStartedActivity = false;
                int theme = r.activityInfo.getThemeResource();
                if (theme != 0) {
                    activity.setTheme(theme);
                }

                activity.mCalled = false;
                if (r.isPersistable()) {
                    mInstrumentation.callActivityOnCreate(activity, r.state, r.persistentState);
                } else {
                    mInstrumentation.callActivityOnCreate(activity, r.state);
                }
                if (!activity.mCalled) {
                    throw new SuperNotCalledException(
                        "Activity " + r.intent.getComponent().toShortString() +
                        " did not call through to super.onCreate()");
                }
                r.activity = activity;
                r.stopped = true;
                if (!r.activity.mFinished) {
                    activity.performStart();
                    r.stopped = false;
                }
                if (!r.activity.mFinished) {
                    if (r.isPersistable()) {
                        if (r.state != null || r.persistentState != null) {
                            mInstrumentation.callActivityOnRestoreInstanceState(activity, r.state,
                                    r.persistentState);
                        }
                    } else if (r.state != null) {
                        mInstrumentation.callActivityOnRestoreInstanceState(activity, r.state);
                    }
                }
                if (!r.activity.mFinished) {
                    activity.mCalled = false;
                    if (r.isPersistable()) {
                        mInstrumentation.callActivityOnPostCreate(activity, r.state,
                                r.persistentState);
                    } else {
                        mInstrumentation.callActivityOnPostCreate(activity, r.state);
                    }
                    if (!activity.mCalled) {
                        throw new SuperNotCalledException(
                            "Activity " + r.intent.getComponent().toShortString() +
                            " did not call through to super.onPostCreate()");
                    }
                }
            }
            r.paused = true;

            mActivities.put(r.token, r);

        } catch (SuperNotCalledException e) {
            throw e;

        } catch (Exception e) {
            if (!mInstrumentation.onException(activity, e)) {
                throw new RuntimeException(
                    "Unable to start activity " + component
                    + ": " + e.toString(), e);
            }
        }

        return activity;
    }
我們看到通過調用mInstrumentation.newActivity(
cl, component.getClassName(), r.intent);返回一個Activity,哇~這個管家婆真是厲害!看看做了啥?肯定是反射創建一個Activity嘛。。不信?
Instrumentation.java
public Activity newActivity(ClassLoader cl, String className,
        Intent intent)
        throws InstantiationException, IllegalAccessException,
        ClassNotFoundException {
    return (Activity)cl.loadClass(className).newInstance();
}
不得不說Instrumentation真是任勞任怨啊。。
好,接著上面創建Activity之後,判斷activity是否不等於空,走進if裡面調用了
activity.attach(appContext, this, getInstrumentation(), r.token,
        r.ident, app, r.intent, r.activityInfo, title, r.parent,
        r.embeddedID, r.lastNonConfigurationInstances, config,
        r.referrer, r.voiceInteractor, window);
原來我們Activity的attach在這裡調用的啊。。。接著下面走
if (r.isPersistable()) {
    mInstrumentation.callActivityOnCreate(activity, r.state, r.persistentState);
} else {
    mInstrumentation.callActivityOnCreate(activity, r.state);
}
看到沒!看到沒!熟悉不,我的application.onCreate也是這樣調用的,管家婆666666
Instrumentation.java
public void callActivityOnCreate(Activity activity, Bundle icicle) {
    prePerformCreate(activity);
    activity.performCreate(icicle);
    postPerformCreate(activity);
}
調用了activity.performCreate(icicle);看到這麼名字就應該很清楚了吧~,又不信?
Activity.java
final void performCreate(Bundle icicle) {
    restoreHasCurrentPermissionRequest(icicle);
    onCreate(icicle);
    mActivityTransitionState.readState(icicle);
    performCreateCommon();
}
看到木有~~~回到上面,當執行handleLaunchActivity的時候,調用performLaunchActivity(r, customIntent);返回了Activity之後
我們接著向下看
ActivityThread.java
Activity a = performLaunchActivity(r, customIntent);
if (a != null) {
    r.createdConfig = new Configuration(mConfiguration);
    reportSizeConfigurations(r);
    Bundle oldState = r.state;
    handleResumeActivity(r.token, false, r.isForward,
            !r.activity.mFinished && !r.startsNotResumed, r.lastProcessedSeq, reason);
}
調用了handleResumeActivity,不用說 我敢肯定是用mInstrumentation來調用Activity.onResume的,我們來驗證一下
final void handleResumeActivity(IBinder token,
        boolean clearHide, boolean isForward, boolean reallyResume, int seq, String reason) {
    ActivityClientRecord r = mActivities.get(token);

    ....
    // TODO Push resumeArgs into the activity for consideration
    r = performResumeActivity(token, clearHide, reason);
    ....
}
繼續看performResumeActivity()
public final ActivityClientRecord performResumeActivity(IBinder token,
        boolean clearHide, String reason) {
ActivityClientRecord r = mActivities.get(token);
if (localLOGV) Slog.v(TAG, "Performing resume of " + r
        + " finished=" + r.activity.mFinished);
if (r != null && !r.activity.mFinished) {
    if (clearHide) {
        r.hideForNow = false;
        r.activity.mStartedActivity = false;
    }
    try {
        r.activity.onStateNotSaved();
        r.activity.mFragments.noteStateNotSaved();
        if (r.pendingIntents != null) {
            deliverNewIntents(r, r.pendingIntents);
            r.pendingIntents = null;
        }
        if (r.pendingResults != null) {
            deliverResults(r, r.pendingResults);
            r.pendingResults = null;
        }
        r.activity.performResume();
...
} catch (Exception e) {
    if (!mInstrumentation.onException(r.activity, e)) {
        throw new RuntimeException(
            "Unable to resume activity "
            + r.intent.getComponent().toShortString()
            + ": " + e.toString(), e);
    }
}
}
看到了調用r.activity.performResume(),我們在繼續看看Activity.performResume()
Activity.java
final void performResume() {
    performRestart();

    mFragments.execPendingActions();

    mLastNonConfigurationInstances = null;

    mCalled = false;
    // mResumed is set by the instrumentation
    mInstrumentation.callActivityOnResume(this);
    if (!mCalled) {
        throw new SuperNotCalledException(
            "Activity " + mComponent.toShortString() +
            " did not call through to super.onResume()");
    }

    // invisible activities must be finished before onResume() completes
    if (!mVisibleFromClient && !mFinished) {
        Log.w(TAG, "An activity without a UI must call finish() before onResume() completes");
        if (getApplicationInfo().targetSdkVersion
                > android.os.Build.VERSION_CODES.LOLLIPOP_MR1) {
            throw new IllegalStateException(
                    "Activity " + mComponent.toShortString() +
                    " did not call finish() prior to onResume() completing");
        }
    }

    // Now really resume, and install the current status bar and menu.
    mCalled = false;

    mFragments.dispatchResume();
    mFragments.execPendingActions();

    onPostResume();
    if (!mCalled) {
        throw new SuperNotCalledException(
            "Activity " + mComponent.toShortString() +
            " did not call through to super.onPostResume()");
    }
}
調用了mInstrumentation.callActivityOnResume(this);看來我們的驗證是沒錯的
至此,Activity整個的啟動流程也講完了,大家也看到,調用過程極其復雜
源碼中各種條件判斷讓人眼花缭亂,所以說如果你沒記住也沒關系,你只要記住這個流程,理解了Android在控制Activity生命周期時是如何操作,以及是通過哪幾個關鍵的類進行操作的就可以了,以後遇到相關的問題之道從哪塊下手即可,這些過程我雖然也是撸了一遍,但還是記不清。
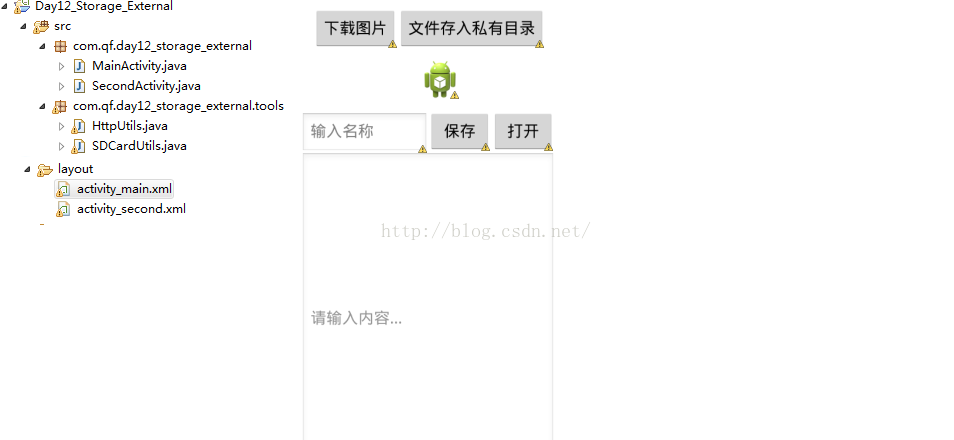 Android 數據存儲-------外部存儲(SD卡) External Storage
1, 特點1, 插入sd卡2, 分為兩部分: sd的公共目錄 sd的私有目錄3, 公共目錄下的文件可以被應用程序共享, 私有目錄下的文件只能被當前應用程序訪問4, 當程序
 我是如何從零開始自學Android到一萬月薪的
本篇文章致那些從零開始學 Android 的或者正要學習還沒有勇氣出發的人, 希望通過我的經歷能夠讓你在學習的道路中堅持下來。我的第一份工作畢業之際通過學校的校招找到了一
 Android之Socket,Service通訊
Android與服務器之間的通訊方式主要有兩種。一種是Http通訊 , 一種是Socket通訊。兩者最大的差異在於,Http連接使用的是“請求---響應方式&
 Android中launchMode模式詳解
關於Android中launchMode的文章介紹的真心不少,廣為流傳而且介紹的最詳細的莫過於這篇文章http://blog.csdn.net/android_tutor
 Android 依賴注入:Dagger--A fast dependency injector for Android and Java 實例講解
Dagger 是一種android平台的依賴注入框架,是有一家專注於移動