編輯:關於Android編程
首先,創建一個用於顯示一個item的layout,名為item.xml
復制代碼 代碼如下:
<?xml version="1.0" encoding="utf-8"?>
<LinearLayout xmlns:android="http://schemas.android.com/apk/res/android"
android:layout_width="match_parent"
android:layout_height="match_parent"
android:orientation="horizontal" >
<TextView
android:id="@+id/name"
android:layout_width="120dp"
android:layout_height="wrap_content" />
<TextView
android:id="@+id/phone"
android:layout_width="150dp"
android:layout_height="wrap_content" />
<TextView
android:id="@+id/amount"
android:layout_width="fill_parent"
android:layout_height="wrap_content" />
</LinearLayout>
然後,在main.xml中,添加一個ListView數據顯示控件,添加id名稱為listview
接下來便是進行數據的綁定,總共分為三種方法:
復制代碼 代碼如下:
private void show1() {
List persons = ps.getScollData(0, 10);
List<HashMap<String, Object>> data = new ArrayList<HashMap<String, Object>>();
for (Person person : persons) {
HashMap<String, Object> item = new HashMap<String, Object>();
item.put("amount", person.getAmount());
item.put("id", person.getId());
item.put("name", person.getName());
item.put("phone", person.getPhone());
data.add(item);
}
SimpleAdapter adapter = new SimpleAdapter(getApplicationContext(),data, R.layout.item,
new String[] { "name", "phone", "amount" }, new int[] {R.id.name, R.id.phone, R.id.amount });
// item表示為之前定義的item.xml,表示將data集合中的每一個對象綁定到些item中,即將data中的每一項綁定到一個視圖item上;
// 後兩個參數表示把結果集中哪些key的值綁定到哪些控件上;(把結果集中key為name對應的對象綁定到視圖中id為name的控件上)
listview.setAdapter(adapter);//內部處理流程如下
// {int total = adapter.getCount();// 獲取得到的數據總數
// int perpage = 7;//獲取每一頁的顯示條目數,
// for (int i = 0; i < perpage; i++) {
// View view = adapter.getView(i, convertView, parent);//第二次執行時會將前一次執行的view傳給convertView;
// 顯示條目
// }}
}
private void show2() {//此方法需要一個結果集中的Cursor,要求Cursor中需要有一個名稱為_id的字段;所以添加一個獲取Cursor的方法如下!
Cursor cursor = ps.getCursorScollData(0, 10);
SimpleCursorAdapter adapter = new SimpleCursorAdapter(this,R.layout.item, cursor,
new String[] { "name", "phone", "amount" }, new int[] {R.id.name, R.id.phone, R.id.amount });
listview.setAdapter(adapter);
}
public Cursor getCursorScollData(int offest, int maxResult) {
SQLiteDatabase db = dbOpenHelper.getReadableDatabase();//因為要求結果集中要有一個名為_id的字,所以SQL語句如下!
Cursor cursor = db.rawQuery("select personid as _id,name,phone,amount from person order by personid asc limit ?,?",
new String[] { String.valueOf(offest),String.valueOf(maxResult) });
// db.query(table, columns, selection, selectionArgs, groupBy, having,orderBy, limit);
return cursor;
}
private void show3() {
List persons = ps.getScollData(0, 10);// PersonAdapter見下一章節自定義適配器
PersonAdapter adapter = new PersonAdapter(getApplicationContext(),persons, R.layout.item);
listview.setAdapter(adapter);
}
當每點擊一項需要獲取此項的相關信息時可以添加此方法:
listview.setOnItemClickListener(new ItemClickListener());
private final class ItemClickListener implements OnItemClickListener {
@Override//此方法中第一個參數為顯示數據(item項)的控件,在此例子中即為ListView;第三個參數為點擊項的位置,
public void onItemClick(AdapterView<?> parent, View arg1, int position,long arg3) {
ListView lview = (ListView) parent;
// show3()方法對應的處理方法
// Person person = (Person) lview.getItemAtPosition(position);
// Toast.makeText(getApplicationContext(),person.getId().toString(),1).show();
// show2()方法對應的處理方法
// show2方法中,adapter返回的是Cursor,
// Cursor cursor = (Cursor) lview.getItemAtPosition(position);
// int personid = cursor.getInt(cursor.getColumnIndex("_id"));
// Toast.makeText(getApplicationContext(), personid + "", 1).show();
// show1()方法對應的處理方法
// show1方法中,adapter返回的是Map,再對Map進行操作取出相應的id值
HashMap<String, Object> item = (HashMap<String, Object>) lview.getItemAtPosition(position);
int personid = (Integer) item.get("id");
Toast.makeText(getApplicationContext(), personid + "", 1).show();
}
}
 Android之——JNI初探
這裡,我將用一個小例子的形式來幫助大家初探JNI的用法,首先,大家要先搭建好NDK環境,請大家先閱讀《Android之——NDK環境搭建》一文。一
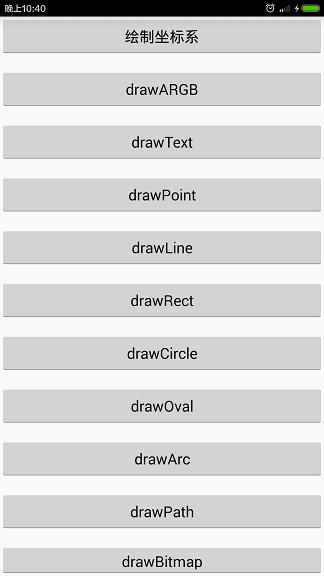
 Android系統架構
一、Android歷史2003 年 Andy Rubin 創辦 Android 公司2005 年 Google 收購 Android 公司2007 年成立開放手持設備聯盟
 Android自定義控件---聯系人列表A-Z排序
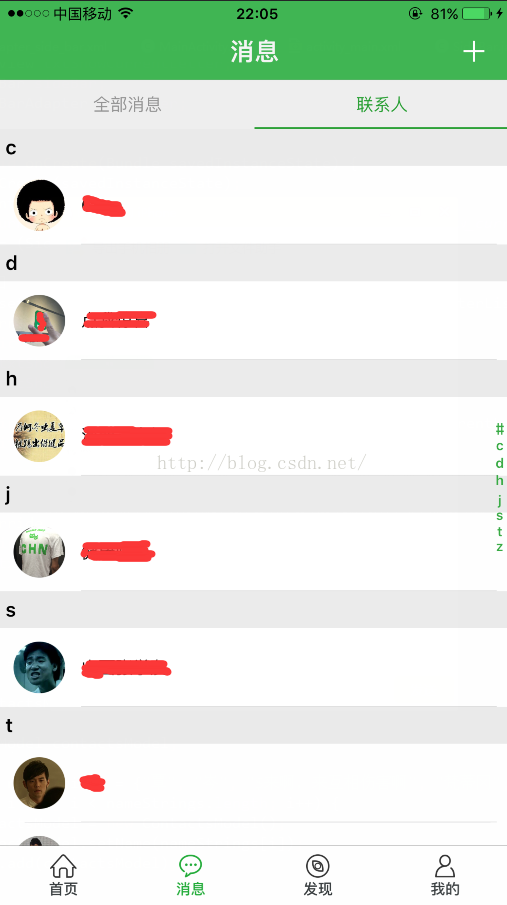
這幾天在做IM模塊,設計圖要求做一個類似下圖所示的自定義控件。 我百度了一下,發現類似的Ddmo有很多,但是還不能完全滿足設計圖的需求。參考了幾個
 小米5、榮耀V8、魅族PRO6和一加手機3哪個好 參數對比評測
國產手機的集體高潮,卻使消費者變的“煩惱了”,因為消費者在購買手機時變得越來越猶豫糾結。以2499元這個價位的手機來說,單國產手機就