編輯:關於Android編程
本文實例分析了Android開發之電話撥號器的用法。分享給大家供大家參考,具體如下:
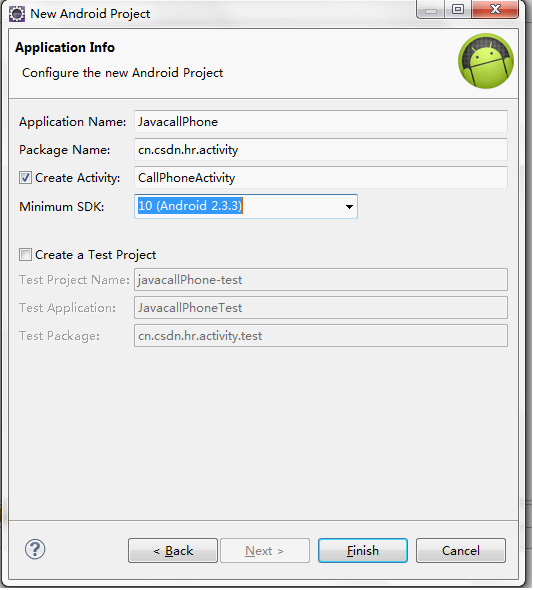
1、新建一個名為javacallPhone的安卓項目,並在cn.csdn.hr.activity包下建一個CallPhoneActivity.java類
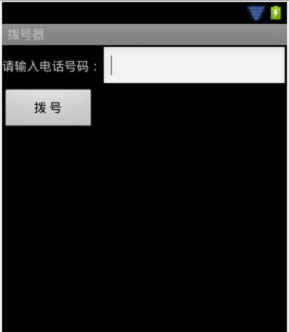
2.打開res下的Layout下的main.xml進行布局,設置布局方式為水平布局,再從左側分別拖入textview,text files下的Phone,和button按鈕,通過new String後效果如下:
3.打開CallPhoneActivity.java進行編寫,具體代碼如下:
package cn.csdn.hr.activity;
import android.app.Activity;
import android.content.Intent;
import android.net.Uri;
import android.os.Bundle;
import android.text.Editable;
import android.view.View;
import android.widget.Button;
import android.widget.EditText;
public class CallPhoneActivity extends Activity {
  /** Called when the activity is first created. */
  @Override
  public void onCreate(Bundle savedInstanceState) {
    super.onCreate(savedInstanceState);
    //設置顯示的視圖界面
    setContentView(R.layout.main);
    //獲取該布局文件中相應的組件
    Button callBtn = (Button) findViewById(R.id.callBtn);
    //為按鈕注冊點擊事件
    callBtn.setOnClickListener(new View.OnClickListener() {
public void onClick(View v) {
// 撥號
//獲取輸入框 可編輯對象
EditText editText = (EditText) findViewById(R.id.editCallPhone);
//獲取輸入的電話號碼
Editable editable = editText.getText();
//轉換成字符串:editable.toString();
//意圖
Intent intent = new Intent(Intent.ACTION_CALL,Uri.parse("tel:"+editable.toString()));
//執行
startActivity(intent);
}
});
}
}
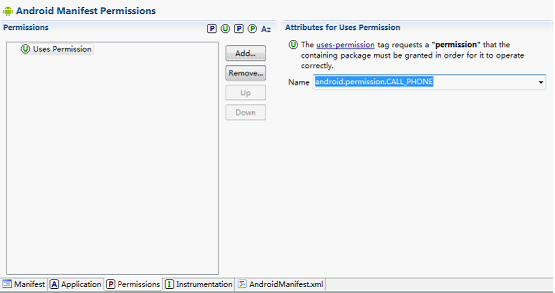
4.打開項目清單文件Andriod Manifest.xml,選擇permissions,添加用戶打電話權限,如下圖:
5、在源代碼中出現:
復制代碼 代碼如下:<uses-permission android:name="android.permission.CALL_PHONE"/>
6、最後run as 安卓應用,實現撥號功能
補充:android電話撥號器開發筆記
AndroidActivity:
package itcast.com;
import android.app.Activity;
import android.content.Intent;
import android.net.Uri;
import android.os.Bundle;
import android.view.View;
import android.view.View.OnClickListener;
import android.widget.Button;
import android.widget.EditText;
public class AndroidActivity extends Activity {
 private EditText editex;
 @Override
 public void onCreate(Bundle savedInstanceState) {
 super.onCreate(savedInstanceState);
 setContentView(R.layout.main);
 // 得到按鈕
 Button button = (Button) this.findViewById(R.id.bt_number);
 editex = (EditText) this.findViewById(R.id.et_number);
 // 設置button監聽器
 // 方式二:通過匿名內部類
 //
 // button.setOnClickListener(new OnClickListener() {
 //
 // @Override
 // public void onClick(View v) {
 // // TODO Auto-generated method stub
 // String number = editex.getText().toString(); // 獲取電話號碼
 // Intent intent = new Intent(); // 創建意圖
 // intent.setAction(Intent.ACTION_CALL); // 設置打電話的意圖
 // intent.setData(Uri.parse("telphone" + number)); // 撥打的具體號碼
 // startActivity(intent);// 激活意圖
 // }
 // });
 // button.setOnClickListener(this); // 當前的實現這是AndroidActivity
 }
 public void btlisten(View v) {
 String number = editex.getText().toString();
 Intent intent = new Intent();
 intent.setAction(Intent.ACTION_CALL);
 intent.setData(Uri.parse(number));
 startActivity(intent);
 }
 // // 方式三 實現了,OnClickListener
 // @Override
 // public void onClick(View v) {
 // // TODO Auto-generated method stub
 // switch (v.getId()) {
 // case R.id.bt_number:
 // // 相應的按鈕時間
 // String number = editex.getText().toString();
 // Intent intent = new Intent();
 // intent.setAction(Intent.ACTION_CALL);
 // intent.setData(Uri.parse(number));
 // startActivity(intent);
 // break;
 // }
 // }
 // 方式一
 // class MyOnClickListener implements OnClickListener {
 //
 // @Override
 // public void onClick(View v) {
 // // TODO Auto-generated method stub
 // // 獲取文本域
 // EditText editext = (EditText) AndroidActivity.this
 // .findViewById(R.id.et_number);
 // // 得到電話號碼
 // String number = editext.getText().toString();
 // Intent intent = new Intent(); // 創建意圖.代表要執行的動作
 // intent.setAction(Intent.ACTION_CALL); // 撥打電話的意圖
 // intent.setData(Uri.parse(number));// 撥打的號碼 例如110
 // startActivity(intent);// 激活意圖
 // }
 // }
}
mian.xml:
<?xml version="1.0" encoding="utf-8"?>
<LinearLayout xmlns:android="http://schemas.android.com/apk/res/android"
  android:layout_width="fill_parent"
  android:layout_height="fill_parent"
  android:orientation="vertical" >
  <TextView
    android:layout_width="fill_parent"
    android:layout_height="wrap_content"
    android:text="@string/input_number" />
  <EditText
    android:id="@+id/et_number"
    android:layout_width="fill_parent"
    android:layout_height="wrap_content"
    android:hint="@string/print"
    android:lines="1"
    android:numeric="integer" />
  <Button
    android:id="@+id/bt_number"
    android:layout_width="fill_parent"
    android:layout_height="wrap_content"
    android:text="@string/bt_call"
    android:onClick="btlisten"/>
</LinearLayout>
Strings.xml:
<?xml version="1.0" encoding="utf-8"?>
<resources>
  <string name="hello">Hello World, AndroidActivity!</string>
  <string name="app_name">AndroidCall</string>
  <string name="input_number">請輸入電話號碼</string>
  <string name="print">請輸入號碼</string>
  <string name="bt_call">撥打電話</string>
</resources>
需求:
撥打電話的程序
步驟
1. 配置文件
strings.xml 負責的頁面是文字
main.xml 負責頁面的布局以及每個空間的ID
2.java的代碼:
通過ID 獲取button
監聽button(參數view)
3.MyOnCliockListenr
處理事件:
得到EdiText,獲取電話號碼
創建意圖的引用:Intent intrnt = new Intent();
設置意圖對象的動作setAction()
撥打電話號碼setData()
開啟意圖statAchivate(Intent)
修改安全異常:AndroidMainfest.xml中的permissions-->android.permission.CALL_PHONE
希望本文所述對大家Android程序設計有所幫助。
 Android Touch事件傳遞機制解析
android系統中的每個ViewGroup的子類都具有下面三個和TouchEvent處理密切相關的方法: 1)public boolean dispatchTouc
 Android--藍牙操作(藍牙的打開與關閉,可見性的打開與關閉)
BluetoothAdapter 用法藍牙運行原理:通過BluetoothAdapter 藍牙適配器處理任務,如果藍牙被啟動之後,系統會自動去搜索其它
 Android資源之圖像資源(1)
以前看別人的程序的drawable文件夾裡有xml資源,說實話第一次見到這樣的xml圖像資源時,我真心不知道是干什麼的。抽空學習了一下圖像資源,才了解了這類圖像資源的妙用
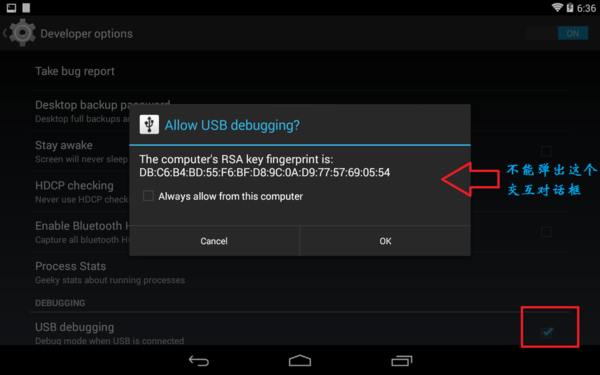 Android 5.0 Usb調試攔截分析及修改
當我們調試安卓機器時,第一次插上usb線,會彈出一個授權的對話框,(前提是打開了usb調試功能)點擊確認,才會允許調試.如果我們想機器默認就可以調試該怎麼做呢?如果我們想