編輯:關於Android編程
本文實例講述了Android動畫之補間動畫。分享給大家供大家參考,具體如下:
前面講了《Android動畫之逐幀動畫(Frame Animation)》,今天就來詳細講解一下Tween動畫的使用。
同樣,在開始實例演示之前,先引用官方文檔中的一段話:
Tween動畫是操作某個控件讓其展現出旋轉、漸變、移動、縮放的這麼一種轉換過程,我們稱為補間動畫。我們可以以XML形式定義動畫,也可以編碼實現。
如果以XML形式定義一個動畫,我們按照動畫的定義語法完成XML,並放置於/res/anim目錄下,文件名可以作為資源ID被引用;如果由編碼實現,我們需要使用到Animation對象。
如果用定義XML方式實現動畫,我們需要熟悉一下動畫XML語法:
<?xml version="1.0" encoding="utf-8"?>
<set xmlns:android="http://schemas.android.com/apk/res/android"
  android:interpolator="@[package:]anim/interpolator_resource"
  android:shareInterpolator=["true" | "false"] >
  <alpha
    android:fromAlpha="float"
    android:toAlpha="float" />
  <scale
    android:fromXScale="float"
    android:toXScale="float"
    android:fromYScale="float"
    android:toYScale="float"
    android:pivotX="float"
    android:pivotY="float" />
  <translate
    android:fromX="float"
    android:toX="float"
    android:fromY="float"
    android:toY="float" />
  <rotate
    android:fromDegrees="float"
    android:toDegrees="float"
    android:pivotX="float"
    android:pivotY="float" />
  <set>
    ...
  </set>
</set>
XML文件中必須有一個根元素,可以是<alpha>、<scale>、<translate>、<rotate>中的任意一個,也可以是<set>來管理一個由前面幾個元素組成的動畫集合。
<set>是一個動畫容器,管理多個動畫的群組,與之相對應的Java對象是AnimationSet。它有兩個屬性,android:interpolator代表一個插值器資源,可以引用系統自帶插值器資源,也可以用自定義插值器資源,默認值是勻速插值器;稍後我會對插值器做出詳細講解。android:shareInterpolator代表<set>裡面的多個動畫是否要共享插值器,默認值為true,即共享插值器,如果設置為false,那麼<set>的插值器就不再起作用,我們要在每個動畫中加入插值器。
<alpha>是漸變動畫,可以實現fadeIn和fadeOut的效果,與之對應的Java對象是AlphaAnimation。android:fromAlpha屬性代表起始alpha值,浮點值,范圍在0.0和1.0之間,分別代表透明和完全不透明,android:toAlpha屬性代表結尾alpha值,浮點值,范圍也在0.0和1.0之間。
<scale>是縮放動畫,可以實現動態調控件尺寸的效果,與之對應的Java對象是ScaleAnimation。android:fromXScale屬性代表起始的X方向上相對自身的縮放比例,浮點值,比如1.0代表自身無變化,0.5代表起始時縮小一倍,2.0代表放大一倍;android:toXScale屬性代表結尾的X方向上相對自身的縮放比例,浮點值;android:fromYScale屬性代表起始的Y方向上相對自身的縮放比例,浮點值;android:toYScale屬性代表結尾的Y方向上相對自身的縮放比例,浮點值;android:pivotX屬性代表縮放的中軸點X坐標,浮點值,android:pivotY屬性代表縮放的中軸點Y坐標,浮點值,對於這兩個屬性,如果我們想表示中軸點為圖像的中心,我們可以把兩個屬性值定義成0.5或者50%。
<translate>是位移動畫,代表一個水平、垂直的位移。與之對應的Java對象是TranslateAnimation。android:fromXDelta屬性代表起始X方向的位置,android:toXDelta代表結尾X方向上的位置,android:fromYScale屬性代表起始Y方向上的位置,android:toYDelta屬性代表結尾Y方向上的位置,以上四個屬性都支持三種表示方式:浮點數、num%、num%p;如果以浮點數字表示,代表相對自身原始位置的像素值;如果以num%表示,代表相對於自己的百分比,比如toXDelta定義為100%就表示在X方向上移動自己的1倍距離;如果以num%p表示,代表相對於父類組件的百分比。
<rotate>是旋轉動畫,與之對應的Java對象是RotateAnimation。android:fromDegrees屬性代表起始角度,浮點值,單位:度;android:toDegrees屬性代表結尾角度,浮點值,單位:度;android:pivotX屬性代表旋轉中心的X坐標值,android:pivotY屬性代表旋轉中心的Y坐標值,這兩個屬性也有三種表示方式,數字方式代表相對於自身左邊緣的像素值,num%方式代表相對於自身左邊緣或頂邊緣的百分比,num%p方式代表相對於父容器的左邊緣或頂邊緣的百分比。
另外,在動畫中,如果我們添加了android:fillAfter="true"後,這個動畫執行完之後保持最後的狀態;android:duration="integer"代表動畫持續的時間,單位為毫秒。
如果要把定義在XML中的動畫應用在一個ImageView上,代碼是這樣的:
ImageView image = (ImageView) findViewById(R.id.image);
Animation testAnim = AnimationUtils.loadAnimation(this, R.anim.test);
image.startAnimation(testAnim);
下面重點介紹一下插值器的概念:
首先要了解為什麼需要插值器,因為在補間動畫中,我們一般只定義關鍵幀(首幀或尾幀),然後由系統自動生成中間幀,生成中間幀的這個過程可以成為“插值”。插值器定義了動畫變化的速率,提供不同的函數定義變化值相對於時間的變化規則,可以定義各種各樣的非線性變化函數,比如加速、減速等。下面是幾種常見的插值器:
<set android:interpolator="@android:anim/accelerate_interpolator">
...
</set>
<alpha android:interpolator="@android:anim/accelerate_interpolator"
  .../>
如果只簡單地引用這些插值器還不能滿足需要的話,我們要考慮一下個性化插值器。我們可以創建一個插值器資源修改插值器的屬性,比如修改AnticipateInterpolator的加速速率,調整CycleInterpolator的循環次數等。為了完成這種需求,我們需要創建XML資源文件,然後將其放於/res/anim下,然後再動畫元素中引用即可。我們先來看一下幾種常見的插值器可調整的屬性:
<accelerateDecelerateInterpolator> 無
<accelerateInterpolator> android:factor 浮點值,加速速率,默認為1
<anticipateInterploator> android:tension 浮點值,起始點後退的張力、拉力數,默認為2
<anticipateOvershootInterpolator> android:tension 同上 android:extraTension 浮點值,拉力的倍數,默認為1.5(2 * 1.5)
<bounceInterpolator> 無
<cycleInterplolator> android:cycles 整數值,循環的個數,默認為1
<decelerateInterpolator> android:factor 浮點值,減速的速率,默認為1
<linearInterpolator> 無
<overshootInterpolator> 浮點值,超出終點後的張力、拉力,默認為2
下面我們就拿最後一個插值器來舉例:
<?xml version="1.0" encoding="utf-8"?>
<overshootInterpolator xmlns:android="http://schemas.android.com/apk/res/android"
  android:tension="7.0"/>
上面的代碼中,我們把張力改為7.0,然後將此文件命名為my_overshoot_interpolator.xml,放置於/res/anim下,我們就可以引用到自定義的插值器了:
<scale xmlns:android="http://schemas.android.com/apk/res/android"
  android:interpolator="@anim/my_overshoot_interpolator"
  .../>
如果以上這些簡單的定義還不能滿足我們的需求,那麼我們就需要考慮一下自己定義插值器類了。
我們可以實現Interpolator接口,因為上面所有的Interpolator都實現了Interpolator接口,這個接口定義了一個方法:float getInterpolation(float input);
此方法由系統調用,input代表動畫的時間,在0和1之間,也就是開始和結束之間。
線性(勻速)插值器定義如下:
public float getInterpolation(float input) {
  return input;
}
加速減速插值器定義如下:
public float getInterpolation(float input) {
  return (float)(Math.cos((input + 1) * Math.PI) / 2.0f) + 0.5f;
}
有興趣的話,大家可以嘗試一下自定義一個插值器。
講了這麼久的概念,下面我們就結合實例來演示一下幾種Tween動畫的應用。
先來介紹一下旋轉動畫的使用,布局文件/res/layout/rotate.xml如下:
<?xml version="1.0" encoding="utf-8"?>
<LinearLayout
 xmlns:android="http://schemas.android.com/apk/res/android"
 android:orientation="vertical"
 android:layout_width="fill_parent"
 android:layout_height="fill_parent"
 android:background="#FFFFFF">
 <ImageView
    android:id="@+id/piechart"
    android:layout_width="wrap_content"
    android:layout_height="wrap_content"
    android:layout_gravity="center_horizontal"
    android:src="@drawable/piechart"/>
 <Button
    android:id="@+id/positive"
    android:layout_width="fill_parent"
    android:layout_height="wrap_content"
    android:text="順時針"
    android:onClick="positive"/>
 <Button
    android:id="@+id/negative"
    android:layout_width="fill_parent"
    android:layout_height="wrap_content"
    android:text="逆時針"
    android:onClick="negative"/>
</LinearLayout>
我們定義了一個ImageView,用於顯示一個餅狀圖,演示旋轉動畫,然後定義了兩個按鈕,用以運行編碼實現的動畫。動畫定義文件/res/anim/rotate.xml如下:
<?xml version="1.0" encoding="utf-8"?>
<set xmlns:android="http://schemas.android.com/apk/res/android"
  android:interpolator="@android:anim/accelerate_decelerate_interpolator">
  <rotate
    android:fromDegrees="0"
    android:toDegrees="+360"
    android:pivotX="50%"
    android:pivotY="50%"
    android:duration="5000"/>
</set>
最後再來看一下RotateActivity.java代碼:
package com.scott.anim;
import android.app.Activity;
import android.os.Bundle;
import android.view.View;
import android.view.animation.Animation;
import android.view.animation.AnimationUtils;
import android.view.animation.LinearInterpolator;
import android.view.animation.RotateAnimation;
public class RotateActivity extends Activity {
  private int currAngle;
  private View piechart;
  @Override
  public void onCreate(Bundle savedInstanceState) {
    super.onCreate(savedInstanceState);
    setContentView(R.layout.rotate);
    piechart = findViewById(R.id.piechart);
    Animation animation = AnimationUtils.loadAnimation(this, R.anim.rotate);
    piechart.startAnimation(animation);
  }
  public void positive(View v) {
    Animation anim = new RotateAnimation(currAngle, currAngle + 180, Animation.RELATIVE_TO_SELF, 0.5f,
        Animation.RELATIVE_TO_SELF, 0.5f);
    /** 勻速插值器 */
    LinearInterpolator lir = new LinearInterpolator();
    anim.setInterpolator(lir);
    anim.setDuration(1000);
    /** 動畫完成後不恢復原狀 */
    anim.setFillAfter(true);
    currAngle += 180;
    if (currAngle > 360) {
      currAngle = currAngle - 360;
    }
    piechart.startAnimation(anim);
  }
  public void negative(View v) {
    Animation anim = new RotateAnimation(currAngle, currAngle - 180, Animation.RELATIVE_TO_SELF, 0.5f,
        Animation.RELATIVE_TO_SELF, 0.5f);
    /** 勻速插值器 */
    LinearInterpolator lir = new LinearInterpolator();
    anim.setInterpolator(lir);
    anim.setDuration(1000);
    /** 動畫完成後不恢復原狀 */
    anim.setFillAfter(true);
    currAngle -= 180;
    if (currAngle < -360) {
      currAngle = currAngle + 360;
    }
    piechart.startAnimation(anim);
  }
}
然後,看一下漸變動畫,布局文件/res/layout/alpha.xml如下:
<?xml version="1.0" encoding="utf-8"?>
<FrameLayout
 xmlns:android="http://schemas.android.com/apk/res/android"
 android:layout_width="fill_parent"
 android:layout_height="fill_parent"
 android:background="#FFFFFF">
 <ImageView
   android:id="@+id/splash"
   android:layout_width="fill_parent"
   android:layout_height="fill_parent"
   android:layout_gravity="center"
   android:src="@drawable/splash"/>
 <Button
   android:layout_width="fill_parent"
   android:layout_height="wrap_content"
   android:layout_gravity="bottom"
   android:text="alpha"
   android:onClick="alpha"/>
</FrameLayout>
動畫定義文件/res/anim/alpha.xml如下:
<?xml version="1.0" encoding="utf-8"?>
<set xmlns:android="http://schemas.android.com/apk/res/android">
  <alpha
    android:fromAlpha="0.0"
    android:toAlpha="1.0"
    android:duration="3000"/>
</set>
AlphaActivity.java代碼如下:
package com.scott.anim;
import android.app.Activity;
import android.os.Bundle;
import android.util.Log;
import android.view.View;
import android.view.animation.AlphaAnimation;
import android.view.animation.Animation;
import android.view.animation.Animation.AnimationListener;
import android.view.animation.AnimationUtils;
import android.widget.ImageView;
public class AlphaActivity extends Activity implements AnimationListener {
  private ImageView splash;
  @Override
  protected void onCreate(Bundle savedInstanceState) {
    super.onCreate(savedInstanceState);
    setContentView(R.layout.alpha);
    splash = (ImageView) findViewById(R.id.splash);
    Animation anim = AnimationUtils.loadAnimation(this, R.anim.alpha);
    anim.setAnimationListener(this);
    splash.startAnimation(anim);
  }
  public void alpha(View view) {
    Animation anim = new AlphaAnimation(1.0f, 0.0f);
    anim.setDuration(3000);
    anim.setFillAfter(true);
    splash.startAnimation(anim);
  }
  @Override
  public void onAnimationStart(Animation animation) {
    Log.i("alpha", "onAnimationStart called.");
  }
  @Override
  public void onAnimationEnd(Animation animation) {
    Log.i("alpha", "onAnimationEnd called");
  }
  @Override
  public void onAnimationRepeat(Animation animation) {
    Log.i("alpha", "onAnimationRepeat called");
  }
}
接著看一下位移動畫,布局文件/res/layout/translate.xml如下:
<?xml version="1.0" encoding="utf-8"?>
<FrameLayout
 xmlns:android="http://schemas.android.com/apk/res/android"
 android:orientation="vertical"
 android:layout_width="fill_parent"
 android:layout_height="fill_parent">
 <ImageView
  android:id="@+id/trans_image"
  android:layout_width="wrap_content"
  android:layout_height="wrap_content"
  android:layout_weight="1"
  android:src="@drawable/person"/>
 <Button
  android:id="@+id/trans_button"
  android:layout_width="fill_parent"
  android:layout_height="wrap_content"
  android:layout_gravity="bottom"
  android:text="translate"
  android:onClick="translate"/>
</FrameLayout>
動畫定義文件/res/anim/translate.xml如下:
<?xml version="1.0" encoding="utf-8"?>
<set xmlns:android="http://schemas.android.com/apk/res/android"
  android:interpolator="@android:anim/bounce_interpolator">
  <translate
    android:fromXDelta="0"
    android:fromYDelta="0"
    android:toXDelta="200"
    android:toYDelta="300"
    android:duration="2000"/>
</set>
然後TranslateActivity.java代碼如下:
package com.scott.anim;
import android.app.Activity;
import android.os.Bundle;
import android.view.View;
import android.view.animation.Animation;
import android.view.animation.AnimationUtils;
import android.view.animation.OvershootInterpolator;
import android.view.animation.TranslateAnimation;
import android.widget.ImageView;
public class TranslateActivity extends Activity {
  private ImageView trans_iamge;
  @Override
  protected void onCreate(Bundle savedInstanceState) {
    super.onCreate(savedInstanceState);
    setContentView(R.layout.tanslate);
    trans_iamge = (ImageView) findViewById(R.id.trans_image);
    Animation anim = AnimationUtils.loadAnimation(this, R.anim.translate);
    anim.setFillAfter(true);
    trans_iamge.startAnimation(anim);
  }
  public void translate(View view) {
    Animation anim = new TranslateAnimation(200, 0, 300, 0);
    anim.setDuration(2000);
    anim.setFillAfter(true);
    OvershootInterpolator overshoot = new OvershootInterpolator();
    anim.setInterpolator(overshoot);
    trans_iamge.startAnimation(anim);
  }
}
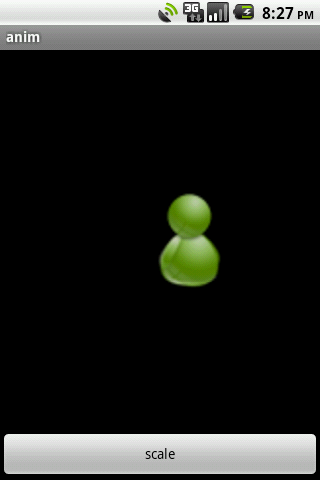
最後,我們再來看以下縮放動畫,布局文件/res/layout/scale.xml如下:
<?xml version="1.0" encoding="utf-8"?>
<LinearLayout
 xmlns:android="http://schemas.android.com/apk/res/android"
 android:orientation="vertical"
 android:layout_width="fill_parent"
 android:layout_height="fill_parent">
 <ImageView
  android:id="@+id/scale_image"
  android:layout_width="wrap_content"
  android:layout_height="wrap_content"
  android:layout_gravity="center"
  android:layout_weight="1"
  android:src="@drawable/person"/>
 <Button
  android:id="@+id/scale_button"
  android:layout_width="fill_parent"
  android:layout_height="wrap_content"
  android:layout_gravity="bottom"
  android:text="scale"
  android:onClick="sclae"/>
</LinearLayout>
動畫定義文件/res/anim/scale.xml如下:
<?xml version="1.0" encoding="utf-8"?>
<set xmlns:android="http://schemas.android.com/apk/res/android"
  android:interpolator="@android:anim/bounce_interpolator">
  <scale
    android:fromXScale="1.0"
    android:toXScale="2.0"
    android:fromYScale="1.0"
    android:toYScale="2.0"
    android:pivotX="0.5"
    android:pivotY="50%"
    android:duration="2000"/>
  <alpha
    android:fromAlpha="0.0"
    android:toAlpha="1.0"
    android:duration="3000"/>
</set>
然後ScaleActivity.java代碼如下:
package com.scott.anim;
import android.app.Activity;
import android.os.Bundle;
import android.view.View;
import android.view.animation.Animation;
import android.view.animation.AnimationUtils;
import android.view.animation.BounceInterpolator;
import android.view.animation.ScaleAnimation;
import android.widget.ImageView;
public class ScaleActivity extends Activity {
  private ImageView scale_iamge;
  @Override
  protected void onCreate(Bundle savedInstanceState) {
    super.onCreate(savedInstanceState);
    setContentView(R.layout.scale);
    scale_iamge = (ImageView) findViewById(R.id.scale_image);
    Animation anim = AnimationUtils.loadAnimation(this, R.anim.scale);
    anim.setFillAfter(true);
    scale_iamge.startAnimation(anim);
  }
  public void sclae(View view) {
    Animation anim = new ScaleAnimation(2.0f, 1.0f, 2.0f, 1.0f,
        Animation.RELATIVE_TO_SELF, 0.5f,
        Animation.RELATIVE_TO_SELF, 0.5f);
    anim.setDuration(2000);
    anim.setFillAfter(true);
    BounceInterpolator bounce = new BounceInterpolator();
    anim.setInterpolator(bounce);
    scale_iamge.startAnimation(anim);
  }
}
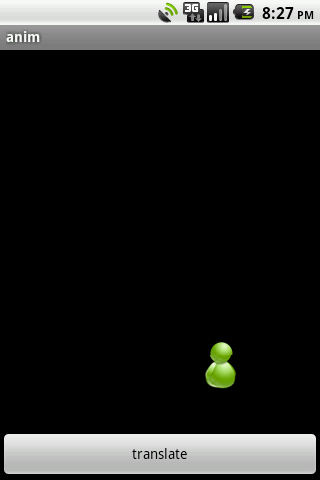
幾種動畫運行效果如下圖所示:


希望本文所述對大家Android程序設計有所幫助。
 Android NDK開發(一) 入門
開始之前 最近學習了一下NDK的開發, 就來分享一下. 對一個新鮮事物, 我們先解決的無非就是三件事情: 是什麼?為什麼?怎麼做?.NDK簡介 (英語:native de
 Android生命周期裡你或許不知道的事
Android生命周期估計連初學者都再熟悉不過的東西了,但這裡我拋出幾個問題,或許大家以前沒有想過或者可能認識的有些錯誤。 一、當A啟動B時,A和B生命周期方法執行的先後
 Android:仿手機QQ好友動態的ListView
1.介紹:本博客使用XListView模仿Android版QQ好友動態的ListView效果。效果截圖如下:效果圖1效果圖2這裡面主要涉及的是ListView的布局問題,
 Android之ListView分頁加載數據功能實現代碼
什麼是ListView分頁加載數據功能呢?在現在的大數據時代,我們不可能把某些數據全部展示到界面,好比我們經常會看的QQ空間一樣,當你看動態的時候,系統不可能會把所有好友