編輯:關於Android編程
本文實例講述了Android編程滑動效果之倒影效果實現方法。分享給大家供大家參考,具體如下:
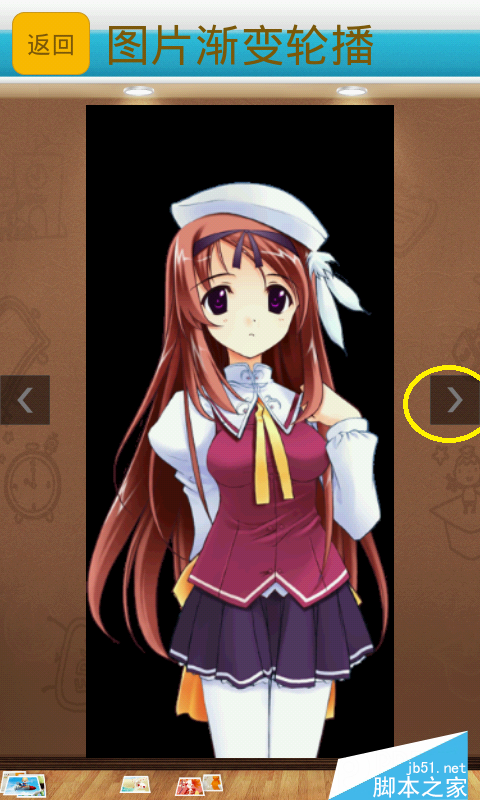
前面介紹了使用《Android編程實現3D滑動旋轉效果的方法》,現在介紹圖片倒影實現,先看效果圖

這裡主要通過自定義Gallery和ImageAdapter(繼承自BaseAdapter)實現
1、倒影繪制
ImageAdapter繼承自BaseAdapter,詳細實現可見前面關於Android Gallery的用法。這裡重點介紹倒影原理及實現
倒影原理:
倒影效果是主要由原圖+間距+倒影三部分組成,高度大約為原圖的3/2(原圖為1、倒影為1/2)
原圖,就是我們看到了最開始的圖片
間距,是原圖與倒影之間的間隙,如:reflectionGap = 4;
倒影,是原圖下半部分1/2高度,通過矩陣變換matrix.preScale(1, -1); 獲取倒立圖片,然後再加上線性遮罩和陰影實現
倒影實現:
/** 反射倒影 */
public boolean createReflectedImages() {
  final int reflectionGap = 4;
  int index = 0;
  for (Map<String, Object> map : list) {
    Integer id = (Integer) map.get("image");
    Bitmap originalImage = BitmapFactory.decodeResource(mContext.getResources(), id); // 獲取原始圖片
    int width = originalImage.getWidth();
    int height = originalImage.getHeight();
    Matrix matrix = new Matrix();
    matrix.preScale(1, -1); // 圖片矩陣變換(從低部向頂部的倒影)
    Bitmap reflectionImage = Bitmap.createBitmap(originalImage, 0, height/2, width, height/2, matrix, false); // 截取原圖下半部分
    Bitmap bitmapWithReflection = Bitmap.createBitmap(width, (height + height / 2), Config.ARGB_8888); // 創建倒影圖片(高度為原圖3/2)
    Canvas canvas = new Canvas(bitmapWithReflection); // 繪制倒影圖(原圖 + 間距 + 倒影)
    canvas.drawBitmap(originalImage, 0, 0, null); // 繪制原圖
    Paint paint = new Paint();
    canvas.drawRect(0, height, width, height + reflectionGap, paint); // 繪制原圖與倒影的間距
    canvas.drawBitmap(reflectionImage, 0, height + reflectionGap, null); // 繪制倒影圖
    paint = new Paint();
    LinearGradient shader = new LinearGradient(0, originalImage.getHeight(), 0, bitmapWithReflection.getHeight() + reflectionGap, 0x70ffffff, 0x00ffffff, TileMode.CLAMP);
    paint.setShader(shader); // 線性漸變效果
    paint.setXfermode(new PorterDuffXfermode(Mode.DST_IN)); // 倒影遮罩效果
    canvas.drawRect(0, height, width, bitmapWithReflection.getHeight() + reflectionGap, paint); // 繪制倒影的陰影效果
    ImageView imageView = new ImageView(mContext);
    imageView.setImageBitmap(bitmapWithReflection); // 設置倒影圖片
    imageView.setLayoutParams(new myGallery.LayoutParams(180, 240));
    imageView.setScaleType(ScaleType.MATRIX);
    mImages[index++] = imageView;
  }
  return true;
}
2、myGallery
自定義Gallery來實現倒影圖片的浏覽與選擇
public class myGallery extends Gallery {
  private Camera mCamera = new Camera();
  private int mMaxRotationAngle = 60; // 最大旋轉角度 60
  private int mMaxZoom = -120;
  private int mCoveflowCenter;
  public myGallery(Context context) {
    super(context);
    this.setStaticTransformationsEnabled(true);
  }
  public myGallery(Context context, AttributeSet attrs) {
    super(context, attrs);
    this.setStaticTransformationsEnabled(true);
  }
  public myGallery(Context context, AttributeSet attrs, int defStyle) {
    super(context, attrs, defStyle);
    this.setStaticTransformationsEnabled(true);
  }
  public int getMaxRotationAngle() {
    return mMaxRotationAngle;
  }
  public void setMaxRotationAngle(int maxRotationAngle) {
    mMaxRotationAngle = maxRotationAngle;
  }
  public int getMaxZoom() {
    return mMaxZoom;
  }
  public void setMaxZoom(int maxZoom) {
    mMaxZoom = maxZoom;
  }
  /** 獲取Gallery的中心x */
  private int getCenterOfCoverflow() {
    return (getWidth() - getPaddingLeft() - getPaddingRight()) / 2 + getPaddingLeft();
  }
  /** 獲取View的中心x */
  private static int getCenterOfView(View view) {
    return view.getLeft() + view.getWidth() / 2;
  }
  @Override
  protected void onSizeChanged(int w, int h, int oldw, int oldh) {
    mCoveflowCenter = getCenterOfCoverflow();
    super.onSizeChanged(w, h, oldw, oldh);
  }
  @Override
  protected boolean getChildStaticTransformation(View child, Transformation trans) {
    final int childCenter = getCenterOfView(child);
    final int childWidth = child.getWidth();
    int rotationAngle = 0;
    trans.clear();
    trans.setTransformationType(Transformation.TYPE_BOTH); // alpha 和 matrix 都變換
    if (childCenter == mCoveflowCenter) { // 正中間的childView
      transformImageBitmap((ImageView) child, trans, 0);
    } else { // 兩側的childView
      rotationAngle = (int) ( ( (float) (mCoveflowCenter - childCenter) / childWidth ) * mMaxRotationAngle );
      if (Math.abs(rotationAngle) > mMaxRotationAngle) {
        rotationAngle = (rotationAngle < 0) ? -mMaxRotationAngle : mMaxRotationAngle;
      }
      transformImageBitmap((ImageView) child, trans, rotationAngle);
    }
    return true;
  }
  private void transformImageBitmap(ImageView child, Transformation trans, int rotationAngle) {
    mCamera.save();
    final Matrix imageMatrix = trans.getMatrix();
    final int imageHeight = child.getLayoutParams().height;
    final int imageWidth = child.getLayoutParams().width;
    final int rotation = Math.abs(rotationAngle);
    // 在Z軸上正向移動camera的視角,實際效果為放大圖片; 如果在Y軸上移動,則圖片上下移動; X軸上對應圖片左右移動。
    mCamera.translate(0.0f, 0.0f, 100.0f);
    // As the angle of the view gets less, zoom in
    if (rotation < mMaxRotationAngle) {
      float zoomAmount = (float) (mMaxZoom + (rotation * 1.5));
      mCamera.translate(0.0f, 0.0f, zoomAmount);
    }
    mCamera.rotateY(rotationAngle); // rotationAngle 為正,沿y軸向內旋轉; 為負,沿y軸向外旋轉
    mCamera.getMatrix(imageMatrix);
    imageMatrix.preTranslate(-(imageWidth / 2), -(imageHeight / 2));
    imageMatrix.postTranslate((imageWidth / 2), (imageHeight / 2));
    mCamera.restore();
  }
}
3、Activity
Activity中,主要實現自定義Gallery的圖片填充ImageAdapter、myGallery選擇事件監聽、點擊事件監聽
private void initRes(){
  tvTitle = (TextView) findViewById(R.id.tvTitle);
  gallery = (myGallery) findViewById(R.id.mygallery); // 獲取自定義的myGallery控件
  adapter = new ImageAdapter(this);
  adapter.createReflectedImages(); // 創建倒影效果
  gallery.setAdapter(adapter);
  gallery.setOnItemSelectedListener(new OnItemSelectedListener() { // 設置選擇事件監聽
    @Override
    public void onItemSelected(AdapterView<?> parent, View view, int position, long id) {
      tvTitle.setText(adapter.titles[position]);
    }
    @Override
    public void onNothingSelected(AdapterView<?> parent) {
    }
  });
  gallery.setOnItemClickListener(new OnItemClickListener() { // 設置點擊事件監聽
    @Override
    public void onItemClick(AdapterView<?> parent, View view, int position, long id) {
      Toast.makeText(Main.this, "img " + (position+1) + " selected", Toast.LENGTH_SHORT).show();
    }
  });
}
main.xml布局文件中,通過實現自定義的myGallery,來顯示圖片集合
<?xml version="1.0" encoding="utf-8"?>
<RelativeLayout xmlns:android="http://schemas.android.com/apk/res/android"
  android:layout_width="fill_parent"
  android:layout_height="fill_parent"
  android:orientation="vertical" >
  <TextView
    android:id="@+id/tvTitle"
    android:layout_width="wrap_content"
    android:layout_height="wrap_content"
    android:layout_centerHorizontal="true"
    android:textSize="16sp" />
  <com.homer.reflect.myGallery
    android:id="@+id/mygallery"
    android:layout_width="fill_parent"
    android:layout_height="wrap_content"
    android:layout_below="@id/tvTitle"
    android:layout_marginTop="10dip" />
</RelativeLayout>
完整實例代碼點擊此處本站下載。
更多關於Android相關內容感興趣的讀者可查看本站專題:《Android開發動畫技巧匯總》、《Android開發入門與進階教程》及《Android控件用法總結》。
希望本文所述對大家Android程序設計有所幫助。
 自定義View之仿淘寶詳情頁
基本介紹現在的一些購物類App例如淘寶,京東等,在物品詳情頁,都采用了類似分層的模式,即上拉加載詳情的方式,節省了空間,使用戶的體驗更加的舒適。只要對於某個東西的介紹很多
 Android 設計模式
簡介項目開發中發現問題、解決問題這個過程中會出現很多問題,比如重復出現、某個問題的遺留,這些問題的本質就是設計模式。今天記錄設計模式的知識點。內容在java以及其他的面向
 Android實現listview動態加載數據分頁的兩種方法
在android開發中,經常需要使用數據分頁,比如要實現一個新聞列表的顯示,或者博文列表的顯示,不可能第一次加載就展示出全部,這就需要使用分頁的方法來加載數據,在andr
 最簡單的Dagger2入門教程
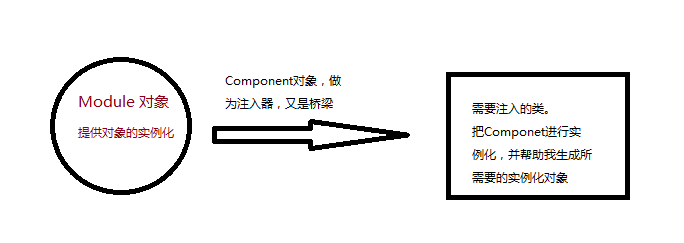
依賴注入就是將調用者需要的另一個對象實例不在調用者內部實現,而是通過一定的方式從外部傳入實例,解決了各個類之間的耦合。那麼這個外部,到底指的是哪裡,如果指的是另一個類,那