編輯:關於Android編程
一、 Intent 作用
Intent 是一個將要執行的動作的抽象的描述,一般來說是作為參數來使用,由Intent來協助完成Android各個組件之間的通訊。比如說調用startActivity()來啟動一個activity,或者由broadcaseIntent()來傳遞給所有感興趣的BroadcaseReceiver, 再或者由startService()/bindservice()來啟動一個後台的service.所以可以看出來,intent主要是用來啟動其他的activity 或者service,所以可以將intent理解成activity之間的粘合劑。
二、 Intent的構成
要在不同的activity之間傳遞數據,就要在intent中包含相應的東西,一般來說數據中最基本的應該包括:
Action 用來指明要實施的動作是什麼,比如說ACTION_VIEW, ACTION_EDIT等。具體的可以查閱android SDK-> reference中的Android.content.intent類,裡面的constants中定義了所有的action。
Data 要事實的具體的數據,一般由一個Uri變量來表示
下面是一些簡單的例子:
ACTION_VIEW content://contacts/1 //顯示identifier為1的聯系人的信息。
ACTION_DIAL content://contacts/1 //給這個聯系人打電話
除了Action和data這兩個最基本的元素外,intent還包括一些其他的元素,
Category(類別): 這個選項指定了將要執行的這個action的其他一些額外的信息,例如 LAUNCHER_CATEGORY 表示Intent 的接受者應該在Launcher中作為頂級應用出現;而ALTERNATIVE_CATEGORY表示當前的Intent是一系列的可選動作中的一個,這些動作可以在同一塊數據上執行。具體同樣可以參考android SDK-> reference中的Android.content.intent類。以前我也寫過一篇於category有關的文章,點擊這裡可以查看。
Type(數據類型): 顯式指定Intent的數據類型(MIME)。一般Intent的數據類型能夠根據數據本身進行判定,但是通過設置這個屬性,可以強制采用顯式指定的類型而不再進行推導。
component(組件): 指定Intent的的目標組件的 類名稱。通常 Android會根據Intent 中包含的其它屬性的信息,比如action、data/type、category進行查找,最終找到一個與之匹配的目標組件。但是,如果 component這個屬性有指定的話,將直接使用它指定的組件,而不再執行上述查找過程。指定了這個屬性以後,Intent的其它所有屬性都是可選的。
extras(附加信息),是其它所有附加信息的集合。使用extras可以為組件提供擴展信息,比如,如果要執行“發送電子郵件”這個動作,可以將電子郵件的標題、正文等保存在extras裡,傳給電子郵件發送組件。
下面是這些額外屬性的幾個例子:
ACTION_MAIN with category CATEGORY_HOME //用來 Launch home screen. 以前我也寫過一篇於與之有關的文章, 點擊這裡可以看到。
ACTION_GET_CONTENT with MIME type vnd.android.cursor.item/phone //用來列出列表中的所有人的電話號碼
綜上可以看出,action、 data/type、category和extras 一起形成了一種語言,這種語言可以是android可以表達出諸如“給張三打電話”之類的短語組合。
三、 intent的解析
應用程序的組件為了告訴Android自己能響應、處理哪些隱式Intent請求,可以聲明一個甚至多個Intent Filter。每個Intent Filter描述該組件所能響應Intent請求的能力——組件希望接收什麼類型的請求行為,什麼類型的請求數據。比如之前請求網頁浏覽器這個例子中,網頁浏覽器程序的Intent Filter就應該聲明它所希望接收的Intent Action是WEB_SEARCH_ACTION,以及與之相關的請求數據是網頁地址URI格式。如何為組件聲明自己的Intent Filter? 常見的方法是在AndroidManifest.xml文件中用屬性< Intent-Filter>描述組件的Intent Filter。
前面我們提到,隱式Intent(Explicit Intents)和Intent Filter(Implicit Intents)進行比較時的三要素是Intent的動作、數據以及類別。實際上,一個隱式Intent請求要能夠傳遞給目標組件,必要通過這三個方面的檢查。如果任何一方面不匹配,Android都不會將該隱式Intent傳遞給目標組件。接下來我們講解這三方面檢查的具體規則。
1.動作測試
< intent-filter>元素中可以包括子元素< action>,比如:
< intent-filter>

< action android:name=”com.example.project.SHOW_CURRENT” />

< action android:name=”com.example.project.SHOW_RECENT” />

 < action android:name=”com.example.project.SHOW_PENDING” />

< /intent-filter>
一條< intent-filter>元素至少應該包含一個< action>,否則任何Intent請求都不能和該< intent-filter>匹配。如果Intent請求的Action和< intent-filter>中個某一條< action>匹配,那麼該Intent就通過了這條< intent-filter>的動作測試。如果Intent請求或< intent-filter>中沒有說明具體的Action類型,那麼會出現下面兩種情況。
(1) 如果< intent-filter>中沒有包含任何Action類型,那麼無論什麼Intent請求都無法和這條< intent- filter>匹配;
(2) 反之,如果Intent請求中沒有設定Action類型,那麼只要< intent-filter>中包含有Action類型,這個 Intent請求就將順利地通過< intent-filter>的行為測試。
2.類別測試
< intent-filter>元素可以包含< category>子元素,比如:
< intent-filter . . . >

 < category android:name=”android.Intent.Category.DEFAULT” />

 < category android:name=”android.Intent.Category.BROWSABLE” />

< /intent-filter>
只有當Intent請求中所有的Category與組件中某一個IntentFilter的< category>完全匹配時,才會讓該 Intent請求通過測試,IntentFilter中多余的< category>聲明並不會導致匹配失敗。一個沒有指定任何類別測試的 IntentFilter僅僅只會匹配沒有設置類別的Intent請求。
3.數據測試
數據在< intent-filter>中的描述如下:
< intent-filter . . . >

 < data android:type=”video/mpeg” android:scheme=”http” . . . />

 < data android:type=”audio/mpeg” android:scheme=”http” . . . />

 < /intent-filter>
元素指定了希望接受的Intent請求的數據URI和數據類型,URI被分成三部分來進行匹配:scheme、 authority和path。其中,用setData()設定的Inteat請求的URI數據類型和scheme必須與IntentFilter中所指定的一致。若IntentFilter中還指定了authority或path,它們也需要相匹配才會通過測試。
4.簡單例子說明
講解完Intent基本概念之後,接下來我們就使用Intent激活Android自帶的電話撥號程序,通過這個實例你會發現,使用Intent並不像其概念描述得那樣難。最終創建Intent的代碼如下所示。
Intent i = new
Intent(Intent.ACTION_DIAL,Uri.parse(”tel://13800138000″));
創建好Intent之後,你就可以通過它告訴Android希望啟動新的Activity了。
startActivity(i);
Activity啟動後顯示界面如下:
三、Intent的構造函數
公共構造函數:
1、Intent() 空構造函數
2、Intent(Intent o) 拷貝構造函數
3、Intent(String action) 指定action類型的構造函數
4、Intent(String action, Uri uri) 指定Action類型和Uri的構造函數,URI主要是結合程序之間的數據共享ContentProvider
5、Intent(Context packageContext, Class<?> cls) 傳入組件的構造函數,也就是上文提到的
6、Intent(String action, Uri uri, Context packageContext, Class<?> cls) 前兩種結合體
Intent有六種構造函數,3、4、5是最常用的,並不是其他沒用!
Intent(String action, Uri uri) 的action就是對應在AndroidMainfest.xml中的action節點的name屬性值。在Intent類中定義了很多的Action和Category常量。
示例代碼二:
Intent intent = new Intent(Intent.ACTION_EDIT, null);
startActivity(intent);
示例代碼二是用了第四種構造函數,只是uri參數為null。執行此代碼的時候,系統就會在程序主配置文件AndroidMainfest.xml中尋找<action android:name="android.intent.action.EDIT" />對應的Activity,如果對應為多個activity具有<action android:name="android.intent.action.EDIT" />此時就會彈出一個dailog選擇Activity。
如果是用示例代碼一那種方式進行發送則不會有這種情況。
利用Intent在Activity之間傳遞數據
在Main中執行如下代碼:
 Bundle bundle = new Bundle();
 bundle.putStringArray("NAMEARR", nameArr);
 Intent intent = new Intent(Main.this, CountList.class);
 intent.putExtras(bundle);
 startActivity(intent);
在CountList中,代碼如下:
 Bundle bundle = this.getIntent().getExtras();
 String[] arrName = bundle.getStringArray("NAMEARR");
以上代碼就實現了Activity之間的數據傳遞!
四、常用方法總結
這篇文章是我剛開始學習Android時看到的,當時理解的不是很深入,現在再回頭看這篇文章總結的很詳細,在這裡與大家分享。
1,調用web浏覽器
Uri myBlogUri = Uri.parse("http://kuikui.javaeye.com");
returnIt = new Intent(Intent.ACTION_VIEW, myBlogUri);
2,地圖
Uri mapUri = Uri.parse("geo:38.899533,-77.036476");
returnIt = new Intent(Intent.ACTION_VIEW, mapUri);
3,調撥打電話界面
Uri telUri = Uri.parse("tel:100861");
returnIt = new Intent(Intent.ACTION_DIAL, telUri);
4,直接撥打電話
Uri callUri = Uri.parse("tel:100861");
returnIt = new Intent(Intent.ACTION_CALL, callUri);
5,卸載
Uri uninstallUri = Uri.fromParts("package", "xxx", null);
returnIt = new Intent(Intent.ACTION_DELETE, uninstallUri);
6,安裝
Uri installUri = Uri.fromParts("package", "xxx", null);
returnIt = new Intent(Intent.ACTION_PACKAGE_ADDED, installUri);
7,播放
Uri playUri = Uri.parse("file:///sdcard/download/everything.mp3");
returnIt = new Intent(Intent.ACTION_VIEW, playUri);
8,調用發郵件
Uri emailUri = Uri.parse("mailto:[email protected]");
returnIt = new Intent(Intent.ACTION_SENDTO, emailUri);
9,發郵件
returnIt = new Intent(Intent.ACTION_SEND);
String[] tos = { "[email protected]" };
String[] ccs = { "[email protected]" };
returnIt.putExtra(Intent.EXTRA_EMAIL, tos);
returnIt.putExtra(Intent.EXTRA_CC, ccs);
returnIt.putExtra(Intent.EXTRA_TEXT, "body");
returnIt.putExtra(Intent.EXTRA_SUBJECT, "subject");
returnIt.setType("message/rfc882");
Intent.createChooser(returnIt, "Choose Email Client");
10,發短信
Uri smsUri = Uri.parse("tel:100861");
returnIt = new Intent(Intent.ACTION_VIEW, smsUri);
returnIt.putExtra("sms_body", "shenrenkui");
returnIt.setType("vnd.android-dir/mms-sms");
11,直接發郵件
Uri smsToUri = Uri.parse("smsto://100861");
returnIt = new Intent(Intent.ACTION_SENDTO, smsToUri);
returnIt.putExtra("sms_body", "shenrenkui");
12,發彩信
Uri mmsUri = Uri.parse("content://media/external/images/media/23");
returnIt = new Intent(Intent.ACTION_SEND);
returnIt.putExtra("sms_body", "shenrenkui");
returnIt.putExtra(Intent.EXTRA_STREAM, mmsUri);
returnIt.setType("image/png");
用獲取到的Intent直接調用startActivity(returnIt)就ok了。
五、eg:
<RelativeLayout xmlns:android="http://schemas.android.com/apk/res/android"
  xmlns:tools="http://schemas.android.com/tools"
  android:layout_width="match_parent"
  android:layout_height="match_parent"
  android:paddingBottom="@dimen/activity_vertical_margin"
  android:paddingLeft="@dimen/activity_horizontal_margin"
  android:paddingRight="@dimen/activity_horizontal_margin"
  android:paddingTop="@dimen/activity_vertical_margin"
  tools:context=".MainActivity" >
  <Button
    android:id="@+id/button1"
    android:layout_height="wrap_content"
    android:layout_width="match_parent"
    android:text="啟動第二個Activity"/>

</RelativeLayout>
<?xml version="1.0" encoding="utf-8"?>
<LinearLayout xmlns:android="http://schemas.android.com/apk/res/android"
  android:layout_width="match_parent"
  android:layout_height="match_parent"
  android:orientation="vertical" >
  <TextView
    android:id="@+id/text1"
    android:layout_width="match_parent"
    android:layout_height="wrap_content"
    />

</LinearLayout>
package com.android.xiong.intent_one;

import android.os.Bundle;
import android.app.Activity;
import android.content.Intent;
import android.view.Menu;
import android.view.View;
import android.view.View.OnClickListener;
import android.widget.Button;

public class MainActivity extends Activity {

  private Button button1;
  @Override
  protected void onCreate(Bundle savedInstanceState) {
    super.onCreate(savedInstanceState);
    setContentView(R.layout.activity_main);

    button1=(Button)findViewById(R.id.button1);
    OnClick on=new OnClick();
    button1.setOnClickListener(on);
  }

  class OnClick implements OnClickListener{

    @Override
    public void onClick(View arg0) {
      // TODO Auto-generated method stub
      Intent intent =new Intent();
      intent.setClass(MainActivity.this, TwoActivity.class);
      String [] name={"zhangsan","lis","wangwu"};
      int []age={12,13,14};
      intent.putExtra("com.android.xiong.intent_one.Name", name);
      intent.putExtra("com.android.xiong.intent_one.Age", age);
      startActivity(intent);


    }

  }

  @Override
  public boolean onCreateOptionsMenu(Menu menu) {
    // Inflate the menu; this adds items to the action bar if it is present.
    getMenuInflater().inflate(R.menu.main, menu);
    return true;
  }

}
package com.android.xiong.intent_one;

import java.util.HashMap;

import android.app.Activity;
import android.content.Intent;
import android.os.Bundle;
import android.widget.TextView;

public class TwoActivity extends Activity{
  private TextView text1;

  @Override
  protected void onCreate(Bundle savedInstanceState) {
    // TODO Auto-generated method stub
    super.onCreate(savedInstanceState);
    setContentView(R.layout.activity_two);
    text1=(TextView)findViewById(R.id.text1);
    Intent intent=getIntent();
    String []name=intent.getStringArrayExtra("com.android.xiong.intent_one.Name");
    int [] age=intent.getIntArrayExtra("com.android.xiong.intent_one.Age");
    String print="";
    for (int i = 0; i < age.length; i++) {
      print+="name: "+name[i].toString()+" age: "+age[i]+" \n";
    }
    text1.setText(print);
  }

}
 手機連接不上刷機精靈
手機連接不上刷機精靈,有時候不知道怎麼了手機想刷機,可就是連不上刷機精靈,不知道怎麼辦。是手機壞USB壞了嗎?現在小編來幫大家解答一下。怎麼檢查這手機連接不
 android如何寫一個循環文字滾動的TextView
效果圖: 在layout中這樣來聲明: activity這樣來調用: private void initStatus(){ ivState =
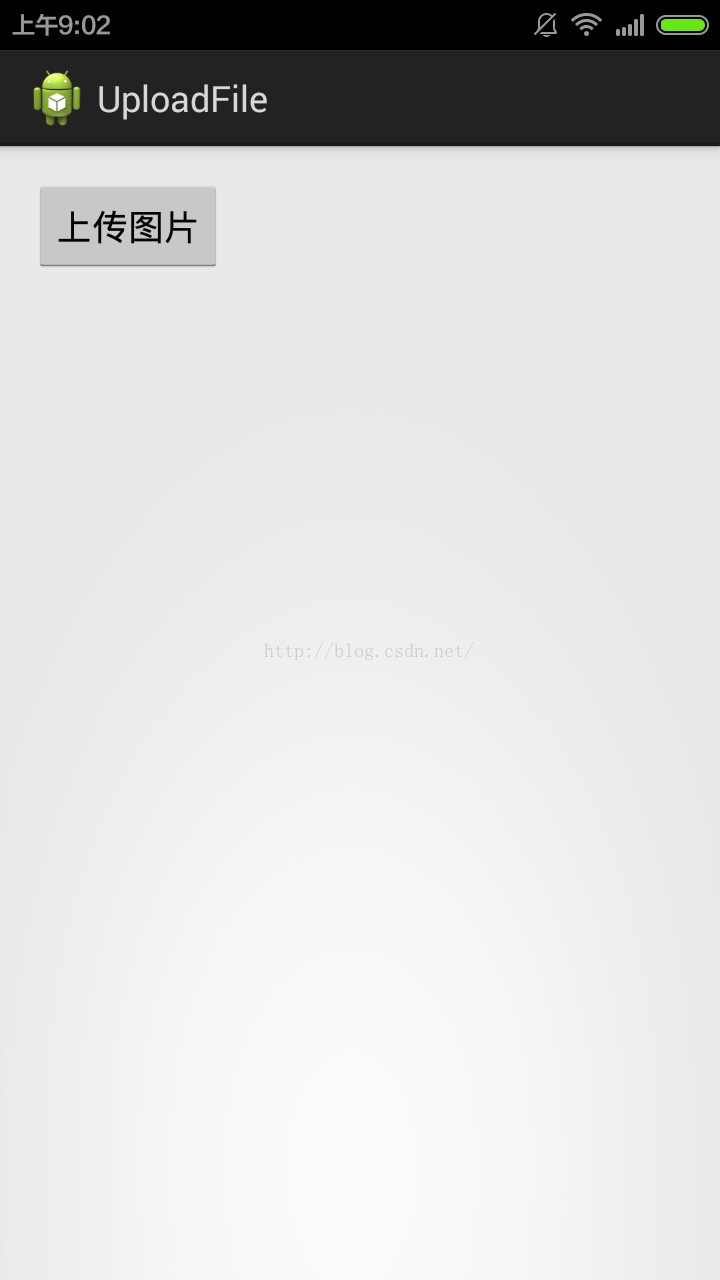
 android app進行代碼混淆實例詳解
接到一個新的任務,對現有項目進行代碼混淆。之前對混淆有過一些了解,但是不夠詳細和完整,知道有些東西混淆起來還是比較棘手的。不過幸好目前的項目不是太復雜(針對混淆這塊來說)
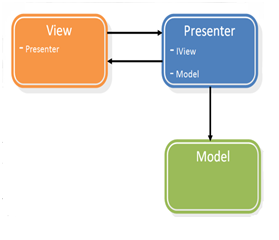 詳解MVP模式在Android開發中的應用
一、MVP介紹 隨著UI創建技術的功能日益增強,UI層也履行著越來越多的職責。為了更好地細分視圖(View)與模型(Model)的功能,讓View專注於處理數據