編輯:關於Android編程
本文實例為大家分享了Android實現畫板的具體代碼,采用的技術是雙緩沖技術,供大家參考,具體內容如下
1.雙緩沖技術的概念
所謂的雙緩沖技術其實很簡單,當程序需要在指定的View上進行繪制時,程序並不需要直接繪制到該View組件,而是先繪制到一個內存中的Bitmap圖片上(就是緩沖),等內存中的Bitmap繪制好之後,再一次性將Bitmap繪制到View組件上。
2.Android采用雙緩沖實現畫板
實現的思路:
1).定義一個內存中圖片,將他作為緩沖區Bitmap cacheBitmap = null;
2).定義緩沖區Cache的Canvas對象 Canvas cacheCanvas = null;
3).設置cacheCanvas將會繪制到內存的bitmap上。
cacheCanvas.setBitmap(cacheBitmap);
4). 將cacheBitmap繪制到該View上.
canvas.drawBitmap(cacheBitmap,0,0,p);
3.代碼實現
package com.lidong.android_ibrary.view;

import android.content.Context;
import android.graphics.Bitmap;
import android.graphics.Canvas;
import android.graphics.Color;
import android.graphics.Paint;
import android.graphics.Path;
import android.util.AttributeSet;
import android.view.MotionEvent;
import android.view.View;

/**
*@類名 : DrawView
*@描述 : 使用雙緩存技術實現繪制
*@時間 : 2016/4/26 9:18
*@作者: 李東
*@郵箱 : [email protected]
*@company: chni
*/
public class DrawView extends View {

 float preX;
 float preY;
 private Path path;
 private Paint paint = null;
 private int VIEW_WIDTH = 800;
 private int VIEW_HEIGHT = 600;
 //定義一個內存中圖片,將他作為緩沖區
 Bitmap cacheBitmap = null;
 //定義緩沖區Cache的Canvas對象
 Canvas cacheCanvas = null;

 public DrawView(Context context) {
  this(context,null);
 }

 public DrawView(Context context, AttributeSet attrs) {
  super(context, attrs);
  //創建一個與該VIew相同大小的緩沖區
  cacheBitmap = Bitmap.createBitmap(VIEW_WIDTH,VIEW_HEIGHT,Bitmap.Config.ARGB_8888);
  //創建緩沖區Cache的Canvas對象
  cacheCanvas = new Canvas();
  path = new Path();
  //設置cacheCanvas將會繪制到內存的bitmap上
  cacheCanvas.setBitmap(cacheBitmap);
  paint = new Paint();
  paint.setColor(Color.RED);
  paint.setFlags(Paint.DITHER_FLAG);
  paint.setStyle(Paint.Style.STROKE);
  paint.setStrokeWidth(5);
  paint.setAntiAlias(true);
  paint.setDither(true);
 }

 @Override
 protected void onDraw(Canvas canvas) {
  Paint p = new Paint();
  //將cacheBitmap繪制到該View
  canvas.drawBitmap(cacheBitmap,0,0,p);
  canvas.drawPath(path,paint);
 }


 @Override
 public boolean onTouchEvent(MotionEvent event) {
  //獲取拖動時間的發生位置
   float x = event.getX();
   float y = event.getY();
  switch (event.getAction()){
   case MotionEvent.ACTION_DOWN:
    path.moveTo(x,y);
    preX = x;
    preY = y;
    break;
   case MotionEvent.ACTION_MOVE:
    path.quadTo(preX,preY,x,y);
    preX = x;
    preY = y;
    break;
   case MotionEvent.ACTION_UP:
    //這是是調用了cacheBitmap的Canvas在繪制
    cacheCanvas.drawPath(path,paint);
    path.reset();
    break;
  }
  invalidate();//在UI線程刷新VIew
  return true;
 }
}
4.實現的效果
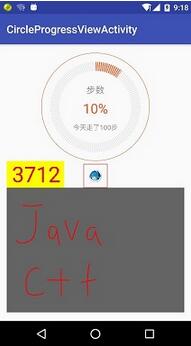
代碼下載:Android實現畫板代碼
以上就是本文的全部內容,希望對大家學習Android軟件編程有所幫助。
 Android NDK編寫一個HelloWorld
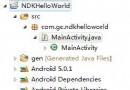
在上一篇博文中,我們搭建好了Android ndk 的開發環境,作為碼農,我們是不是先來寫一個HelloWorld來表示一下自己的到來。(1)首先在你的工作空間建一個An
 Android編程鬧鐘設置方法詳解
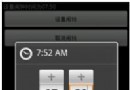
本文實例講述了Android編程鬧鐘設置方法。分享給大家供大家參考,具體如下:鬧鐘在生活中最常見了,在Android中可以通過AlarmManager來實現鬧鐘,Alar
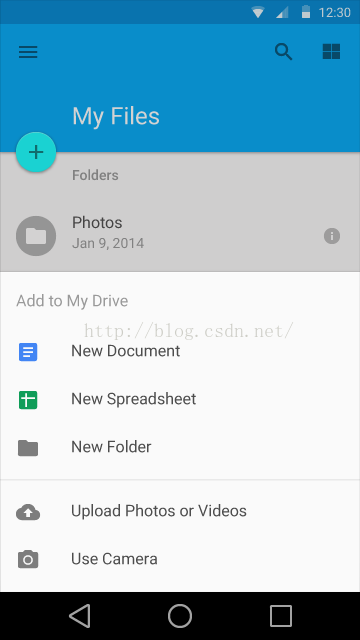 BottomSheet底部動作條使用
底部動作條底部動作條(Bottom Sheets)是一個從屏幕底部邊緣向上滑出的一個面板,使用這種方式向用戶呈現一組功能。底部動作條呈現了簡單、清晰、無需額外解釋的一組操
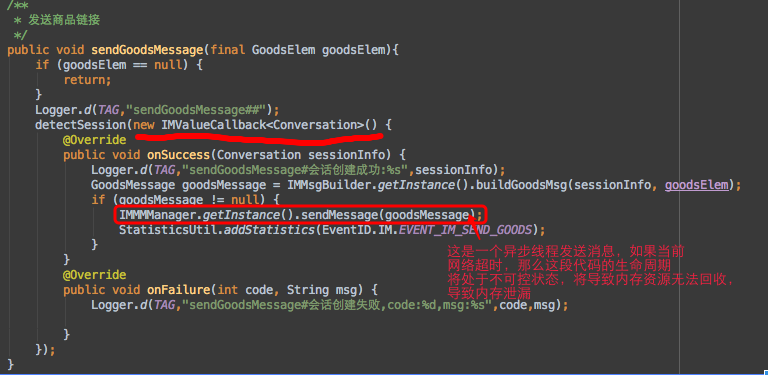 Android 非靜態內部類導致內存洩漏原因深入剖析
背景上周發現蘑菇街IM-Android代碼裡面,一些地方代碼編寫不當,存在內存洩漏的問題,在和瘋紫交流的過程中,發現加深了一些理解,所以決定寫一下分析思路,相互學習。內存