編輯:關於Android編程
本文實例講述了Android實現仿淘寶購物車增加和減少商品數量功能。分享給大家供大家參考,具體如下:
在前面一篇《Android實現的仿淘寶購物車demo示例》中,小編簡單的介紹了如何使用listview來實現購物車,但是僅僅是簡單的實現了列表的功能,隨之而來一個新的問題,買商品的時候,我們可能不止想買一件商品,想買多個,或許有因為某種原因點錯了,本來想買一件來著,小手不小心抖了一下,把數量錯點成了三個,這個時候就涉及到一個新的功能,那就是增加和減少商品的數量,今天這篇博文,小編就來和小伙伴們分享一下,如何實現淘寶購物車中增加和減少商品數量的demo。
首先,我們來布局XML文件,具體代碼如下所示:
<RelativeLayout xmlns:android="http://schemas.android.com/apk/res/android"
  xmlns:tools="http://schemas.android.com/tools"
  android:layout_width="match_parent"
  android:layout_height="match_parent"
  android:paddingBottom="@dimen/activity_vertical_margin"
  android:paddingLeft="@dimen/activity_horizontal_margin"
  android:paddingRight="@dimen/activity_horizontal_margin"
  android:paddingTop="@dimen/activity_vertical_margin"
  tools:context=".MainActivity" >
  <!-- 整體布局,包括增加和減少商品數量的符號以及中間的商品數量 -->
  <LinearLayout
    android:layout_width="fill_parent"
    android:layout_height="wrap_content"
    android:orientation="horizontal">
    <!-- 減少商品數量的布局 -->
    <Button
      android:id="@+id/addbt"
      android:layout_width="wrap_content"
      android:layout_height="wrap_content"
      android:textColor="#0157D3"
      android:text="-">
    </Button>
    <!-- 商品數量的布局 -->
    <EditText
      android:id="@+id/edt"
      android:text="0"
      android:layout_width="wrap_content"
      android:layout_height="wrap_content">
    </EditText>
    <!-- 增加商品數量的布局 -->
    <Button
      android:id="@+id/subbt"
      android:layout_width="wrap_content"
      android:layout_height="wrap_content"
      android:textColor="#0157D3"
      android:text="+">
    </Button>
    <!-- 顯示商品數量的布局 -->
    <TextView
      android:id="@+id/ttt"
      android:layout_width="wrap_content"
      android:layout_height="wrap_content">
    </TextView>
  </LinearLayout>
</RelativeLayout>
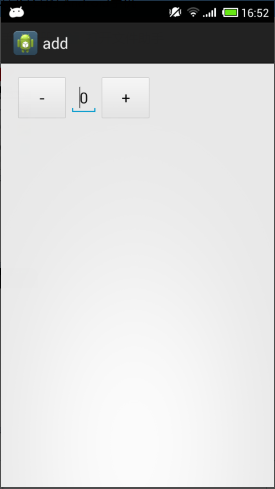
我們來看一下xml布局的頁面會是什麼樣子的nie,如下圖所示:
接著,我們來編寫Java類裡面的代碼,具體代碼如下所示:
package jczb.shoping.ui;
import android.R.string;
import android.app.Activity;
import android.os.Bundle;
import android.text.Editable;
import android.text.TextWatcher;
import android.view.View;
import android.view.View.OnClickListener;
import android.widget.Button;
import android.widget.EditText;
import android.widget.Toast;
public class ShoppingCartItemActivity extends Activity {
  private Button btAdd, btReduce;
  private EditText edtNumber;
  int num=0; //數量
  protected void onCreate(Bundle savedInstanceState) {
    super.onCreate(savedInstanceState);
    setContentView(R.layout.activity_shoppingcart_item);
    btAdd=(Button)findViewById(R.id.cart_pro_reduce);
    btReduce=(Button) findViewById(R.id.cart_pro_add);
    edtNumber=(EditText) findViewById(R.id.cart_pro_count);
    btAdd.setTag("+");
    btReduce.setTag("-");
    //設置輸入類型為數字
    edtNumber.setInputType(android.text.InputType.TYPE_CLASS_NUMBER);
    edtNumber.setText(String.valueOf(num));
    SetViewListener();
  }
  /**
   * 設置文本變化相關監聽事件
   */
  private void SetViewListener()
  {
    btAdd.setOnClickListener(new OnButtonClickListener());
    btReduce.setOnClickListener(new OnButtonClickListener());
    edtNumber.addTextChangedListener(new OnTextChangeListener());
  }
  /**
   * 加減按鈕事件監聽器
   *
   *
   */
  class OnButtonClickListener implements OnClickListener
  {
    @Override
    public void onClick(View v)
    {
      String numString = edtNumber.getText().toString();
      if (numString == null || numString.equals(""))
      {
        num = 0;
        edtNumber.setText("0");
      } else
      {
        if (v.getTag().equals("-"))
        {
          if (++num < 0) //先加,再判斷
          {
            num--;
            Toast.makeText(ShoppingCartItemActivity.this, "請輸入一個大於0的數字",
                Toast.LENGTH_SHORT).show();
          } else
          {
            edtNumber.setText(String.valueOf(num));
          }
        } else if (v.getTag().equals("+"))
        {
          if (--num < 0) //先減,再判斷
          {
            num++;
            Toast.makeText(ShoppingCartItemActivity.this, "請輸入一個大於0的數字",
                Toast.LENGTH_SHORT).show();
          } else
          {
            edtNumber.setText(String.valueOf(num));
          }
        }
      }
    }
  }
  /**
   * EditText輸入變化事件監聽器
   */
  class OnTextChangeListener implements TextWatcher
  {
    @Override
    public void afterTextChanged(Editable s)
    {
      String numString = s.toString();
      if(numString == null || numString.equals(""))
      {
        num = 0;
      }
      else {
        int numInt = Integer.parseInt(numString);
        if (numInt < 0)
        {
          Toast.makeText(ShoppingCartItemActivity.this, "請輸入一個大於0的數字",
              Toast.LENGTH_SHORT).show();
        } else
        {
          //設置EditText光標位置 為文本末端
          edtNumber.setSelection(edtNumber.getText().toString().length());
          num = numInt;
        }
      }
    }
    @Override
    public void beforeTextChanged(CharSequence s, int start, int count,
        int after)
    {
    }
    @Override
    public void onTextChanged(CharSequence s, int start, int before,
        int count)
    {
    }
  }
}
最後,我們來看一下運行效果,如下圖所示:
更多關於Android相關內容感興趣的讀者可查看本站專題:《Android布局layout技巧總結》、《Android視圖View技巧總結》、《Android編程之activity操作技巧總結》、《Android操作SQLite數據庫技巧總結》、《Android操作json格式數據技巧總結》、《Android數據庫操作技巧總結》、《Android文件操作技巧匯總》、《Android編程開發之SD卡操作方法匯總》、《Android開發入門與進階教程》、《Android資源操作技巧匯總》及《Android控件用法總結》
希望本文所述對大家Android程序設計有所幫助。
 地圖篇之百度地圖各種自定義需求
項目中的對地圖的各種需求,實現方式。需求1:自定義縮放按鈕,自定義當前位置按鈕解決方式:隱藏地圖本身自帶的縮放按鈕,添加自定義的縮放按鈕,實現點擊縮放地圖功能(一). 隱
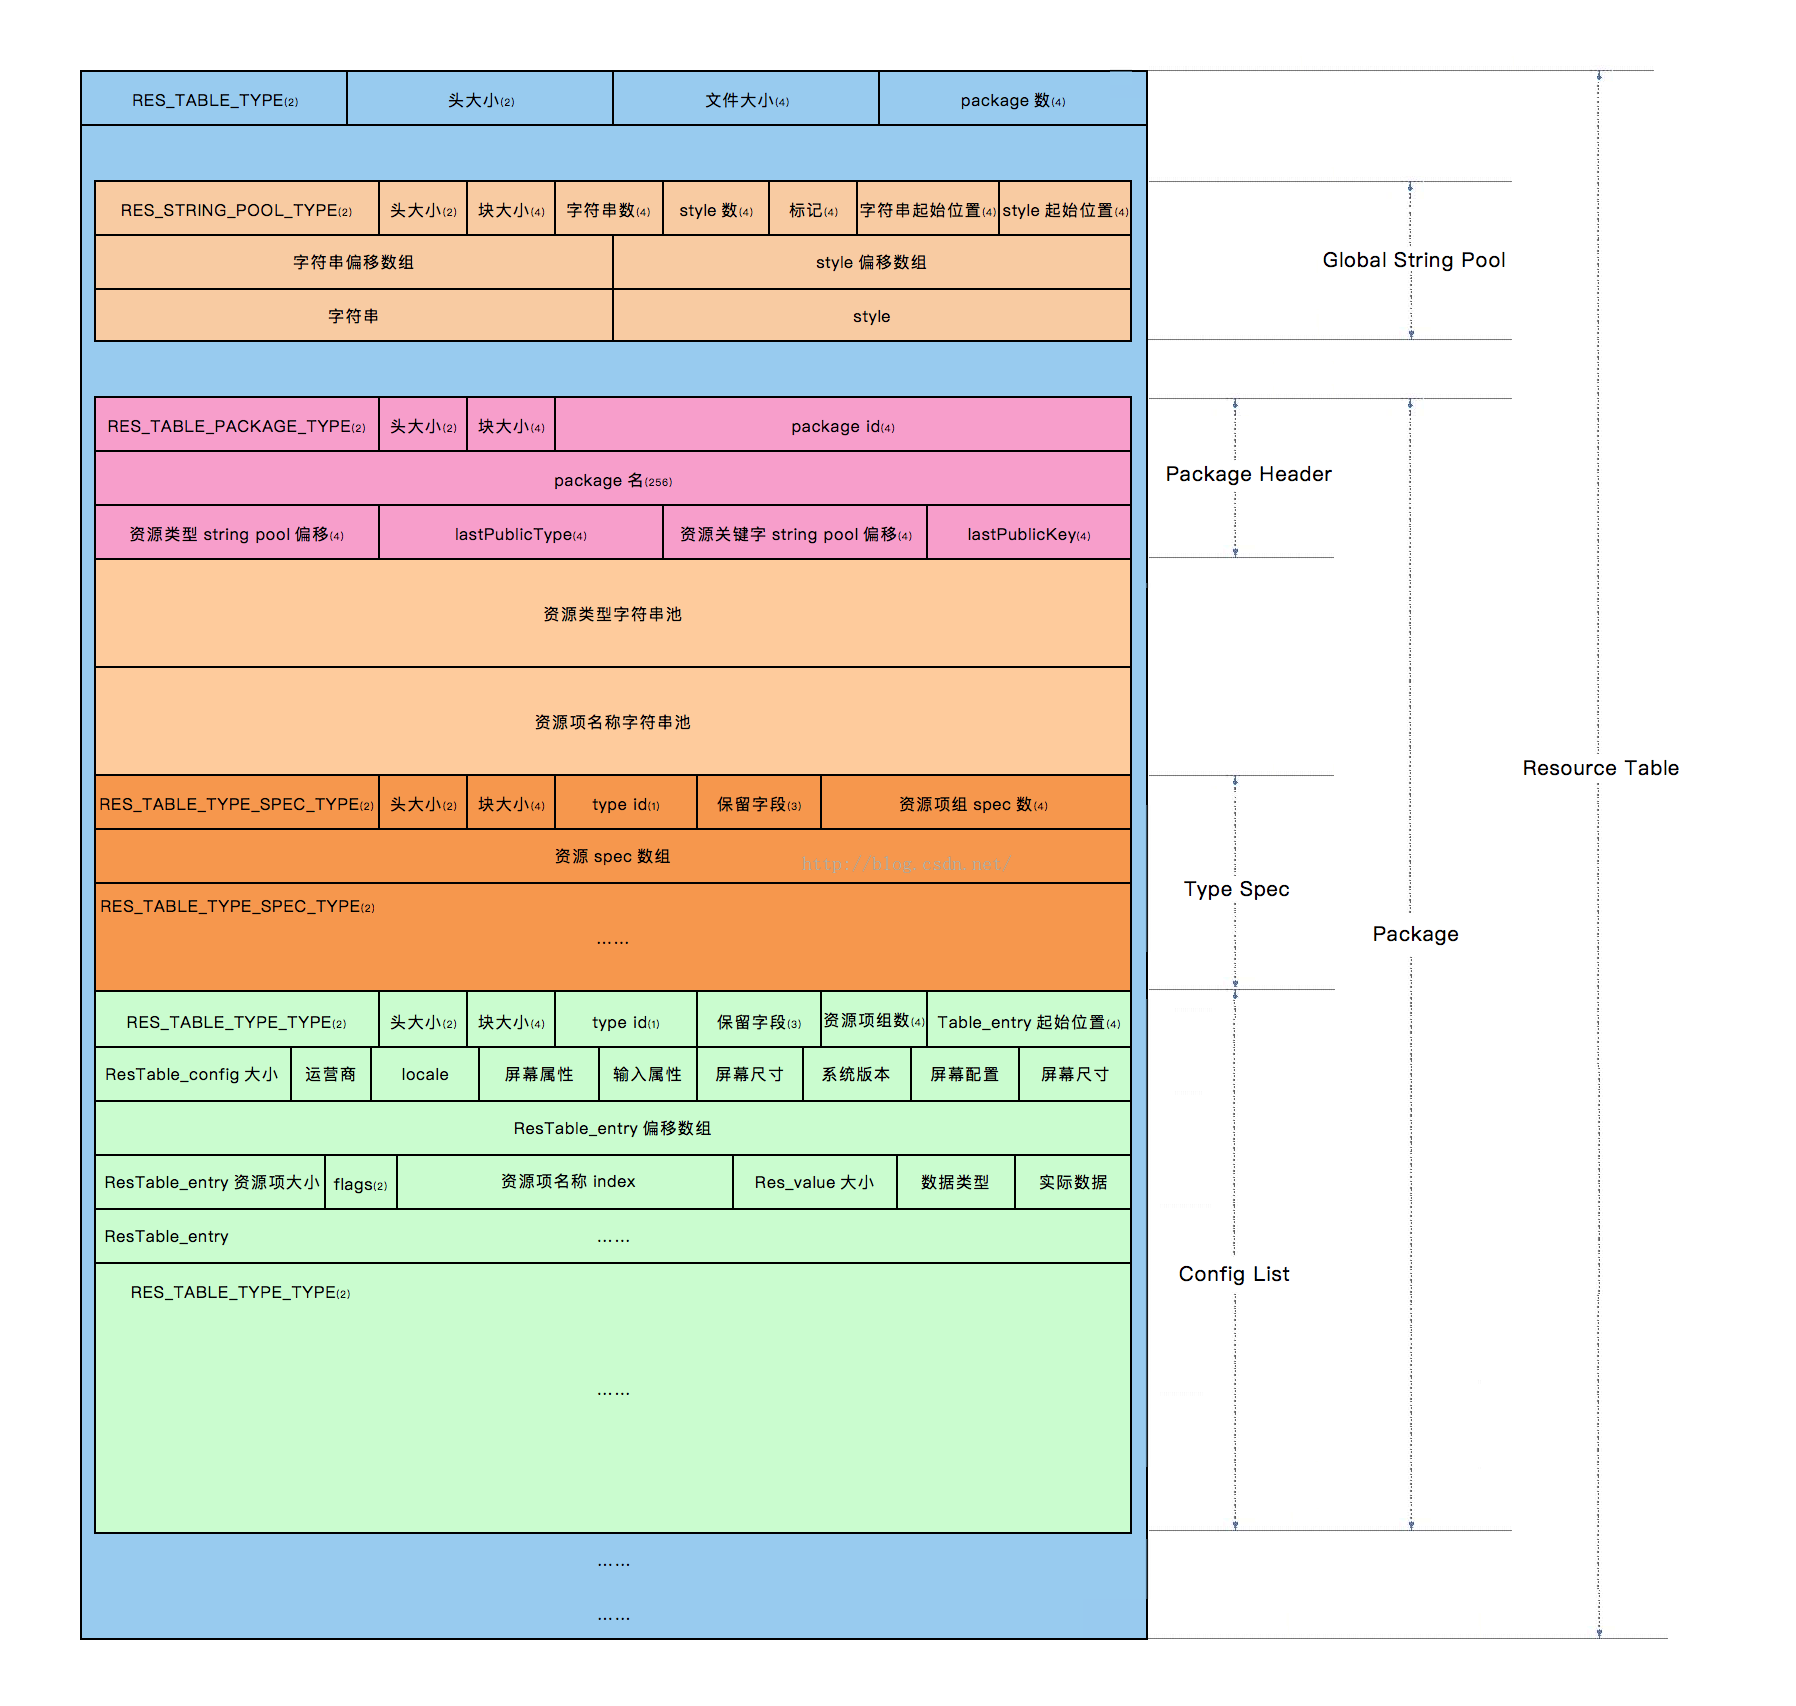 手把手教你解析Resources.arsc
一、前言對於APK裡面的Resources.arsc文件大家應該都知道是干什麼的,它實際上就是App的資源索引表。下面我會結合實例對它的格式做一下剖析,讀完這篇文章應該能
 學習整理 — 從安卓源碼上看Activity
安卓開發的四大組件是Activity, service, broadcast receiver, 和content provider。作為業余的開發者,可能不需要太深入理
 Android中生成彩色位置探測點的二維碼
前段時間項目有需要要顯示彩色探測點的二維碼,網上搜了下,有基於java,c等的源碼。網上的java源碼直接照搬有些問題,自己改了改。不說廢話,先上結果圖。原理其實很簡單,