編輯:關於Android編程
前言
如果不使用系統自帶的TitleBar(即Activity被設置@android:style/Theme.NoTitleBar),那就需要自己來寫進度條了,這裡封裝了一個自定義控件和加載網頁的公共Activity,方便使用。
正文
一、截圖

二、自定義控件
復制代碼
/**
 * 帶進度條的WebView
 * http://www.cnblogs.com/over140/archive/2013/03/07/2947721.html
 *
 */
@SuppressWarnings("deprecation")
public class ProgressWebView extends WebView {

 private ProgressBar progressbar;

 public ProgressWebView(Context context, AttributeSet attrs) {
  super(context, attrs);
  progressbar = new ProgressBar(context, null, android.R.attr.progressBarStyleHorizontal);
  progressbar.setLayoutParams(new LayoutParams(LayoutParams.FILL_PARENT, 3, 0, 0));
  addView(progressbar);
  //  setWebViewClient(new WebViewClient(){});
  setWebChromeClient(new WebChromeClient());
 }

 public class WebChromeClient extends android.webkit.WebChromeClient {
  @Override
  public void onProgressChanged(WebView view, int newProgress) {
   if (newProgress == 100) {
    progressbar.setVisibility(GONE);
   } else {
    if (progressbar.getVisibility() == GONE)
     progressbar.setVisibility(VISIBLE);
    progressbar.setProgress(newProgress);
   }
   super.onProgressChanged(view, newProgress);
  }

 }

 @Override
 protected void onScrollChanged(int l, int t, int oldl, int oldt) {
  LayoutParams lp = (LayoutParams) progressbar.getLayoutParams();
  lp.x = l;
  lp.y = t;
  progressbar.setLayoutParams(lp);
  super.onScrollChanged(l, t, oldl, oldt);
 }
}
復制代碼
三、加載網頁的公共Activity
public class WebActivity extends BaseActivity {

 private ProgressWebView webview;
 private String url;
 private String name;

 @Override
 protected void onCreate(Bundle savedInstanceState) {
  super.onCreate(savedInstanceState);
  setContentView(R.layout.commom_web);

  // ~~~ 獲取參數
  url = getIntent().getStringExtra("url");
  name = getIntent().getStringExtra("name");

  // ~~~ 綁定控件
  webview = (ProgressWebView) findViewById(R.id.webview);

  // ~~~ 設置數據
  titleText.setText(name);
  webview.getSettings().setJavaScriptEnabled(true);
  webview.setDownloadListener(new DownloadListener() {
   @Override
   public void onDownloadStart(String url, String userAgent, String contentDisposition, String mimetype, long contentLength) {
    if (url != null && url.startsWith("http://"))
     startActivity(new Intent(Intent.ACTION_VIEW, Uri.parse(url)));
   }
  });

  webview.loadUrl(url);
 }
}
commom_web.xml
<?xml version="1.0" encoding="utf-8"?>
<LinearLayout xmlns:android="http://schemas.android.com/apk/res/android"
 android:layout_width="fill_parent"
 android:layout_height="fill_parent"
 android:orientation="vertical" >

 <include layout="@layout/include_title" />

 <com.nmbb.ui.widget.ProgressWebView
  android:id="@+id/webview"
  android:layout_width="fill_parent"
  android:layout_height="fill_parent" />

</LinearLayout>
四、補充說明
1、還可以再優化一下,在標題欄加一個刷新按鈕。
2、如果加載的頁面有需要下載文件,需要設置setDownloadListener方法,根據項目實際需求定制。
3、自定義控件是在轉載的,忘記出處,感謝~~
本文就是對Android WebView 帶進度條的實例,有需要的可以參考下。
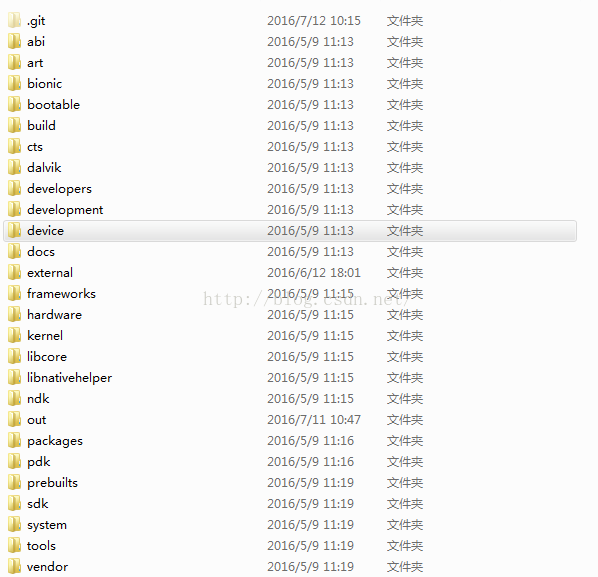 Android 5.1.1 源碼目錄結構
最近公司培訓新同事,我負責整理一點關於android的基礎知識,遙想當年,剛接觸android,也是一頭霧水,啥都不懂,就是靠看文檔和視頻,對andro
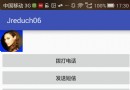 Android手機——讀取手機電話+短信+網頁+圖片+音樂+視頻+APK+通知欄消息+換頭像
<uses-permission android:name="android.permission.CALL_PHONE"/><us
 Android仿微信對話列表滑動刪除效果
微信對話列表滑動刪除效果很不錯的,借鑒了github上SwipeListView(項目地址:https://github.com/likebamboo/SwipeList
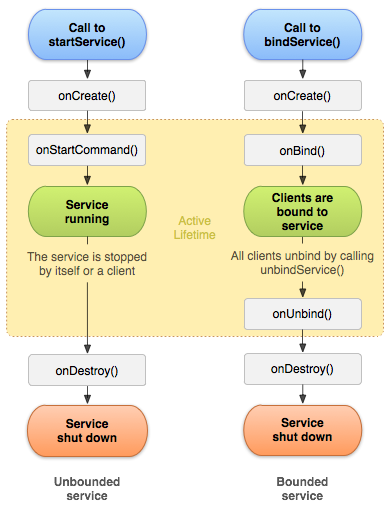
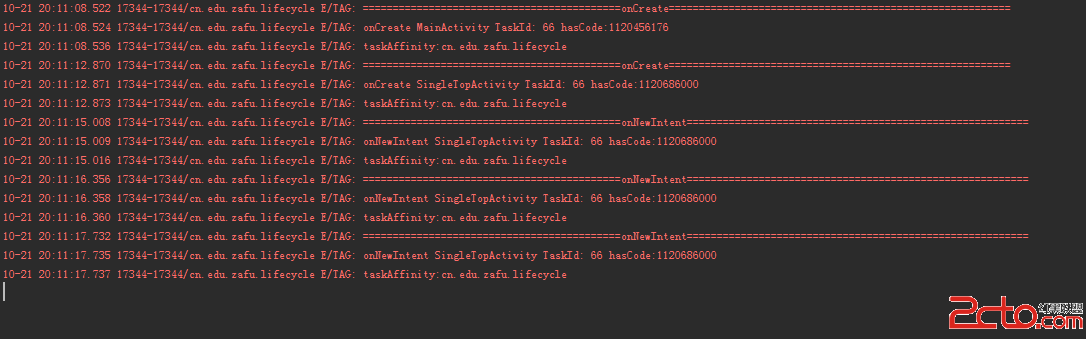 Android Activity啟動模式的功能驗證
之前一直都是看別人寫的啟動模式,發現網上大多數的內容都是抄襲來抄襲去,直到最近看了開發藝術這本書,發現之前對啟動模式的理解過於簡單,很多東西都沒有考慮到,為了加深理解,於