編輯:關於Android編程
這裡也要簡單說一下,這些小模塊並不是我原創,也是當時查資料找到的,由於時間比較久,原文鏈接已經忘記了,所以這裡就不列出引用鏈接了。不過這些代碼我都修改、完善過,也添加了一些注釋,希望對大家有幫助。
文字描邊這個功能挺實用的,如果是單一背景下顯示文字,文字描邊也可起到裝飾作用。如果是復雜背景下,尤其是在不同圖片背景下顯示文字,因為文字顏色很容易和圖片背景相似,這樣導致文字看不清楚,用戶體驗不佳。如果文字經過不同顏色描邊後,文字輪廓部分一種顏色,文字內部另一種顏色,因為一般情況下,圖片要麼和文字輪廓顏色相近,要麼和文字內部顏色相近,這樣不管圖片背景多復雜,文字都會整體顯示。
我這裡使用的方法是重寫TextView方式。
下面是相關代碼,整體比較簡單,很容易懂。
繼承的TextView文字描邊類如下:
public class StrokeTextView extends TextView
{
 private TextView outlineTextView = null;

  public StrokeTextView(Context context)
  {
    super(context);

    outlineTextView = new TextView(context);
    init();
  }

  public StrokeTextView(Context context, AttributeSet attrs)
  {
    super(context, attrs);

    outlineTextView = new TextView(context, attrs);
    init();
  }

  public StrokeTextView(Context context, AttributeSet attrs, int defStyle)
  {
    super(context, attrs, defStyle);

    outlineTextView = new TextView(context, attrs, defStyle);
    init();
  }

  public void init()
  {
    TextPaint paint = outlineTextView.getPaint();
    paint.setStrokeWidth(3);// 描邊寬度
    paint.setStyle(Style.STROKE);
    outlineTextView.setTextColor(Color.parseColor("#45c01a"));// 描邊顏色
    outlineTextView.setGravity(getGravity());
  }

  @Override
  public void setLayoutParams (ViewGroup.LayoutParams params)
  {
    super.setLayoutParams(params);
    outlineTextView.setLayoutParams(params);
  }

  @Override
  protected void onMeasure(int widthMeasureSpec, int heightMeasureSpec)
  {
   super.onMeasure(widthMeasureSpec, heightMeasureSpec);

    // 設置輪廓文字
   CharSequence outlineText = outlineTextView.getText();
    if (outlineText == null || !outlineText.equals(this.getText()))
    {
     outlineTextView.setText(getText());
      postInvalidate();
    }
    outlineTextView.measure(widthMeasureSpec, heightMeasureSpec);
  }

  @Override
  protected void onLayout (boolean changed, int left, int top, int right, int bottom)
  {
    super.onLayout(changed, left, top, right, bottom);
    outlineTextView.layout(left, top, right, bottom);
  }

  @Override
  protected void onDraw(Canvas canvas)
  {
   outlineTextView.draw(canvas);
    super.onDraw(canvas);
  }
}
布局文件如下:
<com.my.teststroketextview.StrokeTextView
    android:id="@+id/test_stroketextview"
    android:layout_width="wrap_content"
    android:layout_height="wrap_content"
    android:layout_marginLeft="10dp"
    android:layout_marginRight="10dp"
    android:textSize="25sp"
    android:textColor="@color/dark_gray"
    android:text="@string/hello_world" />
調用代碼如下:
private StrokeTextView test_stroketextview = null;

@Override
protected void onCreate(Bundle savedInstanceState)
{
 super.onCreate(savedInstanceState);
 setContentView(R.layout.activity_main);

 test_stroketextview = (StrokeTextView)findViewById(R.id.test_stroketextview);
 test_stroketextview.setText("Hello world!");
}
如果想更改文字描邊寬度,或者描邊顏色,需要修改上面的StrokeTextView類,當然也可以把這個類設計的更靈活些,這樣就可以動態的修改描邊寬度或者描邊顏色。
以上就是android中文字描邊功能的實現實例,希望本文對大家學習android開發有所幫助。請大家多多支持本站。
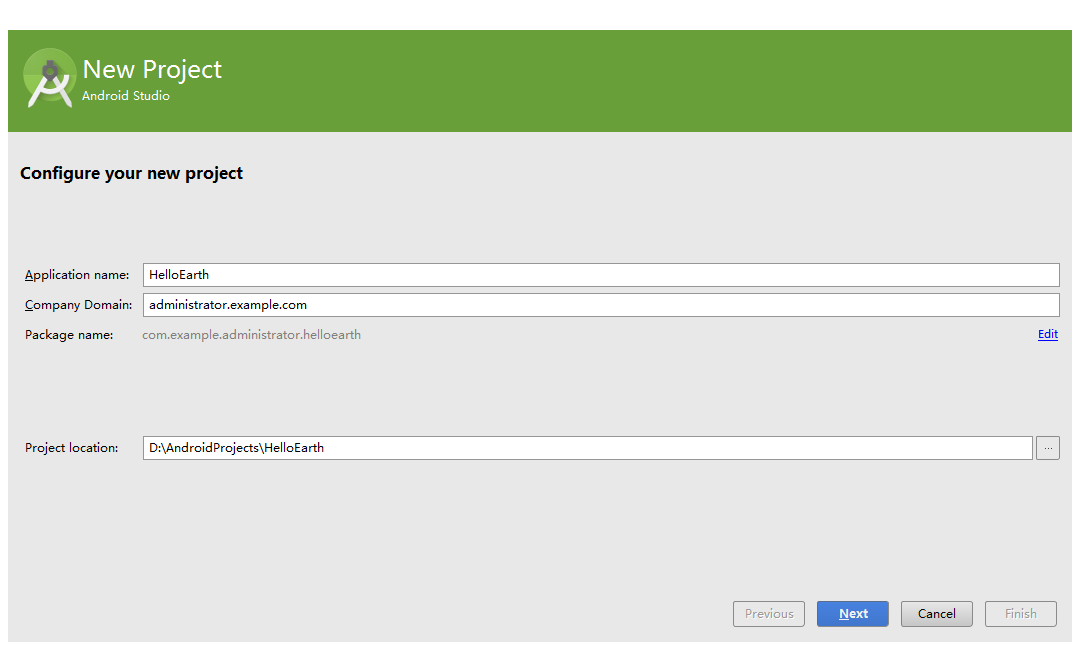 移動應用地圖工具包WhirlyGlobe-Maply新建android項目
WhirlyGlobe-Maply是一個基於OpenGL ES、專注移動應用的開源地圖工具包,支持ios和android平台,本文以android平台為例。環境:wind
 Android自定義view系列之99.99%實現QQ側滑刪除效果實例代碼詳解
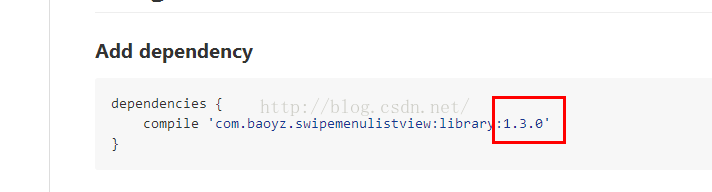
首先聲明本文是基於GitHub上baoyongzhang的SwipeMenuListView修改而來,該項目地址:https://github.com/baoyongzh
 安卓動畫系列之屬性動畫實現跳起落下圓圈運動
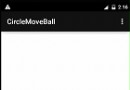
最近看了淘寶手機端的有些頁面是類似下面這個小球的加載效果。後來了解了下,淘寶是直接一個gif圖片實現效果的,這當然是最簡單的方法。為了加深了解屬性動畫,這次就做個類似的效
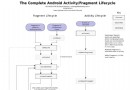 Android Activity和Fragment的生命周期圖