編輯:關於Android編程
前言
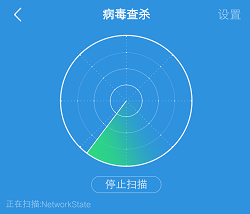
Android的TextView只能設置整個TextView的動畫,而不能設置每個文字的動畫。即使是使用TextSwitcher,也很難實現我想要的效果。
所以選擇自定義一個。大體思路是:繼承ViewGroup,設置Text的時候,每個文字為一個TextView,每隔一個固定時間,啟動每個TextView的動畫。
定義一個CTextView,繼承ViewGroup:
實現主要代碼:
public class CTextView extends ViewGroup {
}
向外提供一個方法setText(String text, final Animation animation, int duration),text為要顯示的字符串,animation為每個字符的動畫,duration為字符動畫的播放間隔。
該方法實現如下:
public void setText(String text, final Animation animation, int duration) {
  int time = 0;
  if(text != null && !text.isEmpty()) {
    char[] characters = text.toCharArray();
    for(char c : characters) {
      final TextView t = new TextView(context);
      //遍歷傳入的字符串的每個字符,生成一個TextView,並設置它的動畫
      t.setText(String.valueOf(c));
      t.setTextSize(28);
      Handler h = new Handler();
      //每隔duration時間,播放下一個TextView的動畫
      h.postDelayed(new Runnable() {
        @Override
        public void run() {
          addView(t);
          t.setAnimation(animation);
        }
      }, time);

      time += duration;

    }
  }
}
CTextView完整實現如下:
import android.content.Context;
import android.os.Handler;
import android.util.AttributeSet;
import android.view.View;
import android.view.ViewGroup;
import android.view.animation.Animation;
import android.widget.TextView;

/**
 * Created by cchen on 2014/9/2.
 */
public class CTextView extends ViewGroup {
  private Context context;

  public CTextView(Context context) {
    super(context);
    this.context = context;
  }

  public CTextView(Context context, AttributeSet attrs) {
    super(context, attrs);
    this.context = context;
  }

  public CTextView(Context context, AttributeSet attrs, int defStyle) {
    super(context, attrs, defStyle);
    this.context = context;
  }

  public void setText(String text, final Animation animation, int duration) {
    int time = 0;
    if(text != null && !text.isEmpty()) {
      char[] characters = text.toCharArray();
      for(char c : characters) {
        final TextView t = new TextView(context);
        //遍歷傳入的字符串的每個字符,生成一個TextView,並設置它的動畫
        t.setText(String.valueOf(c));
        t.setTextSize(28);
        Handler h = new Handler();
        //每隔duration時間,播放下一個TextView的動畫
        h.postDelayed(new Runnable() {
          @Override
          public void run() {
            addView(t);
            t.setAnimation(animation);
          }
        }, time);

        time += duration;

      }
    }
  }

  @Override
  protected void onMeasure(int widthMeasureSpec, int heightMeasureSpec) {
    int measureWidth = measureWidth(widthMeasureSpec);
    int measureHeight = measureHeight(heightMeasureSpec);
    // 計算自定義的ViewGroup中所有子控件的大小
    measureChildren(widthMeasureSpec, heightMeasureSpec);
    // 設置自定義的控件MyViewGroup的大小
    setMeasuredDimension(measureWidth, measureHeight);
  }

  @Override
  protected void onLayout(boolean changed, int l, int t, int r, int b) {
    int childLeft = 0;
    // 遍歷所有子視圖
    int childCount = getChildCount();
    for (int i = 0; i < childCount; i++) {
      View childView = getChildAt(i);

      // 獲取在onMeasure中計算的視圖尺寸
      int measureHeight = childView.getMeasuredHeight();
      int measuredWidth = childView.getMeasuredWidth();

      //將他們橫向排列
      childView.layout(childLeft, 0, childLeft + measuredWidth, measureHeight);

      childLeft += measuredWidth;
    }
  }

  private int measureWidth(int pWidthMeasureSpec) {
    int result = 0;
    int widthMode = MeasureSpec.getMode(pWidthMeasureSpec);// 得到模式
    int widthSize = MeasureSpec.getSize(pWidthMeasureSpec);// 得到尺寸

    switch (widthMode) {
      /**
       * mode共有三種情況,取值分別為MeasureSpec.UNSPECIFIED, MeasureSpec.EXACTLY,
       * MeasureSpec.AT_MOST。
       *
       *
       * MeasureSpec.EXACTLY是精確尺寸,
       * 當我們將控件的layout_width或layout_height指定為具體數值時如andorid
       * :layout_width="50dip",或者為FILL_PARENT是,都是控件大小已經確定的情況,都是精確尺寸。
       *
       *
       * MeasureSpec.AT_MOST是最大尺寸,
       * 當控件的layout_width或layout_height指定為WRAP_CONTENT時
       * ,控件大小一般隨著控件的子空間或內容進行變化,此時控件尺寸只要不超過父控件允許的最大尺寸即可
       * 。因此,此時的mode是AT_MOST,size給出了父控件允許的最大尺寸。
       *
       *
       * MeasureSpec.UNSPECIFIED是未指定尺寸,這種情況不多,一般都是父控件是AdapterView,
       * 通過measure方法傳入的模式。
       */
      case MeasureSpec.AT_MOST:
      case MeasureSpec.EXACTLY:
        result = widthSize;
        break;
    }
    return result;
  }

  private int measureHeight(int pHeightMeasureSpec) {
    int result = 0;

    int heightMode = MeasureSpec.getMode(pHeightMeasureSpec);
    int heightSize = MeasureSpec.getSize(pHeightMeasureSpec);

    switch (heightMode) {
      case MeasureSpec.AT_MOST:
      case MeasureSpec.EXACTLY:
        result = heightSize;
        break;
    }
    return result;
  }
}
然後在布局文件中使用該自定義組件:
<LinearLayout xmlns:android="http://schemas.android.com/apk/res/android"
  xmlns:tools="http://schemas.android.com/tools"
  android:layout_width="match_parent"
  android:layout_height="match_parent"
  android:orientation="vertical"
  tools:context=".NetworkTestActivity">

  <com.network.cchen.network.CTextView
    android:id="@+id/cTextView"
    android:layout_width="match_parent"
    android:layout_height="match_parent">
  </com.network.cchen.network.CTextView>

</LinearLayout>
在Activity中,調用CTextView的setText方法,傳入相關參數即可:
import android.app.Activity;
import android.os.Bundle;
import android.view.animation.AnimationUtils;

public class TestActivity extends Activity {

  @Override
  public void onCreate(Bundle savedInstanceState) {
    super.onCreate(savedInstanceState);

    setContentView(R.layout.activity_network_test);

    CTextView cTextView = (CTextView) findViewById(R.id.cTextView);
    cTextView.setText("Hello world", AnimationUtils.loadAnimation(this, R.anim.myanim), 300);
  }
}
其中的第二個參數為動畫,我想要的效果是從透明到不透明,myanim.xml:
<?xml version="1.0" encoding="utf-8"?>
<set xmlns:android="http://schemas.android.com/apk/res/android">
  <alpha
    android:duration="1000"
    android:fromAlpha="0.0"
    android:toAlpha="1.0" />
</set>
如果想實現文字逐個從右側飛入:
<?xml version="1.0" encoding="utf-8"?>
<set xmlns:android="http://schemas.android.com/apk/res/android">
  <translate
    android:duration="1000"
    android:fillAfter="true"
    android:fromXDelta="50%p"
    android:interpolator="@android:anim/anticipate_interpolator"
    android:toXDelta="0" />
</set>
總結
以上就是利用Android中的TextView實現逐字動畫的全部內容,實現後效果還是很贊的,感興趣的小伙伴們自己動手實踐起來吧。如果有疑問可以留言討論。
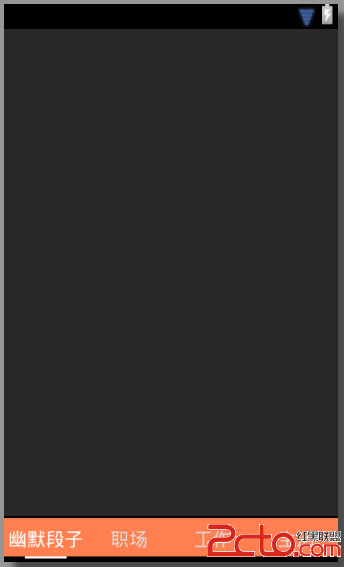 android項目剖解之ViewPager+Fragment 實現tabhost效果
項目中需要用到底欄導航欄,滑動或者點擊會切換上面的視圖,如圖: 這個效果使用Viewpager+Fragmen實現是主流方案,加入你之前對fragment
 android中子線程更新UI的方式淺析
一、為何寫作此文??你是不是經常看到很多書籍中說:不能在子線程中操作ui,不然會報錯。你是不是也遇到了如下的疑惑(見下面的代碼):@Override prote
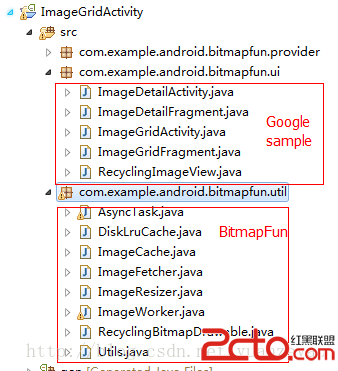 Android圖片處理神器BitmapFun源碼分析
作為一名Android開發人員,相信大家對圖片OOM的問題已經耳熟能詳了,關於圖片緩存和解決OOM的開源項目也是相當的多,被大家熟知的就是Un
 Android基礎入門教程——8.3.6 Paint API之—— Xfermode與PorterDuff詳解(三)
本節引言: 上一節,我們學習了Xfermode中的三兒子:PorterDuffXfermode構造方法中的為一個參數: PorterDuf