編輯:關於Android編程
Android實現讀取NFC卡卡號示例,具體如下:
1.權限
  <uses-permission android:name="android.permission.NFC" />
    <uses-feature
    android:name="android.hardware.nfc"
    android:required="true" />
2.注冊(靜態)
      <intent-filter>
        <action android:name="android.nfc.action.TAG_DISCOVERED" />
        <data android:mimeType="text/plain" />
      </intent-filter>
3.Activity
初始化
    //初始化NfcAdapter
    mNfcAdapter = NfcAdapter.getDefaultAdapter(this);
        // 初始化PendingIntent,當有NFC設備連接上的時候,就交給當前Activity處理
    pi = PendingIntent.getActivity(this, 0, new Intent(this, getClass())
        .addFlags(Intent.FLAG_ACTIVITY_SINGLE_TOP), 0);
啟動
  @Override
  protected void onResume() {
    super.onResume();
    mNfcAdapter.enableForegroundDispatch(this, pi, null, null); //啟動
  }
獲取數據
  @Override
  protected void onNewIntent(Intent intent) {
    super.onNewIntent(intent);
    // 當前app正在前端界面運行,這個時候有intent發送過來,那麼系統就會調用onNewIntent回調方法,將intent傳送過來
    // 我們只需要在這裡檢驗這個intent是否是NFC相關的intent,如果是,就調用處理方法
    if (NfcAdapter.ACTION_TAG_DISCOVERED.equals(intent.getAction())) {
      processIntent(intent);
    }
  }
解析
  /**
   * Parses the NDEF Message from the intent and prints to the TextView
   */
  private void processIntent(Intent intent) {
    //取出封裝在intent中的TAG
    Tag tagFromIntent = intent.getParcelableExtra(NfcAdapter.EXTRA_TAG);
    String CardId =ByteArrayToHexString(tagFromIntent.getId());
  }
private String ByteArrayToHexString(byte[] inarray) {
    int i, j, in;
    String[] hex = { "0", "1", "2", "3", "4", "5", "6", "7", "8", "9", "A",
        "B", "C", "D", "E", "F" };
    String out = "";


    for (j = 0; j < inarray.length; ++j) {
      in = (int) inarray[j] & 0xff;
      i = (in >> 4) & 0x0f;
      out += hex[i];
      i = in & 0x0f;
      out += hex[i];
    }
    return out;
  }
4.完整參考
<?xml version="1.0" encoding="utf-8"?>
<manifest xmlns:android="http://schemas.android.com/apk/res/android"
  package="cn.com.jslh.zjcdprogrect">

  <uses-permission android:name="android.permission.NFC" />
  <uses-permission android:name="android.permission.INTERNET" />

  <uses-feature
    android:name="android.hardware.nfc"
    android:required="true" />

  <application
    android:name=".common.MyApplication"
    android:allowBackup="true"
    android:icon="@mipmap/ic_launcher"
    android:label="@string/app_name"
    android:roundIcon="@mipmap/ic_launcher_round"
    android:supportsRtl="true"
    android:theme="@style/AppTheme">
    <activity android:name=".LoginActivity">
      <intent-filter>
        <action android:name="android.intent.action.MAIN" />

        <category android:name="android.intent.category.LAUNCHER" />
      </intent-filter>
    </activity>
    <activity android:name=".saoka.WorkActivity">
      <intent-filter>
        <action android:name="android.nfc.action.TAG_DISCOVERED" />
        <data android:mimeType="text/plain" />
      </intent-filter>
      <!--<meta-data android:name="android.nfc.action.TECH_DISCOVERED" android:resource="@xml/nfc_tech_filter" />-->
    </activity>
  </application>

</manifest>
package cn.com.jslh.zjcdprogrect.saoka;

import android.app.PendingIntent;
import android.content.Context;
import android.content.Intent;
import android.content.IntentFilter;
import android.nfc.NfcAdapter;
import android.nfc.Tag;
import android.os.Bundle;
import android.support.v7.app.AppCompatActivity;

import cn.com.jslh.zjcdprogrect.R;

public class WorkActivity extends AppCompatActivity {

  private NfcAdapter mNfcAdapter;
  private PendingIntent pi;
  private IntentFilter tagDetected;

  @Override
  protected void onCreate(Bundle savedInstanceState) {
    super.onCreate(savedInstanceState);
    setContentView(R.layout.activity_work);

    //初始化NfcAdapter
    mNfcAdapter = NfcAdapter.getDefaultAdapter(this);
    //初始化PendingIntent
    // 初始化PendingIntent,當有NFC設備連接上的時候,就交給當前Activity處理
    pi = PendingIntent.getActivity(this, 0, new Intent(this, getClass())
        .addFlags(Intent.FLAG_ACTIVITY_SINGLE_TOP), 0);
    // 新建IntentFilter,使用的是第二種的過濾機制
//    tagDetected = new IntentFilter(NfcAdapter.ACTION_TECH_DISCOVERED);
//    tagDetected.addCategory(Intent.CATEGORY_DEFAULT);
  }

  @Override
  protected void onNewIntent(Intent intent) {
    super.onNewIntent(intent);
    // 當前app正在前端界面運行,這個時候有intent發送過來,那麼系統就會調用onNewIntent回調方法,將intent傳送過來
    // 我們只需要在這裡檢驗這個intent是否是NFC相關的intent,如果是,就調用處理方法
    if (NfcAdapter.ACTION_TAG_DISCOVERED.equals(intent.getAction())) {
      processIntent(intent);
    }
  }

  @Override
  protected void onResume() {
    super.onResume();
    mNfcAdapter.enableForegroundDispatch(this, pi, null, null);
  }

  /**
   * Parses the NDEF Message from the intent and prints to the TextView
   */
  private void processIntent(Intent intent) {
    //取出封裝在intent中的TAG
    Tag tagFromIntent = intent.getParcelableExtra(NfcAdapter.EXTRA_TAG);
    String CardId =ByteArrayToHexString(tagFromIntent.getId());
  }

  public static void startActivity(Context context){
    Intent intent = new Intent();
    intent.setClass(context,WorkActivity.class);
    context.startActivity(intent);
  }

  private String ByteArrayToHexString(byte[] inarray) {
    int i, j, in;
    String[] hex = { "0", "1", "2", "3", "4", "5", "6", "7", "8", "9", "A",
        "B", "C", "D", "E", "F" };
    String out = "";


    for (j = 0; j < inarray.length; ++j) {
      in = (int) inarray[j] & 0xff;
      i = (in >> 4) & 0x0f;
      out += hex[i];
      i = in & 0x0f;
      out += hex[i];
    }
    return out;
  }
}
以上就是本文的全部內容,希望對大家的學習有所幫助,也希望大家多多支持本站。
 Android的事件分發與消費機制
一、Touch的三個重要方法在Android中,與觸摸事件也就是 Touch 相關的有三個重要方法,這三個方法共同完成觸摸事件的分發。public boolean dis
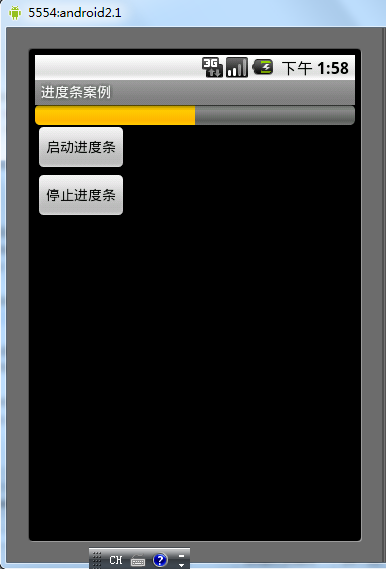 Android控件之ProgressBar用法實例分析
本文實例講述了Android控件之ProgressBar用法。分享給大家供大家參考。具體如下:ProgressBar位於android.widget包下,其繼承於View
 Android屏幕適配方案
Android屏幕適配出現的原因在我們學習如何進行屏幕適配之前,我們需要先了解下為什麼Android需要進行屏幕適配。由於Android系統的開放性,任何用戶、開發者、O
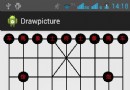 android 用paint,canvas 繪圖
(1)主要用了paint ,canvas 兩個類中的方法 (2)主要用了畫線和畫圓的方法。 (3)drawline(起始點軸坐標,起始點y軸坐標,終點軸坐標,終點y軸坐標