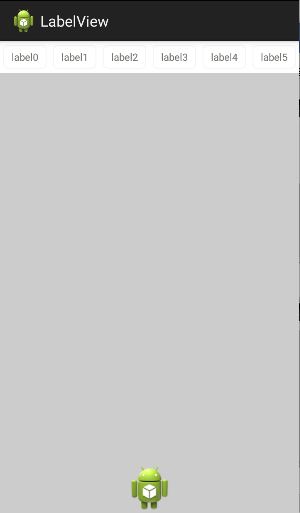
編輯:關於Android編程
本文實例講述了Android編程實現自定義Tab選項卡功能。分享給大家供大家參考,具體如下:
import android.app.TabActivity;
import android.content.Intent;
import android.os.Bundle;
import android.widget.*;
import android.widget.TabHost.OnTabChangeListener;
import android.os.Build;
import android.view.View;
import java.lang.reflect.Field;
import android.view.LayoutInflater;
public class testTabActivity extends TabActivity {
 /** Called when the activity is first created. */
   @Override
   public void onCreate(Bundle savedInstanceState) {
     super.onCreate(savedInstanceState);
     int width =45;
     int height =48;
     final TabHost tabs = getTabHost();
     final TabWidget tabWidget = tabs.getTabWidget();
     Field mBottomLeftStrip;
     Field mBottomRightStrip;
     LayoutInflater.from(this).inflate(R.layout.tab_views, tabs.getTabContentView(), true);
     tabs.addTab(tabs.newTabSpec("first tab")
       .setIndicator("信息",getResources().getDrawable(R.drawable.m))
       .setContent(new Intent(testTabActivity.this,OneActivty.class))
       );
     tabs.addTab(tabs.newTabSpec("second tab")
     .setIndicator("收藏",getResources().getDrawable(R.drawable.n))
     .setContent(R.id.content));
     tabs.addTab(tabs.newTabSpec("second tab")
       .setIndicator("設置",getResources().getDrawable(R.drawable.s))
       .setContent(R.id.content));
     for (int i =0; i < tabWidget.getChildCount(); i++) {
       /**
       * 設置高度、寬度,不過寬度由於設置為fill_parent,在此對它沒效果
       */
       tabWidget.getChildAt(i).getLayoutParams().height = height;
       tabWidget.getChildAt(i).getLayoutParams().width = width;
     /**
      * 設置tab中標題文字的顏色,不然默認為黑色
      */
      final TextView tv = (TextView) tabWidget.getChildAt(i).findViewById(android.R.id.title);
      tv.setTextColor(this.getResources().getColorStateList(android.R.color.white));
       /**
       * 此方法是為了去掉系統默認的色白的底角
       *
       * 在 TabWidget中mBottomLeftStrip、mBottomRightStrip
       * 都是私有變量,但是我們可以通過反射來獲取
       *
       * 由於還不知道Android 2.2的接口是怎麼樣的,現在先加個判斷好一些
       */
     if (Float.valueOf(Build.VERSION.RELEASE) <= 2.1) {
        try {
          mBottomLeftStrip = tabWidget.getClass().getDeclaredField ("mBottomLeftStrip");
          mBottomRightStrip = tabWidget.getClass().getDeclaredField ("mBottomRightStrip");
          if(!mBottomLeftStrip.isAccessible()) {
           mBottomLeftStrip.setAccessible(true);
          }
          if(!mBottomRightStrip.isAccessible()){
           mBottomRightStrip.setAccessible(true);
          }
         mBottomLeftStrip.set(tabWidget, getResources().getDrawable (R.drawable.no));
         mBottomRightStrip.set(tabWidget, getResources().getDrawable (R.drawable.no));
        } catch (Exception e) {
         e.printStackTrace();
        }
     } else {
     /**
     * 不做任何處理
     */
     }
     View vvv = tabWidget.getChildAt(i);
  if(tabs.getCurrentTab()==i){
      vvv.setBackgroundDrawable(getResources().getDrawable(R.drawable.tab_button));
  }
  else {
      vvv.setBackgroundDrawable(getResources().getDrawable(R.drawable.bar));
  }
     }
     /**
     * 當點擊tab選項卡的時候,更改當前的背景
     */
     tabs.setOnTabChangedListener(new OnTabChangeListener(){
  @Override
  public void onTabChanged(String tabId) {
   // TODO Auto-generated method stub
   for (int i =0; i < tabWidget.getChildCount(); i++) {
   View vvv = tabWidget.getChildAt(i);
   if(tabs.getCurrentTab()==i){
       vvv.setBackgroundDrawable(getResources().getDrawable(R.drawable.tab_button));
   }
   else {
       vvv.setBackgroundDrawable(getResources().getDrawable(R.drawable.bar));
   }
   }
  }});
   }
}
更多關於Android相關內容感興趣的讀者可查看本站專題:《Android開發入門與進階教程》、《Android編程之activity操作技巧總結》、《Android資源操作技巧匯總》、《Android文件操作技巧匯總》、《Android操作SQLite數據庫技巧總結》、《Android操作json格式數據技巧總結》、《Android數據庫操作技巧總結》、《Android編程開發之SD卡操作方法匯總》、《Android視圖View技巧總結》及《Android控件用法總結》
希望本文所述對大家Android程序設計有所幫助。
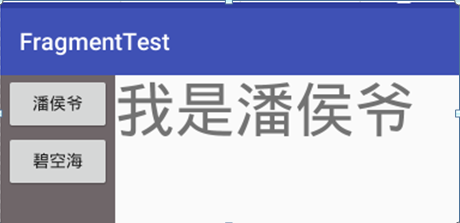
 Fragment重疊問題引發的思考
Fragment重疊問題相信很多開發者都遇到個這個問題,也解決個這個問題,前段時間偶然發現,公司項目偶然出現了Fragment重疊的Bug,心裡不由一緊,趕緊去stack
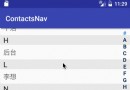 Android 通訊錄導航欄
這樣的一個控件實現起來不難,需要對自定義view有一定的基礎,也要了解怎麼實現一個集合的排序。大體思路很簡單。首先完成view的基本繪制以及相關的內部邏輯。 其次,就是要
 Android插件實例——360 DroidPlugin詳解
在中國找到錢不難,但你的一個點子不意味著是一個創業。你談一個再好的想法,比如我今天談一個創意說,新浪為什麼不收購GOOGLE呢?這個創意很好。新浪一收購GOOGLE,是
 Android Rsa數據加解密的介紹與使用示例
Rsa加密RSA是目前最有影響力的公鑰加密算法,RSA也是第一個既能用於數據加密也能用於數字簽名的算法。該算法基於一個十分簡單的數論事實:將兩個大素數相乘十分容易,但那時