編輯:Android開發實例
tank 教你做在android上的簡單的google map程序
第一步:申請google key
1.找debug.keystore的路徑
myeclipse中
window -->preferences -->android-->build-->default debug keystore
default debug keystore ="C:\Documents and Settings\Administrator\.android\debug.keystore"
cmd 中:
keytool -list -alias androiddebugkey -keystore "C:\Documents and
Settings\Administrator\.android\debug.keystore"
輸入:
android
就會得到指紋 7A:71:D1:*:EC:40:*:18:52:0A:08:B1:05:*:*:*
申請GOOGEL KEY 網址:http://code.google.com/intl/zh-CN/android/add-ons/google-apis/maps- api-
signup.html,輸入後注冊一個賬號就可以得到 key了
第二步:
新建工程,注意在新建android project中build target中一定 要選google apis
前面自己的SDK因為安裝沒有完全所以build target中沒有google apis,害自己困惱了點時間
OK沒有的話重新安裝一下SDK
新建一個類繼承mapactivity
不多說貼源碼:
package com.android.google.tank;

import java.util.List;

import android.graphics.drawable.Drawable;
import android.os.Bundle;
import android.view.View;
import android.view.View.OnClickListener;
import android.widget.Button;

import com.google.android.maps.GeoPoint;
import com.google.android.maps.MapActivity;
import com.google.android.maps.MapController;
import com.google.android.maps.MapView;
import com.google.android.maps.Overlay;
import com.google.android.maps.OverlayItem;

public class MyGoogleMap extends MapActivity {
	private MapView mapView;
	private MapController mc;

	@Override
	protected boolean isRouteDisplayed() {
		// TODO Auto-generated method stub
		return false;
	}

	@Override
	protected void onCreate(Bundle icicle) {
		// TODO Auto-generated method stub
		super.onCreate(icicle);

               setContentView(R.layout.main);


		mapView = (MapView) findViewById(R.id.map);
		mapView.setTraffic(true);//交通模式
		mapView.setStreetView(false);//街道模式
		mapView.setSatellite(false);//衛星模式
		mc = mapView.getController();

		GeoPoint gp = new GeoPoint((int) (31.132259 * 1000000),
				(int) (121.180762 * 1000000)); // 地理坐標 上海
		mc.animateTo(gp);
		mc.setZoom(10);//縮放比例
		//添加縮放功能事件
		//放大
		Button btnBig=(Button) findViewById(R.id.btnBig);
		btnBig.setOnClickListener(new OnClickListener() {

			@Override
			public void onClick(View v) {
				// TODO Auto-generated method stub
				mapView.getController().setZoom(mapView.getZoomLevel()+1);
			}
		});
		//縮小
		Button btnSmall=(Button) findViewById(R.id.btnSmall);
		btnSmall.setOnClickListener(new OnClickListener() {

			@Override
			public void onClick(View v) {
				// TODO Auto-generated method stub
				mapView.getController().setZoom(mapView.getZoomLevel()-1);
			}
		});


	}

}
在Androidmanifest.xml中配置權限和google的加載包:
<?xml version="1.0" encoding="utf-8"?>
<manifest xmlns:android="http://schemas.android.com/apk/res/android"
	package="com.android.google.tank" android:versionCode="1"
	android:versionName="1.0">
	<uses-permission android:name="android.permission.ACCESS_COARSE_LOCATION" />
	<uses-permission android:name="android.permission.INTERNET" />
	<!--		訪問網絡的權限	-->
	<application android:icon="@drawable/icon" android:label="@string/app_name">
		<uses-library android:name="com.google.android.maps" />
		<!--			加載google包		-->
		<activity android:name="com.android.google.tank.MyGoogleMap"
			android:label="MapsDemo">
			<intent-filter>
				<category android:name="android.intent.category.LAUNCHER"></category>
				<action android:name="android.intent.action.MAIN"></action>
			</intent-filter>
		</activity>
	</application>


</manifest>
main.xml中:
<?xml version="1.0" encoding="utf-8"?>
<LinearLayout xmlns:android="http://schemas.android.com/apk/res/android"
	android:orientation="vertical" android:layout_width="fill_parent"
	android:layout_height="fill_parent">

	<LinearLayout android:id="@+id/LinearLayout01"
		android:layout_width="wrap_content" android:layout_height="wrap_content">
		<Button android:id="@+id/btnBig" android:text="放大"
			android:layout_width="wrap_content" android:layout_height="wrap_content"></Button>
		<Button android:id="@+id/btnSmall" android:text="縮小"
			android:layout_width="wrap_content" android:layout_height="wrap_content"></Button>
	</LinearLayout>
	<com.google.android.maps.MapView
		android:id="@+id/map" android:layout_width="match_parent"
		android:layout_height="match_parent" android:enabled="true"
		android:clickable="true" android:apiKey="你申請的goole key" />

</LinearLayout>
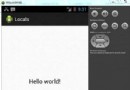
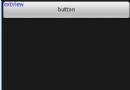
ok 了,點擊運行,就可以看到很cool的google地圖了!
不過注意,一定要是可以連接網絡的,模擬器要可以上網!模擬器的平台也要選擇google api
下幾篇我將貼出在google上自定義標注功能,和 如何獲取gps自己的位置(經緯度!)
效果如圖:
轉自:http://www.cnblogs.com/tankaixiong/archive/2010/10/21/1857741.html
 Android本地化
Android應用程序可以在許多不同地區的許多設備上運行。為了使應用程序更具交互性,應用程序應該處理以適合應用程序將要使用的語言環境方面的文字,數字,文件等。在本章中,我
 深入Android 五大布局對象的應用
FrameLayout(幀布局),LinearLayout (線性布局),AbsoluteLayout(絕對布局),RelativeLayout(相對布局),T
 Android編程之菜單實現方法
本文實例講述了Android編程之菜單實現方法。分享給大家供大家參考,具體如下: 菜單是許多應用程序不可或缺的一部分,Android中更是如此,所有搭載Andro
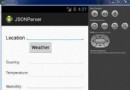
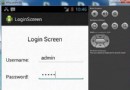
 Android字段驗證的實例代碼
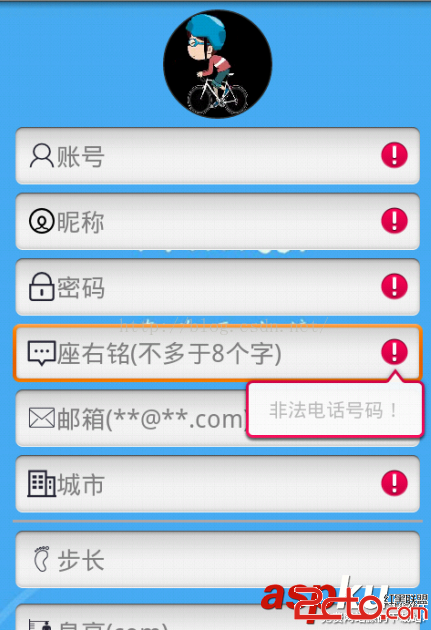
這篇文章主要介紹了Android字段驗證的實例代碼的相關資料,代碼簡單易懂,具有參考借鑒價值,需要的朋友可以參考下 先給大家展示效果圖: