編輯:Android開發實例
列表(ListView)、表格(GridView),這在手機應用上面肯定是少不了的,怎樣實現比較復雜一點的界面呢,先看一下我的效果圖。
這樣布局的情況是最基本的,也是最常用的,網上關於這樣的布局有多種版本的實現方法,但是有很多需要自己實現Adapter,那樣子是比較復雜而且沒有必要的,因為我們有簡約而不簡單的SimpleAdapter。
1. ListView
SimpleAdapter的核心代碼:
		for (int i = 0; i < 10; i++) {
			Map<String, Object> map = new HashMap<String, Object>();
			map.put("PIC", R.drawable.pic);
			map.put("TITLE", "Test Title");
			map.put("CONTENT", "Test Content");
			contents.add(map);
		}
		SimpleAdapter adapter = new SimpleAdapter(this,
				(List<Map<String, Object>>) contents, R.layout.listitem,
				new String[] { "PIC", "TITLE", "CONTENT" }, new int[] {
						R.id.listitem_pic, R.id.listitem_title,
						R.id.listitem_content });

		listView.setAdapter(adapter);
listitem的Layout:
<?xml version="1.0" encoding="utf-8"?>

<RelativeLayout xmlns:android="http://schemas.android.com/apk/res/android"
	android:layout_width="fill_parent" android:layout_height="?android:attr/listPreferredItemHeight">
	<ImageView android:id="@+id/listitem_pic"
		android:layout_width="wrap_content" android:layout_height="fill_parent"
		android:layout_alignParentTop="true" android:layout_alignParentBottom="true"
		android:src="@drawable/pic" android:adjustViewBounds="true"
		android:padding="2dip" />
	<TextView android:id="@+id/listitem_title"
		android:layout_width="wrap_content" android:layout_height="wrap_content"
		android:layout_toRightOf="@+id/listitem_pic"
		android:layout_alignParentRight="true" android:layout_alignParentTop="true"
		android:layout_above="@+id/listitem_content"
		android:layout_alignWithParentIfMissing="true" android:gravity="center_vertical"
		android:text="@+id/listitem_title" android:textSize="22px" />
	<TextView android:id="@+id/listitem_content"
		android:layout_width="fill_parent" android:layout_height="wrap_content"
		android:layout_toRightOf="@+id/listitem_pic"
		android:layout_alignParentBottom="true"
		android:layout_alignParentRight="true" android:singleLine="true"
		android:ellipsize="marquee" android:text="@+id/item_content"
		android:textSize="14px" />
</RelativeLayout>
2. GridView
SimpleAdapter的核心代碼:
		for (int i = 0; i < 10; i++) {
			Map<String, Object> map = new HashMap<String, Object>();
			map.put("PIC", R.drawable.pic);
			map.put("TITLE", "Test Title");
			contents.add(map);
		}
		SimpleAdapter adapter = new SimpleAdapter(this,
				(List<Map<String, Object>>) contents, R.layout.griditem,
				new String[] { "PIC", "TITLE" }, new int[] { R.id.griditem_pic,
						R.id.griditem_title, });

		gridView.setAdapter(adapter);
griditem的Layout:
<?xml version="1.0" encoding="utf-8"?>
<LinearLayout xmlns:android="http://schemas.android.com/apk/res/android"
	android:layout_height="fill_parent" android:layout_width="fill_parent"
	android:orientation="vertical">
	<ImageView android:id="@+id/griditem_pic"
		android:layout_width="wrap_content" android:layout_height="wrap_content"
		android:layout_gravity="center_horizontal">
	</ImageView>
	<TextView android:id="@+id/griditem_title"
		android:layout_width="wrap_content" android:layout_height="wrap_content"
		android:layout_gravity="center_horizontal" android:text="test">
	</TextView>
</LinearLayout>
最後附上代碼:test.zip
 Android ApiDemo示例解讀系列之十:App
QuickContactsDemo示例介紹了如果使用Content Provider來訪問Android系統的Contacts 數據庫。 Cont
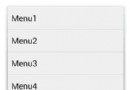 用Android MenuInflater創建菜單項的方法步驟
之前在一篇文章中已經講過了菜單項的創建方法,但是那種方法效率較低,維護不易,現在實現另一種方法創建菜單。 MenuInflater,通過此類我們可以輕松的創建菜單
 Android本地化
Android應用程序可以在許多不同地區的許多設備上運行。為了使應用程序更具交互性,應用程序應該處理以適合應用程序將要使用的語言環境方面的文字,數字,文件等。在本章中,我
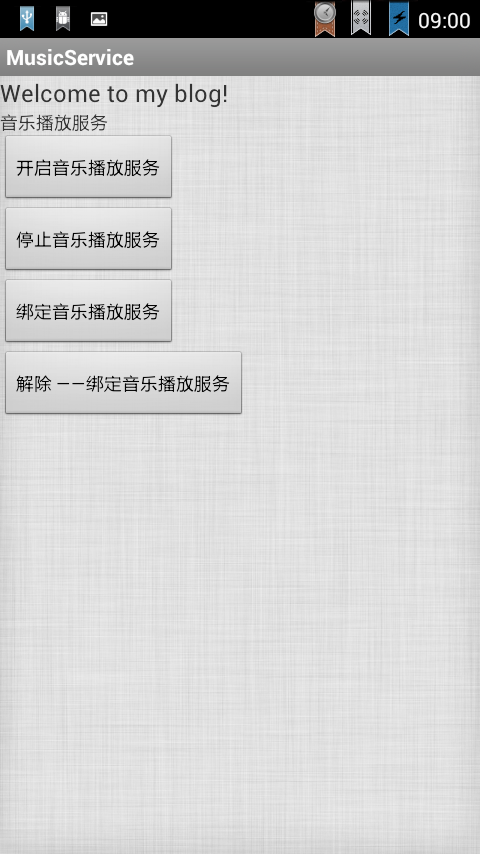 Android Service(不和用戶交互應用組件)案例分析
Service是在一段不定的時間運行在後台,不和用戶交互應用組件。每個Service必須在manifest中 通過<service>來聲明。可以通過c