編輯:Android開發實例
大家好今天簡單講一下Android狀態欄提醒,這個在開發中也會經常使用,當我們插上USB會有狀態欄提醒,來短信時也會有狀態欄的提醒。
而在Android中有提醒功能的也可以用AlertDialog,但是我們要審重的使用,因為當使用AlertDialog 的時候,用戶正在進行的操作將會被打斷
因為當前焦點被AlertDialog得到。我們可以想像一下,當用戶打游戲正爽的時候,這時候來了一條短信。如果這時候短信用AlertDialog提醒,用戶必須先去處理這條提醒,從而才能繼續游戲。用戶可能會活活被氣死。而使用Notification就不會帶來這些麻煩事,用戶完全可以打完游戲再去看這條短信。所以在開發中應根據實際需求,選擇合適的控件。
好了我今天又簡單寫了一個Demo, 教大家如何使用Notification,大致分以下幾個步驟:
第一步:新建一個Android工程命名為NotificationDemo.
第二步:修改main.xml代碼如下:
- <?xml version="1.0" encoding="utf-8"?>
- <LinearLayout xmlns:android="http://schemas.android.com/apk/res/android"
- android:orientation="vertical"
- android:layout_width="fill_parent"
- android:layout_height="fill_parent"
- >
- <TextView
- android:layout_width="fill_parent"
- android:layout_height="wrap_content"
- android:text="Welcome to Mr Wei's blog"
- />
- <Button
- android:id="@+id/showButton"
- android:layout_width="fill_parent"
- android:layout_height="wrap_content"
- android:text="showNotification"
- />
- <Button
- android:id="@+id/cancelButton"
- android:layout_width="fill_parent"
- android:layout_height="wrap_content"
- android:text="cancelNotification"
- />
- </LinearLayout>
第三步:修改NotificationDemo.java代碼如下:
- package com.tutor.notification;
- import android.app.Activity;
- import android.app.Notification;
- import android.app.NotificationManager;
- import android.app.PendingIntent;
- import android.content.Context;
- import android.content.Intent;
- import android.os.Bundle;
- import android.view.View;
- import android.view.View.OnClickListener;
- import android.widget.Button;
- public class NotificationDemo extends Activity implements OnClickListener{
- private Context mContext;
- private Button showButton,cancelButton;
- private Notification mNotification;
- private NotificationManager mNotificationManager;
- private final static int NOTIFICATION_ID = 0x0001;
- @Override
- public void onCreate(Bundle savedInstanceState) {
- super.onCreate(savedInstanceState);
- setContentView(R.layout.main);
- setupViews();
- }
- //這裡是初始化一些操作,可以看到onCreate()方法裡代碼非常簡潔。
- public void setupViews(){
- mContext = NotificationDemo.this;
- showButton = (Button)findViewById(R.id.showButton);
- cancelButton = (Button)findViewById(R.id.cancelButton);
- mNotification = new Notification(R.drawable.icon,"This is a notification.",System.currentTimeMillis());
- //將使用默認的聲音來提醒用戶
- mNotification.defaults = Notification.DEFAULT_SOUND;
- mNotificationManager = (NotificationManager)this.getSystemService(NOTIFICATION_SERVICE);
- showButton.setOnClickListener(this);
- cancelButton.setOnClickListener(this);
- }
- //按鈕點擊事件響應
- public void onClick(View v) {
- if(v == showButton){
- Intent mIntent = new Intent(mContext,NotificationDemo.class);
- //這裡需要設置Intent.FLAG_ACTIVITY_NEW_TASK屬性
- mIntent.setFlags(Intent.FLAG_ACTIVITY_NEW_TASK);
- PendingIntent mContentIntent =PendingIntent.getActivity(mContext,0, mIntent, 0);
- //這裡必需要用setLatestEventInfo(上下文,標題,內容,PendingIntent)不然會報錯.
- mNotification.setLatestEventInfo(mContext, "10086", "您的當前話費不足,請充值.哈哈~", mContentIntent);
- //這裡發送通知(消息ID,通知對象)
- mNotificationManager.notify(NOTIFICATION_ID, mNotification);
- }else if(v == cancelButton){
- //取消只要把通知ID傳過來就OK了.
- mNotificationManager.cancel(NOTIFICATION_ID);
- }
- }
- }
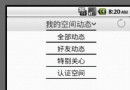
第四步:運行Android工程,效果如下圖所示:
 Android控件系列之TextView使用介紹
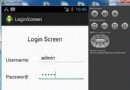
學習目的: 1、了解在Android中如何使用TextView控件 2、掌握TextView控件重要屬性 作用:TextView類似一般UI中的Label,Tex
 Android本地化
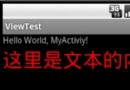
Android應用程序可以在許多不同地區的許多設備上運行。為了使應用程序更具交互性,應用程序應該處理以適合應用程序將要使用的語言環境方面的文字,數字,文件等。在本章中,我
 Android加載Spinner
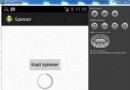
可以顯示在的Android任務,通過加載進度條的進展。進度條有兩種形狀。加載欄和加載微調(spinner)。在本章中,我們將討論微調(spinner)。Spinner 用
 Android JetPlayer實例
Android平台包括JET引擎,可以在應用程序中添加JET音頻內容的交互播放。 Android提供JetPlayer類來處理這些東西。為了使用Jet內容,需要使用Jet