編輯:Android開發實例
前言
本章內容是android.widget.TabWidget,版本為Android 3.0 r1,本章配備完善的截圖、鏈接和示例代碼,翻譯來自"madgoat"。
正文
一、結構
public class TabWidget extends LinearLayout
implements View.OnFocusChangeListener
java.lang.Object
android.view.View
android.view.ViewGroup
android.widget.LinearLayout
android.widget.TabWidget
二、概述
顯示選項卡標簽的列表,用於代表父選項卡集合的每一頁。當前widget的容器對象是TabHost。當用戶選擇一個選項卡時,此對象給父容器對象TabHost發送一個消息,告訴TabHost切換到對應的頁面顯示。此對象上的很多方法,你通常不會直接使用。容器TabHost被用來添加標簽,添加並管理回調函數。你可能會調用此對象以迭代選項卡列表,或者調整選項卡列表的布局,但大多數方法應該是通過容器TabHost對象調用。
參見Tab Layout tutorial。
三、XML屬性
屬性名稱
描述
android:divider
可繪制對象,被繪制在選項卡窗口間充當分割物。
android:tabStripEnabled
確定是否在選項卡繪制
android:tabStripLeft
被用來繪制選項卡下面的分割線左邊部分的可視化對象。
android:tabStripRight
被用來繪制選項卡下面的分割線右邊部分的可視化對象。
四、公共方法
public void addView (View child)
增加子視圖。如果子視圖沒有設置布局參數,那麼將為子視圖設置此ViewGroup默認的布局參數。
參數
child 新增的子視圖
public void childDrawableStateChanged (View child)
如果調用addStatesFromChildren函數返回true,刷新此組的可視化對象的狀態(包括它的子元素的狀態)。
參數
child 可視化對象狀態被改變的子元素。
public void dispatchDraw (Canvas canvas)
繪制時調用此方法來繪制子視圖。派生類在被繪制之前,為獲取控制可能會重寫此方法(但必須在它自己的視圖已經被繪制之後)。
參數
canvas 繪制視圖的畫布(canvas)
public void focusCurrentTab (int index)
設置當前選項卡並且讓其獲得焦點。此方法確保獲取焦點的選項卡窗口匹配選中的窗口,一般情況下類似 setCurrentTab(int)。通常當我們通過操作UI實現時,這些都不是問題,因為UI負責調用TabWidget.onFocusChanged(),但如果我們通過程序控制選中選項卡窗口,那麼我們就必須確認保持焦點。(譯者注:setCurrentTab(int)執行後,選中指定索引的選項卡窗口,但不獲取焦點。focusCurrentTab(int)執行後,不僅通過調用setCurrentTab(int)選中指定索引的選項卡窗口還獲取焦點。)
參數
index 你想要設置焦點(橘色高亮)並且選中(選項卡被至於部件widget的前端)的選項卡。
參見
setCurrentTab(int)
public View getChildTabViewAt (int index)
返回位於指定索引位置的選項卡標識符的視圖
參數
index 選項卡指示符視圖返回的從零開始的索引
返回值
在提供的索引位置上的選項卡指示符視圖
public int getTabCount ()
返回選項卡的數量
返回值
選項卡指示符視圖的數量
public boolean isStripEnabled ()
指明選項卡指示符的底部分隔線是否繪制
public void onFocusChange (View v, boolean hasFocus)
當視圖的焦點狀態被改變時調用。
參數
v 狀態變化的視圖
hasFocus 視圖的新焦點狀態。
public void sendAccessibilityEventUnchecked (AccessibilityEvent event)
處理用於發送AccessibilityEvent的請求。如果再發送之前調度事件,本方法不保證可訪問性檢查。可以通過調用者調用isEnabled()檢查。
參數
event 事件
public void setCurrentTab (int index)
設置當前選項卡。此方法被用來將選項卡置於widget的前部,並且通知其它的UI元素,一個不同的選項卡被調整到了前台。注意,這不同於傳統的“焦點”,是從視圖邏輯的焦點。
例如,如果我們在選項卡式視圖中有一個列表,一個用戶可能會上下移動列表,通過列表選項移動UI焦點(橘色高亮)。光標的移動並不影響選項卡的選中狀態,因為滾動 是在同一個選項卡上的。選中的選項卡僅僅當我們在選項卡上切換時(在此例中,從列表視圖移到下一選項卡視圖)更改。如果想要一次性的設置焦點並選中選項卡,請使用setCurrentTab(int)。
正常情況下,視圖邏輯關注調整焦點,除非你規避了UI,你可能僅僅將你的興趣集中在這裡。
參數
index 你想要指做選中選項卡的選項卡索引(選項卡被顯示到widget的前部)
參見
focusCurrentTab(int)
public void setDividerDrawable (Drawable drawable)
設置用於在選項窗口指示符間分隔的可繪制對象
參數
drawable 用於分隔的可繪制對象
public void setDividerDrawable (int resId)
設置用於在兩個選項卡標識符之間進行分隔的可繪制對象
參數
resId 被用來分隔的可繪制對象的資源標識
public void setEnabled (boolean enabled)
設置當前視圖的啟用狀態。子類的不同而其對應的啟用狀態的解釋也不相同。
參數
enabled 是否啟動
public void setLeftStripDrawable (int resId)
設置被用來當作選項卡指示符下面的分割線,左邊部分的可繪制對象。
參數
resId the 被用來當作左邊分隔線的可繪制對象的資源標識符
public void setLeftStripDrawable (Drawable drawable)
設置被用來當作選項卡指示符下面的分割線,左邊部分的可繪制對象。
參數
drawable 左邊分隔線的可繪制對象
public void setRightStripDrawable (int resId)
設置被用來當作選項卡指示符下面的分割線,右邊部分的可繪制對象。
參數
resId 被用來當作右邊分隔線的可繪制對象的資源標識符
public void setRightStripDrawable (Drawable drawable)
設置被用來當作選項卡指示符下面的分割線,右邊部分的可繪制對象。
參數
drawable 右邊分隔線的可繪制對象
public void setStripEnabled (boolean stripEnabled)
控制選項卡指示符底部的分隔線是否繪制。默認是繪制。如果用戶為選項卡指示符指定一個定制的視圖,那麼TabHost類調用此方法以禁用繪制底部分割線。
參數
stripEnabled 如果需要繪制底部分割線為true
五、受保護方法
protected int getChildDrawingOrder (int childCount, int i)
返回要繪制的子元素在當前迭代中的索引。如果你需要修改子元素的繪制順序,可以覆寫此方法。默認情況下返回參數i值。
注意:為使此方法被調用,你必須先通過調用setChildrenDrawingOrderEnabled(boolean)啟用子元素排序
參數
i 當前的迭代值
返回值
將要繪制的子元素在當前迭代的索引
protected void onSizeChanged (int w, int h, int oldw, int oldh)
布局過程中,當此視圖的大小發生改變時被調用的。如果你只是添加到視圖的層次結構,你調用時可以使用0當作之前的值(old value)。
參數
w 此視圖的當前寬度
h 此視圖的當前高度
oldw Old此視圖之前的寬度
oldh 此視圖之前的高度
六、補充
術語對照
indicator 指示符
drawable 可繪制對象
iteration 迭代
strips 分割線
示例代碼
Java:
public class TabDemo1 extends Activity implements OnClickListener {XML:
<?xml version="1.0" encoding="utf-8"?>
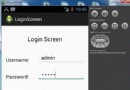
 Android本地化
Android應用程序可以在許多不同地區的許多設備上運行。為了使應用程序更具交互性,應用程序應該處理以適合應用程序將要使用的語言環境方面的文字,數字,文件等。在本章中,我
 Android本地化
Android應用程序可以在許多不同地區的許多設備上運行。為了使應用程序更具交互性,應用程序應該處理以適合應用程序將要使用的語言環境方面的文字,數字,文件等。在本章中,我
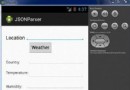 Android JSON解析器
JSON代表JavaScript對象符號。它是一個獨立的數據交換格式,是XML的最佳替代品。本章介紹了如何解析JSON文件,並從中提取所需的信息。Android提供了四個
 Android提高之BroadcastReceiver實例詳解
前面幾篇文章分別討論了Activity和Service,本文就來討論BroastcastReceiver,Broastcast是應用程序間通信的手段。Broast