什麼是AppWidget?AppWidget就是我們平常在桌面上見到的那種一個個的小窗口,利用這個小窗口可以給用戶提供一些方便快捷的操作。本篇打算從以下幾個點來介紹AppWidget:
1.如何創建一個簡單的AppWidget
2.如何使得AppWidget與客戶端程序交互
下面我們來創建一個簡單的AppWidget
1、定義AppWidgetProviderInfor:在res/xml文件夾中定義一個名為 :example_appwidget_info.xml,這個名字隨便取。它是提供AppWidget元數據;設置在桌面上顯示的大小
example_appwidget_info.xml
< appwidget-provider xmlns:android = "http://schemas.android.com/apk/res/android"
- android:minWidth = "294dp"
- android:minHeight = "72dp"
- android:updatePeriodMillis = "86400000"
- android:initialLayout = "@layout/example_appwidget" >
- <!-- initiallayout設置引用 的布局文件 -->
- </ appwidget-provider >
2、為App Widget指定樣式和布局;在桌面上顯示的內容,布局,就像main.xml布局一樣,做為example_appwidget_info.xml的 initialLayout參數的值,用這個布局文件來初始化example_appwidget_info.xml。
- <?xml version= "1.0" encoding= "utf-8" ?>
- <LinearLayout xmlns:android="http://schemas.android.com/apk/res/android"
- android:orientation="vertical"
- android:layout_width="fill_parent"
- android:layout_height="fill_parent"
- >
- <TextView
- android:id="@+id/widgetTextId"
- android:layout_width="fill_parent"
- android:layout_height="wrap_content"
- android:text="firstWidgetText"
- android:background="#000000"
- />
- </LinearLayout>
3、實現繼承AppWidgetProvider這個類;
這個類有五個方法:都需要繼承:(下面按照當第一次加載Widget到刪除的時候,這些方法運行的順序)
1、onReceive (Context context, Intent intent) Implements onReceive(Context, Intent) to dispatch calls to the various other methods on AppWidgetProvider.
2、onEnabled (Context context) Called in response to the ACTION_APPWIDGET_ENABLED broadcast when the a AppWidget for this provider is instantiated. Override this method to implement your own AppWidget functionality.
3、onUpdate (Context context, AppWidgetManager appWidgetManager, int[] appWidgetIds) Called in response to the ACTION_APPWIDGET_UPDATE broadcast when this AppWidget provider is being asked to provide RemoteViews for a set of AppWidgets. Override this method to implement your own AppWidget functionality.
4、onDeleted (Context context, int[] appWidgetIds) Called in response to the ACTION_APPWIDGET_DELETED broadcast when one or more AppWidget instances have been deleted. Override this method to implement your own AppWidget functionality.
5、onDisabled (Context context) Called in response to the ACTION_APPWIDGET_DISABLED broadcast, which is sent when the last AppWidget instance for this provider is deleted. Override this method to implement your own AppWidget functionality.
基中onReceive負責進行接受廣播,控制運行哪一個函數,每一個操作都會首先運行這個方法,再調用其它的方法。所以在Widget一次加載到刪除過程中,onReceive會執行4次;
如下圖:注意message
下面看代碼: ExampleAppWidgetProvider.java
- public class ExampleAppWidgetProvider extends AppWidgetProvider {
- @Override
- public void onUpdate(Context context, AppWidgetManager appWidgetManager,
- int [] appWidgetIds) {
- System.out.println("onupdate" );
- super .onUpdate(context, appWidgetManager, appWidgetIds);
- }
-
- @Override
- public void onDeleted(Context context, int [] appWidgetIds) {
- System.out.println("onDeleted" );
- super .onDeleted(context, appWidgetIds);
- }
-
- @Override
- public void onDisabled(Context context) {
- System.out.println("onDisabled" );
- super .onDisabled(context);
- }
-
- @Override
- public void onEnabled(Context context) {
- System.out.println("onEnabled" );
- super .onEnabled(context);
- }
- }
在這個實例中,因為與Activity脫離關系,所以Activity不用更改,只是在應用系統中注冊了一個與這個應用程序相關的AppWidget而已:結果:
下面再來看看如何在AppWidget中添加按鈕,添加監聽事件。
1、在example_appwidget_info.xml文件裡添加Button迫使
2、添加TargetActivity
只是用來響應點擊事件,在此例中沒有實際意義
- public class TargetActivity extends Activity {
- @Override
- protected void onCreate(Bundle savedInstanceState) {
- super .onCreate(savedInstanceState);
- setContentView(R.layout.main);
- }
- }
3、在AndroidManifest.xml文件注冊TargetActivity
4、重寫ExampleAppWidgetProvider類的onUpdate方法,在第一次創建WidGet的時候,向按鈕添加監聽。並用PendingIntent,和RemoteView兩個類,對事件進行處理;
- public void onUpdate(Context context, AppWidgetManager appWidgetManager,
- int [] appWidgetIds) {
- System.out.println("onupdated" );
-
- for ( int i = 0 ; i <appWidgetIds.length; i++) {
- System.out.println(appWidgetIds[i]);
- //創建一個Intent對象
- Intent intent = new Intent(context,TargetActivity. class );
- //創建一個PendingIntent(有四種方法獲取)
- PendingIntent pendingIntent = PendingIntent.getActivity(context, 0 , intent, 0 );
- RemoteViews remoteViews = new RemoteViews(context.getPackageName(),R.layout.example_appwidget);
- //為按鈕綁定事件處理器
- //第一個參數用來指定被綁定處理器的控件的ID
- //第二個參數用來指定當事件發生時,哪個PendingIntent將會被執行
- remoteViews.setOnClickPendingIntent(R.id.widgetButton, pendingIntent);
- //更新AppWidget
- //第一個參數用於指定被更新AppWidget的ID
- appWidgetManager.updateAppWidget(appWidgetIds[i], remoteViews);
- }
- super .onUpdate(context, appWidgetManager, appWidgetIds);
- }
Called in response to the ACTION_APPWIDGET_DELETED broadcast when one or more AppWidget instances have been deleted. Override this method to implement your own AppWidget functionality.
在實際應用在AppWidget更多的是利用廣播機制Action進行處理的;下面我們來看看如何利用廣播機制,單擊改變AppWidget的內容;在上例 的基礎上進行擴展:
1、AppWidget的布局文件:widget01.xml
<? xml version = "1.0" encoding = "utf-8" ?>
- < LinearLayout xmlns:android = "http://schemas.android.com/apk/res/android"
- android:orientation = "vertical"
- android:layout_width = "fill_parent"
- android:layout_height = "fill_parent"
- >
- < Button android:id = "@+id/widgetButton"
- android:layout_width = "fill_parent"
- android:layout_height = "wrap_content"
- android:text = "@string/widget_button" />
-
- < TextView android:id = "@+id/test_text"
- android:layout_width = "fill_parent"
- android:layout_height = "wrap_content"
- android:text = "@string/test_text"
- android:gravity = "center"
- android:textColor = "#fff" />
- </ LinearLayout >
其中的Button控件是測試按鈕,TextView用來反應單擊Button之後顯示的內容變化;(這是給Button添加監聽器,再利用Action廣播。收onRecerve接收,做出動作)
2、修改AndroidManifest.xml
在Reservi裡添加action,注冊事件
< receiver android:name = "ExampleAppWidgetProvider" > <!--如果action匹配成功,就在此類中進行處理-->
- < intent-filter >
- <!--利用廣播機制接收,onUpdate會接收廣播。查看源碼可收得知 Called in response to the ACTION_APPWIDGET_UPDATE
- broadcast when this AppWidget provider is being asked to provide RemoteViews
- for a set of AppWidgets. Override this method to implement your own AppWidget
- functionality. 這個也必須要,不然onRecerve不會調用 。-->
- <!--這是自定義的Action事件--> < action android:name = "android.appwidget.action.APPWIDGET_UPDATE" />
- < action android:name = "learn.test.UPDATE_APP_WIDGET" />
- </ intent-filter >
- < meta-data android:name = "android.appwidget.provider" android:resource = "@xml/widget_test" />
- </ receiver >
3、修改ExampleAppWidgetProvider.java代碼文件,如下:
public class ExampleAppWidgetProvider extends AppWidgetProvider {
- //定義一個常量字符串,該常量用於命名Action
- private static final String UPDATE_ACTION = "learn.test.UPDATE_APP_WIDGET" ;
-
- @Override
- public void onDeleted(Context context, int [] appWidgetIds) {
- // TODO Auto-generated method stub
- System.out.println("onDeleted" );
- super .onDeleted(context, appWidgetIds);
- }
-
- @Override
- public void onDisabled(Context context) {
- // TODO Auto-generated method stub
- System.out.println("onDisabled" );
- super .onDisabled(context);
- }
-
- @Override
- public void onEnabled(Context context) {
- // TODO Auto-generated method stub
- System.out.println("onEnabled" );
- super .onEnabled(context);
- }
-
- @Override
- public void onReceive(Context context, Intent intent) {
- // TODO Auto-generated method stub
- System.out.println("onReceive" );
-
- String action = intent.getAction();
- if (UPDATE_ACTION.equals(action)) {
- RemoteViews remoteViews = new RemoteViews(context.getPackageName(),
- R.layout.widget01);
- remoteViews.setTextViewText(R.id.test_text, "this is OnReceive" );
- //getInstance(Context context) Get the AppWidgetManager instance to use for the supplied Context object.靜態方法。
- AppWidgetManager appWidgetManager = AppWidgetManager.getInstance(context);
-
- ComponentName componentName = new ComponentName(context,ExampleAppWidgetProvider. class );
- appWidgetManager.updateAppWidget(componentName, remoteViews);
- } else {
- super .onReceive(context, intent); 這裡一定要添加,eles部分,不然,onReceive不會去調用其它的方法。但是如果把這條語句放在外面,就會每次運行 onUpdate,onDeleted等方法,就會運行兩次,因為UPDATE_ACTION.equals(action)配置成功會運行一次,uper.onReceive(context, intent)配置成功又會運行一次,後都是系統自定義的。
- }
- }
-
- @Override
- public void onUpdate(Context context, AppWidgetManager appWidgetManager,
- int [] appWidgetIds) {
- // TODO Auto-generated method stub
- System.out.println("onUpdated" );
-
- //創建一個Intent對象
- Intent intent = new Intent();
- //為Intent對象設置Action
- intent.setAction(UPDATE_ACTION);
- //使用getBroadcast方法,得到一個PendingIntent對象,當該對象執行時,會發送一個廣播
- PendingIntent pendingIntent = PendingIntent.getBroadcast(context, 0 ,
- intent, 0 );
- RemoteViews remoteViews = new RemoteViews(context.getPackageName(),
- R.layout.widget01);
-
- remoteViews.setOnClickPendingIntent(R.id.widgetButton, pendingIntent);
- appWidgetManager.updateAppWidget(appWidgetIds, remoteViews);
- super .onUpdate(context, appWidgetManager, appWidgetIds);
- }
-
- }
 Android本地化
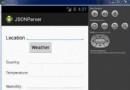 Android JSON解析器
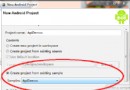 Android ApiDemo示例解讀系列之一:怎樣創建ApiDemo示例工程
 Android MediaPlayer(多媒體播放)