編輯:Android開發實例
本文將探討組合View(Layout)使用不當表現出的怪異顯現,並在下篇文章分析產生的具體原因。
首先來看看具體的示例
在開發Android app 的時候 ,大多數情況下我們都需要使用到組合View,例如一個具有圖標裝飾的兩行文本內容,可以通過如下組合View來實現。
 <LinearLayout
  xmlns:android="http://schemas.android.com/apk/res/android"
  android:orientation="horizontal"
  android:id="@+id/ll1"
  android:background="@android:drawable/btn_default"
  android:focusable="true"
  android:layout_width="fill_parent"
  android:layout_height="wrap_content">
  <ImageView
      android:src="@drawable/feedicon"
      android:layout_width="wrap_content"
      android:layout_height="fill_parent"/>
  <LinearLayout
    android:orientation="vertical"
      android:layout_width="fill_parent"
      android:layout_height="wrap_content">
      <TextView
          android:text="Line one"
          android:layout_width="wrap_content"
          android:layout_height="wrap_content"/>
      <TextView
          android:text="Line two"
          android:layout_width="wrap_content"
          android:layout_height="wrap_content"/>
  </LinearLayout>
</LinearLayout>
在該組合View具有點擊事件的時候,我們可以通過如下代碼設置:
 LinearLayout ll1 = (LinearLayout) findViewById(R.id.ll1);
ll1.setOnClickListener(listener);
示例一:在一個頁面顯示多個組合View,Layout代碼如下
 <?xml version="1.0" encoding="utf-8"?>
<LinearLayout xmlns:android="http://schemas.android.com/apk/res/android"
    android:orientation="vertical"
    android:layout_width="fill_parent"
    android:layout_height="fill_parent"
    >
    <TextView
        android:id="@+id/text"
        android:layout_width="fill_parent"
        android:layout_height="wrap_content"
        android:text="@string/hello"
        />
    <ScrollView
    android:layout_width="fill_parent"
    android:layout_height="fill_parent">
    <LinearLayout
    android:id="@+id/ll"
    android:orientation="vertical"
    android:layout_width="fill_parent"
    android:layout_height="fill_parent" >
     <LinearLayout
          android:id="@+id/ll1"
         android:clickable="true"
         android:focusable="true"
        android:orientation="horizontal"
        android:layout_width="fill_parent"
        android:layout_height="fill_parent"
        android:background="@android:drawable/btn_default"
        >
          <ImageView
              android:src="@drawable/feedicon"
              android:layout_width="wrap_content"
              android:layout_height="fill_parent"/>
          <LinearLayout
            android:orientation="vertical"
              android:layout_width="fill_parent"
              android:layout_height="wrap_content">
              <TextView
                  android:text="Line one"
                  android:layout_width="wrap_content"
                  android:layout_height="wrap_content"/>
              <TextView
                  android:text="Line two"
                  android:layout_width="wrap_content"
                  android:layout_height="wrap_content"/>
          </LinearLayout>
    </LinearLayout>
     <LinearLayout
          android:id="@+id/ll2"
         android:clickable="true"
         android:focusable="true"
        android:orientation="horizontal"
        android:layout_width="fill_parent"
        android:layout_height="fill_parent"
        android:background="@android:drawable/btn_default"
        >
          <ImageView
              android:src="@drawable/feedicon"
              android:layout_width="wrap_content"
              android:layout_height="fill_parent"/>
          <LinearLayout
            android:orientation="vertical"
              android:layout_width="fill_parent"
              android:layout_height="wrap_content">
              <TextView
                  android:text="Line one"
                  android:layout_width="wrap_content"
                  android:layout_height="wrap_content"/>
              <TextView
                  android:text="Line two"
                  android:layout_width="wrap_content"
                  android:layout_height="wrap_content"/>
          </LinearLayout>
    </LinearLayout>

  </LinearLayout>
  </ScrollView>
</LinearLayout>
該布局實現的效果如下圖所示(以前在GoogleCode上的圖片由於違反了GoogleCode的使用協議,現在被刪除了, 所以從GAE博客上轉過來的文章就不提供圖片了.)
通過指定LinearLayout的clickable(如果在代碼中設置了OnClickListener則會自動設置該屬性)和focusable屬性
android:clickable=”true” android:focusable=”true” 則 每個組合View都可以通過軌跡球(導航鍵)來獲取焦點同時點擊每個組合View也可以顯示焦點狀態, 這種使用方式是正常的.
示例二:自定義組合View
但是在某些情況下該組合View的顯示屬性(顯示的圖標,上下兩行文本內容)是根據其他數據模型獲取的,為了簡化編程 可能會使用一個自定義View來封裝這個組合View的實現。如下
Layout 文件 icon_text_view.xml 的代碼
 <?xml version="1.0" encoding="utf-8"?>
<LinearLayout
  xmlns:android="http://schemas.android.com/apk/res/android"
  android:orientation="horizontal"
  android:background="@android:drawable/btn_default"
  android:focusable="true"
  android:clickable="false"
  android:layout_width="fill_parent"
  android:layout_height="wrap_content">
  <ImageView
      android:src="@drawable/feedicon"
      android:layout_width="wrap_content"
      android:layout_height="fill_parent"/>
  <LinearLayout
    android:orientation="vertical"
      android:layout_width="fill_parent"
      android:layout_height="wrap_content">
      <TextView
          android:text="IconTextView Line one"
          android:layout_width="wrap_content"
          android:layout_height="wrap_content"/>
      <TextView
          android:text="IconTextView Line two"
          android:layout_width="wrap_content"
          android:layout_height="wrap_content"/>
  </LinearLayout>
</LinearLayout>
自定義組合View IconTextView類代碼如下
 package org.goodev.viewtest;
//import ...
public class IconTextView extends LinearLayout {

    ImageView mImageView;
    TextView mTextOne;
    TextView mTextTwo;

    public IconTextView(Context context) {
        super(context);

        LayoutInflater inflater = (LayoutInflater) context.getSystemService(Context.LAYOUT_INFLATER_SERVICE);
        inflater.inflate(R.layout.icon_text_view, this, true);
        // 設置mImageView,mTextOne,mTextTwo view的代碼
    }

    public void setData(Drawable icon,String line1, String line2) {
        mImageView.setImageDrawable(icon);
        mTextOne.setText(line1);
        mTextTwo.setText(line2);
    }

}
然後在代碼中 動態添加IconTextView到Layout中,代碼如下
         LinearLayout ll = (LinearLayout) findViewById(R.id.ll);
        IconTextView itv = new IconTextView(this);
        itv.setOnClickListener(listener);
        ll.addView(itv, 0);
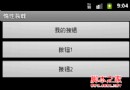
程序運行截圖如下
這個時候會出現一個怪異顯現,IconTextView在Press狀態下 沒有顯示出對應的狀態(背景圖片沒有改變為Press狀態下的圖片)
如果要解決Press狀態下的背景圖片問題,則可以設置 icon_text_view.xml 文件中的clickable為true
android:clickable=”true” 這樣 IconTextView 組合控件的Press的時候也可以正常顯示Press下的背景圖片了。
這個時候顯示狀態是正常了,但是又引入了一個新的問題:IconTextView的點擊事件沒了(用戶點擊該組合View沒有收到IconTextView的OnClickListener事件)。
為什麼直接在布局文件中使用組合View可以正常顯示Press狀態並且可以響應點擊事件
而使用IconTextView封裝這個組合View就出現Press狀態和點擊事件這種魚與熊掌不可兼得的問題了呢?
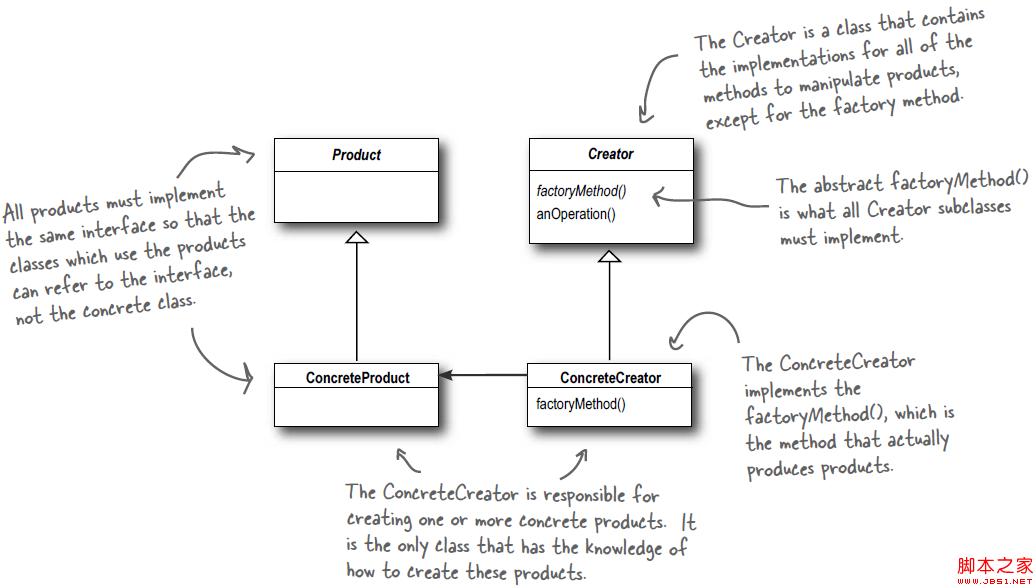 Android源碼學習之工廠方法模式應用及優勢介紹
工廠方法模式定義: Define an interface for creating an object, but let subclasses decide w
 android中選中菜單的顯示跳轉和隱式跳轉的實例介紹
查了好多資料,現發還是不全,干脆自己整理吧,至少保證在我的做法正確的,以免誤導讀者,也是給自己做個記錄吧! 簡介 android供給了三種菜單類型,分別為opti
 android開發教程之framework增加字符串資源和圖片等resource資源
增加String 在Android frameworks/base/core/res/res/values中增加String,舉例來說在string.xml增加一
 Android本地化
Android應用程序可以在許多不同地區的許多設備上運行。為了使應用程序更具交互性,應用程序應該處理以適合應用程序將要使用的語言環境方面的文字,數字,文件等。在本章中,我