編輯:Android開發實例
前言
本文主要講解一下如何處理對一個Bitmap對象進行處理,包括:縮放、旋轉、位移、傾斜等。在最後將以一個簡單的Demo來演示圖片特效的變換。
本文的主要內容:
Matrix
對於一個圖片變換的處理,需要Matrix類的支持,它位於"android.graphics.Matrix"包下,是Android提供的一個矩陣工具類,它本身不能對圖像或View進行變換,但它可與其他API結合來控制圖形、View的變換,如Canvas。
Matrix提供了一些方法來控制圖片變換:
之前有提過,圖片在內存中存放的就是一個一個的像素點,而對於圖片的變換主要是處理圖片的每個像素點,對每個像素點進行相應的變換,即可完成對圖像的變換。上面已經列舉了Matrix進行變換的常用方法,下面以幾個Demo來講解一下如何通過Matrix進行變換。
Matrix縮放
代碼:
- /**
- * 縮放圖片
- */
- protected void bitmapScale(float x, float y) {
- // 因為要將圖片放大,所以要根據放大的尺寸重新創建Bitmap
- Bitmap afterBitmap = Bitmap.createBitmap(
- (int) (baseBitmap.getWidth() * x),
- (int) (baseBitmap.getHeight() * y), baseBitmap.getConfig());
- Canvas canvas = new Canvas(afterBitmap);
- // 初始化Matrix對象
- Matrix matrix = new Matrix();
- // 根據傳入的參數設置縮放比例
- matrix.setScale(x, y);
- // 根據縮放比例,把圖片draw到Canvas上
- canvas.drawBitmap(baseBitmap, matrix,paint);
- iv_after.setImageBitmap(afterBitmap);
- }
效果展示:
Matrix旋轉
代碼:
- /**
- * 圖片旋轉
- */
- protected void bitmapRotate(float degrees) {
- // 創建一個和原圖一樣大小的圖片
- Bitmap afterBitmap = Bitmap.createBitmap(baseBitmap.getWidth(),
- baseBitmap.getHeight(), baseBitmap.getConfig());
- Canvas canvas = new Canvas(afterBitmap);
- Matrix matrix = new Matrix();
- // 根據原圖的中心位置旋轉
- matrix.setRotate(degrees, baseBitmap.getWidth() / 2,
- baseBitmap.getHeight() / 2);
- canvas.drawBitmap(baseBitmap, matrix, paint);
- iv_after.setImageBitmap(afterBitmap);
- }
效果展示:
Matrix位移
代碼:
- /**
- * 圖片移動
- */
- protected void bitmapTranslate(float dx, float dy) {
- // 需要根據移動的距離來創建圖片的拷貝圖大小
- Bitmap afterBitmap = Bitmap.createBitmap(
- (int) (baseBitmap.getWidth() + dx),
- (int) (baseBitmap.getHeight() + dy), baseBitmap.getConfig());
- Canvas canvas = new Canvas(afterBitmap);
- Matrix matrix = new Matrix();
- // 設置移動的距離
- matrix.setTranslate(dx, dy);
- canvas.drawBitmap(baseBitmap, matrix, paint);
- iv_after.setImageBitmap(afterBitmap);
- }
效果展示:
Matrix傾斜
代碼:
承香墨影
- /**
- * 傾斜圖片
- */
- protected void bitmapSkew(float dx, float dy) {
- // 根據圖片的傾斜比例,計算變換後圖片的大小,
- Bitmap afterBitmap = Bitmap.createBitmap(baseBitmap.getWidth()
- + (int) (baseBitmap.getWidth() * dx), baseBitmap.getHeight()
- + (int) (baseBitmap.getHeight() * dy), baseBitmap.getConfig());
- Canvas canvas = new Canvas(afterBitmap);
- Matrix matrix = new Matrix();
- // 設置圖片傾斜的比例
- matrix.setSkew(dx, dy);
- canvas.drawBitmap(baseBitmap, matrix, paint);
- iv_after.setImageBitmap(afterBitmap);
- }
前言
本篇博客主要講解一下如何處理對一個Bitmap對象進行處理,包括:縮放、旋轉、位移、傾斜等。在最後將以一個簡單的Demo來演示圖片特效的變換。
本篇博客的主要內容:
Matrix
對於一個圖片變換的處理,需要Matrix類的支持,它位於"android.graphics.Matrix"包下,是Android提供的一個矩陣工具類,它本身不能對圖像或View進行變換,但它可與其他API結合來控制圖形、View的變換,如Canvas。
Matrix提供了一些方法來控制圖片變換:
之前有提過,圖片在內存中存放的就是一個一個的像素點,而對於圖片的變換主要是處理圖片的每個像素點,對每個像素點進行相應的變換,即可完成對圖像的變換。上面已經列舉了Matrix進行變換的常用方法,下面以幾個Demo來講解一下如何通過Matrix進行變換。
Matrix縮放
代碼:
按 Ctrl+C 復制代碼 按 Ctrl+C 復制代碼效果展示:
Matrix旋轉
代碼:
按 Ctrl+C 復制代碼 按 Ctrl+C 復制代碼效果展示:
Matrix位移
代碼:
按 Ctrl+C 復制代碼 按 Ctrl+C 復制代碼效果展示:
Matrix傾斜
代碼:
按 Ctrl+C 復制代碼 按 Ctrl+C 復制代碼效果展示:
Matrix變換注意事項
上面幾個小方法演示了如何使用Matrix進行變換,但是還有幾點需要額外注意一下:
Matrix完整的Demo
下面給出本文講解的使用Matrix的完整Demo代碼。
布局代碼:
- <LinearLayout xmlns:android="http://schemas.android.com/apk/res/android"
- xmlns:tools="http://schemas.android.com/tools"
- android:layout_width="match_parent"
- android:layout_height="match_parent"
- android:orientation="vertical"
- android:paddingBottom="@dimen/activity_vertical_margin"
- android:paddingLeft="@dimen/activity_horizontal_margin"
- android:paddingRight="@dimen/activity_horizontal_margin"
- android:paddingTop="@dimen/activity_vertical_margin"
- tools:context=".MainActivity" >
- <LinearLayout
- android:layout_width="wrap_content"
- android:layout_height="wrap_content"
- android:orientation="horizontal" >
- <Button
- android:id="@+id/btn_scale"
- android:layout_width="wrap_content"
- android:layout_height="wrap_content"
- android:text="縮放" />
- <Button
- android:id="@+id/btn_rotate"
- android:layout_width="wrap_content"
- android:layout_height="wrap_content"
- android:text="旋轉" />
- <Button
- android:id="@+id/btn_translate"
- android:layout_width="wrap_content"
- android:layout_height="wrap_content"
- android:text="平移" />
- <Button
- android:id="@+id/btn_skew"
- android:layout_width="wrap_content"
- android:layout_height="wrap_content"
- android:text="傾斜" />
- </LinearLayout>
- <!-- 原始圖片 -->
- <ImageView
- android:id="@+id/iv_base"
- android:layout_width="wrap_content"
- android:layout_height="wrap_content" />
- <!-- 處理之後的圖片 -->
- <ImageView
- android:id="@+id/iv_after"
- android:layout_width="wrap_content"
- android:layout_height="wrap_content" />
- </LinearLayout>
- activity_main.xml
實現代碼:
- package cn.bgxt.canvasmatrixdemo;
- import android.os.Bundle;
- import android.view.View;
- import android.widget.Button;
- import android.widget.ImageView;
- import android.app.Activity;
- import android.graphics.Bitmap;
- import android.graphics.BitmapFactory;
- import android.graphics.Canvas;
- import android.graphics.Matrix;
- import android.graphics.Paint;
- public class MainActivity extends Activity {
- private Button btn_scale, btn_rotate, btn_translate, btn_skew;
- private ImageView iv_base, iv_after;
- private Bitmap baseBitmap;
- private Paint paint;
- @Override
- protected void onCreate(Bundle savedInstanceState) {
- super.onCreate(savedInstanceState);
- setContentView(R.layout.activity_main);
- btn_scale = (Button) findViewById(R.id.btn_scale);
- btn_rotate = (Button) findViewById(R.id.btn_rotate);
- btn_translate = (Button) findViewById(R.id.btn_translate);
- btn_skew = (Button) findViewById(R.id.btn_skew);
- btn_scale.setOnClickListener(click);
- btn_rotate.setOnClickListener(click);
- btn_translate.setOnClickListener(click);
- btn_skew.setOnClickListener(click);
- iv_base = (ImageView) findViewById(R.id.iv_base);
- iv_after = (ImageView) findViewById(R.id.iv_after);
- baseBitmap = BitmapFactory.decodeResource(getResources(),
- R.drawable.ic_launcher);
- iv_base.setImageBitmap(baseBitmap);
- // 設置畫筆,消除鋸齒
- paint = new Paint();
- paint.setAntiAlias(true);
- }
- private View.OnClickListener click = new View.OnClickListener() {
- @Override
- public void onClick(View v) {
- switch (v.getId()) {
- case R.id.btn_scale:
- bitmapScale(2.0f, 4.0f);
- break;
- case R.id.btn_rotate:
- bitmapRotate(180);
- break;
- case R.id.btn_translate:
- bitmapTranslate(20f, 20f);
- break;
- case R.id.btn_skew:
- bitmapSkew(0.2f, 0.4f);
- break;
- default:
- break;
- }
- }
- };
- /**
- * 縮放圖片
- */
- protected void bitmapScale(float x, float y) {
- // 因為要將圖片放大,所以要根據放大的尺寸重新創建Bitmap
- Bitmap afterBitmap = Bitmap.createBitmap(
- (int) (baseBitmap.getWidth() * x),
- (int) (baseBitmap.getHeight() * y), baseBitmap.getConfig());
- Canvas canvas = new Canvas(afterBitmap);
- // 初始化Matrix對象
- Matrix matrix = new Matrix();
- // 根據傳入的參數設置縮放比例
- matrix.setScale(x, y);
- // 根據縮放比例,把圖片draw到Canvas上
- canvas.drawBitmap(baseBitmap, matrix, paint);
- iv_after.setImageBitmap(afterBitmap);
- }
- /**
- * 傾斜圖片
- */
- protected void bitmapSkew(float dx, float dy) {
- // 根據圖片的傾斜比例,計算變換後圖片的大小,
- Bitmap afterBitmap = Bitmap.createBitmap(baseBitmap.getWidth()
- + (int) (baseBitmap.getWidth() * dx), baseBitmap.getHeight()
- + (int) (baseBitmap.getHeight() * dy), baseBitmap.getConfig());
- Canvas canvas = new Canvas(afterBitmap);
- Matrix matrix = new Matrix();
- // 設置圖片傾斜的比例
- matrix.setSkew(dx, dy);
- canvas.drawBitmap(baseBitmap, matrix, paint);
- iv_after.setImageBitmap(afterBitmap);
- }
- /**
- * 圖片移動
- */
- protected void bitmapTranslate(float dx, float dy) {
- // 需要根據移動的距離來創建圖片的拷貝圖大小
- Bitmap afterBitmap = Bitmap.createBitmap(
- (int) (baseBitmap.getWidth() + dx),
- (int) (baseBitmap.getHeight() + dy), baseBitmap.getConfig());
- Canvas canvas = new Canvas(afterBitmap);
- Matrix matrix = new Matrix();
- // 設置移動的距離
- matrix.setTranslate(dx, dy);
- canvas.drawBitmap(baseBitmap, matrix, paint);
- iv_after.setImageBitmap(afterBitmap);
- }
- /**
- * 圖片旋轉
- */
- protected void bitmapRotate(float degrees) {
- // 創建一個和原圖一樣大小的圖片
- Bitmap afterBitmap = Bitmap.createBitmap(baseBitmap.getWidth(),
- baseBitmap.getHeight(), baseBitmap.getConfig());
- Canvas canvas = new Canvas(afterBitmap);
- Matrix matrix = new Matrix();
- // 根據原圖的中心位置旋轉
- matrix.setRotate(degrees, baseBitmap.getWidth() / 2,
- baseBitmap.getHeight() / 2);
- canvas.drawBitmap(baseBitmap, matrix, paint);
- iv_after.setImageBitmap(afterBitmap);
- }
- }
- MainActivity.java
源碼下載
 Android加載Spinner
可以顯示在的Android任務,通過加載進度條的進展。進度條有兩種形狀。加載欄和加載微調(spinner)。在本章中,我們將討論微調(spinner)。Spinner 用
 android書架效果實現原理與代碼
以前也模仿者ireader實現了書架的效果,但是那種是使用listview實現的,並不好用。絕大多數都是用gridview實現的,網上這方面資料比較少,有些開源的
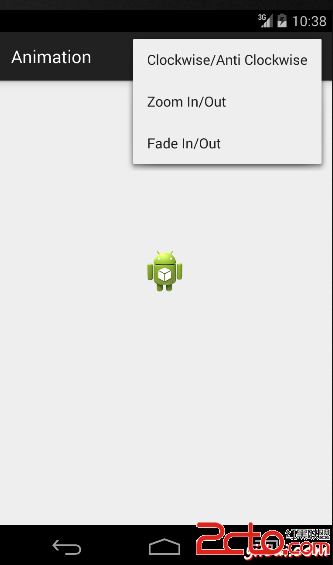 Android Animation(動畫)實例
動畫在Android中可以有許多方式。在本章中,我們將討論一個簡單的和廣泛使用的動畫制作 - 所謂的補間動畫方式。補間動畫補間動畫需要一些參數,如初始值,終值,大小,持續
 Android JSON解析器
JSON代表JavaScript對象符號。它是一個獨立的數據交換格式,是XML的最佳替代品。本章介紹了如何解析JSON文件,並從中提取所需的信息。Android提供了四個