編輯:Android開發實例
這幾天因為項目需求,需要在ImageView上面疊加一層透明圓弧,並且在沿著圓弧的方向顯示相應的文字,效果如下圖所示:

拿到這個需求,首先想到的是自定義一個ImageView來實現此功能,即在onDraw()中繪制圓弧和文字。同時因為要保證圓弧的位置可以任意擺放,圓弧的顏色、透明度以及文字大小、顏色等都是可控的,所以增加了一些自定義屬性。實現代碼非常簡單,如下:
1.自定義ImageView:
package com.chunk.customviewsdemo.views.ArcImageView;
import android.content.Context;
import android.content.res.TypedArray;
import android.graphics.Canvas;
import android.graphics.Paint;
import android.graphics.Path;
import android.graphics.RectF;
import android.util.AttributeSet;
import android.widget.ImageView;
import com.chunk.customviewsdemo.R;
/**
* Description:A custom ImageView with circular arc and text
* Author: XiaoYu
* Date: // :
*/
public class ArcImageView extends ImageView {
/**
* The default text size.
*/
private final float DEFAULT_TEXT_SIZE = ;
/**
* The default scale value which decides the width of arc.
*/
private final float DEFAULT_SCALE = .f;
/**
* The default transparency of arc.
*/
private final int DEFAULT_ARC_ALPHA =;
/**
* The default width of arc.
*/
private final int DEFAULT_ARC_WIDTH =;
/**
* The default angle that the arc starts with.
*/
private final int DEFAULT_START_ANGLE = ;
/**
* The default angle that the arc.
*/
private final int DEFAULT_SWEEP_ANGLE = ;
/**
* The default distance along the path to add to the text's starting position.
*/
private final int DEFAULT_H_OFFSET = ;
/**
* The default distance above(-) or below(+) the path to position the text.
*/
private final int DEFAULT_V_OFFSET = ;
private Context mContext;
/**
* The text displayed on ImageView along arc.
*/
private String mDrawStr;
/**
* The font size of text.
*/
private float mTextSize = DEFAULT_TEXT_SIZE;
/**
* The scale value which decides the width of arc.
*/
private float mScale = DEFAULT_SCALE;
/**
* The transparency of arc.
*/
private int mArcAlpha = DEFAULT_ARC_ALPHA;
/**
* The width of arc.
*/
private int mArcWidth = DEFAULT_ARC_WIDTH;
/**
* The start angle of angle.
*/
private int mStartAngle = DEFAULT_START_ANGLE;
/**
* The swept angle of angle.
*/
private int mSweepAngle = DEFAULT_SWEEP_ANGLE;
/**
* The default distance along the path to add to the text's starting position.
*/
private float mHOffset = DEFAULT_H_OFFSET;
/**
* The default distance above(-) or below(+) the path to position the text.
*/
private float mVOffset = DEFAULT_V_OFFSET;
/**
* The style of arc, all styles includes LEFT_TOP, LEFT_BOTTOM, RIGHT_TOP, RIGHT_BOTTOM, CENTER。
* of course, you can add your own style according to your demands.
*/
private int mDrawStyle;
/**
* The color of arc.
*/
private int mArcColor;
/**
* The color of text.
*/
private int mTextColor;
public ArcImageView(Context context) {
super(context);
this.mContext = context;
}
public ArcImageView(Context context, AttributeSet attrs) {
super(context, attrs);
this.mContext = context;
obtainAttributes(attrs);
}
public ArcImageView(Context context, AttributeSet attrs, int defStyleAttr) {
super(context, attrs, defStyleAttr);
this.mContext = context;
obtainAttributes(attrs);
}
/**
* Set the text that will be drawn on arc.
* @param drawStr the text content.
*/
public void setDrawStr(String drawStr) {
this.mDrawStr = drawStr;
//refresh this view
invalidate();
}
/**
* Set the transparency of arc.
* @param mArcAlpha the value of transparency.
*/
public void setArcAlpha(int mArcAlpha) {
this.mArcAlpha = mArcAlpha;
//refresh this view
invalidate();
}
@Override
protected void onDraw(Canvas canvas) {
super.onDraw(canvas);
//draw arc
Paint arcPaint = new Paint();
arcPaint.setStrokeWidth(mArcWidth);
arcPaint.setStyle(Paint.Style.STROKE);
arcPaint.setColor(mArcColor);
arcPaint.setAlpha(mArcAlpha);
int width = getWidth();
int height = getHeight();
float radius;
if (width > height) {
radius = mScale * height;
} else {
radius = mScale * width;
}
RectF oval = new RectF();
int center_x = width;
int center_y = height;
switch (mDrawStyle) {
case :
center_x = ;
center_y = ;
mStartAngle = ;
mSweepAngle = -;
break;
case :
center_x = ;
center_y = height;
mStartAngle = ;
mSweepAngle = ;
break;
case :
center_x = width;
center_y = ;
mStartAngle = ;
mSweepAngle = -;
break;
case :
center_x = width;
center_y = height;
mStartAngle = ;
mSweepAngle = ;
break;
case :
center_x = width / ;
center_y = height / ;
mStartAngle = ;
mSweepAngle = ;
break;
}
float left = center_x - radius;
float top = center_y - radius;
float right = center_x + radius;
float bottom = center_y + radius;
oval.set(left, top, right, bottom);
canvas.drawArc(oval, mStartAngle, mSweepAngle, false, arcPaint);
//draw text
Paint textPaint = new Paint();
textPaint.setTextSize(mTextSize);
textPaint.setStyle(Paint.Style.FILL);
textPaint.setColor(mTextColor);
Path path = new Path();
path.addArc(oval, mStartAngle, mSweepAngle);
canvas.drawTextOnPath(mDrawStr, path, mHOffset, mVOffset, textPaint);
}
/**
* Obtain custom attributes that been defined in attrs.xml.
* @param attrs A collection of attributes.
*/
private void obtainAttributes(AttributeSet attrs) {
TypedArray ta = mContext.obtainStyledAttributes(attrs, R.styleable.ArcImageView);
mDrawStr = ta.getString(R.styleable.ArcImageView_drawStr);
mTextSize = ta.getDimension(R.styleable.ArcImageView_textSize, DEFAULT_TEXT_SIZE);
mArcAlpha = ta.getInteger(R.styleable.ArcImageView_arcAlpha, DEFAULT_ARC_ALPHA);
mArcWidth = ta.getInteger(R.styleable.ArcImageView_arcWidth, DEFAULT_ARC_WIDTH);
mStartAngle = ta.getInteger(R.styleable.ArcImageView_startAngle, DEFAULT_START_ANGLE);
mSweepAngle = ta.getInteger(R.styleable.ArcImageView_startAngle, DEFAULT_SWEEP_ANGLE);
mHOffset = ta.getInteger(R.styleable.ArcImageView_hOffset, DEFAULT_H_OFFSET);
mVOffset = ta.getInteger(R.styleable.ArcImageView_vOffset, DEFAULT_V_OFFSET);
mArcColor = ta.getColor(R.styleable.ArcImageView_arcColor, XCCCCCC);
mTextColor = ta.getColor(R.styleable.ArcImageView_textColor, XFFFFFF);
mDrawStyle = ta.getInt(R.styleable.ArcImageView_drawStyle, );
ta.recycle();
}
}
2.在values文件夾下的attrs.xml中自定義屬性:
<?xml version="." encoding="utf-"?>
<resources>
<declare-styleable name="ArcImageView">
<attr name="drawStr" format="string" />
<attr name="textSize" format="dimension" />
<attr name="arcAlpha" format="integer" />
<attr name="arcWidth" format="integer" />
<attr name="startAngle" format="integer" />
<attr name="sweepAngle" format="integer" />
<attr name="scale" format="float" />
<attr name="hOffset" format="float" />
<attr name="vOffset" format="float" />
<attr name="drawStyle" format="enum">
<enum name="LEFT_TOP" value="" />
<enum name="LEFT_BOTTOM" value="" />
<enum name="RIGHT_TOP" value="" />
<enum name="RIGHT_BOTTOM" value="" />
<enum name="CENTER" value="" />
</attr>
<attr name="arcColor" format="color" />
<attr name="textColor" format="color" />
</declare-styleable>
</resources>
3.在MainActivity調用ArcImageView,實現代碼如下:
package com.chunk.customviewsdemo;
import android.os.Bundle;
import android.support.v.app.AppCompatActivity;
import android.view.View;
import android.widget.Button;
import com.chunk.customviewsdemo.views.ArcImageView.ArcImageView;
public class MainActivity extends AppCompatActivity implements View.OnClickListener {
private ArcImageView aiv_one;
private ArcImageView aiv_two;
private ArcImageView aiv_three;
private ArcImageView aiv_four;
private Button btn_another_one;
private int mGroup = ;
@Override
protected void onCreate(Bundle savedInstanceState) {
super.onCreate(savedInstanceState);
setContentView(R.layout.activity_main);
aiv_one = (ArcImageView) findViewById(R.id.aiv_one);
aiv_one.setArcAlpha();
aiv_two = (ArcImageView) findViewById(R.id.aiv_two);
aiv_two.setArcAlpha();
aiv_three = (ArcImageView) findViewById(R.id.aiv_three);
aiv_three.setArcAlpha();
aiv_four = (ArcImageView) findViewById(R.id.aiv_four);
aiv_four.setArcAlpha();
btn_another_one = (Button) findViewById(R.id.btn_another_one);
btn_another_one.setOnClickListener(this);
}
@Override
public void onClick(View v) {
switch (v.getId()) {
case R.id.btn_another_one:
if (mGroup == ) {
aiv_one.setDrawStr("蘋果");
aiv_one.setBackgroundResource(R.drawable.apple);
aiv_two.setDrawStr("柚子");
aiv_two.setBackgroundResource(R.drawable.pineapple);
aiv_three.setDrawStr("香蕉");
aiv_three.setBackgroundResource(R.drawable.banana);
aiv_four.setDrawStr("菠蘿");
aiv_four.setBackgroundResource(R.drawable.pineapple);
mGroup = ;
} else {
aiv_one.setDrawStr("牛排");
aiv_one.setBackgroundResource(R.drawable.steak);
aiv_two.setDrawStr("海鮮");
aiv_two.setBackgroundResource(R.drawable.seafood);
aiv_three.setDrawStr("奶酪");
aiv_three.setBackgroundResource(R.drawable.cheese);
aiv_four.setDrawStr("燒烤");
aiv_four.setBackgroundResource(R.drawable.barbecue);
mGroup = ;
}
break;
}
}
}
4.MainActivity的布局文件如下:
<LinearLayout
xmlns:android="http://schemas.android.com/apk/res/android"
xmlns:custom="http://schemas.android.com/apk/res-auto"
android:layout_width="match_parent"
android:layout_height="match_parent"
android:layout_marginTop="dp"
android:layout_marginBottom="dp"
android:orientation="vertical" >
<Button
android:id="@+id/btn_another_one"
android:layout_width="wrap_content"
android:layout_height="wrap_content"
android:text="換一組" />
<LinearLayout
android:layout_width="match_parent"
android:layout_height="dp"
android:layout_weight=""
android:orientation="horizontal" >
<RelativeLayout
android:layout_width="dp"
android:layout_weight=""
android:layout_height="match_parent" >
<com.chunk.customviewsdemo.views.ArcImageView.ArcImageView
android:id="@+id/aiv_one"
android:layout_width="match_parent"
android:layout_height="match_parent"
android:background="@drawable/steak"
custom:drawStyle="RIGHT_BOTTOM"
custom:drawStr="牛排"
custom:arcAlpha=""
custom:arcColor="@color/gray"
custom:textColor="@color/black"
custom:textSize="sp" />
</RelativeLayout>
<RelativeLayout
android:layout_width="dp"
android:layout_weight=""
android:layout_height="match_parent" >
<com.chunk.customviewsdemo.views.ArcImageView.ArcImageView
android:id="@+id/aiv_two"
android:layout_width="match_parent"
android:layout_height="match_parent"
android:background="@drawable/seafood"
custom:drawStyle="LEFT_BOTTOM"
custom:drawStr="海鮮"
custom:arcAlpha=""
custom:arcColor="@color/gray"
custom:textColor="@color/black"
custom:textSize="sp" />
</RelativeLayout>
</LinearLayout>
<LinearLayout
android:layout_width="match_parent"
android:layout_height="dp"
android:layout_weight=""
android:orientation="horizontal" >
<RelativeLayout
android:layout_width="dp"
android:layout_weight=""
android:layout_height="match_parent" >
<com.chunk.customviewsdemo.views.ArcImageView.ArcImageView
android:id="@+id/aiv_three"
android:layout_width="match_parent"
android:layout_height="match_parent"
android:background="@drawable/cheese"
custom:drawStyle="RIGHT_TOP"
custom:drawStr="奶酪"
custom:arcAlpha=""
custom:arcColor="@color/gray"
custom:textColor="@color/black"
custom:textSize="sp" />
</RelativeLayout>
<RelativeLayout
android:layout_width="dp"
android:layout_weight=""
android:layout_height="match_parent" >
<com.chunk.customviewsdemo.views.ArcImageView.ArcImageView
android:id="@+id/aiv_four"
android:layout_width="match_parent"
android:layout_height="match_parent"
android:background="@drawable/barbecue"
custom:drawStyle="LEFT_TOP"
custom:drawStr="燒烤"
custom:arcAlpha=""
custom:arcColor="@color/gray"
custom:textColor="@color/black"
custom:textSize="sp" />
</RelativeLayout>
</LinearLayout>
</LinearLayout>
注意,在布局文件中引入自定義屬性時需要加入一行代碼:xmlns:custom="http://schemas.android.com/apk/res-auto"。
好了,需求搞定,剩下的就是搬到實際的項目當中去了。實現效果如下:
總結一下,自定義View一般就是通過重寫onDraw、onMeasure()、onLayout()等方法來進行測量、繪制,繪制的時候一般會用到Canvas、Paint、Bitmap等類,測量和繪制的過程其實就是對現實生活中繪圖工作的抽象和實現,我們利用面向對象的思想將畫板、畫紙、畫筆等工具以及繪畫的動作用一行行代碼加以描述就OK啦!
由於實現過程比較簡單,我就不貼源碼了,大家如果對2D繪圖還不是很了解,可以去搜一下相關資料或查閱相關書籍!
 Android加載Spinner
可以顯示在的Android任務,通過加載進度條的進展。進度條有兩種形狀。加載欄和加載微調(spinner)。在本章中,我們將討論微調(spinner)。Spinner 用
 Android本地化
Android應用程序可以在許多不同地區的許多設備上運行。為了使應用程序更具交互性,應用程序應該處理以適合應用程序將要使用的語言環境方面的文字,數字,文件等。在本章中,我
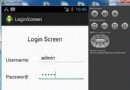 Android登錄實例
登錄應用程序的屏幕,詢問憑據登錄到一些特定的應用。可能需要登錄到Facebook,微博等本章介紹了,如何創建一個登錄界面,以及如何管理安全問題和錯誤嘗試。首先,必須定義兩
 Android加載Spinner
可以顯示在的Android任務,通過加載進度條的進展。進度條有兩種形狀。加載欄和加載微調(spinner)。在本章中,我們將討論微調(spinner)。Spinner 用