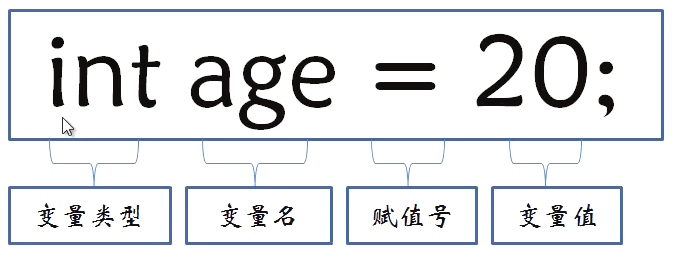
編輯:Android開發實例
記得我之前參與開發過一個華為的項目,要求程序可以支持好幾種終端設備,其中就包括Android手機和Android Pad。然後為了節省人力,公司無節操地讓Android手機和Android Pad都由我們團隊開發。當時項目組定的方案是,制作兩個版本的App,一個手機版,一個Pad版。由於當時手機版的主體功能已經做的差不多了,所以Pad版基本上就是把手機版的代碼完全拷過來,然後再根據平板的特性部分稍作修改就好了。
但是,從此以後我們就非常苦逼了。每次要添加什麼新功能,同樣的代碼要寫兩遍。每次要修復任何bug,都要在手機版代碼和Pad版代碼裡各修改一遍。這還不算什麼,每到出版本的時候就更離譜了。華為要求每次需要出兩個版本,一個華為內網環境的版本,一個客戶現場的版本,而現在又分了手機和Pad,也就是每次需要出四個版本。如果在出完版本後自測還出現了問題,就可以直接通宵了。這尤其是苦了我們的X總(由於他dota打的比較好,我都喜歡叫他X神)。他在我們項目組中單獨維護一個模塊,並且每次打版本都是由他負責,加班的時候我們都能跑,就是他跑不了。這裡也是贊揚一下我們X神的敬業精神,如果他看得到的話。
經歷過那麼苦逼時期的我也就開始思考,可不可以制作同時兼容手機和平板的App呢?答案當然是肯定的,不過我這個人比較懶,一直也提不起精神去鑽研這個問題。直到我一個在美國留學的朋友Gong讓我幫她解決她的研究生導師布置的作業(我知道你研究生導師看不懂中文 ^-^),正好涉及到了這一塊,也就借此機會研究了一下,現在拿出來跟大家分享。
我們先來看一下Android手機的設置界面,點擊一下Sound,可以跳轉到聲音設置界面,如下面兩張圖所示:
然後再來看一下Android Pad的設置界面,主設置頁面和聲音設置頁面都是在一個界面顯示的,如下圖所示:
如果這分別是兩個不同的App做出的效果,那沒有絲毫驚奇之處。但如果是同一個App,在手機上和平板上運行分別有以上兩種效果的話,你是不是就已經心動了?我們現在就來模擬實現一下。
首先你需要對Fragment有一定的了解,如果你還沒接觸過Fragment,建議可以先閱讀 http://www.fengfly.com/plus/view-215089-1.html 這篇文章。並且本次的代碼是運行在Android 4.0版本上的,如果你的SDK版本還比較低的話,建議可以先升升級了。
新建一個Android項目,取名叫FragmentDemo。打開或新建MainActivity作為程序的主Activity,裡面有如下自動生成的內容:
- public class MainActivity extends Activity {
- @Override
- public void onCreate(Bundle savedInstanceState) {
- super.onCreate(savedInstanceState);
- setContentView(R.layout.activity_main);
- }
- }
作為一個Android老手,上面的代碼實在太小兒科了,每個Activity中都會有這樣的代碼。不過今天我們的程序可不會這麼簡單,加載布局這一塊還是大有文章的。
打開或新建res/layout/activity_main.xml作為程序的主布局文件,裡面代碼如下:
- <LinearLayout xmlns:android="http://schemas.android.com/apk/res/android"
- xmlns:tools="http://schemas.android.com/tools"
- android:layout_width="fill_parent"
- android:layout_height="fill_parent"
- android:orientation="horizontal"
- tools:context=".MainActivity" >
- <fragment
- android:id="@+id/menu_fragment"
- android:name="com.example.fragmentdemo.MenuFragment"
- android:layout_width="fill_parent"
- android:layout_height="fill_parent"
- />
- </LinearLayout>
這個布局引用了一個MenuFragment,我們稍後來進行實現,先來看一下今天的一個重點,我們需要再新建一個activity_main.xml,這個布局文件名和前面的主布局文件名是一樣的,但是要放在不同的目錄下面。
在res目錄下新建layout-large目錄,然後這個目錄下創建新的activity_main.xml,加入如下代碼:
- <LinearLayout xmlns:android="http://schemas.android.com/apk/res/android"
- xmlns:tools="http://schemas.android.com/tools"
- android:layout_width="fill_parent"
- android:layout_height="fill_parent"
- android:orientation="horizontal"
- android:baselineAligned="false"
- tools:context=".MainActivity"
- >
- <fragment
- android:id="@+id/left_fragment"
- android:name="com.example.fragmentdemo.MenuFragment"
- android:layout_width="0dip"
- android:layout_height="fill_parent"
- android:layout_weight="1"
- />
- <FrameLayout
- android:id="@+id/details_layout"
- android:layout_width="0dip"
- android:layout_height="fill_parent"
- android:layout_weight="3"
- ></FrameLayout>
- </LinearLayout>
這個布局同樣也引用了MenuFragment,另外還加入了一個FrameLayout用於顯示詳細內容。其實也就是分別對應了平板界面上的左側布局和右側布局。
這裡用到了動態加載布局的技巧,首先Activity中調用 setContentView(R.layout.activity_main) ,表明當前的Activity想加載activity_main這個布局文件。而Android系統又會根據當前的運行環境判斷程序是否運行在大屏幕設備上,如果運行在大屏幕設備上,就加載layout-large目錄下的activity_main.xml,否則就默認加載layout目錄下的activity_main.xml。
關於動態加載布局的更多內容,可以閱讀 http://www.fengfly.com/plus/view-215087-1.html這篇文章。
下面我們來實現久違的MenuFragment,新建一個MenuFragment類繼承自Fragment,具體代碼如下:
- public class MenuFragment extends Fragment implements OnItemClickListener {
- /**
- * 菜單界面中只包含了一個ListView。
- */
- private ListView menuList;
- /**
- * ListView的適配器。
- */
- private ArrayAdapter<String> adapter;
- /**
- * 用於填充ListView的數據,這裡就簡單只用了兩條數據。
- */
- private String[] menuItems = { "Sound", "Display" };
- /**
- * 是否是雙頁模式。如果一個Activity中包含了兩個Fragment,就是雙頁模式。
- */
- private boolean isTwoPane;
- /**
- * 當Activity和Fragment建立關聯時,初始化適配器中的數據。
- */
- @Override
- public void onAttach(Activity activity) {
- super.onAttach(activity);
- adapter = new ArrayAdapter<String>(activity, android.R.layout.simple_list_item_1, menuItems);
- }
- /**
- * 加載menu_fragment布局文件,為ListView綁定了適配器,並設置了監聽事件。
- */
- @Override
- public View onCreateView(LayoutInflater inflater, ViewGroup container, Bundle savedInstanceState) {
- View view = inflater.inflate(R.layout.menu_fragment, container, false);
- menuList = (ListView) view.findViewById(R.id.menu_list);
- menuList.setAdapter(adapter);
- menuList.setOnItemClickListener(this);
- return view;
- }
- /**
- * 當Activity創建完畢後,嘗試獲取一下布局文件中是否有details_layout這個元素,如果有說明當前
- * 是雙頁模式,如果沒有說明當前是單頁模式。
- */
- @Override
- public void onActivityCreated(Bundle savedInstanceState) {
- super.onActivityCreated(savedInstanceState);
- if (getActivity().findViewById(R.id.details_layout) != null) {
- isTwoPane = true;
- } else {
- isTwoPane = false;
- }
- }
- /**
- * 處理ListView的點擊事件,會根據當前是否是雙頁模式進行判斷。如果是雙頁模式,則會動態添加Fragment。
- * 如果不是雙頁模式,則會打開新的Activity。
- */
- @Override
- public void onItemClick(AdapterView<?> arg0, View view, int index, long arg3) {
- if (isTwoPane) {
- Fragment fragment = null;
- if (index == 0) {
- fragment = new SoundFragment();
- } else if (index == 1) {
- fragment = new DisplayFragment();
- }
- getFragmentManager().beginTransaction().replace(R.id.details_layout, fragment).commit();
- } else {
- Intent intent = null;
- if (index == 0) {
- intent = new Intent(getActivity(), SoundActivity.class);
- } else if (index == 1) {
- intent = new Intent(getActivity(), DisplayActivity.class);
- }
- startActivity(intent);
- }
- }
- }
這個類的代碼並不長,我簡單的說明一下。在onCreateView方法中加載了menu_fragment這個布局,這個布局裡面包含了一個ListView,然後我們對這個ListView填充了兩個簡單的數據 "Sound" 和 "Display" 。又在onActivityCreated方法中做了一個判斷,如果Activity的布局中包含了details_layout這個元素,那麼當前就是雙頁模式,否則就是單頁模式。onItemClick方法則處理了ListView的點擊事件,發現如果當前是雙頁模式,就動態往details_layout中添加Fragment,如果當前是單頁模式,就直接打開新的Activity。
我們把MenuFragment中引用到的其它內容一個個添加進來。新建menu_fragment.xml文件,加入如下代碼:
- <?xml version="1.0" encoding="UTF-8"?>
- <LinearLayout xmlns:android="http://schemas.android.com/apk/res/android"
- android:layout_width="fill_parent"
- android:layout_height="fill_parent" >
- <ListView
- android:id="@+id/menu_list"
- android:layout_width="fill_parent"
- android:layout_height="fill_parent"
- ></ListView>
- </LinearLayout>
然後新建SoundFragment,裡面內容非常簡單:
- public class SoundFragment extends Fragment {
- @Override
- public View onCreateView(LayoutInflater inflater, ViewGroup container, Bundle savedInstanceState) {
- View view = inflater.inflate(R.layout.sound_fragment, container, false);
- return view;
- }
- }
這裡SoundFragment需要用到sound_fragment.xml布局文件,因此這裡我們新建這個布局文件,並加入如下代碼:
- <?xml version="1.0" encoding="utf-8"?>
- <RelativeLayout xmlns:android="http://schemas.android.com/apk/res/android"
- android:layout_width="match_parent"
- android:layout_height="match_parent"
- android:background="#00ff00"
- android:orientation="vertical" >
- <TextView
- android:layout_width="wrap_content"
- android:layout_height="wrap_content"
- android:layout_centerInParent="true"
- android:textSize="28sp"
- android:textColor="#000000"
- android:text="This is sound view"
- />
- </RelativeLayout>
同樣的道理,我們再新建DisplayFragment和display_fragment.xml布局文件:
- public class DisplayFragment extends Fragment {
- public View onCreateView(LayoutInflater inflater, ViewGroup container, Bundle savedInstanceState) {
- View view = inflater.inflate(R.layout.display_fragment, container, false);
- return view;
- }
- }
- <?xml version="1.0" encoding="utf-8"?>
- <RelativeLayout xmlns:android="http://schemas.android.com/apk/res/android"
- android:layout_width="match_parent"
- android:layout_height="match_parent"
- android:background="#0000ff"
- android:orientation="vertical" >
- <TextView
- android:layout_width="wrap_content"
- android:layout_height="wrap_content"
- android:layout_centerInParent="true"
- android:textSize="28sp"
- android:textColor="#000000"
- android:text="This is display view"
- />
- </RelativeLayout>
然後新建SoundActivity,代碼如下:
- public class SoundActivity extends Activity {
- @Override
- protected void onCreate(Bundle savedInstanceState) {
- super.onCreate(savedInstanceState);
- setContentView(R.layout.sound_activity);
- }
- }
這個Activity只是加載了一個布局文件,現在我們來實現sound_activity.xml這個布局文件:
- <?xml version="1.0" encoding="utf-8"?>
- <fragment xmlns:android="http://schemas.android.com/apk/res/android"
- android:id="@+id/sound_fragment"
- android:name="com.example.fragmentdemo.SoundFragment"
- android:layout_width="match_parent"
- android:layout_height="match_parent" >
- </fragment>
這個布局文件引用了SoundFragment,這樣寫的好處就是,以後我們只需要在SoundFragment中修改代碼,SoundActivity就會跟著自動改變了,因為它所有的代碼都是從SoundFragment中引用過來的。
好,同樣的方法,我們再完成DisplayActivity:
- public class DisplayActivity extends Activity {
- @Override
- protected void onCreate(Bundle savedInstanceState) {
- super.onCreate(savedInstanceState);
- setContentView(R.layout.display_activity);
- }
- }
然後加入display_activity.xml:
- <?xml version="1.0" encoding="utf-8"?>
- <fragment xmlns:android="http://schemas.android.com/apk/res/android"
- android:id="@+id/display_fragment"
- android:name="com.example.fragmentdemo.DisplayFragment"
- android:layout_width="match_parent"
- android:layout_height="match_parent" >
- </fragment>
現在所有的代碼就都已經完成了,我們來看一下效果吧。
首先將程序運行在手機上,效果圖如下:
分別點擊Sound和Display,界面會跳轉到聲音和顯示界面:
然後將程序在平板上運行,點擊Sound,效果圖如下:
然後點擊Display切換到顯示界面,效果圖如下:
這樣我們就成功地讓程序同時兼容手機和平板了。當然,這只是一個簡單的demo,更多復雜的內容需要大家自己去實現了。
好了,今天的講解到此結束,有疑問的朋友請在下面留言。
源碼下載,請點擊這裡
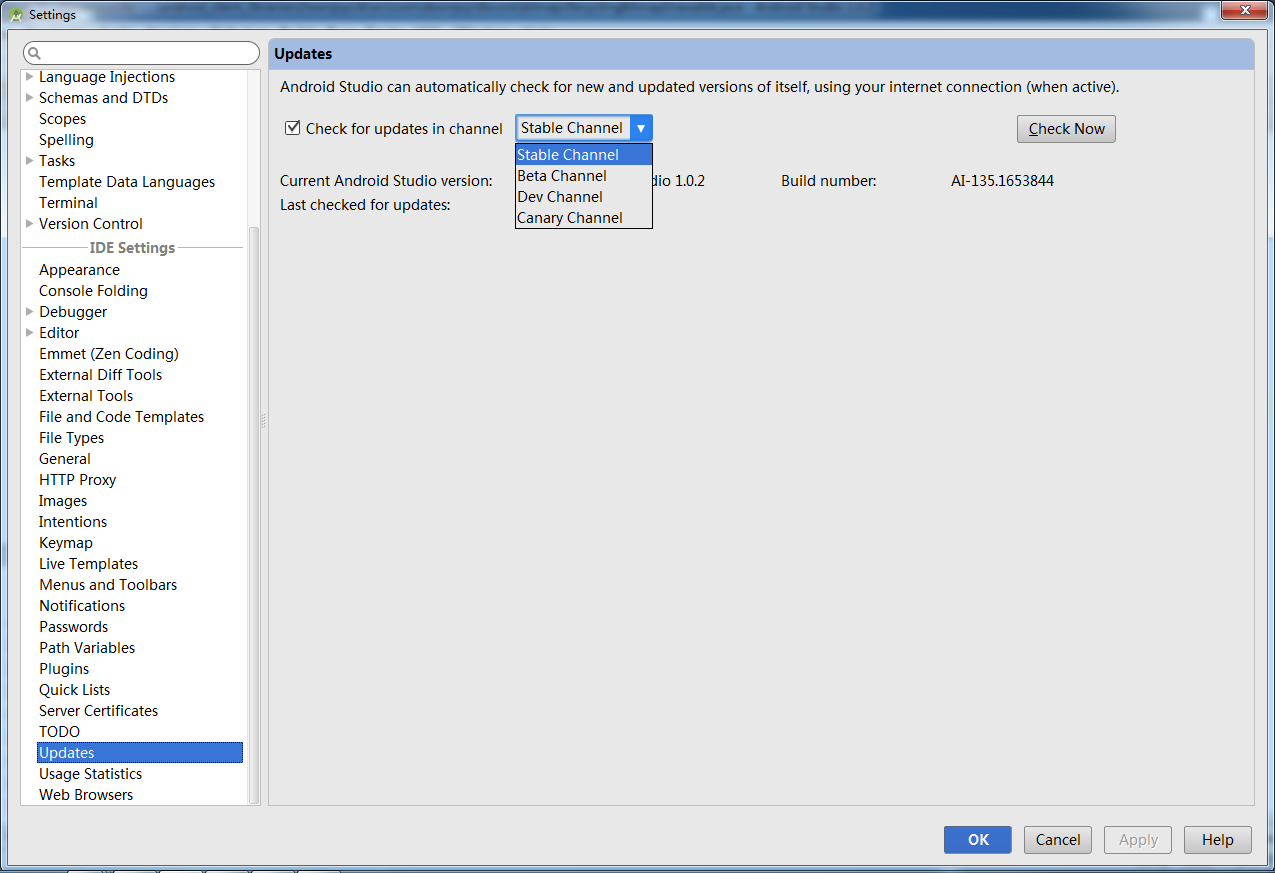 clipse項目遷移到android studio的方法(圖文最新版)
前言 最近Android studio(下文簡稱AS)官方發布了正式版,目前火得不行。個人認為主要是因為android是google自家的產品,AS也是他自己搞的
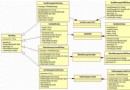 Android 第三方應用接入微信平台研究情況分享(一)
微信平台開放後倒是挺火的,許多第三方應用都想試下接入微信這個平台,畢竟可以利用微信建立起來的關系鏈來拓展自己的應用還是挺不錯的,可以節約很多在社交方面的開銷,我最
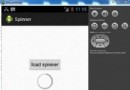 Android加載Spinner
可以顯示在的Android任務,通過加載進度條的進展。進度條有兩種形狀。加載欄和加載微調(spinner)。在本章中,我們將討論微調(spinner)。Spinner 用
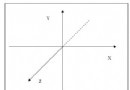 Android編程之OpenGL繪圖技巧總結
本文實例講述了Android編程之OpenGL繪圖技巧。分享給大家供大家參考,具體如下: 很久不用OpenGL ES繪圖,怕自己忘記了,於是重新復習一遍,順便原理