首先我們發現現在我們所用的android智能手機大部分都有當你在打電話時按power鍵來掛斷電話,一般都是在設置中。
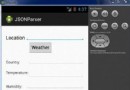
我主要是在原生源碼中添加這一功能,主要用於學習。。。。先看一張圖:

看到那個按電源鍵掛斷電話吧,那就是我所添加的,本來原生源碼中是沒有這一欄的。。。。。
大概思路:
首先我先添加這一個checkboxPreference,然後將是否選擇這一功能的值(0和1)存到data/data/com.android.providers.settings
/databases/settings.db數據庫的system表中
,然後再根據數據庫表中的值在PhoneWindownManager.java中去處理。
具體過程:
首先找到setting的源碼,在源碼下我們要找到通話設置,在seting.xml中我們能找到
代碼如下:
<SPAN > <com.android.settings.IconPreferenceScreen
android:key="call_settings"
settings:icon="@drawable/ic_settings_call"
android:title="@string/call_settings_title">
<intent
android:action="android.intent.action.MAIN"
android:targetPackage="com.android.phone"
android:targetClass="com.android.phone.CallFeaturesSetting" />
</com.android.settings.IconPreferenceScreen></SPAN>
這個call_settings就是我們在setting(設置)中看到的通話設置,但是我們卻不能在settings中的源碼中找到關於call_settings的布局文件, 因此我們需要找到它,其實這個布局文件是在package/app/Phone中,也就是在Phone這個app源碼的資源文件中。
因此我們在Phone的資源文件下能找到Call_feature_setting.xml文件如下:
代碼如下:
<SPAN ><PreferenceScreen xmlns:android="http://schemas.android.com/apk/res/android"
xmlns:phone="http://schemas.android.com/apk/res/com.android.phone"
android:title="@string/call_settings">
<PreferenceScreen
android:key="button_fdn_key"
android:title="@string/fdn"
android:summary="@string/sum_fdn"
android:persistent="false">
<intent android:action="android.intent.action.MAIN"
android:targetPackage="com.android.phone"
android:targetClass="com.android.phone.FdnSetting" />
</PreferenceScreen>
<PreferenceCategory
android:key="button_voicemail_category_key"
android:title="@string/voicemail"
android:persistent="false">
<ListPreference
android:key="button_voicemail_provider_key"
android:title="@string/voicemail_provider"
android:summary="@string/sum_voicemail_choose_provider"
android:defaultValue=""
android:persistent="true"
/>
<PreferenceScreen android:key="button_voicemail_setting_key"
android:title="@string/voicemail_settings"
android:persistent="false">
<!-- Note for all com.android.phone.EditPhoneNumberPreference objects
The last several attributes are for use with the EditText field
in the dialog. These attributes are forwarded to that field
when the edittext is created. The attributes include:
1. android:singleLine
2. android:autoText
3. android:background -->
<com.android.phone.EditPhoneNumberPreference
android:key="button_voicemail_key"
android:title="@string/voicemail_settings_number_label"
android:persistent="false"
android:dialogTitle="@string/voicemail"
phone:confirmMode="confirm"
android:singleLine="true"
android:autoText="false" />
</PreferenceScreen>
</PreferenceCategory>
。。。。。。。。。。。。。。。。。。
。。。。。。。。。。。。。。。。。
</SPAN>
因此我們可以在最前面添加一個checkboxPreference
代碼如下:
<SPAN ><CheckBoxPreference
android:key="press_power_end_call_key"
android:title="@string/press_power_end_call"
android:persistent="false"/></SPAN>
變成:
代碼如下:
<SPAN ><PreferenceScreen xmlns:android="http://schemas.android.com/apk/res/android"
xmlns:phone="http://schemas.android.com/apk/res/com.android.phone"
android:title="@string/call_settings">
<CheckBoxPreference
android:key="press_power_end_call_key"
android:title="@string/press_power_end_call"
android:persistent="false"/>
<PreferenceScreen
android:key="button_fdn_key"
android:title="@string/fdn"
android:summary="@string/sum_fdn"
android:persistent="false">
<intent android:action="android.intent.action.MAIN"
android:targetPackage="com.android.phone"
android:targetClass="com.android.phone.FdnSetting" />
</PreferenceScreen>
。。。。。。。
。。。。。。。
。。。。。。。</SPAN>
在這裡有自己定義的:
android:title="@string/press_power_end_call"
所以我們要在資源的string.xml文件中添加相關的信息:
在package/app/Phone/res/values/string.xml中添加:
<string name="press_power_end_call">press_power_end_call</string>
在package/app/Phone/res/values-zh-rCN/string.xml中添加:
<string name="press_power_end_call" msgid="4676390750360727396">按電源鍵掛斷電話</string>
到這裡就算添加好了UI上的東西,接下來就是代碼了:
在package/app/Phone/src/com/android/phone下找到CallFeatureSetting.java文件,
在 public boolean onPreferenceChange(Preference preference, Object objValue) 方法中要增加一個如果選擇了按power鍵掛電話的事件:
代碼如下:
<SPAN >//add by xxnan
else if (preference == press_power_end_call) {
//如果勾選就將1存到system表的press_power_end_call中
Settings.System.putInt(getContentResolver(),
"press_power_end_call",
press_power_end_call.isChecked() ? 1 : 0);
//end by xxnan </SPAN>
在OnCreate添加如下代碼之後:
代碼如下:
protected void onCreate(Bundle icicle) {
super.onCreate(icicle);
if (DBG) log("Creating activity");
mPhone = PhoneFactory.getDefaultPhone();
addPreferencesFromResource(R.xml.call_feature_setting);
//add by xxnan
ContentResolver resolver = getContentResolver();
press_power_end_call= (CheckBoxPreference)findPreference(press_power_end_call_key);
press_power_end_call.setOnPreferenceChangeListener(this);
// 獲的數據庫system表裡press_power_end_call的值,也就是是否選擇了checkboxpreference
int press_power_end_call_key=Settings.System.getInt(getContentResolver(),
"press_power_end_call",0);
//如果得到的值是1,則下次打開setting的話,選項框要勾選
if(press_power_end_call_key==1)
press_power_end_call.setChecked(true);
//end by xxnan
mAudioManager = (AudioManager) getSystemService(Context.AUDIO_SERVICE);
// get buttons
PreferenceScreen prefSet = getPreferenceScreen();
mSubMenuVoicemailSettings = (EditPhoneNumberPreference)findPreference(BUTTON_VOICEMAIL_KEY);
。。。。。。。
。。。。。。。
這樣就算差不多完成了到獲取是否開啟這一功能存放和取出到系統數據庫中,接下來就是到framework/base/policy/src/com/android
/internal/policy/impl下的
PhoneWindowManager.java中去處理了,之前我們就有分析到PhoneWindowManager.java中的
public int interceptKeyBeforeQueueing(long whenNanos, int action, int flags, int keyCode, int scanCode, int policyFlags,
boolean isScreenOn)方法來接受按power鍵的事件,在這個方法裡我們只需要添加很少代碼:
原來代碼是:
代碼如下:
case KeyEvent.KEYCODE_POWER: {
result &= ~ACTION_PASS_TO_USER;
if (down) {
Log.i("xxnan","xxnan"+"xiaxiangnan");
ITelephony telephonyService = getTelephonyService();
boolean hungUp = false;
if (telephonyService != null) {
try {
if (telephonyService.isRinging()) {
// Pressing Power while there's a ringing incoming
// call should silence the ringer.
telephonyService.silenceRinger();
} else if ((mIncallPowerBehavior
& Settings.Secure.INCALL_POWER_BUTTON_BEHAVIOR_HANGUP) != 0
&& telephonyService.isOffhook()) {
// Otherwise, if "Power button ends call" is enabled,
// the Power button will hang up any current active call.
hungUp = telephonyService.endCall();
}
} catch (RemoteException ex) {
Log.w(TAG, "ITelephony threw RemoteException", ex);
}
}
interceptPowerKeyDown(!isScreenOn || hungUp);
。。。。。。。。。。。。
。。。。。。。。。。。。
修改後:
代碼如下:
case KeyEvent.KEYCODE_POWER: {
result &= ~ACTION_PASS_TO_USER;
if (down) {
Log.i("xxnan","xxnan"+"xiaxiangnan");
int end_call_key=Settings.System.getInt(mContext.getContentResolver(),
"press_power_end_call",0); //取出數據庫中是否打開這一功能的值
Log.i("end_call_key","end_call_key="+end_call_key);
ITelephony telephonyService = getTelephonyService();
boolean hungUp = false;
if (telephonyService != null) {
try {
//如果是電話正在打且開啟了這一功能,當按power鍵就掛掉電話
if (telephonyService.isRinging()&&end_call_key==1) {
// Pressing Power while there's a ringing incoming
// call should silence the ringer.
// telephonyService.silenceRinger();
hungUp=telephonyService.endCall();
} else if ((mIncallPowerBehavior
& Settings.Secure.INCALL_POWER_BUTTON_BEHAVIOR_HANGUP) != 0
&& telephonyService.isOffhook()) {
// Otherwise, if "Power button ends call" is enabled,
// the Power button will hang up any current active call.
hungUp = telephonyService.endCall();
}
} catch (RemoteException ex) {
Log.w(TAG, "ITelephony threw RemoteException", ex);
}
}
interceptPowerKeyDown(!isScreenOn || hungUp);
。。。。。。。。。。。
。。。。。。。。。。。
由於我這個開發板上是不能插電話卡的也就沒能實驗成功,但是原理應該就這樣的!
最後修改過的地方都要重新編譯,那麼我們要在源碼下編譯app下的Phone以及framework下的policy
最後生成的out/。。。/system/app/Phone.apk和out/。。。。/system/framework/android.policy.jar都要替換
手機裡的相同(adb shell 進入你的手機,要有root權限)文件應該就可以了。
 深入淺析Android Fragment(下篇)
 Android 輕松實現仿淘寶地區選擇
 Android加載Spinner
 Android提高之多級樹形菜單的實現方法