編輯:Android開發實例
PopupWindow可以實現浮層效果,主要方法有:可以自定義view,通過LayoutInflator方法;可以出現和退出時顯示動畫;可以指定顯示位置等。
為了將PopupWindow的多個功能展現並力求用簡單的代碼實現,編寫了一個點擊按鈕左側彈出菜單的功能,實現出現和退出時顯示動畫效果並點擊其他區域時彈出層自動消失,效果圖如下:
源碼:
1.PopwindowOnLeftActivity.java
代碼如下:
package com.pop.main;
import android.app.Activity;
import android.os.Bundle;
import android.view.MotionEvent;
import android.view.View;
import android.view.View.OnClickListener;
import android.view.View.OnTouchListener;
import android.widget.Button;
import android.widget.PopupWindow;
public class PopwindowOnLeftActivity extends Activity {
// 聲明PopupWindow對象的引用
private PopupWindow popupWindow;
/** Called when the activity is first created. */
@Override
public void onCreate(Bundle savedInstanceState) {
super.onCreate(savedInstanceState);
setContentView(R.layout.main);
// 點擊按鈕彈出菜單
Button pop = (Button) findViewById(R.id.popBtn);
pop.setOnClickListener(popClick);
}
//點擊彈出左側菜單的顯示方式
OnClickListener popClick = new OnClickListener() {
@Override
public void onClick(View v) {
// TODO Auto-generated method stub
getPopupWindow();
// 這裡是位置顯示方式,在按鈕的左下角
popupWindow.showAsDropDown(v);
// 這裡可以嘗試其它效果方式,如popupWindow.showAsDropDown(v,
// (screenWidth-dialgoWidth)/2, 0);
// popupWindow.showAtLocation(findViewById(R.id.layout),
// Gravity.CENTER, 0, 0);
}
};
/**
* 創建PopupWindow
*/
protected void initPopuptWindow() {
// TODO Auto-generated method stub
// 獲取自定義布局文件pop.xml的視圖
View popupWindow_view = getLayoutInflater().inflate(R.layout.pop, null,
false);
// 創建PopupWindow實例,200,150分別是寬度和高度
popupWindow = new PopupWindow(popupWindow_view, 200, 150, true);
// 設置動畫效果
popupWindow.setAnimationStyle(R.style.AnimationFade);
//點擊其他地方消失
popupWindow_view.setOnTouchListener(new OnTouchListener() {
@Override
public boolean onTouch(View v, MotionEvent event) {
// TODO Auto-generated method stub
if (popupWindow != null && popupWindow.isShowing()) {
popupWindow.dismiss();
popupWindow = null;
}
return false;
}
});
// pop.xml視圖裡面的控件
Button open = (Button) popupWindow_view.findViewById(R.id.open);
Button save = (Button) popupWindow_view.findViewById(R.id.save);
Button close = (Button) popupWindow_view.findViewById(R.id.close);
// pop.xml視圖裡面的控件觸發的事件
// 打開
open.setOnClickListener(new OnClickListener() {
@Override
public void onClick(View v) {
// TODO Auto-generated method stub
// 這裡可以執行相關操作
System.out.println("打開操作");
// 對話框消失
popupWindow.dismiss();
}
});
// 保存
save.setOnClickListener(new OnClickListener() {
@Override
public void onClick(View v) {
// TODO Auto-generated method stub
// 這裡可以執行相關操作
System.out.println("保存操作");
popupWindow.dismiss();
}
});
// 關閉
close.setOnClickListener(new OnClickListener() {
@Override
public void onClick(View v) {
// TODO Auto-generated method stub
// 這裡可以執行相關操作
System.out.println("關閉操作");
popupWindow.dismiss();
}
});
}
/***
* 獲取PopupWindow實例
*/
private void getPopupWindow() {
if (null != popupWindow) {
popupWindow.dismiss();
return;
} else {
initPopuptWindow();
}
}
}
主要界面
2.main.xml
代碼如下:
<?xml version="1.0" encoding="utf-8"?>
<LinearLayout xmlns:android="http://schemas.android.com/apk/res/android"
android:layout_width="fill_parent"
android:layout_height="fill_parent"
android:orientation="vertical" >
<Button android:id="@+id/popBtn"
android:layout_width="fill_parent"
android:layout_height="wrap_content"
android:text="@string/pop_left" />
</LinearLayout>
彈出層的布局
3.pop.xml
代碼如下:
<?xml version="1.0" encoding="utf-8"?>
<LinearLayout xmlns:android="http://schemas.android.com/apk/res/android"
android:orientation="vertical"
android:layout_width="fill_parent"
android:layout_height="fill_parent"
android:background="@android:color/darker_gray">
<Button android:id="@+id/open"
android:layout_width="fill_parent"
android:layout_height="wrap_content"
android:background="@drawable/btn"
android:text="@string/open"/>
<Button android:id="@+id/save"
android:layout_width="fill_parent"
android:layout_height="wrap_content"
android:background="@drawable/btn"
android:text="@string/save"/>
<Button android:id="@+id/close"
android:layout_width="fill_parent"
android:layout_height="wrap_content"
android:background="@drawable/btn"
android:text="@string/close"/>
</LinearLayout>
value下的style文件
4.style
代碼如下:
<?xml version="1.0" encoding="utf-8"?>
<resources>
<style name="AnimationFade">
<!-- PopupWindow左右彈出的效果-->
<item name="android:windowEnterAnimation">@anim/in_lefttoright</item>
<item name="android:windowExitAnimation">@anim/out_righttoleft</item>
</style>
</resources>
value下的string文件
5.string.xml
代碼如下:
<?xml version="1.0" encoding="utf-8"?>
<resources>
<string name="hello">Hello World, PopwindowOnLeftActivity!</string>
<string name="app_name">PopwindowOnLeft</string>
<string name="pop_left">彈出左側菜單</string>
<string name="open">打開</string>
<string name="save">保存</string>
<string name="close">關閉</string>
</resources>
anim目錄下的文件
出現時從左往右的動畫文件
6.in_lefttoright.xml
代碼如下:
<?xml version="1.0" encoding="utf-8"?>
<set xmlns:android="http://schemas.android.com/apk/res/android">
<!-- 定義從左向右進入的動畫 -->
<translate
android:fromXDelta="-100%"
android:toXDelta="0"
android:duration="500"/>
</set>
退出時從右往左消失的動畫
7.out_righttoleft.xml
代碼如下:
<?xml version="1.0" encoding="utf-8"?>
<set xmlns:android="http://schemas.android.com/apk/res/android">
<!-- 定義從右向左動畫退出動畫 -->
<translate
android:fromXDelta="0"
android:toXDelta="-100%"
android:duration="500"/>
</set>
 Android登錄實例
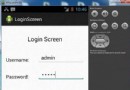
登錄應用程序的屏幕,詢問憑據登錄到一些特定的應用。可能需要登錄到Facebook,微博等本章介紹了,如何創建一個登錄界面,以及如何管理安全問題和錯誤嘗試。首先,必須定義兩
 Android控件系列之Button以及Android監聽器使用介紹
學習目的: 1、掌握在Android中如何建立Button 2、掌握Button的常用屬性 3、掌握Button按鈕的點擊事件(監聽器) Button是各種UI中
 Android登錄實例
登錄應用程序的屏幕,詢問憑據登錄到一些特定的應用。可能需要登錄到Facebook,微博等本章介紹了,如何創建一個登錄界面,以及如何管理安全問題和錯誤嘗試。首先,必須定義兩
 Android JSON解析器
JSON代表JavaScript對象符號。它是一個獨立的數據交換格式,是XML的最佳替代品。本章介紹了如何解析JSON文件,並從中提取所需的信息。Android提供了四個