編輯:Android開發實例
本文實例講述了Android編程使用Fragment界面向下跳轉並一級級返回的實現方法。分享給大家供大家參考,具體如下:
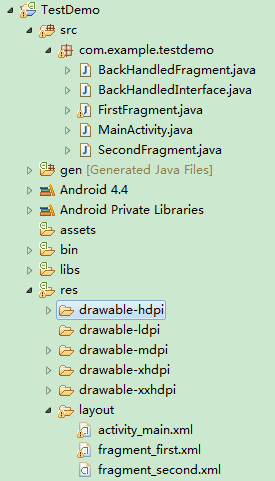
1.首先貼上項目結構圖:
2.先添加一個接口文件BackHandledInterface.java,定義一個setSelectedFragment方法用於設置當前加載的Fragment在棧頂,主界面MainActivity須實現此接口,代碼如下:
package com.example.testdemo;
public interface BackHandledInterface {
  public abstract void setSelectedFragment(BackHandledFragment selectedFragment);
}
3.定義一個抽象類BackHandledFragment繼承自Fragment,後面跳轉的Fragment界面都要繼承自BackHandledFragment。抽象類BackHandledFragment中定義一個返回值為boolean類型的onBackPressed方法,用於處理點擊返回按鍵(物理Back鍵)時的邏輯,若該方法返回false,表示當前Fragment不消費返回事件,而由Fragment所屬的FragmentActivity來處理這個事件。代碼如下:
package com.example.testdemo;
import android.os.Bundle;
import android.support.v4.app.Fragment;
public abstract class BackHandledFragment extends Fragment {
  protected BackHandledInterface mBackHandledInterface;
  /**
   * 所有繼承BackHandledFragment的子類都將在這個方法中實現物理Back鍵按下後的邏輯
   */
  protected abstract boolean onBackPressed();
  @Override
  public void onCreate(Bundle savedInstanceState) {
    super.onCreate(savedInstanceState);
    if (!(getActivity() instanceof BackHandledInterface)) {
      throw new ClassCastException(
          "Hosting Activity must implement BackHandledInterface");
    } else {
      this.mBackHandledInterface = (BackHandledInterface) getActivity();
    }
  }
  @Override
  public void onStart() {
    super.onStart();
    // 告訴FragmentActivity,當前Fragment在棧頂
    mBackHandledInterface.setSelectedFragment(this);
  }
}
4.主界面MainActivity要繼承FragmentActivity才能調用getSupportFragmentManager()方法來處理Fragment。MainActivity還需重寫onBackPressed方法用來捕捉返回鍵(Back Key)事件,代碼如下:
package com.example.testdemo;
import android.os.Bundle;
import android.support.v4.app.FragmentActivity;
import android.support.v4.app.FragmentManager;
import android.support.v4.app.FragmentTransaction;
import android.view.View;
import android.view.View.OnClickListener;
import android.widget.Button;
public class MainActivity extends FragmentActivity implements
    BackHandledInterface {
  private static MainActivity mInstance;
  private BackHandledFragment mBackHandedFragment;
  private Button btnSecond;
  @Override
  public void onCreate(Bundle savedInstanceState) {
    super.onCreate(savedInstanceState);
    setContentView(R.layout.activity_main);
    btnSecond = (Button) findViewById(R.id.btnSecond);
    btnSecond.setOnClickListener(new OnClickListener() {
      @Override
      public void onClick(View v) {
        FirstFragment first = new FirstFragment();
        loadFragment(first);
        btnSecond.setVisibility(View.GONE);
      }
    });
  }
  public static MainActivity getInstance() {
    if (mInstance == null) {
      mInstance = new MainActivity();
    }
    return mInstance;
  }
  public void loadFragment(BackHandledFragment fragment) {
    BackHandledFragment second = fragment;
    FragmentManager fm = getSupportFragmentManager();
    FragmentTransaction ft = fm.beginTransaction();
    ft.replace(R.id.firstFragment, second, "other");
    ft.addToBackStack("tag");
    ft.commit();
  }
  @Override
  public void setSelectedFragment(BackHandledFragment selectedFragment) {
    this.mBackHandedFragment = selectedFragment;
  }
  @Override
  public void onBackPressed() {
    if (mBackHandedFragment == null || !mBackHandedFragment.onBackPressed()) {
      if (getSupportFragmentManager().getBackStackEntryCount() == 0) {
        super.onBackPressed();
      } else {
        if (getSupportFragmentManager().getBackStackEntryCount() == 1) {
          btnSecond.setVisibility(View.VISIBLE);
        }
        getSupportFragmentManager().popBackStack();
      }
    }
  }
}
5.分別添加兩個子級Fragment,FirstFragment.java和SecondFragment.java,代碼分別如下:
FirstFragment.java:
package com.example.testdemo;
import android.os.Bundle;
import android.support.annotation.Nullable;
import android.support.v4.app.FragmentManager;
import android.support.v4.app.FragmentTransaction;
import android.view.LayoutInflater;
import android.view.View;
import android.view.View.OnClickListener;
import android.view.ViewGroup;
import android.widget.Button;
public class FirstFragment extends BackHandledFragment {
  private View myView;
  private Button btnSecond;
  @Override
  public View onCreateView(LayoutInflater inflater,
      @Nullable ViewGroup container, @Nullable Bundle savedInstanceState) {
    myView = inflater.inflate(R.layout.fragment_first, null);
    initView();
    return myView;
  }
  private void initView() {
    btnSecond = (Button) myView.findViewById(R.id.btnSecond);
    btnSecond.setOnClickListener(new OnClickListener() {
      @Override
      public void onClick(View v) {
        SecondFragment second = new SecondFragment();
        FragmentManager fm = getFragmentManager();
        FragmentTransaction ft = fm.beginTransaction();
        ft.replace(R.id.firstFragment, second);
        ft.addToBackStack("tag");
        ft.commit();
      }
    });
  }
  @Override
  protected boolean onBackPressed() {
    return false;
  }
}
SecondFragment.java:
package com.example.testdemo;
import android.os.Bundle;
import android.support.annotation.Nullable;
import android.view.LayoutInflater;
import android.view.View;
import android.view.ViewGroup;
public class SecondFragment extends BackHandledFragment {
  private View mView;
  @Override
  public View onCreateView(LayoutInflater inflater,
      @Nullable ViewGroup container, @Nullable Bundle savedInstanceState) {
    mView = inflater.inflate(R.layout.fragment_second, null);
    return mView;
  }
  @Override
  protected boolean onBackPressed() {
    return false;
  }
}
6.三個布局文件代碼如下:
activity_main.xml:
<RelativeLayout xmlns:android="http://schemas.android.com/apk/res/android"
  xmlns:tools="http://schemas.android.com/tools"
  android:layout_width="match_parent"
  android:layout_height="match_parent"
  android:orientation="vertical" >
  <TextView
    android:layout_width="wrap_content"
    android:layout_height="wrap_content"
    android:layout_centerInParent="true"
    android:text="FragmentActivity 父界面"
    android:textSize="26sp" />
  <Button
    android:id="@+id/btnSecond"
    android:layout_width="wrap_content"
    android:layout_height="wrap_content"
    android:layout_alignParentBottom="true"
    android:text="跳轉到FirstFragment" />
  <FrameLayout
    android:id="@+id/firstFragment"
    android:layout_width="match_parent"
    android:layout_height="match_parent" >
  </FrameLayout>
</RelativeLayout>
fragment_first.xml:
<?xml version="1.0" encoding="utf-8"?>
<RelativeLayout xmlns:android="http://schemas.android.com/apk/res/android"
  android:layout_width="match_parent"
  android:layout_height="match_parent"
  android:background="#e5e5e5"
  android:orientation="vertical" >
  <TextView
    android:layout_width="wrap_content"
    android:layout_height="wrap_content"
    android:layout_centerInParent="true"
    android:text="FirstFragment"
    android:textColor="#000000"
    android:textSize="26sp" />
  <Button
    android:id="@+id/btnSecond"
    android:layout_width="wrap_content"
    android:layout_height="wrap_content"
    android:layout_alignParentBottom="true"
    android:text="打開SecondFragment" />
</RelativeLayout>
fragment_second.xml:
<?xml version="1.0" encoding="utf-8"?>
<RelativeLayout xmlns:android="http://schemas.android.com/apk/res/android"
  android:layout_width="match_parent"
  android:layout_height="match_parent"
  android:background="#e5e5e5"
  android:orientation="vertical" >
  <TextView
    android:layout_width="wrap_content"
    android:layout_height="wrap_content"
    android:layout_centerInParent="true"
    android:text="SecondFragment"
    android:textColor="#000000"
    android:textSize="26sp" />
</RelativeLayout>
7.最後奉上實例鏈接:
完整實例代碼代碼點擊此處本站下載。
希望本文所述對大家Android程序設計有所幫助。
 Android加載Spinner
可以顯示在的Android任務,通過加載進度條的進展。進度條有兩種形狀。加載欄和加載微調(spinner)。在本章中,我們將討論微調(spinner)。Spinner 用
 Android JSON解析器
JSON代表JavaScript對象符號。它是一個獨立的數據交換格式,是XML的最佳替代品。本章介紹了如何解析JSON文件,並從中提取所需的信息。Android提供了四個
 Android JSON解析器
JSON代表JavaScript對象符號。它是一個獨立的數據交換格式,是XML的最佳替代品。本章介紹了如何解析JSON文件,並從中提取所需的信息。Android提供了四個
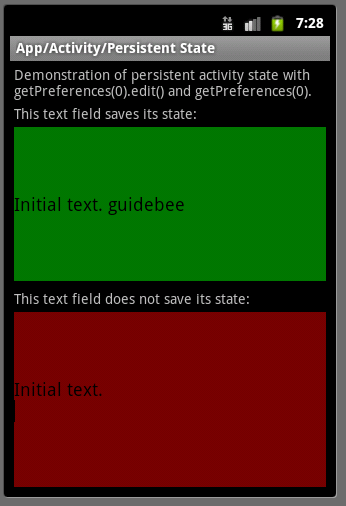 Android ApiDemo示例解讀系列之九:App
Android 提供了多種存儲數據的方法,其中最簡單的是使用Shared Preferences。