編輯:關於android開發
EventBus是一款針對Android優化的發布/訂閱事件總線。主要功能是替代Intent,Handler,BroadCast在Fragment,Activity,Service,線程之間傳遞消息.優點是開銷小,代碼更優雅。以及將發送者和接收者解耦。
1、下載EventBus的類庫
源碼:https://github.com/greenrobot/EventBus
2、基本使用
(1)自定義一個類,可以是空類,比如:
    public class AnyEventType {
         public AnyEventType(){}
     }
(2)在要接收消息的頁面注冊:
eventBus.register(this);
(3)發送消息
eventBus.post(new AnyEventType event);
(4)接受消息的頁面實現(共有四個函數,各功能不同):
public void onEvent(AnyEventType event) {}
public void onEventMainThread(AnyEventType event) {}
public void onEventBackgroundThread(AnyEventType event) {}
public void onEventAsync(AnyEventType event) {}
(5)解除注冊
eventBus.unregister(this);
順序就是這麼個順序,可真正讓自己寫,估計還是雲裡霧裡的,下面舉個例子來說明下。
首先,在EventBus中,獲取實例的方法一般是采用EventBus.getInstance()來獲取默認的EventBus實例,當然你也可以new一個又一個,個人感覺還是用默認的比較好,以防出錯。
先給大家看個例子:
當擊跳轉到第二個界面按鈕的時候,跳到第二個Activity,當點擊第二個activity上面的t按鈕的時候向第一個Activity發送消息,第一個按鈕使用的是
新建一個Activity,SecondActivity布局(activity_two.xml)
<?xml version="1.0" encoding="utf-8"?>
<RelativeLayout xmlns:android="http://schemas.android.com/apk/res/android"
    android:layout_width="match_parent"
    android:layout_height="match_parent"
    android:paddingBottom="@dimen/activity_vertical_margin"
    android:paddingLeft="@dimen/activity_horizontal_margin"
    android:paddingRight="@dimen/activity_horizontal_margin"
    android:paddingTop="@dimen/activity_vertical_margin">

    <Button
        android:layout_width="match_parent"
        android:layout_height="wrap_content"
        android:text="@string/bt_text_post"
        android:id="@+id/bt_post"/>
    <Button
        android:layout_width="match_parent"
        android:layout_height="wrap_content"
        android:text="@string/bt_text_post2"
        android:layout_below="@id/bt_post"
        android:id="@+id/bt_post2"/>
</RelativeLayout>
MainActivity.java
package com.nova.eventbus_1;

import android.content.Intent;
import android.os.Bundle;
import android.support.v7.app.AppCompatActivity;
import android.util.Log;
import android.view.View;
import android.widget.Button;
import android.widget.TextView;
import android.widget.Toast;

import org.greenrobot.eventbus.EventBus;
import org.greenrobot.eventbus.Subscribe;

public class MainActivity extends AppCompatActivity {

    private Button button_jump;
    private TextView tv_notify;
    @Override
    protected void onCreate(Bundle savedInstanceState) {
        super.onCreate(savedInstanceState);
        setContentView(R.layout.activity_main);

        button_jump= (Button) findViewById(R.id.bt_jump);
        tv_notify= (TextView) findViewById(R.id.tv_notify);
        button_jump.setOnClickListener(new View.OnClickListener() {
            @Override
            public void onClick(View v) {
               <strong> Intent intent=new Intent(MainActivity.this,SecondActivity.class);
                startActivityForResult(intent,1);</strong>
            }
        });
    }

    @Override
    protected void onActivityResult(int requestCode, int resultCode, Intent data) {
        switch (requestCode){
            case 1:
                if(resultCode==1){
                    String returnedData=data.getStringExtra("com.nova.eventbus_1.data_return");
                    tv_notify.setText(returnedData);
                    Toast.makeText(MainActivity.this,returnedData,Toast.LENGTH_LONG).show();
                    Log.i("現在的線程",Thread.currentThread().getName());
                }
        }

    }

}
SecondActivity.java
package com.nova.eventbus_1;

import android.content.Intent;
import android.os.Bundle;
import android.support.annotation.Nullable;
import android.support.v7.app.AppCompatActivity;
import android.view.View;
import android.widget.Button;

import org.greenrobot.eventbus.EventBus;

/**
 * Created by Nova on 2016/4/11.
 */
public class SecondActivity extends AppCompatActivity {
    private Button button_post;
    private Button button_post2;//使用EventBus傳遞
    @Override
    protected void onCreate(@Nullable Bundle savedInstanceState) {
        super.onCreate(savedInstanceState);
        setContentView(R.layout.activity_two);
        button_post= (Button) findViewById(R.id.bt_post);
        button_post2= (Button) findViewById(R.id.bt_post2);
        button_post.setOnClickListener(new View.OnClickListener() {
            @Override
            public void onClick(View v) {
                Intent intent=new Intent();
                intent.putExtra("com.nova.eventbus_1.data_return","跳轉按鈕:被點擊了");
                setResult(1,intent);
                finish();
            }
        });

    }
}
package com.nova.eventbus_1;

/**
 * Created by Nova on 2016/4/12.
 * [email protected]
 */
public class FirstEvent {
    private String mMsg;

    public FirstEvent(String mMsg) {
        this.mMsg = mMsg;
    }

    public String getMsg() {
        return mMsg;
    }

}
在上面的GIF圖片的演示中,大家也可以看到,我們是要在MainActivity中接收發過來的消息的,所以我們在MainActivity中注冊消息。
通過我們會在OnCreate()函數中注冊EventBus,在OnDestroy()函數中反注冊。所以整體的注冊與反注冊的代碼如下:
package com.nova.eventbus_1;

import android.content.Intent;
import android.os.Bundle;
import android.support.v7.app.AppCompatActivity;
import android.util.Log;
import android.view.View;
import android.widget.Button;
import android.widget.TextView;
import android.widget.Toast;

import org.greenrobot.eventbus.EventBus;
import org.greenrobot.eventbus.Subscribe;

public class MainActivity extends AppCompatActivity {

    private Button button_jump;
    private TextView tv_notify;
    @Override
    protected void onCreate(Bundle savedInstanceState) {
        super.onCreate(savedInstanceState);
        setContentView(R.layout.activity_main);

       <strong> //注冊EventBus
        EventBus.getDefault().register(MainActivity.this);</strong>
        button_jump= (Button) findViewById(R.id.bt_jump);
        tv_notify= (TextView) findViewById(R.id.tv_notify);
        button_jump.setOnClickListener(new View.OnClickListener() {
            @Override
            public void onClick(View v) {
                Intent intent=new Intent(MainActivity.this,SecondActivity.class);
                startActivityForResult(intent,1);
            }
        });
    }

    @Override
    protected void onActivityResult(int requestCode, int resultCode, Intent data) {
        switch (requestCode){
            case 1:
                if(resultCode==1){
                    String returnedData=data.getStringExtra("com.nova.eventbus_1.data_return");
                    tv_notify.setText(returnedData);
                    Toast.makeText(MainActivity.this,returnedData,Toast.LENGTH_LONG).show();
                    Log.i("現在的線程",Thread.currentThread().getName());
                }
        }

    }

    @Subscribe
    public void onEventMainThread(FirstEvent event){
        String msg="onEventMainThread收到了消息:" + event.getMsg();
        tv_notify.setText(msg);
        Toast.makeText(MainActivity.this,msg,Toast.LENGTH_LONG).show();
        Log.i("現在的線程",Thread.currentThread().getName());
    }


    @Override
    protected void onDestroy() {
        super.onDestroy();
        <strong>EventBus.getDefault().unregister(MainActivity.this);</strong>
    }
}
發送消息是使用EventBus中的Post方法來實現發送的,發送過去的是我們新建的類的實例!
EventBus.getDefault().post(new FirstEvent("跳轉按鈕:被點擊了EventBus post"));
完整的SecondActivity.java的代碼如下:
package com.nova.eventbus_1;

import android.content.Intent;
import android.os.Bundle;
import android.support.annotation.Nullable;
import android.support.v7.app.AppCompatActivity;
import android.view.View;
import android.widget.Button;

import org.greenrobot.eventbus.EventBus;

/**
 * Created by Nova on 2016/4/11.
 */
public class SecondActivity extends AppCompatActivity {
    private Button button_post;
    private Button button_post2;//使用EventBus傳遞
    @Override
    protected void onCreate(@Nullable Bundle savedInstanceState) {
        super.onCreate(savedInstanceState);
        setContentView(R.layout.activity_two);
        button_post= (Button) findViewById(R.id.bt_post);
        button_post2= (Button) findViewById(R.id.bt_post2);
        button_post.setOnClickListener(new View.OnClickListener() {
            @Override
            public void onClick(View v) {
                Intent intent=new Intent();
                intent.putExtra("com.nova.eventbus_1.data_return","跳轉按鈕:被點擊了");
                setResult(1,intent);
                finish();
            }
        });
        button_post2.setOnClickListener(new View.OnClickListener() {
            @Override
            public void onClick(View v) {
                //EventBus使用方法
                EventBus.getDefault().post(new FirstEvent("跳轉按鈕:被點擊了EventBus post"));
                finish();
            }
        });
    }
}
接收消息時,我們使用EventBus中最常用的onEventMainThread()函數來接收消息,具體為什麼用這個,我們下篇再講,這裡先給大家一個初步認識,要先能把EventBus用起來先。
在MainActivity中重寫onEventMainThread(FirstEvent event),參數就是我們自己定義的類:
在收到Event實例後,我們將其中攜帶的消息取出,一方面Toast出去,一方面傳到TextView中;
@Subscribe
    public void onEventMainThread(FirstEvent event){
        String msg="onEventMainThread收到了消息:" + event.getMsg();
        tv_notify.setText(msg);
        Toast.makeText(MainActivity.this,msg,Toast.LENGTH_LONG).show();
        Log.i("現在的線程",Thread.currentThread().getName());
    }
切記一定在開頭寫上@Subscribe,不然報錯。
程序結束。
 ceph管理平台Calamari的擴展開發
ceph管理平台Calamari的擴展開發接近大半年沒有寫日志了,也許是自己越來越懶惰吧。但有時候寫寫東西能夠讓自己沉澱,還是回來記錄一下吧。入職大半年了,熟悉了一些相關
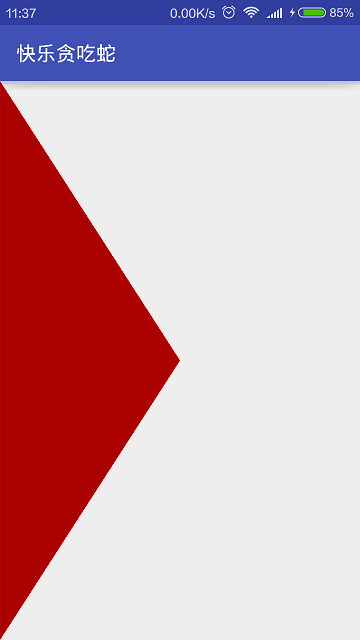 Android快樂貪吃蛇游戲實戰項目開發教程-04虛擬方向鍵(三)三角形按鈕效果,android-04
Android快樂貪吃蛇游戲實戰項目開發教程-04虛擬方向鍵(三)三角形按鈕效果,android-04該系列教程概述與目錄:http://www.cnblogs.com/
 [android] 手機衛士設置向導頁面,android向導
[android] 手機衛士設置向導頁面,android向導設置向導頁面,通過SharedPreferences來判斷是否已經設置過了,跳轉到不同的頁面 自
 初識 Android,初識android
初識 Android,初識android 創建博客有一年的時間了,一直沒把它用起來,頗感慚愧。近日突感有寫博客的沖動,更可怕的是這種沖動似乎比我體內的洪荒之力更為凶猛。