編輯:關於android開發
啦啦啦~又要和大家一起學習Android開發啦,博主心裡好激動哒~
在上篇博文中,我們通過線性布局和基礎組件的使用,完成了一個簡單的學生課外體育積分電子認證系統的界面,本篇博文,將和大家一起熟悉Button、RadioButton、EditText等基本控件,探討能夠處理這些控件的基本事件,學會彈出基本的對話框,能夠定制對話框中的內容,能對確定和取消按鈕的事件做處理。
在上一次實驗中,在onCreateView(Bundle savedInstanceState) 方法中調用 setContentView()方法將布局加載進來。如果需要用到布局中的某些控件的話,首先需要給控件一個 id:
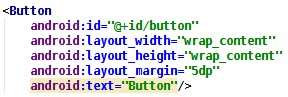
定義 id 的語法和引用資源類似,@+id/id 名稱,在同一個布局文件中不允許有重復的 id, 即使是不同控件也不行,但是不同的布局文件中可以使用同一個 id之後在 java 文件中將布局加載之後,也就是 setContentView()之後,使用 findViewById() 方法可以獲得該控件:

findViewById()方法帶一個參數,就是剛剛定義的那個 id,參數形式為 R.id.XXX,其中 XXX 就是剛剛定義的那個 id,由於 findViewById()方法返回的是一個 View 類型,所以需要 強制類型轉換為 Button 類型。
獲得這個 Button 之後,就可以對這個 Button 進行後續的操作了。
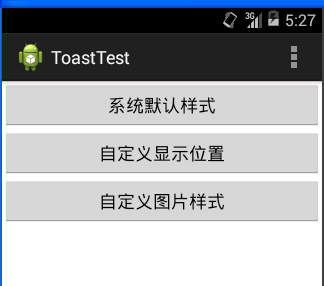
2、彈出 Toast 信息
Toast在APP開發中會經常用到,自己在開發測試中也會用到,測試在還會Logcat窗口顯示。
Toast的主要方法:
cancel 方法:關閉Toast視圖
getDuration 方法:獲取持續時間
getGravity 方法:獲取Toast視圖的位置
makeText 方法:生成標准Toast
setView 方法:設置顯示的View物件
getView 方法:獲取View對象
setGravity 方法:設置顯示位置
getXOffset 方法:獲取水平方向偏移量
getYOffset 方法:獲取垂直方向偏移量
setDuration 方法:設置持續時間
setText 方法:設置顯示的文本內容
show 方法:顯示提示
在需要彈出 Toast 信息的地方,寫上:

這個方法帶三個參數,context,text,duration。context 是一個上下文類型,寫上使用 這個方法的 java 類名加上.this 即可,text 是 Toast 要顯示的信息,duration 是 Toast 顯 示的時間長度,有 Toast.LENGTH_SHORT 和 Toast.LENGTH_LONG 可選,最後記得調用 show() 方法將 Toast 顯示出來。
主要包含3種形式的Toast:
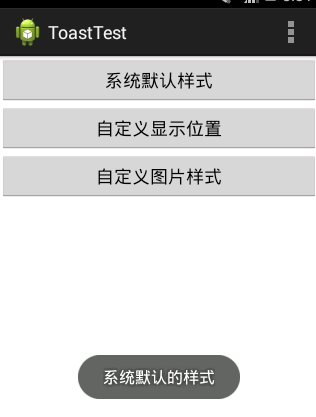
1、標准形式
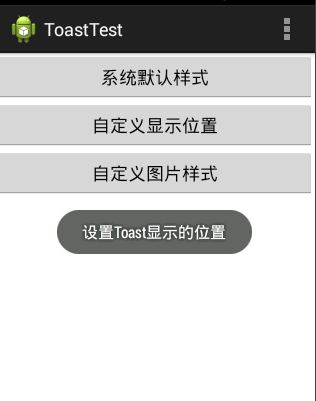
2、設置位置形式
3、帶圖片的Toast
函數代碼如下:
MainActivity .java
import java.io.InputStream;
import android.os.Bundle;
import android.annotation.SuppressLint;
import android.app.Activity;
import android.graphics.Bitmap;
import android.graphics.BitmapFactory;
import android.view.Gravity;
import android.view.Menu;
import android.view.View;
import android.widget.ImageView;
import android.widget.LinearLayout;
import android.widget.Toast;

@SuppressLint("ShowToast")
public class MainActivity extends Activity {
    Toast   toast;
    @Override
    protected void onCreate(Bundle savedInstanceState) {
        super.onCreate(savedInstanceState);
        setContentView(R.layout.main);
        //初始化Toast的主要作用是,在點擊按鈕是可以先立刻消除上一個toast
        toast=Toast.makeText(getApplicationContext(), "", 0);;
    }

    @Override
    public boolean onCreateOptionsMenu(Menu menu) {

        getMenuInflater().inflate(R.menu.main, menu);
        return true;
    }

    public void Button1(View v){
        toast.cancel();
        toast=Toast.makeText(getApplicationContext(), "系統默認的樣式", 1);

        toast.show();
    }

    public void Button2(View v){
        //清除上一個toast,不會有顯示延遲,更加美觀。不知道這種方法是否好,如果好請留言,學習學習。
        toast.cancel();
        toast=Toast.makeText(getApplicationContext(), "設置Toast顯示的位置", 1);
        toast.setGravity(Gravity.CENTER, 0, 0);

        toast.show();
        }
    public void Button3(View v){
        toast.cancel();
        toast=Toast.makeText(getApplicationContext(), "設置Toast顯示圖片和位置", 1);
        toast.setGravity(Gravity.CENTER, 0, 0);
        LinearLayout LinearToast = (LinearLayout) toast.getView();
        LinearToast.setOrientation(LinearLayout.HORIZONTAL);
        ImageView image = new ImageView(getApplicationContext());
        //為了美觀,將圖片縮小為原來的一半
        InputStream is =this.getResources().openRawResource(R.drawable.ic_launcher);
        BitmapFactory.Options options=new BitmapFactory.Options();
        options.inJustDecodeBounds = false;
        options.inSampleSize = 2;   //width,hight設為原來的二分一
        Bitmap btp =BitmapFactory.decodeStream(is,null,options);
        image.setImageBitmap(btp);
        LinearToast.addView(image,0);
        toast.show();
    }

}
下面以 Button 為例簡單介紹一下事件處 理。
要處理事件,首先要將與該事件有關的控件引入進來,比如要判斷用戶名是否為空,那麼 除了 Button 需要引入外(因為 Button 是觸發事件的主體),還需要引入用戶名的輸入框。 引入之後,button.setOnClickListener()中做處理,這裡的 button 是一個變量名,記得 換成自己定義的變量名。
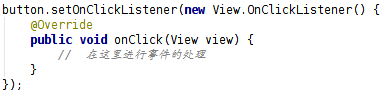
onClick 方法帶的 view 參數是觸發這個單擊事件的控件的引用,在這個例子中,view 就是 觸發事件的 Button,在 onClick()方法中做事件的處理,例如判斷用戶名是否為空: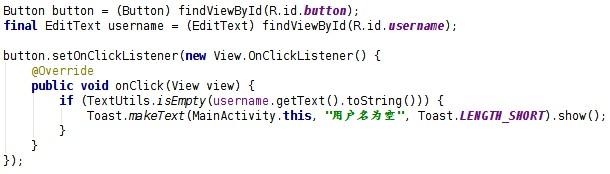
關於EditText,Button,RadioGroup各自有的一些方法建議查看API 文檔,不在這裡一一說明了。
Android 中最基本的對話框是 AlertDialog,之所以說它最簡單,是因為布局和使用的方法 都很簡單,布局是寫好的。標題,通過 setTitle()方法設置;圖標,通過setIcon()方法設置; 顯示在中間的主要信息,通過 setMessage() 方法顯示等。
AlertDialog.Builder創建對話框的幾個常用方法:
setTitle() :設置標題
setIcon() :設置圖標
setMessage():設置提示內容
setView() : 設置自定義視圖
setItems() :設置對話框要顯示的一個list
setMultiChoiceItems() :設置對話框顯示的復選框
setNeutralButton() :普通按鈕
setPositiveButton() :添加"Yes"按鈕
setNegativeButton() :添加"No"按鈕
create() : 創建對話框
show() :顯示對話框
顯示 一 個 AlertDialog 的基本步驟如下:
(1)創建 AlertDialog.Builder 對象
(2)調用上面的方法進行設置
(3)如果需要設置取消按鈕,方法原型如下:

(4)調用 AlertDialog.Builder 的 create() 方法創建 AlertDialog 對象,再調用 AlertDialog 對象的 show()方法將對話框顯示出來。
如果不是很明白可以參考下方的實驗代碼加以理解啦~
Google 在 2015 年的 IO 大會上發布了較之前更為詳細的 Material Design 規范和全新的 Android Design Support Library,Snackbar 就是其中的一個控件,可以用來代替 Toast 信息,除了用戶體驗更好以外,功能也更強大。先來看一下語法:
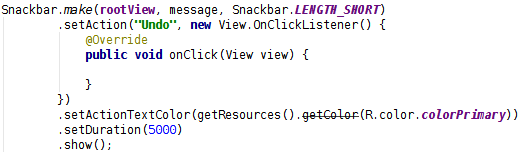
make方法中的三個參數分別是根布局,要顯示的消息和時長,這個方法是必須的,之後的方法都不是必須的。定義完之後調用show()方法就可以顯示 Snackbar 了。
setAction方法使該 Snackbar 右側按鈕可以被點擊並處理一些事件,兩個參數分別是按鈕 顯示的文本以及處理點擊事件的邏輯,形式與 Button 一樣。
setActionTextColor() 是 設 置 右 側 按 鈕 文 本 的 顏 色 , setDuration() 方 法 可 以 定 義 Snackbar 彈出時間長度,單位為 ms,需要注意的是,當右側按鈕被點擊之後,Snackbar 會立刻消失。
放一下靜態的 Snackbar,實驗材料中的 apk 安裝啟動後,點擊拓展啟動 的界面用的都是 Snackbar,可以看一下動態效果。

在 api 為 19 的模擬器下,按鈕顯示不出來,可能是不支持,換了api 22 的模擬器就好了。
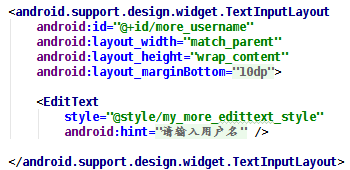
TextInputLayout 也是 Android Design Support Library 中的一個控件,用於接受用戶輸 入,與 EditText 配合使用有更好的用戶體驗,先放幾張圖:
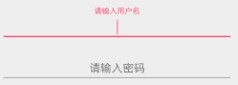
一般登錄注冊界面都需要EditText這個控件來讓用戶輸入信息,同時我們一般會設置一個標簽(使用TextView)和EditText的hint屬性來提示用戶輸入的內容,而設計庫中高級組件TextInputLayout則專門為EditText設計的,即通過使用TextInputLayout包裹EditText實現當用戶開始輸入時hint屬性值將顯示在EditText上面作為一個提示標簽,這個過程還帶有動畫效果,這樣就避免了用戶輸入時輸入提示消失的情況,同時,還可以更好地向用戶提示錯誤輸入信息。
TextInputLayout的兩個功能:
給EditText添加一個帶有動畫效果的提示標簽(利用EditText的hint屬性的值作為提示標簽內容);
處理錯誤輸入,將錯誤輸入提示信息顯示在EditText附近,便於提示用戶更好地完成輸入。
即:
(1) 實現浮動標簽提示效果
TextInputLayout和FrameLayout一樣都是一個ViewGroup,而TextInputLayout包裹的是EditText,並且會將EditText的Android:hint屬性值作為提示標簽,所以,使用非常簡單,可以看到,TextInputLayout 集合了輸入提示,報錯等功能,並且自帶動畫效果。
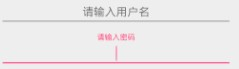
(2) 顯示錯誤輸入信息
TextInputLayout使得我們在驗證輸入數據是可以更加方便地顯示錯誤輸入提示,這樣可以使得輸入更加友好。
對於處理錯誤信息,TextInputLayout提供了兩個方法:
setError(String message):設置錯誤提示信息,這個信息將會顯示在EditText附近。
setErrorEnabled(boolean enabled):設置錯誤信息不可以用,也就是移除setError(String message)添加的錯誤提示信息。
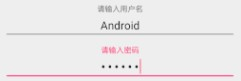
當我們開始在EditText中輸入信息的時候,EditText的hint屬性值將會顯示在EditText上面,並且帶有一個動畫效果,顯示為一個浮動標簽。而且,當輸入的數據格式不對時,還會顯示錯誤提示在EditText下面。
下面來看一下怎麼實現:
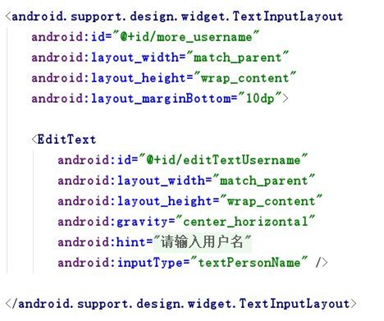
首先是 xml 布局:
一個 TextInputLayout 中只能包含一個 EditText,如果想要在預覽中看到 TextInputLayout 布局的話,需要在修改對應的 build.gradle 文件中的配置:
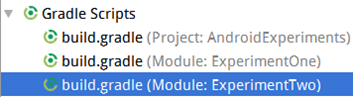
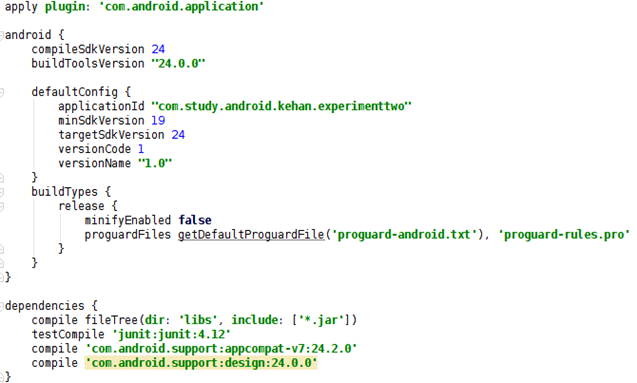
在 dependencies 中加上 compile 'com.android.support:design:24.0.0',然後再同步項 目,就可以顯示了:

在修改了 build.gradle 文件之後,也可以點擊 Sync Now同步項目。
然後在 java 文件中引入 TextInputLayout,通過 TextInputLayout 獲取 EditText 中的內 容:

TextInputLayout 有特色的一點是可以顯示提示信息:

首先允許使用提示信息 ,然後顯示提示信息,如果想使提示信息消失,設置setErrorEnabled(false)即可。
其它方法的話自行查閱 API 文檔。
如果不是很明白可以參考下方的實驗代碼加以理解啦~
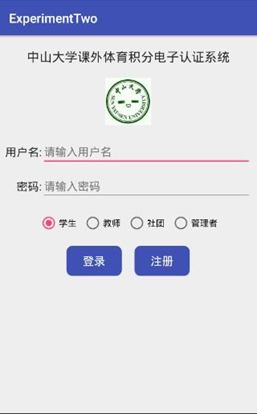
實現一個 Android 應用,界面呈現如下效果(界面設計上的要求與實驗一相同): 要求:
(1)該界面為應用啟動後看到的第一個界面
(2)點擊登錄按鈕:
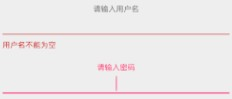
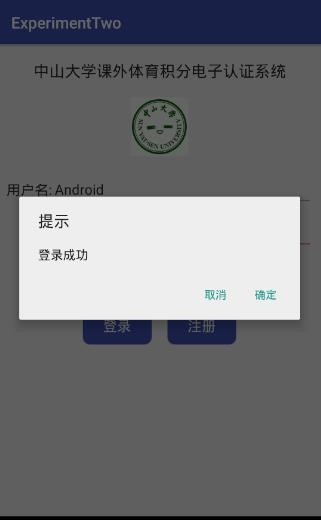
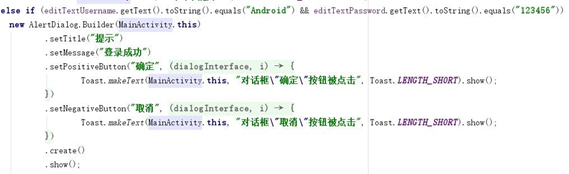
如果用戶名為空,彈出 Toast 信息“用戶名不能為空”; 如果密碼為空,彈出 Toast 信息“密碼不能為空”; 如果用戶名輸入為“Android”,密碼為“123456”,彈出如下對話框:
點擊“確定”,彈出 Toast 信息——對話框“確定”按鈕被點擊。,點擊“取消”,彈出 Toast 信息——對話框“取消”按鈕被點擊。
否則,彈出如下對話框:
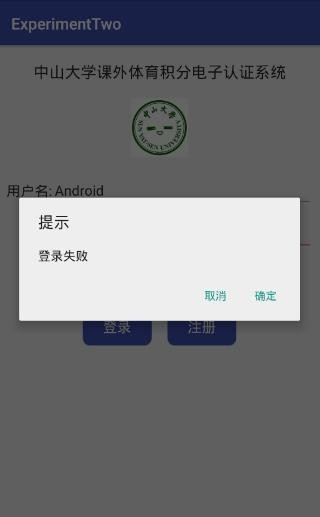
確定和取消按鈕點擊後效果參見上一個對話框 點擊注冊按鈕:
如果 RadioButton 選中的是“學生”,那麼彈出 Toast 信息“學生身份注冊功能尚未開 啟”,如果選中的是“教師”,那麼彈出 Toast 信息“教師身份注冊功能尚未開啟”,以 此類推。
RadioButton 選擇項切換:選擇項切換之後,彈出 Toast 信息“XX 身份被選中”,例如從 學生切換到教師,彈出 Toast 信息“教師身份被選中”。
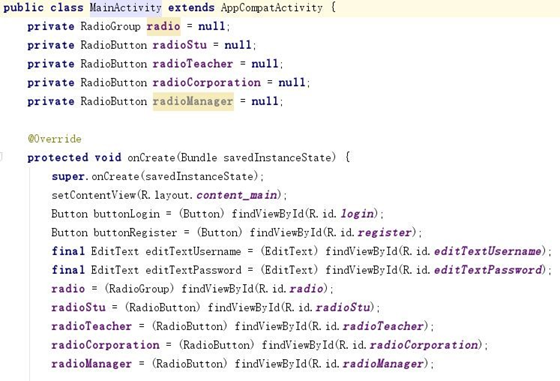
在 java 文 件 中 將 布 局 加 載 之 後 , 在 setContentView() 之 後 , 使 用 findViewById()方法可以獲得該控件,並聲明設置其他類型的元素和類型:
此次實驗用到的事件處理方法一共兩個,一個是 Button 的 單 擊 事 件 button.setOnClickListener() , 一 個 是 RadioGroup 的 切 換 事 件 radioGroup.setOnCheckedChangeListener()。我們設置 Button 的 單 擊 事 件, button.setOnClickListener() 和 RadioGroup 的 切 換 事 件 , radioGroup.setOnCheckedChangeListener()。 處理事件時將與該事件有關的控件引入進來,比如要判斷用戶名是否為空,那麼 除了 Button 需要引入外(因為 Button 是觸發事件的主體),還需要引入用戶名 的輸入框。 引入之後在 SetOnClickListener()中做處理。
在需要彈出 Toast 信息的地方,寫上 Toast 的相關代碼。這個方法帶三個 參數 context,text,duration。context 是一個上下文類型,寫上使用 這個 方法的 java 類名加上.this 即可,text 是 Toast 要顯示的信息,duration 是 Toast 顯示的時間長度,有 Toast.LENGTH_SHORT 和 Toast.LENGTH_LONG 可 選,最後調用 show() 方法將 Toast 顯示出來。

Android 中最基本的對話框是 AlertDialog,它的布局和使用的方法都很簡 單,布局是寫好的,標題通過 setTitle()方法設置,圖標通過 setIcon()方法 設置,顯示在中間的主要信息通過 setMessage()方法顯示。
創建 AlertDialog.Builder 對象調用上面的方法進行設置調用
AlertDialog.Builder的create() 方法創建 AlertDialog 對象 , 再調用 AlertDialog 對象的 show()方法將對話框顯示出來:
在基礎實驗上的結構和初始聲明的基礎上,在聽取大神們的完成經驗後,先完成 TextInputLayout 部分的內容。首先,按照要求,在 xml 布局文件中對 EditText 部 分 進 行 修 改 , 使 用 TextInputLayout 。 TextInputLayout 和 FrameLayout 一樣都是一個 ViewGroup,而 TextInputLayout 包裹的是 EditText, 並且會將 EditText 的 Android:hint 屬性值作為提示標簽用 TextInputLayout 包裹 EditText 並給 EditText 設置了 hint 屬性後,這個 EditText 就帶有了浮動 提示標簽的效果:
然後在修改對應的 build.gradle 文件中的配置。
在 java 文件中引入 TextInputLayout,通過 TextInputLayout 獲取 EditText 中的內容。在這之前需要對我們需要的兩個元素進行聲明:

然後獲取 EditText 中的內容:

在登錄按鈕的監聽事件中按照要求實現所需功能:
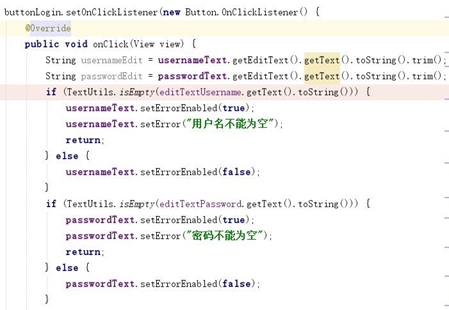
此外需要注意的是:TextInputLayout 使得我們在驗證輸入數據是可以更加 方便地顯示錯誤輸入提示,這樣可以使得輸入更加友好。
對於處理錯誤信息,TextInputLayout 提供了兩個方法: setError(String message):設置錯誤提示信息,這個信息將會顯示在EditText 附近。
setErrorEnabled(boolean enabled):設置錯誤信息不可以用,也就是移除 setError(String message)添加的錯誤提示信息。
顯示提示信息 , 符合要求需使提示信息消失,可以在相應位置設置 setErrorEnabled(false)。
對於Snackbar,make 方法中的三個參數分別是根布局,要顯示的消息和時 長,這個方法是必須的,定義完之後調用 show()方法就可以顯示 Snackbar。
而
setAction 方法使該 Snackbar 右側按鈕可以被點擊並處理一些事件,兩 個參數分別是按鈕顯示的文本以及處理點擊事件的邏輯,形式與 Button 一樣。
完成實驗~
(1)基礎部分
content_main.xml
<?xml version="1.0" encoding="utf-8"?>
<LinearLayout xmlns:android="http://schemas.android.com/apk/res/android"
    android:layout_width="match_parent"
    android:layout_height="match_parent"
    android:background="@color/colorWhite"
    android:orientation="vertical">

    <TextView
        android:id="@+id/SYSUTitle"
        android:layout_width="wrap_content"
        android:layout_height="wrap_content"
        android:layout_gravity="center"
        android:layout_marginTop="20dp"
        android:text="@string/sysu"
        android:textSize="20sp"
        android:textStyle="bold" />

    <ImageView
        android:id="@+id/sysuImage"
        android:layout_width="80dp"
        android:layout_height="80dp"
        android:layout_gravity="center"
        android:layout_marginBottom="20dp"
        android:layout_marginTop="20dp"
        android:contentDescription="@string/app_name"
        android:src="@mipmap/sysu" />


    <android.support.design.widget.TextInputLayout
        android:id="@+id/more_username"
        android:layout_width="match_parent"
        android:layout_height="wrap_content"
        android:layout_marginBottom="10dp">

        <EditText
            android:id="@+id/editTextUsername"
            android:layout_width="match_parent"
            android:layout_height="wrap_content"
            android:gravity="center_horizontal"
            android:hint="@string/username2"
            android:inputType="textPersonName" />

    </android.support.design.widget.TextInputLayout>


    <android.support.design.widget.TextInputLayout
        android:id="@+id/more_password"
        android:layout_width="match_parent"
        android:layout_height="wrap_content"
        android:layout_marginBottom="10dp">

        <EditText
            android:id="@+id/editTextPassword"
            android:layout_width="match_parent"
            android:layout_height="wrap_content"
            android:gravity="center_horizontal"
            android:hint="@string/password2"
            android:inputType="textPassword" />

    </android.support.design.widget.TextInputLayout>


    <RadioGroup
        android:id="@+id/radio"
        android:layout_width="wrap_content"
        android:layout_height="wrap_content"
        android:layout_gravity="center"
        android:layout_marginTop="10dp"
        android:orientation="horizontal">

        <RadioButton
            android:id="@+id/radioStu"
            style="@style/radioButtonStyle"
            android:checked="true"
            android:text="@string/student" />

        <RadioButton
            android:id="@+id/radioTeacher"
            style="@style/radioButtonStyle"
            android:text="@string/teacher" />

        <RadioButton
            android:id="@+id/radioCorporation"
            style="@style/radioButtonStyle"
            android:text="@string/corporation" />

        <RadioButton
            android:id="@+id/radioManager"
            android:layout_width="wrap_content"
            android:layout_height="wrap_content"
            android:text="@string/manager"
            android:textSize="@dimen/etWordSp" />

    </RadioGroup>

    <LinearLayout
        android:layout_width="wrap_content"
        android:layout_height="wrap_content"
        android:layout_gravity="center"
        android:layout_marginTop="20dp"
        android:orientation="horizontal">

        <Button
            android:id="@+id/login"
            style="@style/Button"
            android:layout_marginRight="5dp"
            android:text="@string/signIn" />

        <Button
            android:id="@+id/register"
            style="@style/Button"
            android:text="@string/register" />

    </LinearLayout>

</LinearLayout>
MainActivity.java
package com.example.yanglh6.myapplication1;

import android.content.DialogInterface;
import android.os.Bundle;
import android.support.v7.app.AlertDialog;
import android.support.v7.app.AppCompatActivity;
import android.text.TextUtils;
import android.view.View;
import android.widget.Button;
import android.widget.EditText;
import android.widget.RadioButton;
import android.widget.RadioGroup;
import android.widget.Toast;

public class MainActivity extends AppCompatActivity {
    private RadioGroup radio = null;
    private RadioButton radioStu = null;
    private RadioButton radioTeacher = null;
    private RadioButton radioCorporation = null;
    private RadioButton radioManager = null;

    @Override
    protected void onCreate(Bundle savedInstanceState) {
        super.onCreate(savedInstanceState);
        setContentView(R.layout.content_main);
        Button buttonLogin = (Button) findViewById(R.id.login);
        Button buttonRegister = (Button) findViewById(R.id.register);
        final EditText editTextUsername = (EditText) findViewById(R.id.editTextUsername);
        final EditText editTextPassword = (EditText) findViewById(R.id.editTextPassword);
        radio = (RadioGroup) findViewById(R.id.radio);
        radioStu = (RadioButton) findViewById(R.id.radioStu);
        radioTeacher = (RadioButton) findViewById(R.id.radioTeacher);
        radioCorporation = (RadioButton) findViewById(R.id.radioCorporation);
        radioManager = (RadioButton) findViewById(R.id.radioManager);

        buttonLogin.setOnClickListener(new Button.OnClickListener() {
            @Override
            public void onClick(View view) {
                if (TextUtils.isEmpty(editTextUsername.getText().toString())) {
                    Toast.makeText(MainActivity.this, "用戶名不能為空", Toast.LENGTH_SHORT).show();
                } else if (TextUtils.isEmpty(editTextPassword.getText().toString())) {
                    Toast.makeText(MainActivity.this, "密碼不能為空", Toast.LENGTH_SHORT).show();
                } else if (editTextUsername.getText().toString().equals("Android") && editTextPassword.getText().toString().equals("123456")) {
                    new AlertDialog.Builder(MainActivity.this)
                            .setTitle("提示")
                            .setMessage("登錄成功")
                            .setPositiveButton("確定", new DialogInterface.OnClickListener() {
                                @Override
                                public void onClick(DialogInterface dialogInterface, int i) {
                                    Toast.makeText(MainActivity.this, "對話框\"確定\"按鈕被點擊", Toast.LENGTH_SHORT).show();
                                }
                            })
                            .setNegativeButton("取消", new DialogInterface.OnClickListener() {
                                @Override
                                public void onClick(DialogInterface dialogInterface, int i) {
                                    Toast.makeText(MainActivity.this, "對話框\"取消\"按鈕被點擊", Toast.LENGTH_SHORT).show();
                                }
                            })
                            .create()
                            .show();

                } else {
                    new AlertDialog.Builder(MainActivity.this)
                            .setTitle("提示")
                            .setMessage("登錄失敗")
                            .setPositiveButton("確定", new DialogInterface.OnClickListener() {
                                @Override
                                public void onClick(DialogInterface dialogInterface, int i) {
                                    Toast.makeText(MainActivity.this, "對話框\"確定\"按鈕被點擊", Toast.LENGTH_SHORT).show();
                                }
                            })
                            .setNegativeButton("取消", new DialogInterface.OnClickListener() {
                                @Override
                                public void onClick(DialogInterface dialogInterface, int i) {
                                    Toast.makeText(MainActivity.this, "對話框\"取消\"按鈕被點擊", Toast.LENGTH_SHORT).show();
                                }
                            })
                            .create()
                            .show();
                }
            }

        });

        radio.setOnCheckedChangeListener(new RadioGroup.OnCheckedChangeListener() {
            @Override
            public void onCheckedChanged(RadioGroup group, int checkedId) {
                if (checkedId == radioStu.getId()) {
                    Toast.makeText(MainActivity.this, "學生身份被選中", Toast.LENGTH_SHORT).show();
                }
                if (checkedId == radioTeacher.getId()) {
                    Toast.makeText(MainActivity.this, "教師身份被選中", Toast.LENGTH_SHORT).show();
                }
                if (checkedId == radioCorporation.getId()) {
                    Toast.makeText(MainActivity.this, "社團身份被選中", Toast.LENGTH_SHORT).show();
                }
                if (checkedId == radioManager.getId()) {
                    Toast.makeText(MainActivity.this, "管理者身份被選中", Toast.LENGTH_SHORT).show();
                }
            }
        });

        buttonRegister.setOnClickListener(new View.OnClickListener() {
            @Override
            public void onClick(View view) {
                RadioGroup radioGroup = (RadioGroup) findViewById(R.id.radio);
                int checkedId = radioGroup.getCheckedRadioButtonId();
                if (checkedId == R.id.radioStu) {
                    Toast.makeText(MainActivity.this, "學生身份注冊功能尚未開啟", Toast.LENGTH_SHORT).show();
                } else if (checkedId == radioTeacher.getId()) {
                    Toast.makeText(MainActivity.this, "教師身份注冊功能尚未開啟", Toast.LENGTH_SHORT).show();
                } else if (checkedId == radioTeacher.getId()) {
                    Toast.makeText(MainActivity.this, "社團身份注冊功能尚未開啟", Toast.LENGTH_SHORT).show();
                } else if (checkedId == radioCorporation.getId()) {
                    Toast.makeText(MainActivity.this, "管理者身份注冊功能尚未開啟", Toast.LENGTH_SHORT).show();
                }
            }
        });

    }
}
(2)拓展部分
MainActivity.java
package com.example.yanglh6.myapplication1;
import android.os.Bundle;
import android.support.design.widget.Snackbar;
import android.support.design.widget.TextInputLayout;
import android.support.v7.app.AppCompatActivity;
import android.text.TextUtils;
import android.view.View;
import android.widget.Button;
import android.widget.EditText;
import android.widget.RadioButton;
import android.widget.RadioGroup;
import android.widget.Toast;
public class MainActivity extends AppCompatActivity {
private RadioGroup radio = null;
private RadioButton radioStu = null;
private RadioButton radioTeacher = null;
private RadioButton radioCorporation = null;
private RadioButton radioManager = null;
private TextInputLayout usernameText;
private TextInputLayout passwordText;
@Override
protected void onCreate(Bundle savedInstanceState) {
super.onCreate(savedInstanceState);
setContentView(R.layout.content_main);
usernameText = (TextInputLayout) findViewById(R.id.more_username);
passwordText = (TextInputLayout) findViewById(R.id.more_password);
Button buttonLogin = (Button) findViewById(R.id.login);
final Button buttonRegister = (Button) findViewById(R.id.register);
final EditText editTextUsername = (EditText) findViewById(R.id.editTextUsername);
final EditText editTextPassword = (EditText) findViewById(R.id.editTextPassword);
radio = (RadioGroup) findViewById(R.id.radio);
radioStu = (RadioButton) findViewById(R.id.radioStu);
radioTeacher = (RadioButton) findViewById(R.id.radioTeacher);
radioCorporation = (RadioButton) findViewById(R.id.radioCorporation);
radioManager = (RadioButton) findViewById(R.id.radioManager);
buttonLogin.setOnClickListener(new Button.OnClickListener() {
@Override
public void onClick(View view) {
String usernameEdit = usernameText.getEditText().getText().toString().trim();
String passwordEdit = passwordText.getEditText().getText().toString().trim();
if (TextUtils.isEmpty(editTextUsername.getText().toString())) {
usernameText.setErrorEnabled(true);
usernameText.setError("用戶名不能為空");
return;
} else {
usernameText.setErrorEnabled(false);
}
if (TextUtils.isEmpty(editTextPassword.getText().toString())) {
passwordText.setErrorEnabled(true);
passwordText.setError("密碼不能為空");
return;
} else {
passwordText.setErrorEnabled(false);
}
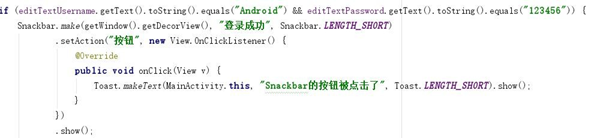
if (editTextUsername.getText().toString().equals("Android") && editTextPassword.getText().toString().equals("123456")) {
Snackbar.make(getWindow().getDecorView(), "登錄成功", Snackbar.LENGTH_SHORT)
.setAction("按鈕", new View.OnClickListener() {
@Override
public void onClick(View v) {
Toast.makeText(MainActivity.this, "Snackbar的按鈕被點擊了", Toast.LENGTH_SHORT).show();
}
})
.show();
} else {
Snackbar.make(getWindow().getDecorView(), "登錄失敗", Snackbar.LENGTH_SHORT)
.setAction("按鈕", new View.OnClickListener() {
@Override
public void onClick(View v) {
Toast.makeText(MainActivity.this, "Snackbar的按鈕被點擊了", Toast.LENGTH_SHORT).show();
}
})
.show();
}
}
});
radio.setOnCheckedChangeListener(new RadioGroup.OnCheckedChangeListener() {
@Override
public void onCheckedChanged(RadioGroup group, int checkedId) {
if (checkedId == radioStu.getId()) {
Snackbar.make(getWindow().getDecorView(), "學生身份被選中", Snackbar.LENGTH_SHORT)
.setAction("按鈕", new View.OnClickListener() {
@Override
public void onClick(View v) {
Toast.makeText(MainActivity.this, "Snackbar的按鈕被點擊了", Toast.LENGTH_SHORT).show();
}
})
.setDuration(5000)
.show();
}
if (checkedId == radioTeacher.getId()) {
Snackbar.make(getWindow().getDecorView(), "教師身份被選中", Snackbar.LENGTH_SHORT)
.setAction("按鈕", new View.OnClickListener() {
@Override
public void onClick(View v) {
Toast.makeText(MainActivity.this, "Snackbar的按鈕被點擊了", Toast.LENGTH_SHORT).show();
}
})
.setDuration(5000)
.show();
}
if (checkedId == radioCorporation.getId()) {
Snackbar.make(getWindow().getDecorView(), "社團身份被選中", Snackbar.LENGTH_SHORT)
.setAction("按鈕", new View.OnClickListener() {
@Override
public void onClick(View v) {
Toast.makeText(MainActivity.this, "Snackbar的按鈕被點擊了", Toast.LENGTH_SHORT).show();
}
})
.setDuration(5000)
.show();
}
if (checkedId == radioManager.getId()) {
Snackbar.make(getWindow().getDecorView(), "管理者身份被選中", Snackbar.LENGTH_SHORT)
.setAction("按鈕", new View.OnClickListener() {
@Override
public void onClick(View v) {
Toast.makeText(MainActivity.this, "Snackbar的按鈕被點擊了", Toast.LENGTH_SHORT).show();
}
})
.setDuration(5000)
.show();
}
}
});
buttonRegister.setOnClickListener(new View.OnClickListener() {
@Override
public void onClick(View view) {
RadioGroup radioGroup = (RadioGroup) findViewById(R.id.radio);
int checkedId = radioGroup.getCheckedRadioButtonId();
if (checkedId == R.id.radioStu) {
Snackbar.make(getWindow().getDecorView(), "學生身份注冊功能尚未開啟", Snackbar.LENGTH_SHORT)
.setAction("按鈕", new View.OnClickListener() {
@Override
public void onClick(View v) {
Toast.makeText(MainActivity.this, "Snackbar的按鈕被點擊了", Toast.LENGTH_SHORT).show();
}
})
.setDuration(5000)
.show();
} else if (checkedId == radioTeacher.getId()) {
Snackbar.make(getWindow().getDecorView(), "教師身份注冊功能尚未開啟", Snackbar.LENGTH_SHORT)
.setAction("按鈕", new View.OnClickListener() {
@Override
public void onClick(View v) {
Toast.makeText(MainActivity.this, "Snackbar的按鈕被點擊了", Toast.LENGTH_SHORT).show();
}
})
.setDuration(5000)
.show();
} else if (checkedId == radioCorporation.getId()) {
Snackbar.make(getWindow().getDecorView(), "社團身份注冊功能尚未開啟", Snackbar.LENGTH_SHORT)
.setAction("按鈕", new View.OnClickListener() {
@Override
public void onClick(View v) {
Toast.makeText(MainActivity.this, "Snackbar的按鈕被點擊了", Toast.LENGTH_SHORT).show();
}
})
.setDuration(5000)
.show();
} else if (checkedId == radioManager.getId()) {
Snackbar.make(getWindow().getDecorView(), "管理者身份注冊功能尚未開啟", Snackbar.LENGTH_SHORT)
.setAction("按鈕", new View.OnClickListener() {
@Override
public void onClick(View v) {
Toast.makeText(MainActivity.this, "Snackbar的按鈕被點擊了", Toast.LENGTH_SHORT).show();
}
})
.setDuration(5000)
.show();
}
}
});
}
}
1、Toast:在需要彈出 Toast 信息的地方,寫上 Toast 的相關代碼。這個 方法帶三個參數 context,text,duration。context 是一個上下文類型,寫上 使用 這個方法的 java 類名加上.this 即可,text 是 Toast 要顯示的信息, duration 是 Toast 顯 示 的 時 間 長 度 , 有 Toast.LENGTH_SHORT 和 Toast.LENGTH_LONG 可選,最後調用 show() 方法將 Toast 顯示出來。
2、AlertDialog 的構造方法全部是 Protected 的,所以不能直接通過 new 一個 AlertDialog 來創建出一個 AlertDialog。
要創建一個 AlertDialog,就要用到 AlertDialog.Builder 中的 create()方法。
使用 AlertDialog.Builder 創建對話框需要了解以下幾個方法:
setTitle:為對話框設置標題
setIcon:為對話框設置圖標
setMessage:為對話框設置內容
setView: 給對話框設置自定義樣式
setItems:設置對話框要顯示的一個 list,一般用於顯示幾個命令時
setMultiChoiceItems :用來設置對話框顯示一系列的復選框
setNeutralButton:普通按鈕
setPositiveButton:給對話框添加"Yes"按鈕
setNegativeButton:對話框添加"No"按鈕
create:創建對話框
show:顯示對話框
3、Snackbar 是 Android design support library 中的另一個組件。使 用 Snackbar,可以在屏幕底部快速的顯示一條消息,大體與 Toast 相同,但多了幾分靈活性:
一小段時間之後、或者用戶與屏幕觸發交互,Snackbar 會自動消失; 可以包含一個可選的操作;
把 Snackbar 劃出屏幕,可以棄用;
作為一條上下文敏感的消息,也是 UI 的一部分,並在屏幕內所有元素的上 層顯示,而不是像 Toast 消息一樣位於屏幕中央;
一個時刻只能有唯一一個 Snackbar 顯示。 make()方法的第一個參數是一個 view,snackbar 會找到一個父 view,以
寄存所賦的 snackbar 值。Snackbar 會沿著 view 的樹狀路徑,找到第一個合適 的布局或窗口視圖,作為父 view。
持續時間屬性與 Toast 的相同,可選 LENG_SHORT 或者 LENGTH_LONG。
設 置 Action 行 為 事 件 , 使 用 的 方 法 是 public Snackbar setAction (CharSequence text, View.OnClickListener listener); Action 的字體顏色 默認使用系統主題中的如<item name="colorAccent">#ff0000</item>
可以通過代碼去改變 Action 的字體顏色:Snackbar setActionTextColor (int color)。
4、TextInputLayout
一般登錄注冊界面都需要 EditText 這個控件來讓用戶輸入信息,同時我們 一般會設置一個標簽(使用 TextView)和 EditText 的 hint 屬性來提示用戶輸 入的內容,而設計庫中高級組件 TextInputLayout 則專門為 EditText 設計的, 即通過使用 TextInputLayout 包裹 EditText 實現當用戶開始輸入時 hint 屬性值 將顯示在 EditText 上面作為一個提示標簽,這個過程還帶有動畫效果,這樣就 避免了用戶輸入時輸入提示消失的情況,同時,還可以更好地向用戶提示錯誤輸 入信息。TextInputLayout 的兩個功能:
給 EditText 添加一個帶有動畫效果的提示標簽(利用 EditText 的 hint 屬 性的值作為提示標簽內容);
處理錯誤輸入,將錯誤輸入提示信息顯示在 EditText 附近,便於提示用戶 更好地完成輸入。
1、本實驗實驗環境:
操作系統 Windows 10
實驗軟件 Android Studio 2.2.1
虛擬設備:Nexus_5X
API:23
2、貼代碼的時候由於插入代碼框的大小問題,代碼格式不太嚴整,望見諒~
 模仿輕仿蘑菇街應用源碼,仿蘑菇街源碼
模仿輕仿蘑菇街應用源碼,仿蘑菇街源碼主要學習load頁面的逐幀動畫和補間動畫 源碼下載:http://code.662p.com/list/11_1.html[tr][t
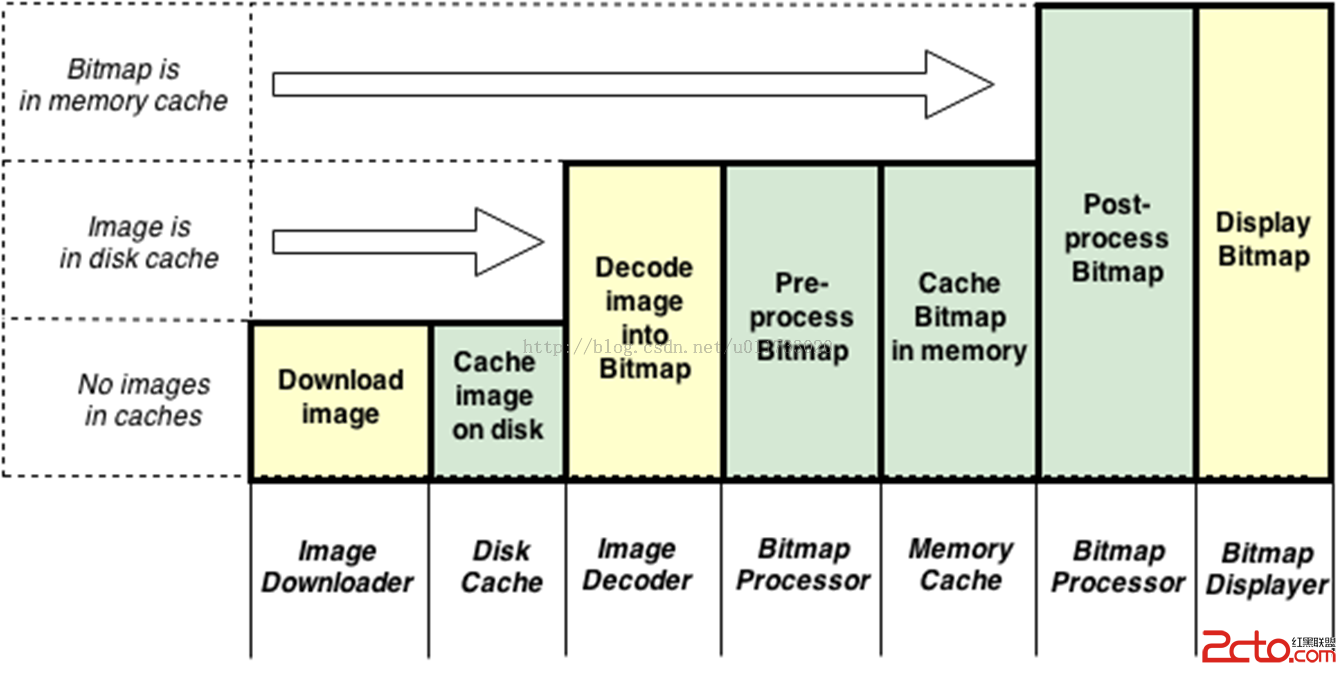 Android-Universal-Image-Loader (圖片異步加載緩存庫)的源碼解讀
Android-Universal-Image-Loader (圖片異步加載緩存庫)的源碼解讀 前言: 在Android開發中,對於圖片的加載可以說是個老生常談的問題了,
 解析BroadcastReceiver之你需要了解的一些東東,broadcastreceiver
解析BroadcastReceiver之你需要了解的一些東東,broadcastreceiver 前些天把四大組件之一的Service扯了一遍,今天就要開始談談它的弟兄
 Android性能優化之使用線程池處理異步任務
Android性能優化之使用線程池處理異步任務 說到線程,我想大家都不陌生,因為在開發時候或多或少都會用到線程,而通常創建線程有兩種方式: 1、繼承Thread類
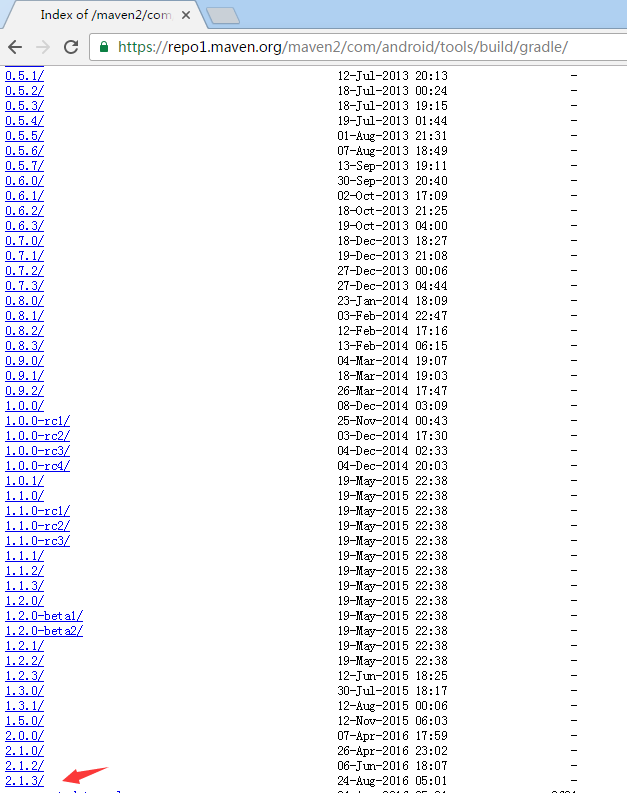 解決 Could not find com.android.tools.build:gradle 問題,couldnotfindntldr
解決 Could not find com.android.tools.