編輯:關於android開發
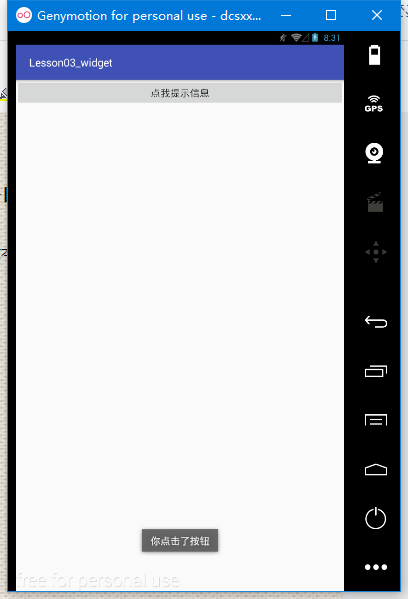 Toast是一種輕量級的提示工具,可顯示一行文本對用戶的操作進行提示響應
用法:Toast.makeText(context,text,time).show();
context:上下文 、text:顯示文本內容、time:顯示時長
Toast.LENGTH_SHORT(短時間顯示)
Toast.LENGTH_LONG(長時間顯示)
例:
button=(Button)findViewById(R.id.button);
button.setOnClickListener(new View.OnClickListener() {
@Override
public void onClick(View v) {
Toast.makeText(ceshi.this, "你點擊了按鈕", Toast.LENGTH_SHORT).show();
}
});
二、TextView——文本顯示控件
常用屬性
text 顯示的文本內容 textColor 文本顏色
textSize 字體大小 singleLine 單行顯示true|false
gravity 內容的重心位置 drawableLeft 文字左邊顯示的圖片
drawableRight 文字右邊顯示的圖片
drawableTop 文字上邊顯示的圖片
drawableBottom 文字下邊顯示的圖片
Toast是一種輕量級的提示工具,可顯示一行文本對用戶的操作進行提示響應
用法:Toast.makeText(context,text,time).show();
context:上下文 、text:顯示文本內容、time:顯示時長
Toast.LENGTH_SHORT(短時間顯示)
Toast.LENGTH_LONG(長時間顯示)
例:
button=(Button)findViewById(R.id.button);
button.setOnClickListener(new View.OnClickListener() {
@Override
public void onClick(View v) {
Toast.makeText(ceshi.this, "你點擊了按鈕", Toast.LENGTH_SHORT).show();
}
});
二、TextView——文本顯示控件
常用屬性
text 顯示的文本內容 textColor 文本顏色
textSize 字體大小 singleLine 單行顯示true|false
gravity 內容的重心位置 drawableLeft 文字左邊顯示的圖片
drawableRight 文字右邊顯示的圖片
drawableTop 文字上邊顯示的圖片
drawableBottom 文字下邊顯示的圖片
 例:
<TextView
android:layout_width="200dp"
android:layout_height="100dp"
android:background="#00ff00"
android:id="@+id/textView2"
android:layout_alignBottom="@id/f1"
android:layout_centerInParent="true"
android:text="來一碗魚丸粗面"
android:textColor="#f00"
android:textSize="20sp"
android:gravity="bottom|center"/>
常用方法
nsetText() 設置顯示文字
nsetTextColor() 設置文字顏色,參數為顏色值
nsetTextSize() 設置文字尺寸,參數1為尺寸單位,2為尺寸大小
ngetText() 獲取顯示的文字
三、Button——按鈕
常用屬性
TextView的屬性
還有一個onClick,但是這個一般用不到,
Button的方法見上面的Toast的用法
四、EditText——文本輸入控件,繼承自TextView
常用屬性
inputType 限制能夠輸入文本類型
hint 顯示的提示 值為 string
maxLength 能夠輸入的最大長度 值為 int
focusable 能否獲取焦點 值為 boolean
lines 顯示的行數 值為 int
maxLines 最大顯示行數 值為 int
enable 是否可用 值為 boolean
例:
例:
<TextView
android:layout_width="200dp"
android:layout_height="100dp"
android:background="#00ff00"
android:id="@+id/textView2"
android:layout_alignBottom="@id/f1"
android:layout_centerInParent="true"
android:text="來一碗魚丸粗面"
android:textColor="#f00"
android:textSize="20sp"
android:gravity="bottom|center"/>
常用方法
nsetText() 設置顯示文字
nsetTextColor() 設置文字顏色,參數為顏色值
nsetTextSize() 設置文字尺寸,參數1為尺寸單位,2為尺寸大小
ngetText() 獲取顯示的文字
三、Button——按鈕
常用屬性
TextView的屬性
還有一個onClick,但是這個一般用不到,
Button的方法見上面的Toast的用法
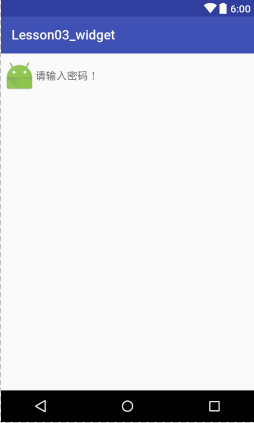
四、EditText——文本輸入控件,繼承自TextView
常用屬性
inputType 限制能夠輸入文本類型
hint 顯示的提示 值為 string
maxLength 能夠輸入的最大長度 值為 int
focusable 能否獲取焦點 值為 boolean
lines 顯示的行數 值為 int
maxLines 最大顯示行數 值為 int
enable 是否可用 值為 boolean
例:
 <EditText
android:id="@+id/edittext_2"
android:layout_width="match_parent"
android:layout_height="wrap_content"
android:hint="請輸入密碼!"
android:textSize="16sp"
android:textColor="#f00"
android:textColorHighlight="#a00000ff"
android:drawableLeft="@mipmap/ic_launcher"
android:inputType="textPassword" />
常用方法
setHint() 設置提示文本
setInputType() 設置輸入限制類型
setFocusable() 設置能否獲取焦點
setEnable() 設置是否可用
isEnable() 是否可用
具體代碼:
edittext1.getText().toString();//獲取EditView的文本值
edittext1.addTextChangedListener(watcher);//文本監聽
private TextWatcher watcher = new TextWatcher() {
/*文本改變之前*/
@Override
public void beforeTextChanged(CharSequence s, int start, int count, int after) {
}
/*當文本改變的時候*/
@Override
public void onTextChanged(CharSequence s, int start, int before, int count) {
}
/*文本改變之後*/
@Override
public void afterTextChanged(Editable s) {
//獲取已經輸入的的文字總數
int currentCount = s.length();
//計算還能輸入多少個字符,記住,數字不能直接寫
textview1.setText(String.valueOf(max - currentCount));
}
};
五、CheckBox——復選框,繼承自TextView
<EditText
android:id="@+id/edittext_2"
android:layout_width="match_parent"
android:layout_height="wrap_content"
android:hint="請輸入密碼!"
android:textSize="16sp"
android:textColor="#f00"
android:textColorHighlight="#a00000ff"
android:drawableLeft="@mipmap/ic_launcher"
android:inputType="textPassword" />
常用方法
setHint() 設置提示文本
setInputType() 設置輸入限制類型
setFocusable() 設置能否獲取焦點
setEnable() 設置是否可用
isEnable() 是否可用
具體代碼:
edittext1.getText().toString();//獲取EditView的文本值
edittext1.addTextChangedListener(watcher);//文本監聽
private TextWatcher watcher = new TextWatcher() {
/*文本改變之前*/
@Override
public void beforeTextChanged(CharSequence s, int start, int count, int after) {
}
/*當文本改變的時候*/
@Override
public void onTextChanged(CharSequence s, int start, int before, int count) {
}
/*文本改變之後*/
@Override
public void afterTextChanged(Editable s) {
//獲取已經輸入的的文字總數
int currentCount = s.length();
//計算還能輸入多少個字符,記住,數字不能直接寫
textview1.setText(String.valueOf(max - currentCount));
}
};
五、CheckBox——復選框,繼承自TextView
 常用屬性
TextView的屬性
button 復選指示按鈕
checked 是否選中
例:
<CheckBox
android:id="@+id/checkbox3"
android:layout_width="wrap_content"
android:layout_height="wrap_content"
android:layout_below="@id/checkbox1"
android:text="敲代碼" />
常用方法
TextView的方法
setChecked() 設置是否選中
isChecked() 是否選中的
setOnCheckedChangeListener() 設置選中改變監聽
具體代碼
checkboxall.setOnCheckedChangeListener(changeListener);
checkboxall.setChecked(false);
常用屬性
TextView的屬性
button 復選指示按鈕
checked 是否選中
例:
<CheckBox
android:id="@+id/checkbox3"
android:layout_width="wrap_content"
android:layout_height="wrap_content"
android:layout_below="@id/checkbox1"
android:text="敲代碼" />
常用方法
TextView的方法
setChecked() 設置是否選中
isChecked() 是否選中的
setOnCheckedChangeListener() 設置選中改變監聽
具體代碼
checkboxall.setOnCheckedChangeListener(changeListener);
checkboxall.setChecked(false);
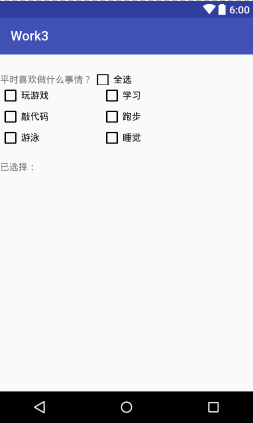
<!--布局-->
<?xml version="1.0" encoding="utf-8"?>
<RelativeLayout xmlns:android="http://schemas.android.com/apk/res/android"
    android:layout_width="match_parent"
    android:layout_height="match_parent"
    xmlns:app="http://schemas.android.com/apk/res-auto">

    <TextView
        android:id="@+id/textviewtitle"
        android:layout_width="wrap_content"
        android:layout_height="wrap_content"
        android:layout_marginTop="30dp"
        android:text="平時喜歡做什麼事情?" />

    <CheckBox
        android:id="@+id/checkboxall"
        android:layout_width="wrap_content"
        android:layout_height="wrap_content"
        android:layout_alignBottom="@id/textviewtitle"
        android:layout_alignTop="@id/textviewtitle"
        android:layout_toRightOf="@id/textviewtitle"
        android:text="全選" />
    <!--內容的CheckBox-->
    <CheckBox
        android:id="@+id/checkbox1"
        android:layout_width="wrap_content"
        android:layout_height="wrap_content"
        android:layout_below="@id/textviewtitle"
        android:layout_marginRight="80dp"
        android:text="玩游戲" />

    <CheckBox
        android:id="@+id/checkbox2"
        android:layout_width="wrap_content"
        android:layout_height="wrap_content"
        android:layout_below="@id/textviewtitle"
        android:layout_toRightOf="@+id/checkbox1"
        android:text="學習" />

    <CheckBox
        android:id="@+id/checkbox3"
        android:layout_width="wrap_content"
        android:layout_height="wrap_content"
        android:layout_below="@id/checkbox1"
        android:text="敲代碼" />

    <CheckBox
        android:id="@+id/checkbox4"
        android:layout_width="wrap_content"
        android:layout_height="wrap_content"
        android:layout_below="@id/checkbox2"
        android:layout_toRightOf="@+id/checkbox1"
        android:text="跑步" />

    <CheckBox
        android:id="@+id/checkbox5"
        android:layout_width="wrap_content"
        android:layout_height="wrap_content"
        android:layout_below="@id/checkbox3"
        android:text="游泳" />

    <CheckBox
        android:id="@+id/checkbox6"
        android:layout_width="wrap_content"
        android:layout_height="wrap_content"
        android:layout_below="@id/checkbox4"
        android:layout_toRightOf="@+id/checkbox1"
        android:text="睡覺" />


    <TextView
        android:id="@+id/textviewinfo"
        android:layout_width="match_parent"
        android:layout_height="wrap_content"
        android:layout_below="@id/checkbox5"
        android:layout_marginTop="20dp"
        android:text="已選擇:"/>
</RelativeLayout>


<!--java代碼-->
package com.dc.work3;

import android.os.Bundle;
import android.support.v7.app.AppCompatActivity;
import android.util.Log;
import android.widget.CheckBox;
import android.widget.CompoundButton;
import android.widget.TextView;
import android.widget.Toast;

import java.util.LinkedList;
import java.util.List;

/**
 * Created by 怪蜀黍 on 2016/11/4.
 */

public class MainActivity2s extends AppCompatActivity {
    private CheckBox checkboxall;
    private CheckBox checkBox1;
    private CheckBox checkBox2;
    private CheckBox checkBox3;
    private CheckBox checkBox4;
    private CheckBox checkBox5;
    private CheckBox checkBox6;


    private TextView textviewinfo;
    private List<String> checkedStr;


    //操作取消一個時,全選取消,這個變量是是否是用戶點擊
    private boolean checkFoUser=true;

    protected void onCreate(Bundle savedInstanceState) {
        super.onCreate(savedInstanceState);
        setContentView(R.layout.activity_main_2);

        checkboxall = (CheckBox) findViewById(R.id.checkboxall);
        checkBox1 = (CheckBox) findViewById(R.id.checkbox1);
        checkBox2 = (CheckBox) findViewById(R.id.checkbox2);
        checkBox3 = (CheckBox) findViewById(R.id.checkbox3);
        checkBox4 = (CheckBox) findViewById(R.id.checkbox4);
        checkBox5 = (CheckBox) findViewById(R.id.checkbox5);
        checkBox6 = (CheckBox) findViewById(R.id.checkbox6);
        textviewinfo = (TextView) findViewById(R.id.textviewinfo);

        checkBox1.setOnCheckedChangeListener(changeListener);
        checkBox2.setOnCheckedChangeListener(changeListener);
        checkBox3.setOnCheckedChangeListener(changeListener);
        checkBox4.setOnCheckedChangeListener(changeListener);
        checkBox5.setOnCheckedChangeListener(changeListener);
        checkBox6.setOnCheckedChangeListener(changeListener);
        checkboxall.setOnCheckedChangeListener(changeListener);

        checkedStr=new LinkedList<>();

    }
    public CompoundButton.OnCheckedChangeListener changeListener = new CompoundButton.OnCheckedChangeListener() {
        @Override
        public void onCheckedChanged(CompoundButton buttonView, boolean isChecked) {
            switch (buttonView.getId()){
                case R.id.checkbox1:
                case R.id.checkbox2:
                case R.id.checkbox3:
                case R.id.checkbox4:
                case R.id.checkbox5:
                case R.id.checkbox6:
                    String str=buttonView.getText().toString();
                    if(isChecked){
                        checkedStr.add(str);
                    }else {
                        checkedStr.remove(str);
                    }
                     checkboxall.setOnCheckedChangeListener(null);
                    if(checkBox1.isChecked()&&checkBox2.isChecked()&&checkBox3.isChecked()&&checkBox4.isChecked()&&checkBox5.isChecked()&&checkBox6.isChecked()){
                        //表示如果都選中時,把全選按鈕也選中
                        checkboxall.setChecked(true);
                    }else {
                        //否則就全選按鈕去不選中,但是這樣會觸發checkboxall的監聽,會把所有的都取消掉
                        checkboxall.setChecked(false);
                    }
                     checkboxall.setOnCheckedChangeListener(changeListener);
                    break;
                case R.id.checkboxall:
                    if(checkFoUser) {
                        checkBox1.setChecked(isChecked);
                        checkBox2.setChecked(isChecked);
                        checkBox3.setChecked(isChecked);
                        checkBox4.setChecked(isChecked);
                        checkBox5.setChecked(isChecked);
                        checkBox6.setChecked(isChecked);
                        break;
                    }
            }
            StringBuffer sb=new StringBuffer();
            for(String str:checkedStr){
                sb.append(str+",");
            }
            if(sb.length()>0){
                //設置長度為長度-1,去除最後的“,”
                sb.setLength(sb.length()-1);
            }
            textviewinfo.setText("已選擇:"+sb.toString());
        }
    };

}
六、RadioButtonRadioGroup——單選按鈕、單選組
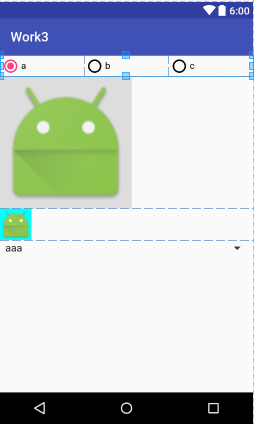 RadioButton——單選按鈕,繼承自TextView
單獨使用和CheckBox一樣,經常和RadioGroup一起使用,形
成單選效果
RadioGroup——單選組,繼承自LinearLayout
常用屬性:LinearLayout的屬性
常用方法
setOnCheckedChangeLinsener() 內部單選按鈕選中改變監聽
check() 選中指定id的子項
getCheckedRadioButtonId() 獲取選中的RadioButton的id
clearCheck() 清除選中
七、ImageView——圖片控件
常用屬性
src 指定要顯示的圖片
adjustViewBounds 控件的大小僅僅顯示到圖片的范圍大小
maxHeight 最大高度
maxWidth 最大寬度
scaleType 縮放類型
nfitStart(等比例自適應大小在開頭的顯示) fitEnd(等比例自適應大小在末尾顯示)
nfitXY(自適應控件xy大小) fitCenter(等比例自適應大小在中間顯示)
ncenter(按原圖片大小在中心顯示) centerCrop(等比例縮放至充滿控件)
ncenterInside(圖片小於控件寬高時,縮放顯示在中間,否則等比例縮放後顯示在中間)
nmatrix(圖片不縮放,顯示在左上角,此時可以通過setImageMatrix()方法對圖片進行操作)
RadioButton——單選按鈕,繼承自TextView
單獨使用和CheckBox一樣,經常和RadioGroup一起使用,形
成單選效果
RadioGroup——單選組,繼承自LinearLayout
常用屬性:LinearLayout的屬性
常用方法
setOnCheckedChangeLinsener() 內部單選按鈕選中改變監聽
check() 選中指定id的子項
getCheckedRadioButtonId() 獲取選中的RadioButton的id
clearCheck() 清除選中
七、ImageView——圖片控件
常用屬性
src 指定要顯示的圖片
adjustViewBounds 控件的大小僅僅顯示到圖片的范圍大小
maxHeight 最大高度
maxWidth 最大寬度
scaleType 縮放類型
nfitStart(等比例自適應大小在開頭的顯示) fitEnd(等比例自適應大小在末尾顯示)
nfitXY(自適應控件xy大小) fitCenter(等比例自適應大小在中間顯示)
ncenter(按原圖片大小在中心顯示) centerCrop(等比例縮放至充滿控件)
ncenterInside(圖片小於控件寬高時,縮放顯示在中間,否則等比例縮放後顯示在中間)
nmatrix(圖片不縮放,顯示在左上角,此時可以通過setImageMatrix()方法對圖片進行操作)
 Android中使用Notification實現進度通知欄(示例三),notification進度條
Android中使用Notification實現進度通知欄(示例三),notification進度條我們在使用APP的過程中,軟件會偶爾提示我們進行版本更新,我們點擊確認
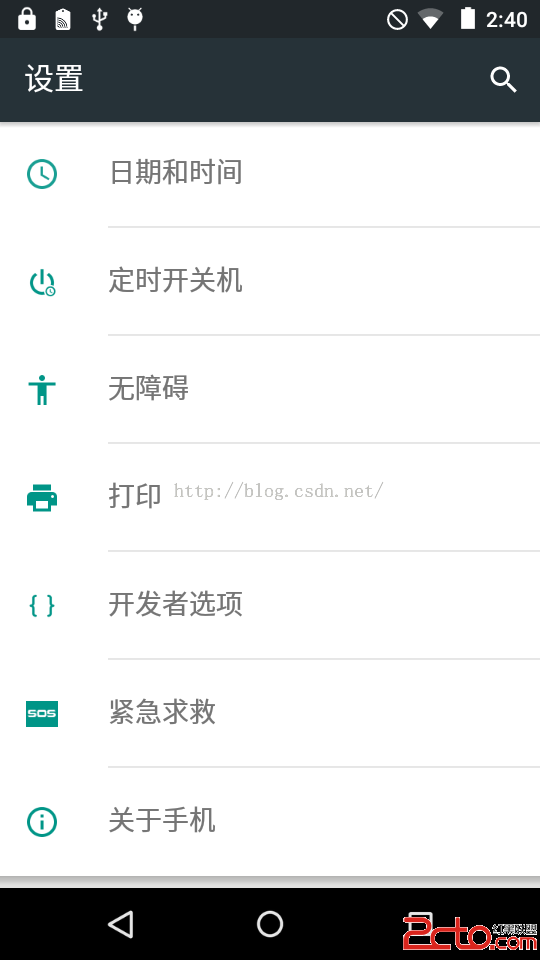 Android系統移植與調試之-------)如何修改Android系統默認顯示
Android系統移植與調試之-------)如何修改Android系統默認顯示 1、首先解決【設置】界面默認顯示【開發者選項】的問題 查看源代碼:pack
 Android學習指南之十八:共享參數類SharedPreferences的使用
Android系統在數據存儲和數據共享方面提供了多種方式,包括前面我們講過的使
 Android定位&地圖&導航——基於百度地圖移動獲取位置和自動定位,android定位城市
Android定位&地圖&導航——基於百度地圖移動獲取位置和自動定位,android定位城市 一、問題描述 使用百度地圖實現如圖所示應用,首先自