編輯:關於android開發
轉載自: http://blog.163.com/ppy2790@126/blog/static/103242241201382210910473/
開發自定義控件的步驟:
1、了解View的工作原理
2、 編寫繼承自View的子類
3、 為自定義View類增加屬性
4、 繪制控件
5、 響應用戶消息
6 、自定義回調函數

一、View結構原理
Android系統的視圖結構的設計也采用了組合模式,即View作為所有圖形的基類,Viewgroup對View繼承擴展為視圖容器類。
View定義了繪圖的基本操作
基本操作由三個函數完成:measure()、layout()、draw(),其內部又分別包含了onMeasure()、onLayout()、onDraw()三個子方法。具體操作如下:
1、measure操作
     measure操作主要用於計算視圖的大小,即視圖的寬度和長度。在view中定義為final類型,要求子類不能修改。measure()函數中又會調用下面的函數:
     (1)onMeasure(),視圖大小的將在這裡最終確定,也就是說measure只是對onMeasure的一個包裝,子類可以覆寫onMeasure()方法實現自己的計算視圖大小的方式,並通過setMeasuredDimension(width, height)保存計算結果。

2、layout操作
     layout操作用於設置視圖在屏幕中顯示的位置。在view中定義為final類型,要求子類不能修改。layout()函數中有兩個基本操作:
     (1)setFrame(l,t,r,b),l,t,r,b即子視圖在父視圖中的具體位置,該函數用於將這些參數保存起來;
     (2)onLayout(),在View中這個函數什麼都不會做,提供該函數主要是為viewGroup類型布局子視圖用的;

3、draw操作
     draw操作利用前兩部得到的參數,將視圖顯示在屏幕上,到這裡也就完成了整個的視圖繪制工作。子類也不應該修改該方法,因為其內部定義了繪圖的基本操作:
     (1)繪制背景;
     (2)如果要視圖顯示漸變框,這裡會做一些准備工作;
     (3)繪制視圖本身,即調用onDraw()函數。在view中onDraw()是個空函數,也就是說具體的視圖都要覆寫該函數來實現自己的顯示(比如TextView在這裡實現了繪制文字的過程)。而對於ViewGroup則不需要實現該函數,因為作為容器是“沒有內容“的,其包含了多個子view,而子View已經實現了自己的繪制方法,因此只需要告訴子view繪制自己就可以了,也就是下面的dispatchDraw()方法;
     (4)繪制子視圖,即dispatchDraw()函數。在view中這是個空函數,具體的視圖不需要實現該方法,它是專門為容器類准備的,也就是容器類必須實現該方法;
     (5)如果需要(應用程序調用了setVerticalFadingEdge或者setHorizontalFadingEdge),開始繪制漸變框;
     (6)繪制滾動條;
      從上面可以看出自定義View需要最少覆寫onMeasure()和onDraw()兩個方法。

二、View類的構造方法
創建自定義控件的3種主要實現方式:
1)繼承已有的控件來實現自定義控件: 主要是當要實現的控件和已有的控件在很多方面比較類似, 通過對已有控件的擴展來滿足要求。
2)通過繼承一個布局文件實現自定義控件,一般來說做組合控件時可以通過這個方式來實現。
    注意此時不用onDraw方法,在構造廣告中通過inflater加載自定義控件的布局文件,再addView(view),自定義控件的圖形界面就加載進來了。
3)通過繼承view類來實現自定義控件,使用GDI繪制出組件界面,一般無法通過上述兩種方式來實現時用該方式。

三、自定義View增加屬性的兩種方法:
1)在View類中定義。通過構造函數中引入的AttributeSet 去查找XML布局的屬性名稱,然後找到它對應引用的資源ID去找值。
案例:實現一個帶文字的圖片(圖片、文字是onDraw方法重繪實現)
復制代碼

public class MyView extends View {

    private String mtext;
    private int msrc;

    public MyView(Context context) {
        super(context);
    }

    public MyView(Context context, AttributeSet attrs) {
        super(context, attrs);
        int resourceId = 0;
        int textId = attrs.getAttributeResourceValue(null, "Text",0);
        int srcId = attrs.getAttributeResourceValue(null, "Src", 0);
        mtext = context.getResources().getText(textId).toString();
        msrc = srcId;
    }

    @Override
    protected void onDraw(Canvas canvas) {
        Paint paint = new Paint();
        paint.setColor(Color.RED);
        InputStream is = getResources().openRawResource(msrc);
                Bitmap mBitmap = BitmapFactory.decodeStream(is);
                int bh = mBitmap.getHeight();
                int bw = mBitmap.getWidth();
            canvas.drawBitmap(mBitmap, 0,0, paint);
        //canvas.drawCircle(40, 90, 15, paint);
        canvas.drawText(mtext, bw/2, 30, paint);
    }
}

復制代碼

布局文件:
復制代碼

<?xml version="1.0" encoding="utf-8"?>
<LinearLayout xmlns:android="http://schemas.android.com/apk/res/android"
    android:layout_width="match_parent"
    android:layout_height="match_parent"
    android:orientation="vertical" >

    <com.example.myimageview2.MyView
        android:id="@+id/myView1"
        android:layout_width="wrap_content"
        android:layout_height="wrap_content"
        Text="@string/hello_world"
        Src="@drawable/xh"/>

</LinearLayout>

復制代碼

屬性Text, Src在自定義View類的構造方法中讀取。


2)通過XML為View注冊屬性。與Android提供的標准屬性寫法一樣。
案例:  實現一個帶文字說明的ImageView (ImageView+TextView組合,文字說明,可在布局文件中設置位置)
復制代碼

public class MyImageView extends LinearLayout {

    public MyImageView(Context context) {
        super(context);
    }

    public MyImageView(Context context, AttributeSet attrs) {
        super(context, attrs);
        int resourceId = -1;
        TypedArray typedArray = context.obtainStyledAttributes(attrs,
                R.styleable.MyImageView);
        ImageView iv = new ImageView(context);
        TextView tv = new TextView(context);
        int N = typedArray.getIndexCount();
        for (int i = 0; i < N; i++) {
            int attr = typedArray.getIndex(i);
            switch (attr) {
            case R.styleable.MyImageView_Oriental:
                resourceId = typedArray.getInt(
                        R.styleable.MyImageView_Oriental, 0);
                this.setOrientation(resourceId == 1 ? LinearLayout.HORIZONTAL
                        : LinearLayout.VERTICAL);
                break;
            case R.styleable.MyImageView_Text:
                resourceId = typedArray.getResourceId(
                        R.styleable.MyImageView_Text, 0);
                tv.setText(resourceId > 0 ? typedArray.getResources().getText(
                        resourceId) : typedArray
                        .getString(R.styleable.MyImageView_Text));
                break;
            case R.styleable.MyImageView_Src:
                resourceId = typedArray.getResourceId(
                        R.styleable.MyImageView_Src, 0);
                iv.setImageResource(resourceId > 0 ?resourceId:R.drawable.ic_launcher);
                break;
            }
        }
        addView(iv);
        addView(tv);
        typedArray.recycle();
    }
}

復制代碼

attrs.xml進行屬性聲明, 文件放在values目錄下
復制代碼

<?xml version="1.0" encoding="utf-8"?>
<resources>

    <declare-styleable name="MyImageView">
        <attr name="Text" format="reference|string"></attr>
        <attr name="Oriental" >
            <enum name="Horizontal" value="1"></enum>
            <enum name="Vertical" value="0"></enum>
        </attr>
        <attr name="Src" format="reference|integer"></attr>
    </declare-styleable>

</resources>

復制代碼
MainActivity的布局文件:先定義命名空間 xmlns:uview="http://schemas.android.com/apk/res/com.example.myimageview2" (com.example.myimageview2為你
在manifest中定義的包名)
然後可以像使用系統的屬性一樣使用:uview:Oriental="Vertical"
復制代碼

<LinearLayout xmlns:android="http://schemas.android.com/apk/res/android"
    xmlns:uview="http://schemas.android.com/apk/res/com.example.myimageview2"
    xmlns:tools="http://schemas.android.com/tools"
    android:layout_width="match_parent"
    android:layout_height="match_parent"
    android:orientation="vertical"
    tools:context=".MainActivity" >

    <TextView
        android:layout_width="wrap_content"
        android:layout_height="wrap_content"
        android:text="@string/hello_world" />

    <com.example.myimageview2.MyImageView
        android:id="@+id/myImageView1"
        android:layout_width="wrap_content"
        android:layout_height="wrap_content"
        uview:Text="這是一個圖片說明"
        uview:Src="@drawable/tw"
        uview:Oriental="Vertical">
    </com.example.myimageview2.MyImageView>

</LinearLayout>

復制代碼
四、控件繪制 onDraw()

五、

六:自定義View的方法
onFinishInflate() 回調方法,當應用從XML加載該組件並用它構建界面之後調用的方法
onMeasure() 檢測View組件及其子組件的大小
onLayout() 當該組件需要分配其子組件的位置、大小時
onSizeChange() 當該組件的大小被改變時
onDraw() 當組件將要繪制它的內容時
onKeyDown 當按下某個鍵盤時
onKeyUp  當松開某個鍵盤時
onTrackballEvent 當發生軌跡球事件時
onTouchEvent 當發生觸屏事件時
onWindowFocusChanged(boolean)  當該組件得到、失去焦點時
onAtrrachedToWindow() 當把該組件放入到某個窗口時
onDetachedFromWindow() 當把該組件從某個窗口上分離時觸發的方法
onWindowVisibilityChanged(int): 當包含該組件的窗口的可見性發生改變時觸發的方法
 圖片放大縮小(和ViewPager配合使用流暢顯示)--第三方開源--PhotoView,
圖片放大縮小(和ViewPager配合使用流暢顯示)--第三方開源--PhotoView, 圖片的放大縮小實現效果是使用的github上的一個開源項目photoView實
 Intent(一.顯示使用intent),顯示使用intent
Intent(一.顯示使用intent),顯示使用intent 大家都知道如果手機只有一個活動的應用,那這個應用也太簡單了吧。如同網頁一下,是有多
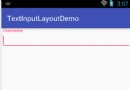 Android Design Support Library——TextInputLayout,designsupportlibrary
Android Design Support Library——TextInputLayout,designsupportlibrary前沿 上一篇介紹了Naviga
 Android進程通信之兩種序列化方式分析
Android進程通信之兩種序列化方式分析 2月下旬辭職了,去海南度假到現在,領略了一把三亞風情也算任性和 然而這樣任性帶來的後果就是。。不行了我必須吐槽一句。。 沒