編輯:高級開發
在對android操作系統進行相應修改中,我們可以發現,這一系統的編程方式非常簡單易懂,方便開發人員實現各種功能需求。在這裡就先從android選項卡的實現來具體了解一下這一系統的編寫方式。
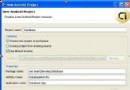
首先創建android工程命名自己的Activity為HelloTabWidget
在main.xml或者自己定義的*.XML文件中創建一個TabHost,需要兩個元素TabWidget和FrameLayout 通常會把這兩個元素放到LinearLayout中。FrameLayout作為改變內容content用的。
注意:TabWidget和FrameLayout 有不同的ID命名空間android:id="@android:id/idnames",這個是必須的因此TabHost才能自動找到它,Activity需要繼承TabActivity。
android選項卡XML代碼
- < ?XML version="1.0" encoding="utf-8"?>
- < TabHost XMLns:android=
"http://schemas.android.com/apk/res/android"- android:id="@android:id/tabhost"
- android:layout_width="fill_parent"
- android:layout_height="fill_parent">
- < LinearLayout
- android:orIEntation="vertical"
- android:layout_width="fill_parent"
- android:layout_height="fill_parent">
- < TabWidget
- android:id="@android:id/tabs"
- android:layout_width="fill_parent"
- android:layout_height="wrap_content" />
- < FrameLayout
- android:id="@android:id/tabcontent"
- android:layout_width="fill_parent"
- android:layout_height="fill_parent">
- < TextVIEw
- android:id="@+id/textvIEw1"
- android:layout_width="fill_parent"
- android:layout_height="fill_parent"
- android:text="this is a tab" />
- < TextVIEw
- android:id="@+id/textvIEw2"
- android:layout_width="fill_parent"
- android:layout_height="fill_parent"
- android:text="this is another tab" />
- < TextVIEw
- android:id="@+id/textvIEw3"
- android:layout_width="fill_parent"
- android:layout_height="fill_parent"
- android:text="this is a third tab" />
- < /FrameLayout>
- < /LinearLayout>
- < /TabHost>
Activity需要繼承TabActivity
android選項卡Java代碼
- public class HelloTabWidget extends TabActivity
- public class HelloTabWidget extends TabActivity
android選項卡Java代碼
- public void onCreate(Bundle savedInstanceState) {
- super.onCreate(savedInstanceState);
- setContentVIEw(R.layout.main);
- mTabHost = getTabHost();
- mTabHost.addTab(mTabHost.newTabSpec("tab_test1").
setIndicator("TAB 1").setContent(R.id.textvIEw1));- mTabHost.addTab(mTabHost.newTabSpec("tab_test2").
setIndicator("TAB 2").setContent(R.id.textvIEw2));- mTabHost.addTab(mTabHost.newTabSpec("tab_test3").
setIndicator("TAB 3").setContent(R.id.textvIEw3));- mTabHost.setCurrentTab(0);
- }
android選項卡的具體實現方式就為大家介紹到這裡。
 對Android chrome浏覽器全新功能詳細述說
android Chrome浏覽器是運行在模擬器或設備上的一個程序,盡最大的努力為用戶提供良好的WEB服務,就如其它許多浏覽器事件一樣,他的穩定性和智能型絕對是業內一流
 新一代的Android手機介紹
android手機將成為谷歌手機主導的開發手機平台,最終將成為android平台的主要發展的有一大成員,這對於諾基亞的SymBian和微軟的mobile帶來了不少的壓力
 nbandroid:NetBeans的Android插件(1)
最近,Google面向大學生推出android開發挑戰賽,android開發成為時下開發者的熱點開發項目。像《在NetBeans上搭建android SDK環境》這樣的
 Android創建和使用數據庫詳細指南(1)
數據庫支持每個應用程序無論大小的生命線,除非你的應用程序只處理簡單的數據,那麼就需要一個數據庫系統存儲你的結構化數據,android使用SQLite數據庫,它是一個開源