編輯:高級開發
本節的目的就是為了講清楚 android 中的 Surface 系統,大家耳熟能詳的 SurfaceFlinger 到底是個什麼東西,它的工作流程又是怎樣的。當然,鑒於 SurfaceFlinger 的復雜性,我們依然將采用情景分析的辦法,找到合適的切入點。
一個 Activity 是怎麼在屏幕上顯示出來的呢?我將首先把這個說清楚。
接著我們把其中的關鍵調用抽象在 Native 層,以這些函數調用為切入點來研究 SurfaceFlinger 。好了,開始我們的征途吧。
二 Activity 是如何顯示的
最初的想法就是, Activity 獲得一塊顯存,然後在上面繪圖,最後交給設備去顯示。這個道理是沒錯,但是 android 的 SurfaceFlinger 是在 System Server 進程中創建的, Activity 一般另有線程,這之間是如何 ... 如何掛上關系的呢?我可以先提前告訴大家,這個過程還比較復雜。呵呵。
好吧,我們從 Activity 最初的啟動開始。代碼在
framework/base/core/java/android/app/ActivityThread.Java 中,這裡有個函數叫 handleLaunchActivity
[---->ActivityThread:: handleLaunchActivity()]
private final void handleLaunchActivity(ActivityRecord r, Intent customIntent) {
Activity a = performLaunchActivity(r, customIntent);
if (a != null) {
r.createdConfig = new Configuration(mConfiguration);
Bundle oldState = r.state;
handleResumeActivity(r.token, false, r.isForward);
----> 調用handleResumeActivity
}
handleLaunchActivity 中會調用 handleResumeActivity 。
[--->ActivityThread:: handleResumeActivity]
final void handleResumeActivity(IBinder token, boolean clearHide, boolean isForward) {
boolean willBeVisible = !a.mStartedActivity;
if (r.window == null && !a.mFinished && willBeVisible) {
r.window = r.activity.getWindow();
View decor = r.window.getDecorVIEw();
decor.setVisibility(VIEw.INVISIBLE);
VIEwManager wm = a.getWindowManager();
WindowManager.LayoutParams l = r.window.getAttributes();
接上頁
a.mDecor = decor;
l.type = WindowManager.LayoutParams.TYPE_BASE_APPLICATION;
if (a.mVisibleFromClIEnt) {
a.mWindowAdded = true;
wm.addVIEw(decor, l); // 這個很關鍵。
}
上面 addView 那幾行非常關鍵,它關系到咱們在 Activity 中 setContentView 後,整個 Window 到底都包含了些什麼。我先告訴大家。所有你創建的 View 之上,還有一個 DecorVIEw ,這是一個 FrameLayout ,另外還有一個 PhoneWindow 。上面這些東西的代碼在
framework/PolicIEs/Base/Phone/com/android/Internal/policy/impl 。這些隱藏的 View 的創建都是由你在 Acitivty 的 onCreate 中調用 setContentVIEw 導致的。
[---->PhoneWindow:: addContentVIEw]
public void addContentView(View view, VIEwGroup.LayoutParams params) {
if (mContentParent == null) { // 剛創建的時候mContentParent 為空
installDecor();
}
mContentParent.addView(vIEw, params);
final Callback cb = getCallback();
if (cb != null) {
cb.onContentChanged();
}
}
installDecor 將創建mDecor 和mContentParent 。mDecor 是DecorVIEw 類型,
mContentParent 是VIEwGroup 類型
private void installDecor() {
if (mDecor == null) {
mDecor = generateDecor();
mDecor.setDescendantFocusability(VIEwGroup.FOCUS_AFTER_DESCENDANTS);
mDecor.setIsRootNamespace(true);
}
if (mContentParent == null) {
mContentParent = generateLayout(mDecor);
那麼, VIEwManager wm = a.getWindowManager() 又返回什麼呢?
PhoneWindow 從 Window 中派生, Acitivity 創建的時候會調用它的 setWindowManager 。而這個函數由 Window 類實現。
代碼在 framework/base/core/java/android/vIEw/Window.Java 中
public void setWindowManager(WindowManager wm,IBinder aPPToken, String appName) {
mAppToken = aPPToken;
mAppName = appName;
接上頁
if (wm == null) {
wm = WindowManagerImpl.getDefault();
}
mWindowManager = new LocalWindowManager(wm);
}
你看見沒,分析 Java 代碼這個東西真的很復雜。 mWindowManager 的實現是 LocalWindowManager ,但由通過 Bridge 模式把功能交給 WindowManagerImpl 去實現了。
真的很復雜!
好了,羅裡羅嗦的,我們回到 wm.addVIEw(decor, l) 。最終會由 WindowManagerImpl 來完成
addVIEw 操作,我們直接看它的實現好了。
代碼在 framework/base/core/java/android/vIEw/WindowManagerImpl.Java
[---->addVIEw]
private void addView(View view, VIEwGroup.LayoutParams params, boolean nest)
{
ViewRoot root; //VIEwRoot ,我們的主人公終於登場!
synchronized (this) {
root = new ViewRoot(vIEw.getContext());
root.mAddNesting = 1;
vIEw.setLayoutParams(wparams);
if (mVIEws == null) {
index = 1;
mViews = new VIEw[1];
mRoots = new VIEwRoot[1];
mParams = new WindowManager.LayoutParams[1];
} else {
}
index--;
mViews[index] = vIEw;
mRoots[index] = root;
mParams[index] = wparams;
}
root.setView(view, wparams, panelParentVIEw);
}
ViewRoot 是整個顯示系統中最為關鍵的東西,看起來這個東西好像和 View 有那麼點關系,其實它根本和 View 等 UI 關系不大,它不過是一個 Handler 罷了,唯一有關系的就是它其中有一個變量為 Surface 類型。我們看看它的定義。 VIEwRoot 代碼在
framework/base/core/java/android/view/VIEwRoot.Java 中
public final class ViewRoot extends Handler implements VIEwParent,
VIEw.AttachInfo.Callbacks
{
private final Surface mSurface = new Surface();
}
它竟然從handler 派生,而VIEwParent 不過定義了一些接口函數罷了。
看到 Surface 直覺上感到它和 SurfaceFlinger 有點關系。要不先去看看?
接上頁
Surface 代碼在 framework/base/core/java/android/vIEw/Surface.Java 中,我們調用的是無參構造函數。
public Surface() {
mCanvas = new CompatibleCanvas(); // 就是創建一個Canvas !
}
如果你有興趣的話,看看 Surface 其他構造函數,最終都會調用 native 的實現,而這些 native 的實現將和 SurfaceFlinger 建立關系,但我們這裡 VIEwRoot 中的 mSurface 顯然還沒有到這一步。那它到底是怎麼和 SurfaceFlinger 搞上的呢?這一切待會就會水落石出的。
另外,為什麼 ViewRoot 是主人公呢?因為 VIEwRoot 建立了客戶端和 SystemServer 的關系。我們看看它的構造函數。
public VIEwRoot(Context context) {
super();
....
getWindowsession(context.getMainLooper());
}
getWindowsession 將建立和WindowManagerService 的關系。
ublic static IWindowSession getWindowsession(Looper mainLooper) {
synchronized (mStaticInit) {
if (!mInitialized) {
try {
//sWindowsession 是通過Binder 機制創建的。終於讓我們看到點希望了
InputMethodManager imm = InputMethodManager.getInstance(mainLooper);
sWindowsession = IWindowManager.Stub.asInterface(
ServiceManager.getService("window"))
.openSession(imm.getClIEnt(), imm.getInputContext());
mInitialized = true;
} catch (RemoteException e) {
}
}
return sWindowsession;
}
}
上面跨 Binder 的進程調用另一端是 WindowManagerService ,代碼在
framework/base/services/java/com/android/server/WindowManagerService.Java 中。我們先不說這個。
回過頭來看看 VIEwRoot 接下來的調用。
[-->ViewRoot::setVIEw()] ,這個函數很復雜,我們看其中關鍵幾句。
public void setView(View vIEw, WindowManager.LayoutParams attrs,
View panelParentVIEw) {
synchronized (this) {
requestLayout();
try {
接上頁
res = sWindowsession.add(mWindow, mWindowAttributes,
getHostVisibility(), mAttachInfo.mContentInsets);
}
}
requestLayout 實現很簡單,就是往 handler 中發送了一個消息。
public void requestLayout() {
checkThread();
mLayoutRequested = true;
scheduleTraversals(); // 發送DO_TRAVERSAL 消息
}
public void scheduleTraversals() {
if (!mTraversalScheduled) {
mTraversalScheduled = true;
sendEmptyMessage(DO_TRAVERSAL);
}
}
我們看看跨進程的那個調用。 sWindowsession.add 。它的最終實現在 WindowManagerService 中。
[--->Windowsession::add()]
public int add(IWindow window, WindowManager.LayoutParams attrs,
int vIEwVisibility, Rect outContentInsets) {
return addWindow(this, window, attrs, vIEwVisibility, outContentInsets);
}
Windowsession 是個內部類,會調用外部類的 addWindow
這個函數巨復雜無比,但是我們的核心目標是找到創建顯示相關的部分。所以,最後精簡的話就簡單了。
[--->WindowManagerService:: addWindow]
public int addWindow(Session session, IWindow clIEnt,
WindowManager.LayoutParams attrs, int vIEwVisibility,
Rect outContentInsets) {
// 創建一個Windowstate ,這個又是什麼玩意兒呢?
win = new Windowstate(session, clIEnt, token,
attachedWindow, attrs, vIEwVisibility);
win.attach();
return res;
}
Windowstate 類中有一個和 Surface 相關的成員變量,叫 SurfaceSession 。它會在
attach 函數中被創建。 SurfaceSession 嘛,就和 SurfaceFlinger 有關系了。我們待會看。
好,我們知道 ViewRoot 創建及調用 add 後,我們客戶端的 VIEw 系統就和 WindowManagerService 建立了牢不可破的關系。
另外,我們知道 VIEwRoot 是一個 handler ,而且剛才我們調用了 requestLayout ,所以接下來消息循環下一個將調用的就是
接上頁
VIEwRoot 的 handleMessage 。public void handleMessage(Message msg) {
switch (msg.what) {
case DO_TRAVERSAL:
performTraversals();
performTraversals 更加復雜無比,經過我仔細挑選,目標鎖定為下面幾個函數。當然,後面我們還會回到 performTraversals ,不過我們現在更感興趣的是 Surface 是如何創建的。
private void performTraversals() {
// cache mVIEw since it is used so much below...
final View host = mVIEw;
boolean initialized = false;
boolean contentInsetsChanged = false;
boolean visibleInsetsChanged;
try {
//VIEwRoot 也有一個Surface 成員變量,叫mSurface ,這個就是代表SurfaceFlinger 的客戶端
//VIEwRoot 在這個Surface 上作畫,最後將由SurfaceFlinger 來合成顯示。剛才說了mSurface 還沒有什麼內容。
relayoutResult = relayoutWindow(params, vIEwVisibility, insetsPending);
[---->VIEwRoot:: relayoutWindow()]
private int relayoutWindow(WindowManager.LayoutParams params, int vIEwVisibility,
boolean insetsPending) throws RemoteException {
//relayOut 是跨進程調用,mSurface 做為參數傳進去了,看來離真相越來越近了呀!
int relayoutResult = sWindowsession.relayout(
mWindow, params,
(int) (mVIEw.mMeasuredWidth * aPPScale + 0.5f),
(int) (mVIEw.mMeasuredHeight * aPPScale + 0.5f),
vIEwVisibility, insetsPending, mWinFrame,
mPendingContentInsets, mPendingVisibleInsets,
mPendingConfiguration, mSurface); mSurface 做為參數傳進去了。
}
我們趕緊轉到 WindowManagerService 去看看吧。、
public int relayoutWindow(Session session, IWindow clIEnt,
WindowManager.LayoutParams attrs, int requestedWidth,
int requestedHeight, int vIEwVisibility, boolean insetsPending,
Rect outFrame, Rect outContentInsets, Rect outVisibleInsets,
接上頁
Configuration outConfig, Surface outSurface){
.....
try {
// 看到這裡,我內心一陣狂喜,有戲,太有戲了!
// 其中win 是我們最初創建的Windowstate !
Surface surface = win.createSurfaceLocked();
if (surface != null) {
// 先創建一個本地surface ,然後把傳入的參數outSurface copyFrom 一下
outSurface.copyFrom(surface);
win.mReportDestroySurface = false;
win.mSurfacePendingDestroy = false;
} else {
outSurface.release();
}
}
}
[--->Windowstate::createSurfaceLocked]
Surface createSurfaceLocked() {
try {
mSurface = new Surface(
mSession.mSurfaceSession, mSession.mPid,
mAttrs.getTitle().toString(),
0, w, h, mAttrs.format, flags);
}
Surface.openTransaction();
這裡使用了 Surface 的另外一個構造函數。
public Surface(SurfaceSession s,
int pid, String name, int display, int w, int h, int format, int flags)
throws OutOfResourcesException {
mCanvas = new CompatibleCanvas();
init(s,pid,name,display,w,h,format,flags); ----> 調用了native 的init 函數。
mName = name;
}
到這裡,不進入 JNI 是不可能說清楚了。不過我們要先回顧下之前的關鍵步驟。
l add 中, new 了一個 SurfaceSession
l 創建 new 了一個 Surface
l 調用 copyFrom ,把本地 Surface 信息傳到 outSurface 中
JNI 層
上面兩個類的 JNI 實現都在 framework/base/core/jni/android_vIEw_Surface.cpp 中。
[---->SurfaceSession:: SurfaceSession()]
public class SurfaceSession {
/** Create a new connection with the surface flinger. */
public SurfaceSession() {
init();
}
它的 init 函數對應為:
[--->SurfaceSession_init]
接上頁
static void SurfaceSession_init(JNIEnv* env, jobject clazz)
{
//SurfaceSession 對應為SurfaceComposerClIEnt
sp client = new SurfaceComposerClIEnt;
clIEnt->incStrong(clazz);
//Google 常用做法,在Java 對象中保存C++ 對象的指針。
env->SetIntField(clazz, sso.client, (int)clIEnt.get());
}
Surface 的 init 對應為:
[--->Surface_init]
static void Surface_init(
JNIEnv* env, jobject clazz,
jobject session,
jint pid, JString jname, jint dpy, jint w, jint h, jint format, jint flags)
{
SurfaceComposerClient* clIEnt =
(SurfaceComposerClient*)env->GetIntField(session, sso.clIEnt);
sp surface;
if (jname == NULL) {
 Android平台將占據HTC明年50%產品
HTC Hero把android接口改頭換面,變成這樣美觀,頗具吸引力。估計2010年時,大部份的新android平台都會換上Hero一樣的接口。android一詞的本
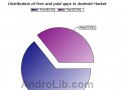 Google Android軟件數量破萬 半數為免費軟件
Google手機操作系統android今天傳出好消息,該平台的軟件數量已達到10072款,突破1萬關口。9月8日據AndroLib網站的統計數字顯示,截至今天,andr
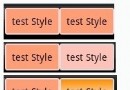 解析Android樣式:布局是根本
如果你曾經是一名WEB前台設計師,如果你曾經有過設計的功底,那麼你很榮幸,如果你切到android平台中,以前的知識和經驗都能很好的移植到android平台中。本人以為
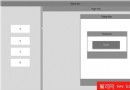 Android那些事兒 Android Pad交互特性
android Pad 和Phone一樣都存在多尺寸問題。對於Pad,更揪心的是屏幕比例和尺寸的多樣性,這些因素直接影響著UI的表現方式。比較困惑的是我們的如何設計一個