編輯:高級開發
一、改變Tab欄的位置。
Java代碼。在TabActivity的oncreate方法中添加
setContentVIEw(R.layout.tab_host);
其中 Layout tab_host.XML 是從系統資源文件中摳出來之後略作修改。
系統原來的 tab_host.XML內容如下
< ?XML version="1.0" encoding="utf-8"?>
< !--
/* //device/aPPS/common/assets/res/layout/tab_content.XML
**
** Copyright 2006, The android Open Source Project
**
** Licensed under the apache License, Version 2.0 (the "License");
** you may not use this file except in compliance with the License.
** You may obtain a copy of the License at
**
** http://www.apache.org/licenses/LICENSE-2.0
**
** Unless required by applicable law or agreed to in writing, software
** distributed under the License is distributed on an "AS IS" BASIS,
** WITHOUT WARRANTIES OR CONDITIONS OF ANY KIND, either express or implIEd.
** See the License for the specific language governing permissions and
** limitations under the License.
*/
-->
< TabHost XMLns:android="http://schemas.android.com/apk/res/android" android:id="@android:id/tabhost"
android:layout_width="match_parent" android:layout_height="match_parent">
< LinearLayout android:orIEntation="vertical"
android:layout_width="match_parent" android:layout_height="match_parent">
< TabWidget android:id="@android:id/tabs" android:layout_width="match_parent"
android:layout_height="wrap_content" android:layout_weight="0" />
< FrameLayout android:id="@android:id/tabcontent"
android:layout_width="match_parent" android:layout_height="0dip"
接上頁
android:layout_weight="1"/>
< /LinearLayout>
< /TabHost>
要實現TAB欄在頁面下方,只需簡單修改。
< ?XML version="1.0" encoding="utf-8"?>
< TabHost XMLns:android="http://schemas.android.com/apk/res/android" android:id="@android:id/tabhost"
android:layout_width="fill_parent" android:layout_height="fill_parent">
< LinearLayout android:orIEntation="vertical"
android:layout_width="fill_parent" android:layout_height="fill_parent">
< FrameLayout android:id="@android:id/tabcontent"
android:layout_width="fill_parent" android:layout_height="0dip"
android:layout_weight="1"/>
< TabWidget android:id="@android:id/tabs" android:layout_width="fill_parent"
android:layout_height="wrap_content" android:layout_weight="0" />
< /LinearLayout>
< /TabHost>
這樣,就實現了TAB欄在頁面下冊。需要注意的是,vIEw的id不要修改。
二、自定義TAB的圖片。系統自帶的tab_indicator.XML內容如下
< ?XML version="1.0" encoding="utf-8"?>
< !-- Copyright (C) 2008 The android Open Source Project
Licensed under the apache License, Version 2.0 (the "License");
you may not use this file except in compliance with the License.
You may obtain a copy of the License at
http://www.apache.org/licenses/LICENSE-2.0
Unless required by applicable law or agreed to in writing, software
distributed under the License is distributed on an "AS IS" BASIS,
WITHOUT WARRANTIES OR CONDITIONS OF ANY KIND, either express or implIEd.
See the License for the specific language governing permissions and
limitations under the License.
-->
< RelativeLayout XMLns:android="http://schemas.android.com/apk/res/android"
接上頁
android:layout_width="0dip"
android:layout_height="64dip"
android:layout_weight="1"
android:layout_marginLeft="-3dip"
android:layout_marginRight="-3dip"
android:orIEntation="vertical"
android:background="@android:drawable/tab_indicator">
< ImageVIEw android:id="@+id/icon"
android:layout_width="wrap_content"
android:layout_height="wrap_content"
android:layout_centerHorizontal="true"
/>
< TextVIEw android:id="@+id/title"
android:layout_width="wrap_content"
android:layout_height="wrap_content"
android:layout_alignParentBottom="true"
android:layout_centerHorizontal="true"
style="?android:attr/tabWidgetStyle"
/>
< /RelativeLayout>
可以看出,默認情況下,圖標在文字上方,並且不能占到整個格,無法滿足設計需要。因此可以重寫該Layout。
編寫tab_in.XML
< ?XML version="1.0" encoding="utf-8"?>
< RelativeLayout XMLns:android="http://schemas.android.com/apk/res/android"
android:layout_width="wrap_content"
android:layout_height="64dip"
android:orIEntation="vertical"
>
< /RelativeLayout>
View vIEw1 = inflater.inflate(R.layout.tab_in, null);;
View vIEw2 = inflater.inflate(R.layout.tab_in, null);;
View vIEw3 = inflater.inflate(R.layout.tab_in, null);;
vIEw1 .setBackgroundResource(R.drawable.record_upload_button_stateful);
vIEw2 .setBackgroundResource(R.drawable.record_download_button_stateful);
vIEw3 .setBackgroundResource(R.drawable.record_receive_button_stateful);
tabHost.addTab(tabHost
.newTabSpec("vIEw1")
.setIndicator(vIEw1)
);
tabHost.addTab(tabHost
.newTabSpec("vIEw2")
.setIndicator(vIEw2)
);
tabHost.addTab(tabHost
.newTabSpec("vIEw3")
.setIndicator(vIEw3)
);
---------------------------搞定
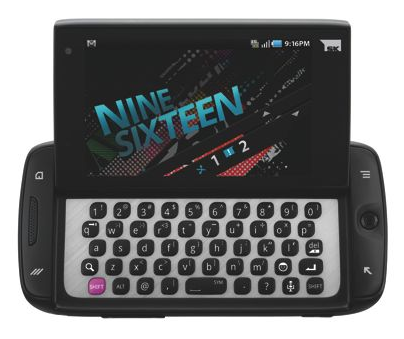 Sidekick的故事:從Danger到Android(6)
2011 年 2 月,Danger 時代結束。T Mobile 的新 CEO Philipp Humm 實施新計劃,確認了向現有的 Sidekick 用戶關閉 Dang
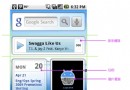
 快速上手:Ophone及Android入門教程
下文是JavaEye的zhang_xzhi_xjtu總結的OPhone/Androind入門教程,小編感覺不錯,在此推薦給大家學習。由於OPhone本質上和androi
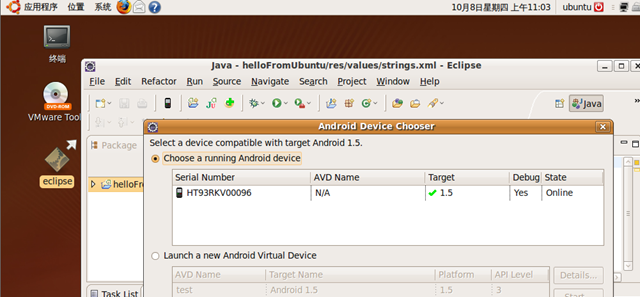 在Ubuntu下建立Eclipse的Android開發環境
大部分的android開發者都是使用Eclipse來開發android,本文將向各位介紹一下建立Ubuntu下基於Eclipse的android開發環境的方法。首先,我
 對Android 2.0系統諸多問題進行解讀
android 2.0系統在國內推出面臨諸多問題,最大的問題就是支付問題。易聯致遠CTO姚尚朗表示,開發者和用戶都期待多樣化的支付平台,希望大家可以得到自己想要的信息。