android service 使用以及aidl使用
編輯:初級開發
service1:service的啟動方式
service 是一個在後台運行的服務。你所啟動的這個service所做得工作最好在另一個線程中做。因為這個service的線程的工作將阻塞調用它的線程。
創建和啟動一個service有兩種方式
Intent in = new Intent(***);
startService(in) 和 bindService(in)。
與上面相對應,停止一個service也有兩種方式
stopService(in) 和 unbindService(in)。 如果是本地的service 則 Intent in = new Intent(this,LocalService.class)。同時那個service要在manifest文件中標明自己的name
<service android:name = ".serviceA"/> 如果是非本地的service 則在Intent中指明就可以了Intent in= new Intent("com.test.A") 與此同時那個非本地的service也要在manifest文件中申明自己的name和intent-filter
<service android:name = ".serviceA">
<intent-filter>
<action android:name="com.test.A"/>
<category android:name="android.intent.category.DEFAULT" />
</intent-filter>
</service>2:使用startService 和 stopService
這種啟動和停止方式是比較簡單的。只需要在調用Activity中直接寫上就可以了。2.1service客戶端代碼
調用service的客戶端的activity的代碼:
package com.D_activity; import android.app.Activity;
import android.content.Intent;
import android.os.Bundle;
import android.view.VIEw;
import android.view.VIEw.OnClickListener;
import android.widget.Button;
public class D_activity extends Activity {
Button b;
private boolean running = false;
@Override
public void onCreate(Bundle savedInstanceState) {
super.onCreate(savedInstanceState);
setContentView(R.layout.main); b=(Button)findVIEwById(R.id.button); @Override
protected void onResume() {
//指定一個Intent
final Intent in = new Intent("com.test.A");
super.onResume();
b.setOnClickListener(new OnClickListener(){ @Override
public void onClick(VIEw v) {
if(running){
running = false; stopService(in);
b.setText("start "); else{
running = true; startService(in);
b.setText("stop"); } }); }
2.2 被startService()調用的service 的代碼:
通過startService啟動的service在service的生命周期中將調用:onCreate()->onStartCommand()->onDestory()。
onCreate 僅僅在第一次創建這個service的時候調用。onStartCommand會在你使用startService()後調用。onDestory會在你使用stopSerivce的時候調用。 以下代碼將實現一個每5秒打印系統時間的service,多半代碼都是從文檔中直接拿過來的。
package com.A_s; import Java.text.SimpleDateFormat; import android.app.Service;
import android.content.Context;
import android.content.Intent;
import android.os.Handler;
import android.os.HandlerThread;
import android.os.IBinder;
import android.os.Looper;
import android.os.Message;
import android.util.Log;
import android.os.Process;
import android.widget.Toast; public class serviceA extends Service { private boolean flag =true;
private Looper mServiceLooper;
private ServiceHandler mServiceHandler; // Handler that receives messages from the thread
private final class ServiceHandler extends Handler {
public ServiceHandler(Looper looper) {
super(looper); @Override
public void handleMessage(Message msg) {
// Normally we would do some work here, like download a file.
// For our sample, we just sleep for 5 seconds.
SimpleDateFormat sdf = new SimpleDateFormat("yyyy-MM-dd HH:mm:ss");
while(flag){
synchronized (this) {
try {
Log.i("TEST","A :"+sdf.format(System.currentTimeMillis()));
wait(5*1000);
} catch (InterruptedException e) {
e.printStackTrace(); } // Stop the service using the startId, so that we don't stop
// the service in the middle of handling another job
stopSelf(msg.arg1); } @Override
public void onCreate() {
// Start up the thread running the service. Note that we create a
// separate thread because the service normally runs in the process's
// main thread, which we don't want to block. We also make it
// background priority so CPU-intensive work will not disrupt our UI.
HandlerThread thread = new HandlerThread("ServiceStartArguments",
Process.THREAD_PRIORITY_BACKGROUND);
thread.start(); // Get the HandlerThread's Looper and use it for our Handler
mServiceLooper = thread.getLooper();
mServiceHandler = new ServiceHandler(mServiceLooper);
} @Override
public int onStartCommand(Intent intent, int flags, int startId) {
Toast.makeText(this, "service starting", Toast.LENGTH_SHORT).show(); // For each start request, send a message to start a job and deliver the
// start ID so we know which request we're stopping when we finish the job
Message msg = mServiceHandler.obtainMessage();
msg.arg1 = startId;
mServiceHandler.sendMessage(msg); // If we get killed, after returning from here, restart
return START_STICKY;
} @Override
public IBinder onBind(Intent intent) {
// We don't provide binding, so return null
return null;
@Override
public void onDestroy() {
Toast.makeText(this, "service done", Toast.LENGTH_SHORT).show();
flag =false; }
Manifest文件:
<service android:name = ".serviceA">
<intent-filter>
<action android:name="com.test.A"/>
<category android:name="android.intent.category.DEFAULT" />
</intent-filter>
</service>3:使用bindService和 unbindService
這種方式啟動的service 生命周期中將調用:onCreate()->onBind()->onDestory()。
在service中與之前startService最不同的一點是,這次service不再使用onStartCommand而是使用onBind.所以這次service的代碼與上面service的不同僅僅在於把onStartCommand的邏輯代碼放到onBind中就可以了。
@Override
public IBinder onBind(Intent intent) {
// We don't provide binding, so return null
Toast.makeText(this, "service starting in onBind", Toast.LENGTH_SHORT).show();
Message msg = mServiceHandler.obtainMessage();
mServiceHandler.sendMessage(msg); return IBind;
}
3.1使用bindService的客戶端的代碼如下 這次的Activity明顯比之前使用startService的Activity多了一點東西,就是多了ServiceConnection類。當bindService完成時,系統會自動調用ServiceConnection中的onServiceConnected()
package com.C_activity; import android.app.Activity;
import android.content.ComponentName;
import android.content.Intent;
import android.content.ServiceConnection;
import android.os.Bundle;
import android.os.Handler;
import android.os.IBinder;
import android.os.Message;
import android.os.RemoteException;
import android.util.Log;
import android.view.VIEw;
import android.view.VIEw.OnClickListener;
import android.widget.Button;
import android.widget.Toast; public class C_activity extends Activity {
Button b;
private boolean running = false; @Override
public void onCreate(Bundle savedInstanceState) {
super.onCreate(savedInstanceState);
setContentVIEw(R.layout.main);
b=(Button)findVIEwById(R.id.button); }
@Override
protected void onResume() {
final Intent in = new Intent("com.test.E");
super.onResume();
b.setOnClickListener(new OnClickListener(){ @Override
public void onClick(VIEw v) {
if(running){
running = false;
unbindService(sc);
b.setText("start "); else{
running = true;
//bindService方法的最後一個參數有其特定的意義,最好找文檔確定自己需要哪種
bindService(in, sc, 1);
b.setText("stop"); } }); private ServiceConnection sc = new ServiceConnection(){ @Override
public void onServiceConnected(ComponentName name, IBinder service) {
} @Override
public void onServiceDisconnected(ComponentName name) { }4:利用aidl 遠程調用service
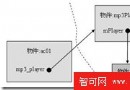
當service 不是本地的服務,也就不能通過onServiceConnected中的IBinder來強制轉換成相應服務類來使用service提供的一些方法。這時就需要使用aidl了。
直觀的去看,遠程服務如果能夠被操作,也需要提供一個操作的接口,而這個接口不光在服務器端實現,同時在客戶端也需要知道調用和使用的方式; 因此我們需要定義aidl文件來描述這麼一個服務,也就是通過雙方共享一個aidl文件的方式來共享一個接口。
在aidl裡面定義了這個接口的內容之後, android的IDE幫助編譯自動生成一個相應名字的java文件。這個Java裡面生成一個接口:test_aidl (extends android.os.IInterface) ,
同時,最主要的,裡面有個樁: public static abstract class Stub extends android.os.Binder implements test_aidl 比如我寫了一個叫test_aidl.aidl的文件 內容如下:
package com.E_s;
interface test_aidl{
int getCount(); 那麼在工程的gen目錄下會自動生成一個test_aidl.Java文件。然後在service中你就可以使用並實現這個接口中的方法。 private final test_aidl.Stub IBind = new test_aidl.Stub() {
@Override
public int getCount() throws RemoteException {
// TODO Auto-generated method stub
return i; };4.1 使用aidl的service端的全部代碼如下:
package com.E_s; import Java.text.SimpleDateFormat; import android.app.Service;
import android.content.Context;
import android.content.Intent;
import android.os.AsyncTask;
import android.os.Handler;
import android.os.HandlerThread;
import android.os.IBinder;
import android.os.Looper;
import android.os.Message;
import android.os.RemoteException;
import android.util.Log;
import android.os.Process;
import android.widget.Toast; public class serviceA extends Service { private boolean flag =true;
private Looper mServiceLooper;
private ServiceHandler mServiceHandler;
public static int i = 0; // Handler that receives messages from the thread
private final class ServiceHandler extends Handler {
public ServiceHandler(Looper looper) {
super(looper); @Override
public void handleMessage(Message msg) {
// Normally we would do some work here, like download a file.
// For our sample, we just sleep for 5 seconds.
SimpleDateFormat sdf = new SimpleDateFormat("yyyy-MM-dd HH:mm:ss");
while(flag){
synchronized (this) {
try {
i++;
Toast.makeText(serviceA.this, "E_s", Toast.LENGTH_SHORT).show();
Log.i("liyufei","E(A) :"+sdf.format(System.currentTimeMillis()));
wait(5*1000);
} catch (InterruptedException e) {
// TODO Auto-generated catch block
e.printStackTrace(); } // Stop the service using the startId, so that we don't stop
// the service in the middle of handling another job
// stopSelf(msg.arg1); } @Override
public void onCreate() {
// Start up the thread running the service. Note that we create a
// separate thread because the service normally runs in the process's
// main thread, which we don't want to block. We also make it
// background priority so CPU-intensive work will not disrupt our UI.
HandlerThread thread = new HandlerThread("ServiceStartArguments",
Process.THREAD_PRIORITY_BACKGROUND);
thread.start(); // Get the HandlerThread's Looper and use it for our Handler
mServiceLooper = thread.getLooper();
mServiceHandler = new ServiceHandler(mServiceLooper);
} @Override
public IBinder onBind(Intent intent) {
Toast.makeText(this, "service starting in onBind", Toast.LENGTH_SHORT).show(); Message msg = mServiceHandler.obtainMessage();
mServiceHandler.sendMessage(msg); return IBind;
private final test_aidl.Stub IBind = new test_aidl.Stub() {
@Override
public int getCount() throws RemoteException {
return i; @Override
public void onDestroy() {
Toast.makeText(this, "service done", Toast.LENGTH_SHORT).show();
flag =false; }
在客戶端,你首先要在客戶端的工程中也創建相應的包名和aidl文件。比如將文中的test_aidl.aidl也放入客戶端的com.E_s包中。然後客戶端中也會自動生成一個test_aidl.Java文件。
然後就只需要將之前的使用bindService的客戶端代碼中的ServiceConnection方法中添加些東西就好了。
test_aidl testAidl; private ServiceConnection sc = new ServiceConnection(){
@Override
public void onServiceConnected(ComponentName name, IBinder service) {
testAidl = test_aidl.Stub.asInterface(service); @Override
public void onServiceDisconnected(ComponentName name) {
testAidl = null; }; 然後你就可以使用這個ta就可以直接操作service中的方法了。比如testAidl.getCount();
- 上一頁:Android 內置浏覽器代碼
- 下一頁:Android開發系列六:子窗口向主窗口回傳數據
 Android開發教程之高煥堂-上課講義(4)
 Android引入第三方jar包的方法
 Android架構詳解
 Android采用PULL解析XML文檔