編輯:Android技術基礎
本節是Android多媒體基本API調用的最後一節,帶來的是MediaRecord的簡單使用, 用法非常簡單,我們寫個例子來熟悉熟悉~
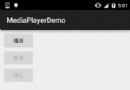
運行結果:
實現代碼:
布局代碼:activity_main.xml:
<RelativeLayout xmlns:android="http://schemas.android.com/apk/res/android"
    xmlns:tools="http://schemas.android.com/tools"
    android:layout_width="match_parent"
    android:layout_height="match_parent"
    tools:context=".MainActivity">

    <Button
        android:id="@+id/btn_control"
        android:layout_width="wrap_content"
        android:layout_height="wrap_content"
        android:text="開始錄音" />

</RelativeLayout>
MainActivity.java:
public class MainActivity extends AppCompatActivity {
private Button btn_control;
private boolean isStart = false;
private MediaRecorder mr = null;
@Override
protected void onCreate(Bundle savedInstanceState) {
super.onCreate(savedInstanceState);
setContentView(R.layout.activity_main);
btn_control = (Button) findViewById(R.id.btn_control);
btn_control.setOnClickListener(new View.OnClickListener() {
@Override
public void onClick(View v) {
if(!isStart){
startRecord();
btn_control.setText("停止錄制");
isStart = true;
}else{
stopRecord();
btn_control.setText("開始錄制");
isStart = false;
}
}
});
}
//開始錄制
private void startRecord(){
if(mr == null){
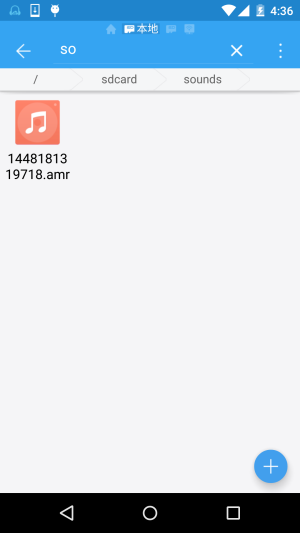
File dir = new File(Environment.getExternalStorageDirectory(),"sounds");
if(!dir.exists()){
dir.mkdirs();
}
File soundFile = new File(dir,System.currentTimeMillis()+".amr");
if(!soundFile.exists()){
try {
soundFile.createNewFile();
} catch (IOException e) {
e.printStackTrace();
}
}
mr = new MediaRecorder();
mr.setAudioSource(MediaRecorder.AudioSource.MIC); //音頻輸入源
mr.setOutputFormat(MediaRecorder.OutputFormat.AMR_WB); //設置輸出格式
mr.setAudioEncoder(MediaRecorder.AudioEncoder.AMR_WB); //設置編碼格式
mr.setOutputFile(soundFile.getAbsolutePath());
try {
mr.prepare();
mr.start(); //開始錄制
} catch (IOException e) {
e.printStackTrace();
}
}
}
//停止錄制,資源釋放
private void stopRecord(){
if(mr != null){
mr.stop();
mr.release();
mr = null;
}
}
}
最後別忘了在AndroidManifest.xml中添加下述權限:
<uses-permission android:name="android.permission.WRITE_EXTERNAL_STORAGE"/>
<uses-permission android:name="android.permission.RECORD_AUDIO"/>
好的,就是這麼簡單~
RecordDemo.zip
好的,本節內容非常簡單,就是MediaRecorder的使用而已,大概是整套教程中最精簡的一節 了吧~嘿嘿~
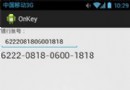 第26章、OnKeyListener鍵盤事件(從零開始學Android)
可以通過鍵盤事件對EMAIL進行驗證(這是網上最多的例子),也可以加入關鍵字非法文字的過濾。如果要監聽鍵盤事件,必須知道按下和松開兩種不同的操作,在OnKeyEvent可
 第41章、定時器Chronometer(從零開始學Android)
定時器Chronometer在Android應用中,對於需要計時的場合應用比較方便,類似於VB中的Timer控件。 一、設計界面 1、打開“res
 2.4.9 ListView的數據更新問題
本節引言:我們前面已經學習了ListView的一些基本用法咧,但是細心的你可能發現了,我們的數據一開始定義好的,都是靜態的,但是實際開發中,我們的數
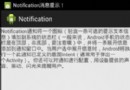 第88章、系統服務之NOTIFICATION_SERVICE服務(從零開始學Android)
Notification通知將一個圖標(包含一條可選的提示文本信息)填加到系統的狀態欄(一般來說,Android手機的狀態欄是在頂部,非底部,要注意噢)中,並將一條展開信