編輯:Android開發教程
xml:
<?xml version="1.0" encoding="utf-8"?>
<LinearLayout xmlns:android="http://schemas.android.com/apk/res/android"
xmlns:app="http://schemas.android.com/apk/res-auto"
android:layout_width="match_parent"
android:layout_height="match_parent"
android:layout_marginTop="40dp"
android:orientation="vertical" >
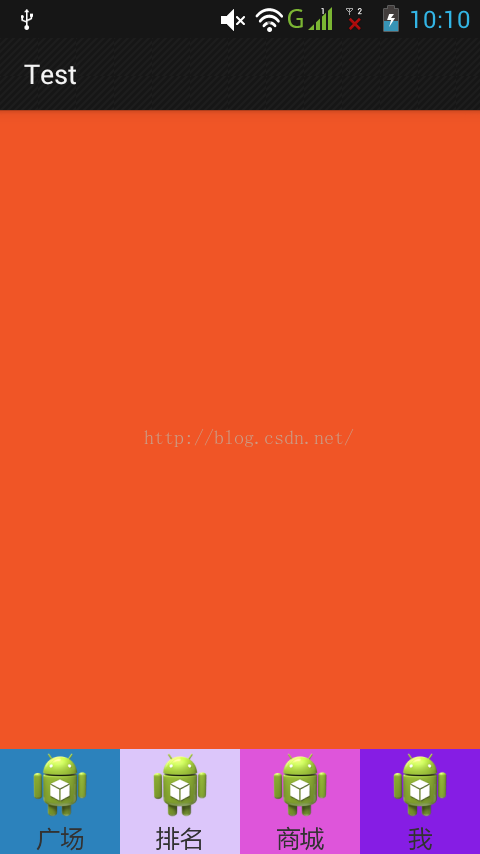
<com.sw.demo.widget.NinePhotoView
android:id="@+id/photoview"
android:layout_width="match_parent"
android:layout_height="wrap_content"
app:ninephoto_hspace="10dp"
app:ninephoto_vspace="10dp"
app:rainbowbar_color="@android:color/holo_blue_bright" >
</com.sw.demo.widget.NinePhotoView>
NinePhotoView.java
public class NinePhotoView extends ViewGroup {

public static final int MAX_PHOTO_NUMBER = 9;

private int[] constImageIds = { R.drawable.girl_0, R.drawable.girl_1,
      R.drawable.girl_2, R.drawable.girl_3, R.drawable.girl_4,
      R.drawable.girl_5, R.drawable.girl_6, R.drawable.girl_7,
      R.drawable.girl_8 };

// horizontal space among children views
int hSpace = Utils.dpToPx(10, getResources());
// vertical space among children views
int vSpace = Utils.dpToPx(10, getResources());

// every child view width and height.
int childWidth = 0;
int childHeight = 0;

// store images res id
ArrayList<integer> mImageResArrayList = new ArrayList<integer>(9);
private View addPhotoView;

public NinePhotoView(Context context) {
  super(context);
}

public NinePhotoView(Context context, AttributeSet attrs) {
  this(context, attrs, 0);
}

public NinePhotoView(Context context, AttributeSet attrs, int defStyle) {
  super(context, attrs, defStyle);

  TypedArray t = context.obtainStyledAttributes(attrs,
          R.styleable.NinePhotoView, 0, 0);
  hSpace = t.getDimensionPixelSize(
          R.styleable.NinePhotoView_ninephoto_hspace, hSpace);
  vSpace = t.getDimensionPixelSize(
          R.styleable.NinePhotoView_ninephoto_vspace, vSpace);
  t.recycle();

  addPhotoView = new View(context);
  addView(addPhotoView);
  mImageResArrayList.add(new integer());
}
Measure
@Override
protected void onMeasure(int widthMeasureSpec, int heightMeasureSpec) {
  int rw = MeasureSpec.getSize(widthMeasureSpec);
  int rh = MeasureSpec.getSize(heightMeasureSpec);

  childWidth = (rw - 2 * hSpace) / 3;
  childHeight = childWidth;

  int childCount = this.getChildCount();
  for (int i = 0; i < childCount; i++) {
      View child = this.getChildAt(i);
      //this.measureChild(child, widthMeasureSpec, heightMeasureSpec);

      LayoutParams lParams = (LayoutParams) child.getLayoutParams();
      lParams.left = (i % 3) * (childWidth + hSpace);
      lParams.top = (i / 3) * (childWidth + vSpace);
  }

  int vw = rw;
  int vh = rh;
  if (childCount < 3) {
      vw = childCount * (childWidth + hSpace);
  }
  vh = ((childCount + 3) / 3) * (childWidth + vSpace);
  setMeasuredDimension(vw, vh);
}
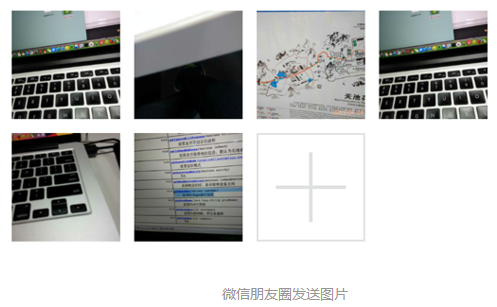
我們的子View三個一排,而且都是正方形,所以我們上面通過循環很好去得到所有子View的位置,注意我們上面把子View的左上角坐標存儲到我們自定義的LayoutParams 的left和top二個字段中,Layout階段會使用,最後我們算得整個ViewGroup的寬高,調用setMeasuredDimension設置。
Layout
@Override
protected void onLayout(boolean arg0, int arg1, int arg2, int arg3, int arg4) {
int childCount = this.getChildCount();
for (int i = 0; i < childCount; i++) {
View child = this.getChildAt(i);
LayoutParams lParams = (LayoutParams) child.getLayoutParams();
child.layout(lParams.left, lParams.top, lParams.left + childWidth,
lParams.top + childHeight);
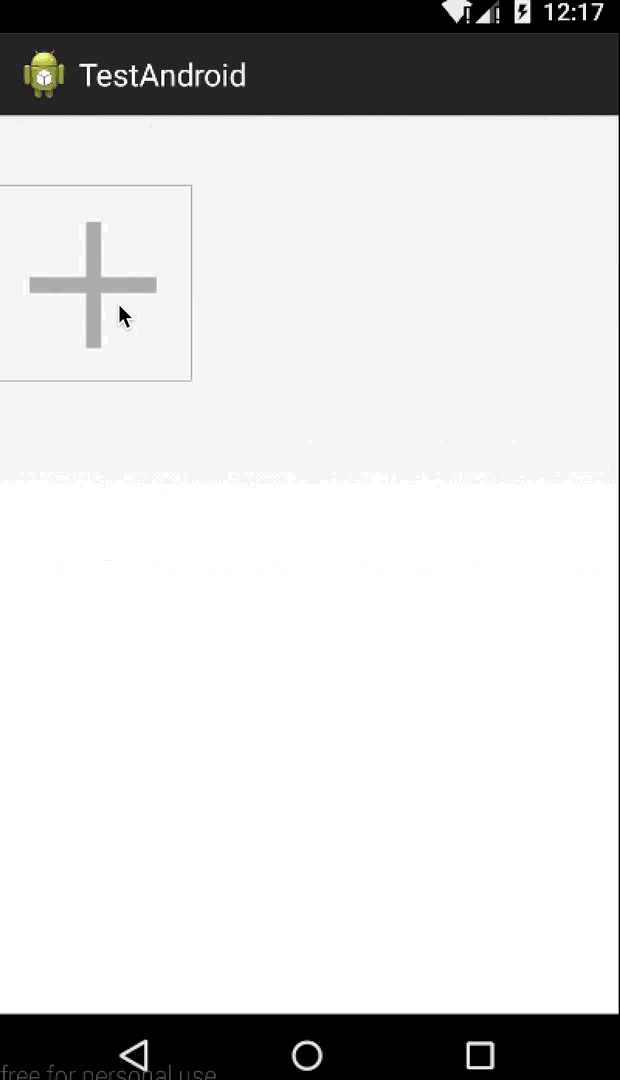
if (i == mImageResArrayList.size() - 1 && mImageResArrayList.size() != MAX_PHOTO_NUMBER) {
child.setBackgroundResource(R.drawable.add_photo);
child.setOnClickListener(new View.OnClickListener() {
@Override
public void onClick(View arg0) {
addPhotoBtnClick();
}
});
}else {
child.setBackgroundResource(constImageIds[i]);
child.setOnClickListener(null);
}
}
}
public void addPhoto() {
if (mImageResArrayList.size() < MAX_PHOTO_NUMBER) {
View newChild = new View(getContext());
addView(newChild);
mImageResArrayList.add(new integer());
requestLayout();
invalidate();
}
}
public void addPhotoBtnClick() {
final CharSequence[] items = { "Take Photo", "Photo from gallery" };
AlertDialog.Builder builder = new AlertDialog.Builder(getContext());
builder.setItems(items, new DialogInterface.OnClickListener() {
@Override
public void onClick(DialogInterface arg0, int arg1) {
addPhoto();
}
});
builder.show();
}
最核心的就是調用layout方法,根據我們measure階段獲得的LayoutParams中的left和top字段,也很好對每個子View進行位置排列。然後判斷在圖片未達到最大值9張時,默認最後一張是+號圖片,然後設置點擊事件,彈出對話框供用戶選擇操作。
Draw
不需要重寫,使用ViewGroup默認實現即可。
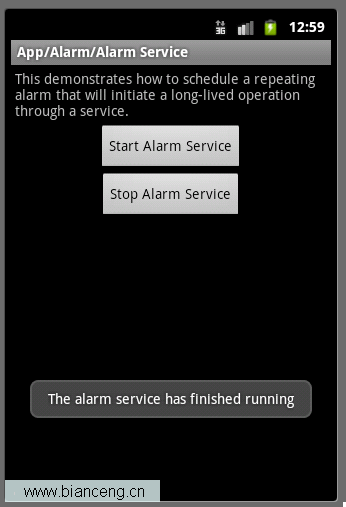 Android ApiDemos示例解析(20) App->Alarm->Alarm Service
Alarm Service和Alarm Controller 例子非常類似,只是Alarm Service是用來Schedule一個Service,而前面的例子是來 Sc
 C/C++交叉編譯環境中編譯可在Android上運行的可執行文件
X86架構的CPU采用的是復雜指令集(Complex Instruction Set Computer,CICS),而ARM架構的CPU使用的是精 簡指令集
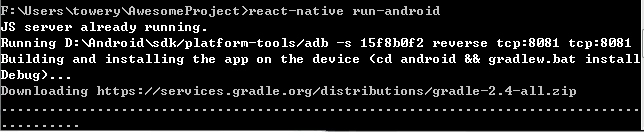 React Native Android gradle下載慢有關問題解決
React Native Android gradle下載慢問題解決很多人會遇到 初次運行 react-native run android的時候 gradle下載極慢,
 使用Android Studio籌建Android集成開發環境
使用Android Studio搭建Android集成開發環境一、Android Studio簡單介紹 2013年GoogleI/O大會首次發布了Android St