編輯:Android開發教程
在Android3.0之後,google創造了Fragment,因此原來的Tabhost已經不推薦使用了,現在一般推薦使用FragmentTabhost。
google考慮到了兼容問題,因此FragmentTabhost並未加在官方的SDK中,而是把它放在了android-support-v4.jar中
下面我帶大家來實現一下這個功能。
1、MyFragmentTabhostActivity.java
public class MyFragmentTabhostActivity extends FragmentActivity {
private Context context;
private FragmentTabHost fragmentTabHost = null;
private Class[] fragmentArray = { MyFragment.class, MyFragment.class, MyFragment.class, MyFragment.class };
private int[] tabImageArray = { R.drawable.ic_launcher, R.drawable.ic_launcher, R.drawable.ic_launcher, R.drawable.ic_launcher };
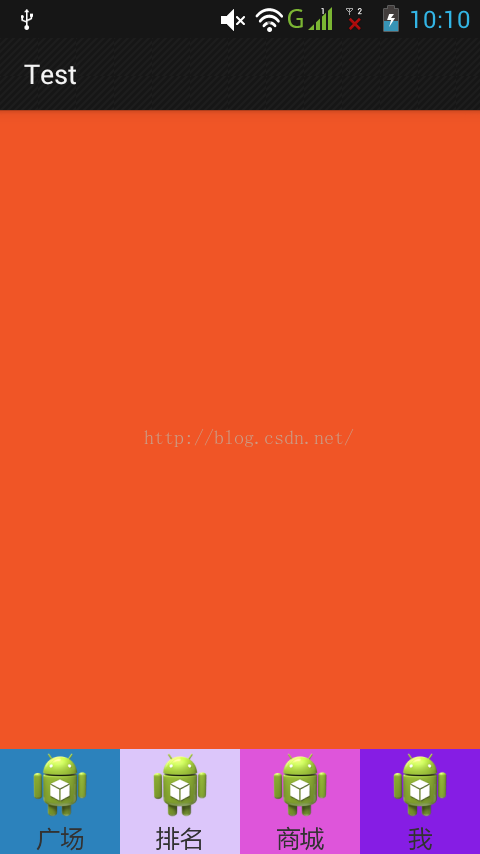
private String[] tabTextArray = { "廣場", "排名", "商城", "我" };
@Override
protected void onCreate(Bundle savedInstanceState) {
super.onCreate(savedInstanceState);
setContentView(R.layout.activity_fragmenttabhost);
context = this;
initView();
}
private void initView() {
LayoutInflater inflater = (LayoutInflater) getSystemService(Context.LAYOUT_INFLATER_SERVICE);
fragmentTabHost = (FragmentTabHost) findViewById(android.R.id.tabhost);
fragmentTabHost.setup(context, getSupportFragmentManager(), R.id.real_tabcontent);
for (int i = 0; i < fragmentArray.length; i++) {
// 給每個Tab按鈕設置圖標、文字和內容
TabSpec tabSpec = fragmentTabHost.newTabSpec(tabTextArray[i]).setIndicator(getTabItemView(inflater, i));
fragmentTabHost.addTab(tabSpec, fragmentArray[i], null);
// 設置Tab按鈕的背景
fragmentTabHost.getTabWidget().getChildAt(i).setBackgroundColor(Color.rgb((int)(Math.random()*255), (int)(Math.random()*255), (int)(Math.random()*255)));
}
}
public View getTabItemView(LayoutInflater inflater, int index) {
View view = inflater.inflate(R.layout.item_tab, null);
ImageView imageView = (ImageView) view.findViewById(R.id.imageview);
TextView textView = (TextView) view.findViewById(R.id.textview);
imageView.setImageResource(tabImageArray[index]);
textView.setText(tabTextArray[index]);
return view;
}
}
URL:http://www.bianceng.cn/OS/extra/201609/50439.htm
2、Fragment.java
public class MyFragment extends Fragment {

	@Override
	public View onCreateView(LayoutInflater inflater, ViewGroup container, Bundle savedInstanceState) {
		View view = inflater.inflate(R.layout.layout_fragment, null);
		view.setBackgroundColor(Color.rgb((int)(Math.random()*255), (int)(Math.random()*255), (int)(Math.random()*255)));
		return view;
	}
}
3、activity_fragment.xml
<?xml version="1.0" encoding="utf-8"?>
<LinearLayout xmlns:android="http://schemas.android.com/apk/res/android"
    android:layout_width="match_parent"
    android:layout_height="match_parent"
    android:orientation="vertical" >

    <FrameLayout
        android:id="@+id/real_tabcontent"
        android:layout_width="match_parent"
        android:layout_height="0dp"
        android:layout_weight="1" />

    <android.support.v4.app.FragmentTabHost
        android:id="@android:id/tabhost"
        android:layout_width="match_parent"
        android:layout_height="wrap_content"
        android:layout_weight="0" >

        <FrameLayout
            android:id="@android:id/tabcontent"
            android:layout_width="0dp"
            android:layout_height="0dp"/>
    </android.support.v4.app.FragmentTabHost>

</LinearLayout>
4、item_tab.xml
<?xml version="1.0" encoding="utf-8"?>
<RelativeLayout xmlns:android="http://schemas.android.com/apk/res/android"
    android:layout_width="match_parent"
    android:layout_height="match_parent"
    android:orientation="vertical" >

    <LinearLayout
        android:layout_width="wrap_content"
        android:layout_height="wrap_content"
        android:layout_centerInParent="true"
        android:gravity="center_horizontal"
        android:orientation="vertical" >

        <ImageView
            android:id="@+id/imageview"
            android:layout_width="wrap_content"
            android:layout_height="wrap_content"
            android:src="@drawable/ic_launcher" />

        <TextView
            android:id="@+id/textview"
            android:layout_width="wrap_content"
            android:layout_height="wrap_content"
            android:text="" />
    </LinearLayout>

</RelativeLayout>
5、layout_fragment.xml
<?xml version="1.0" encoding="utf-8"?>
<LinearLayout xmlns:android="http://schemas.android.com/apk/res/android"
    android:layout_width="match_parent"
    android:layout_height="match_parent"
    android:orientation="vertical" >

</LinearLayout>
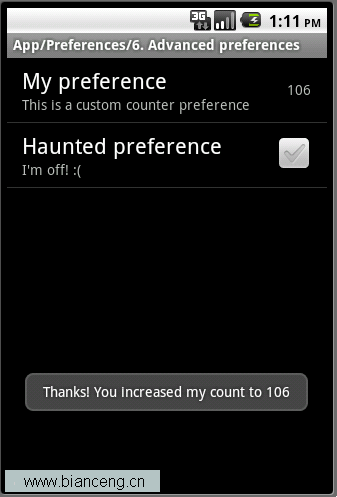
6、運行截圖
 Android 4.4急需的新功能
Google馬上就要正式發布Android 4.4 KitKat了。據我們現在所知,一些新的用戶界面預示著這次的操作系統將有一些新的改變,比如說重新設計的電話應用,比如說
 Android系統聯系人全特效實現(上),分組導航和擠壓動畫
記得在我剛接觸Android的時候對系統聯系人中的特效很感興趣,它會根據手機中聯系人姓氏的首字母進 行分組,並在界面的最頂端始終顯示一個當前的分組。如下圖所示:最讓我感興
 Android和iOS誰更強:Android 4.4與iOS 7的對比
Android和iOS誰更強?看到這個問題兩大陣營的用戶們估計又要吵翻天了。但誰都不能否認的是,這兩款操作系統都具備著超強的實力,才能夠取得如今的成績。在最近,Andro
 android LinearLayout和RelativeLayout實現精確布局
先明確幾個概念的區別:padding margin:都是邊距的含義,關鍵問題得明白是什麼相對什麼的邊距padding:是 控件的內容相對控件的邊緣的邊距.margin &
 Android ApiDemos示例解析(31):App->Preferences->Launching preferences
前給例子介紹了如何使用PreferenceActivity 來顯示修改應