編輯:關於Android編程
為何要用帶動畫的柱狀圖呢?
最近,項目中遇到一個地方,要用到柱狀圖。所以這篇文章主要講怎麼搞一個柱子。100行代碼,搞定柱狀圖!
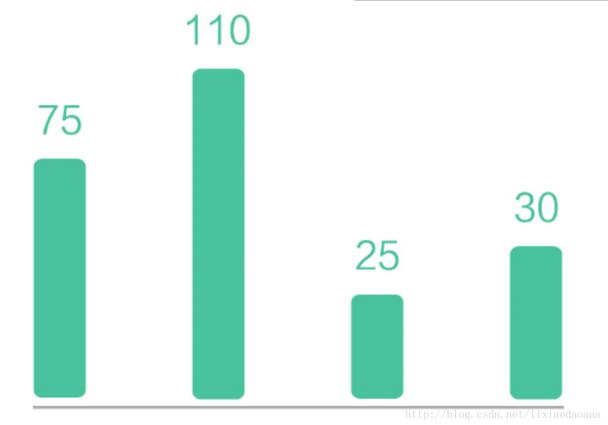
圓角,頭頂帶數字。恩,這樣用drawable也可以搞定。但是,這個柱子是有一個動畫的,就是進入到界面的時候柱子不斷的長高。這樣的話,綜合考慮還是用自定義View來做比較簡便。效果如下圖了:
完整Demo地址請到我的github下載地址:
https://github.com/lixiaodaoaaa/ColumnAnimViewProject
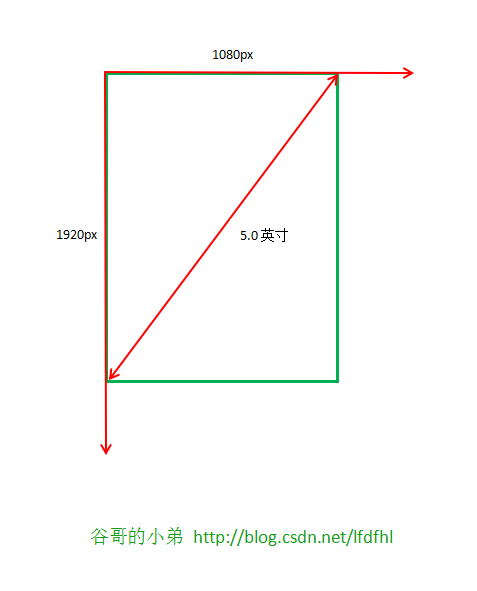
關於尺寸
控件尺寸直接來自xml中的設置,無需進行onMeasure測量。所以使用getWidth和getHeight獲取高度。
關於數據范圍
數據如果是一個柱子單獨顯示,則數據的范圍不是很重要,但是柱狀圖通常是由很多柱子並列顯示的,而這些柱子的單位高度都應該是一樣的,所以提供設置最大值的范圍,最小值就是0.
關於數字的文字大小
由於柱子的寬度就是整個View的寬度,所以數字的寬度不能超過柱子的寬度。因為這個原因,文字的size需要動態計算。意思就是 0和100000這兩個數字顯示的時候,文字的大小是不一樣的。
關於邊界值
0,是一個邊界值(最小值),當顯示0的時候,並不是柱子不顯示的,而是顯示一個最小高度的。
關於動畫
不停的設置值,就會形成動畫。意思是先設置數據1,然後緊接著設數據2.3.4.5……一直到最終的顯示值,就會有動畫效果。但是如果最終數值很大,1,1,1的增加就會很慢,動畫時間很長。
完整代碼如下:
package com.lixiaodaoaaa.view.pieview;

import android.content.Context;
import android.graphics.Canvas;
import android.graphics.Paint;
import android.graphics.RectF;
import android.support.annotation.Nullable;
import android.util.AttributeSet;
import android.view.View;

import com.gcssloop.graphics.R;
import com.lixiaodaoaaa.uitls.DensityUtils;

/**************************************
 * *** http://weibo.com/lixiaodaoaaa **
 * *** create at 2017/5/18  23:45 ****
 * ******* by:lixiaodaoaaa **********
 **************************************/

public class PColumn extends View {
  int MAX = 100;//最大
  int corner = 40;
  int data = 0;//顯示的數
  int tempData = 0;
  int textPadding = 20;
  Paint mPaint;
  int mColor;

  Context mContext;

  public PColumn(Context context) {
    super(context);
    mContext = context;
  }

  public PColumn(Context context, @Nullable AttributeSet attrs) {
    super(context, attrs);
    mContext = context;
    initPaint();
  }

  public PColumn(Context context, @Nullable AttributeSet attrs, int defStyleAttr) {
    super(context, attrs, defStyleAttr);
    mContext = context;
    initPaint();
  }

  private void initPaint() {
    mPaint = new Paint();
    mPaint.setAntiAlias(true);
    mColor = mContext.getResources().getColor(R.color.colorPrimary);
    mPaint.setColor(mColor);
  }

  @Override
  public void draw(Canvas canvas) {
    super.draw(canvas);

    if (data == 0) {
      mPaint.setTextSize(getWidth() / 2);
      RectF oval3 = new RectF(0, getHeight() - DensityUtils.pxTodip(mContext, 20), getWidth(), getHeight());// 設置個新的長方形
      canvas.drawRoundRect(oval3, DensityUtils.pxTodip(mContext, corner), DensityUtils.pxTodip(mContext, corner), mPaint);

      canvas.drawText("0",
          getWidth() * 0.5f - mPaint.measureText("0") * 0.5f,
          getHeight() - DensityUtils.pxTodip(mContext, 20) - 2 * DensityUtils.pxTodip(mContext, textPadding),
          mPaint);
      return;
    }

    //防止數值很大的的時候,動畫時間過長
    int step = data / 100 + 1;

    if (tempData < data - step) {
      tempData = tempData + step;
    } else {
      tempData = data;
    }
    //畫圓角矩形
    String S = tempData + "";
    //一個字和兩,三個字的字號相同
    if (S.length() < 4) {
      mPaint.setTextSize(getWidth() / 2);
    } else {
      mPaint.setTextSize(getWidth() / (S.length() - 1));
    }

    float textH = mPaint.ascent() + mPaint.descent();
    float MaxH = getHeight() - textH - 2 * DensityUtils.pxTodip(mContext, textPadding);
    //圓角矩形的實際高度
    float realH = MaxH / MAX * tempData;
    RectF oval3 = new RectF(0, getHeight() - realH, getWidth(), getHeight());// 設置個新的長方形
    canvas.drawRoundRect(oval3, DensityUtils.pxTodip(mContext, corner), DensityUtils.pxTodip(mContext, corner), mPaint);
    //寫數字
    canvas.drawText(S,
        getWidth() * 0.5f - mPaint.measureText(S) * 0.5f,
        getHeight() - realH - 2 * DensityUtils.pxTodip(mContext, textPadding),
        mPaint);
    if (tempData != data) {
      postInvalidate();
    }
  }

  public void setData(int data, int MAX) {
    this.data = data;
    tempData = 0;
    this.MAX = MAX;
    postInvalidate();
  }

}
/*
 * Copyright 2016 GcsSloop
 *
 * Licensed under the Apache License, Version 2.0 (the "License");
 * you may not use this file except in compliance with the License.
 * You may obtain a copy of the License at
 *
 *  http://www.apache.org/licenses/LICENSE-2.0
 *
 * Unless required by applicable law or agreed to in writing, software
 * distributed under the License is distributed on an "AS IS" BASIS,
 * WITHOUT WARRANTIES OR CONDITIONS OF ANY KIND, either express or implied.
 * See the License for the specific language governing permissions and
 * limitations under the License.
 *
 * Last modified 2016-10-02 00:22:33
 *
 */

package com.lixiaodaoaaa.graphics;

import android.os.Bundle;
import android.support.v7.app.AppCompatActivity;

import com.gcssloop.graphics.R;
import com.lixiaodaoaaa.view.pieview.PColumn;

public class MainActivity extends AppCompatActivity {

  private PColumn column_one;
  private PColumn column_two;
  private PColumn column_three;

  @Override
  protected void onCreate(Bundle savedInstanceState) {
    super.onCreate(savedInstanceState);
    setContentView(R.layout.activity_main);

    initAllViews();
  }

  private void initAllViews() {
    column_one = (PColumn) findViewById(R.id.column_one);
    column_two = (PColumn) findViewById(R.id.column_two);
    column_three = (PColumn) findViewById(R.id.column_three);

    column_one.setData(0, 100);
    column_two.setData(30, 100);
    column_three.setData(40, 100);

  }

}
xml配置如下:
<?xml version="1.0" encoding="utf-8"?>
<LinearLayout
  xmlns:android="http://schemas.android.com/apk/res/android"
  xmlns:tools="http://schemas.android.com/tools"
  android:layout_width="match_parent"
  android:layout_height="match_parent"
  android:layout_weight="1"
  android:paddingBottom="@dimen/activity_vertical_margin"
  android:paddingLeft="@dimen/activity_horizontal_margin"
  android:paddingRight="@dimen/activity_horizontal_margin"
  android:paddingTop="@dimen/activity_vertical_margin"
  tools:context="com.lixiaodaoaaa.graphics.MainActivity"
>
  <View
    android:layout_width="0dp"
    android:layout_height="match_parent"
    android:layout_weight="0.2"/>
  <com.lixiaodaoaaa.view.pieview.PColumn
    android:id="@+id/column_one"
    android:layout_width="0dp"
    android:layout_height="match_parent"
    android:layout_weight="1"/>

  <View
    android:layout_width="0dp"
    android:layout_height="match_parent"
    android:layout_weight="2.4"/>

  <com.lixiaodaoaaa.view.pieview.PColumn
    android:id="@+id/column_two"
    android:layout_width="0dp"
    android:layout_height="match_parent"
    android:layout_weight="1"/>

  <View
    android:layout_width="0dp"
    android:layout_height="match_parent"
    android:layout_weight="2.4"/>

  <com.lixiaodaoaaa.view.pieview.PColumn
    android:id="@+id/column_three"
    android:layout_width="0dp"
    android:layout_height="match_parent"
    android:layout_weight="1"/>
  <View
    android:layout_width="0dp"
    android:layout_height="match_parent"
    android:layout_weight="0.2"/>
</LinearLayout>
完整Demo地址請到我的github下載地址:
https://github.com/lixiaodaoaaa/ColumnAnimViewProject
以上就是本文的全部內容,希望對大家的學習有所幫助,也希望大家多多支持本站。
 探究drawable圖片的加載原理和縮放規律
前言Android的源碼公開策略豐富了手持設備的多樣性,但隨之而來的卻是較為嚴重的”碎片化”——版本繁多、尺寸多樣、功能定
 android ExpandableListView三級菜單的使用
由於本人所作的項目需要用到這種列表式的收縮與展開,因此,就好好研究了有關這方面的一些知識,當然,也借鑒了網上一些成功的案列。下面就是我模擬測試的一個展示界面。 實現上面的
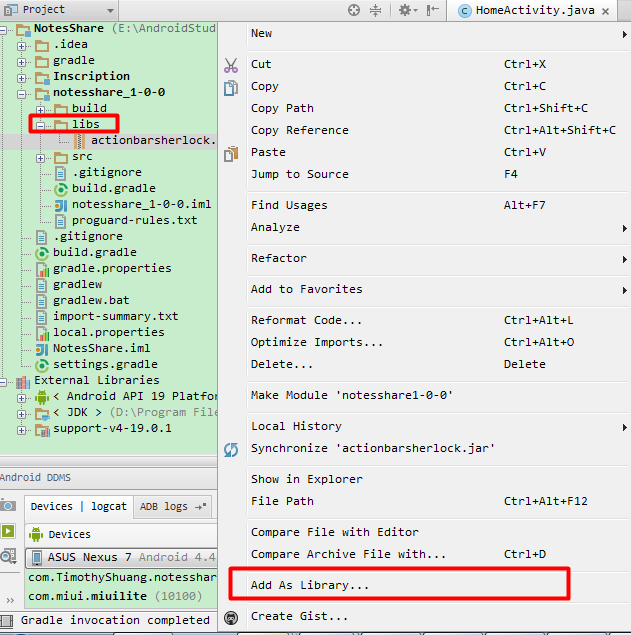 Android Studio中導入第三方庫
之前開發Android都是使用的eclipse,最近由於和外國朋友Timothy一起開發一款應用,他是從WP平台剛切換使用Android的,使用的開發環境時Android
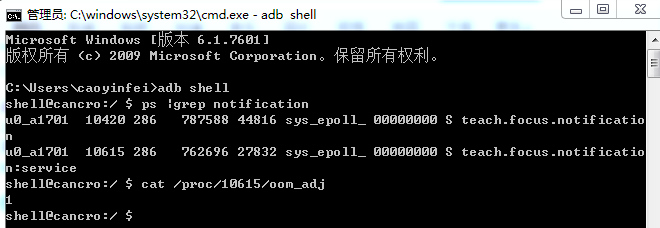 Android service進程保護
應用進程保活基本就是圍繞兩個方面來展開:1 盡量保證進程不被殺死。2 進程被殺死後復活。細分如下:1)Service重啟2)進程守護3)Receiver觸發4)Alarm