通知是應用程序通知用戶的一種方式,它無須活動,由通知管理器進行統一管理。通知包含一下功能:
1. 創建新的狀態欄圖標
2. 在擴展的狀態欄窗口顯示額外的信息(可以發起一個意圖)
3. 閃爍/LED
4. 讓手機震動
5. 發出聲音(鈴聲,媒體庫歌曲)
通知管理器是用來處理通知的系統服務,使用getSystemService方法可以獲得對它的引用,如下:
NotificationManager notificationManager = (NotificationManager) context.getSystemService(android.content.Context.NOTIFICATION_SERVICE);
通過使用通知管理器,可以觸發新的通知,修改現有的通知或者刪除那些不再需要的通知。首先創建一個新的Notification對象並傳遞給它要在狀態欄顯示的圖標、狀態欄的點擊文本以及這個通知的時間。可以設置Notification對象的number屬性來顯示一個狀態欄圖標所表示的事件的數量。
Notification notification = new Notification(R.drawable.icon,"在EoeAndroidReceiver1中", System.currentTimeMillis());
可以通過兩張方式在擴展的狀態窗口配置通知的外觀。
1. 使用setLatestEventInfo方法更新標准的擴展的狀態通知顯示中所顯示的詳細信息。
2. 使用一個遠程視圖(Remote View)設置contentView和contentIntent,以便為擴展的狀態顯示分配一個定制的UI。
最簡單的方法是使用setLatestEventInfo方法來填充默認的狀態窗口布局。標准的擴展的狀態窗口布局會顯示構造函數中定義的圖標和時間,以及標題和一個詳細信息字符串。
notification.setLatestEventInfo(context, "在EoeAndroidReceiver1中", null,contentIntent);
通知常用於請求用戶的動作或注意,所以可以指定一個PendingIntent,當用戶單擊通知項的時候觸發它,在大多數情況下,該意圖應該打開應用程序,並導航到為通知提供了上下文的活動。
PendingIntent contentIntent = PendingIntent.getActivity(context, 0,new Intent(context, ActivityMain.class), 0);
notification.setLatestEventInfo(context, "在EoeAndroidReceiver1中", null,contentIntent);
notificationManager.notify(NOTIFICATION_ID, notification);
向通知添加聲音、閃燈和振動效果的最簡單、最一致的方式是使用當前的用戶默認設置,使用defaults屬性,可以組合:
Notification.DEFAULT_LIGHTS
Notification.DEFAULT_SOUND
Notification.DEFAULT_VIBRATE
如果想全部使用默認值,可以使用Notification.DEFAULT_ALL常量。
Notification.defaults =Notificaiton.DEFAULT_ALL;
通過向sound屬性分配一個位置URI,android可以將手機上的任意音頻文件作為通知進行播放。要使用自己定制的音頻,需要把它復制到設備上,或者把它包含在原始資源(raw)中。
Uri uri =RingtoneManager.getDefaultUri(RingtongManager.TYPE_NOTIFICATION);
Notification.sound=uri;
可以使用電話的振動功能,讓通知執行指定類型的振動。Android可以控制振動的類型,可以使用振動來傳遞信息或者吸引用戶的注意。
要設置振動類型,可以向通知的vibrate屬性分配一個longs類型的數組:構造該數組,可以使得代表振動時間的值和代表暫停時間的值交替存在。使用振動必須添加權限:
<uses-permissionandroid:name=”android.permission.VIBRATE”/>
Long[] vibrate = newlong[]{1000,1000,1000,1000,1000};
notification.vibrate=vibrate;
通知還可以包含用來配置設備的LED的顏色和閃爍頻率的屬性。
每個設備在對LED的控制方面可能具有不同的限制。如果指定的顏色可用,則將使用一個與指定顏色最接近的顏色。
ledARGB屬性可以用來設置LED顏色,而ledOffMS和ledOnMS屬性則可以設置LED閃爍的頻率和模式。可以通過把ledOnMS屬性設置為1,並且把ledOffMS設置為0來打開LED,或者也可以通過把這兩個屬性都設置為0來關閉LED。
一旦配置了LED設置,就必須在通知的flags屬性中添加FLAG_SHOW_LIGHTS標記。
notification.ledARGB = Color.RED
notification.ledOffMS = 0;
notification.ledOnMS = 1;
notification.flags = notification.flags |Notification.FLAG_SHOW_LIGHTS;
通過設置通知的FLAG_INSISTENT和FLAG_ONGOING_EVENT標記,可以把它配置為持續的或者連續的。
持續的通知會一直重復音頻、振動和閃燈設置,只到被取消為止。
1. NotificationManager和Notification用來設置通知。
通知的設置等操作相對比較簡單,基本的使用方式就是用新建一個Notification對象,然後設置好通知的各項參數,然後使用系統後台運行的NotificationManager服務將通知發出來。
基本步驟如下:
1)得到NotificationManager:
String ns = Context.NOTIFICATION_SERVICE;
NotificationManager mNotificationManager = (NotificationManager) getSystemService(ns);
2)創建一個新的Notification對象:
Notification notification = new Notification();
notification.icon = R.drawable.notification_icon;
也可以使用稍微復雜一些的方式創建Notification:
int icon = R.drawable.notification_icon; //通知圖標
CharSequence tickerText = "Hello"; //狀態欄(Status Bar)顯示的通知文本提示
long when = System.currentTimeMillis(); //通知產生的時間,會在通知信息裡顯示
Notification notification = new Notification(icon, tickerText, when);
3)填充Notification的各個屬性:
Context context = getApplicationContext();
CharSequence contentTitle = "My notification";
CharSequence contentText = "Hello World!";
Intent notificationIntent = new Intent(this, MyClass.class);
PendingIntent contentIntent = PendingIntent.getActivity(this, 0, notificationIntent, 0);
notification.setLatestEventInfo(context, contentTitle, contentText, contentIntent);
Notification提供了豐富的手機提示方式:
a)在狀態欄(Status Bar)顯示的通知文本提示,如:
notification.tickerText = "hello";
b)發出提示音,如:
notification.defaults |= Notification.DEFAULT_SOUND;
notification.sound = Uri.parse("file:///sdcard/notification/ringer.mp3");
notification.sound = Uri.withAppendedPath(Audio.Media.INTERNAL_CONTENT_URI, "6");
c)手機振動,如:
notification.defaults |= Notification.DEFAULT_VIBRATE;
long[] vibrate = {0,100,200,300};
notification.vibrate = vibrate;
d)LED燈閃爍,如:
notification.defaults |= Notification.DEFAULT_LIGHTS;
或者可以自己的LED提醒模式:
notification.ledARGB = 0xff00ff00;
notification.ledOnMS = 300; //亮的時間
notification.ledOffMS = 1000; //滅的時間
notification.flags |= Notification.FLAG_SHOW_LIGHTS;
* 更多的特征屬性
* notification.flags |= FLAG_AUTO_CANCEL; //在通知欄上點擊此通知後自動清除此通知
* notification.flags |= FLAG_INSISTENT; //重復發出聲音,直到用戶響應此通知
* notification.flags |= FLAG_ONGOING_EVENT; //將此通知放到通知欄的"Ongoing"即"正在運行"組中
* notification.flags |= FLAG_NO_CLEAR; //表明在點擊了通知欄中的"清除通知"後,此通知不清除,
* //經常與FLAG_ONGOING_EVENT一起使用
* notification.number = 1; //number字段表示此通知代表的當前事件數量,它將覆蓋在狀態欄圖標的頂部
* //如果要使用此字段,必須從1開始
* notification.iconLevel = ; //
*/
//設置通知的事件消息
Context context = getApplicationContext(); //上下文
CharSequence contentTitle = "My Notification"; //通知欄標題
CharSequence contentText = "Hello World!"; //通知欄內容
Intent notificationIntent = new Intent(this,Main.class); //點擊該通知後要跳轉的Activity
PendingIntent contentIntent = PendingIntent.getActivity(this,0,notificationIntent,0);
notification.setLatestEventInfo(context, contentTitle, contentText, contentIntent);
//把Notification傳遞給NotificationManager
mNotificationManager.notify(0,notification);
4)發送通知:
private static final int ID_NOTIFICATION = 1;
mNotificationManager.notify(ID_NOTIFICATION, notification);
2. 通知的更新
如果需要更新一個通知,只需要在設置好notification之後,再調用setLatestEventInfo,然後重新發送一次通知即可。
3. 自定義通知視圖
這部分可以參考官方文檔,講的很詳細了。
AndroidSDK: docs/guide/topics/ui/notifiers/notifications.html
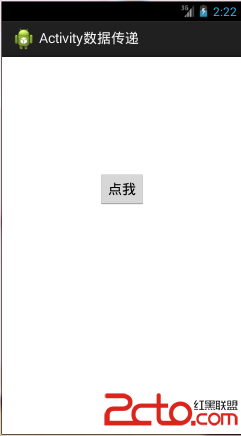 android:Activity數據傳遞之全局對象(application)
 Android開發之BroadcastReceiver詳解
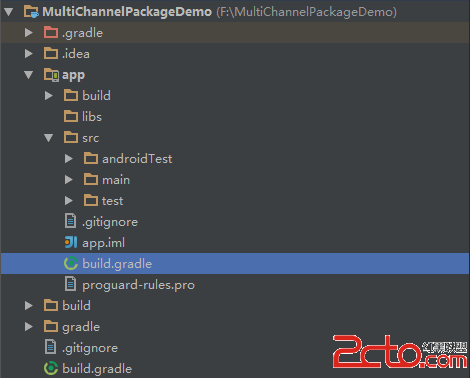 Android Studio多渠道打包
 Android 開源日志庫 Logger 使用教程