1.Intent作用
Intent是一個將要執行的動作的抽象的描述,由Intent來協助完成android各個組件之間的通訊。比如調用Activity實例化對象的startActivity()來啟動一個activity,或者由broadcaseIntent()來傳遞給所有感興趣的BroadcaseReceiver, 或者由startService()/bindservice()來啟動一個後台的service。可見,intent主要用來啟動activity或者service(並攜帶需要傳遞的參數信息),intent理解成activity之間的粘合劑。
總之,Intent具有激活組件和攜帶數據的功能!
2.Intent形式
(1).顯示意圖(Explicit Intents)
明確指定組件名的Intent為顯式意圖,指定了Intent應該傳遞給那個組件。通過下面代碼方式,可以創建顯示意圖實例化對象,並設定需要傳遞的參數信息。由於顯示意圖指定了具體的組件對象,不需要設置intent的其它意圖過濾對象。
[java]
// 1.創建Intent實例化對象幾種方式
Intent intent = new Intent();
intent.setClass(Context packageContext, Class<?> cls) ; //內部調用setComponent(ComponentName)
intent.setClassName(Context packageContext, String className) ; //內部調用setComponent(ComponentName)
intent.setClassName(String packageName, String className) ; //內部調用setComponent(ComponentName),可以激活外部應用
intent.setComponent(new ComponentName(this, Class<?> cls));
intent.setComponent(new ComponentName(this, "package Name"));
(2).隱式意圖(Implicit Intents)
沒有明確指定組件名的Intent為隱式意圖,系統會根據隱式意圖中設置的 動作(action)、類別(category)、數據URI等來匹配最合適的組件。
1).action
The general action to be performed, such as ACTION_VIEW, ACTION_EDIT, ACTION_MAIN, 包括Android 系統指定的 和 自定義
[java]
intent.setAction("com.baidu.action.TEST");
[html] view plaincopy
<action android:name="com.baidu.action.TEST"/>
2).data
expressed as a Uri, The data to operate on, such as a person record in the contacts database.
系統自帶的Action簡單舉例
Action Data(Uri) Content
ACTION_VIEW
content://contacts/people/1
Display information about the person whose identifier is "1".
ACTION_VIEW
tel:123
Display the phone dialer with the given number filled in.
ACTION_DIAL
tel:123
Display the phone dialer with the given number filled in.
自定義data匹配
[java]
intent.setData(Uri.parse("baidu://www.baidu.com/news"));
[html]
<!-- android:path 內容字符串需要以 / 開頭 -->
<data android:scheme="baidu" android:host="www.baidu.com" android:path="/news"/>
3).category
Gives additional information about the action to execute.
注意:項目清單的xml文件意圖過濾器中必須指定 android.intent.category.DEFAULT類別,Activities will very often need to support the CATEGORY_DEFAULT so that they can be found by Context.startActivity,or Context can't the acitivity component
[java]
intent.addCategory("com.baidu.category.TEST");
[html]
<!-- 必須指定CATEGORY_DEFAULT,只有這樣startActivity(intent)才能找到 -->
<category android:name="com.baidu.category.TEST" />
<category android:name="android.intent.category.DEFAULT" />
除了以上主要屬性外,下面還有其它屬性可以額外增強。
4).type
Specifies an explicit type (a MIME type) of the intent data.
[java]
intent.setType("image/jpeg");
[html] view plaincopy
<data android:mimeType="image/*" />
注意:java文件中data Uri 和 type不能同時使用各自的函數進行設定,因為使用type時會把Uri清除掉,可以使用setDataAndType方法設定
[java]
intent.setDataAndType(Uri.parse("baidu://www.baidu.com/news"), "image/jpeg");
[html]
<data android:mimeType="image/*" android:scheme="baidu" android:host="www.baidu.com" android:path="/news"/>
(3).兩者的使用區別
顯式意圖一般在應用的內部使用,因為在應用內部已經知道了組件的名稱,直接調用就可以了。
當一個應用要激活另一個應用中的Activity時,只能使用隱式意圖,根據Activity配置的意圖過濾器建一個意圖,讓意圖中的各項參數的值都跟過濾器匹配,這樣就可以激活其他應用中的Activity。所以,隱式意圖是在應用與應用之間使用的。
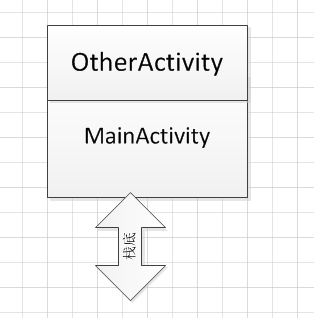
3.Activity的Intent數據傳遞
[java]
//Activity間的數據傳遞
// 1.直接向intent對象中傳入鍵值對(相當於Intent對象具有Map鍵值對功能)
intent.putExtra("first", text1.getText().toString());
intent.putExtra("second", text2.getText().toString());
// 2.新建一個Bundle對象 ,想該對象中加入鍵值對,然後將該對象加入intent中
Bundle bundle = new Bundle();
bundle.putString("first", "zhang");
bundle.putInt("age", 20);
intent.putExtras(bundle);
// 3.向intent中添加ArrayList集合對象
intent.putIntegerArrayListExtra(name, value);
intent.putIntegerArrayListExtra(name, value);
// 4.intent傳遞Object對象(被傳遞的對象的類實現Parcelable接口,或者實現Serialiable接口)
public Intent putExtra(String name, Serializable value)
public Intent putExtra(String name, Parcelable value)
4.Activity退出的返回結果
[java]
// 1.通過startActivityForResult方式啟動一個Activity
MainActivity.this.startActivityForResult(intent, 200); //intent對象,和 requestCode請求碼
// 2.新activity設定setResult方法,通過該方法可以傳遞responseCode 和 Intent對象
setResult(101, intent2); //responseCode響應碼 和 intent對象
// 3.在MainActivity中覆寫onActivityResult方法,新activity一旦退出,就會執行該方法
protected void onActivityResult(int requestCode, int resultCode, Intent data) {
Toast.makeText(this, data.getStringExtra("info")+"requestCode:"+requestCode+"resultCode:"+resultCode, Toast.LENGTH_LONG).show();
}
5.Intent常見應用(轉)
(1).調用撥號程序
[java]
Uri uri = Uri.parse("tel:10086");
Intent intent = new Intent(Intent.ACTION_DIAL, uri);
startActivity(intent);
(2).發送短信或者彩信
[java]
//發生短信
Uri uri = Uri.parse("smsto:10086");
Intent intent = new Intent(Intent.ACTION_SENDTO, uri);
intent.putExtra("sms_body", "Hello");
startActivity(intent);
//發送彩信,相當於發送帶附件的短信
Intent intent = new Intent(Intent.ACTION_SEND);
intent.putExtra("sms_body", "Hello");
Uri uri = Uri.parse("content://media/external/images/media/23");
intent.putExtra(Intent.EXTRA_STREAM, uri);
intent.setType("image/png");
startActivity(intent);
(3).通過浏覽器打開網頁
[java]
Uri uri = Uri.parse("http://www.google.com");
Intent intent = new Intent(Intent.ACTION_VIEW, uri);
startActivity(intent);
(4).發送電子郵件
[java]
Uri uri = Uri.parse("mailto:
[email protected]");
Intent intent = new Intent(Intent.ACTION_SENDTO, uri);
startActivity(intent);
//給
[email protected]發郵件發送內容為“Hello”的郵件
Intent intent = new Intent(Intent.ACTION_SEND);
intent.putExtra(Intent.EXTRA_EMAIL, "
[email protected]");
intent.putExtra(Intent.EXTRA_SUBJECT, "Subject");
intent.putExtra(Intent.EXTRA_TEXT, "Hello");
intent.setType("text/plain");
startActivity(intent);
// 給多人發郵件
Intent intent=new Intent(Intent.ACTION_SEND);
String[] tos = {"
[email protected]", "
[email protected]"}; // 收件人
String[] ccs = {"
[email protected]", "
[email protected]"}; // 抄送
String[] bccs = {"
[email protected]", "
[email protected]"}; // 密送
intent.putExtra(Intent.EXTRA_EMAIL, tos);
intent.putExtra(Intent.EXTRA_CC, ccs);
intent.putExtra(Intent.EXTRA_BCC, bccs);
intent.putExtra(Intent.EXTRA_SUBJECT, "Subject");
intent.putExtra(Intent.EXTRA_TEXT, "Hello");
intent.setType("message/rfc822");
startActivity(intent);
(5).顯示地圖與路徑規劃
[java]
// 打開Google地圖中國北京位置(北緯39.9,東經116.3)
Uri uri = Uri.parse("geo:39.9,116.3");
Intent intent = new Intent(Intent.ACTION_VIEW, uri);
startActivity(intent);
// 路徑規劃:從北京某地(北緯39.9,東經116.3)到上海某地(北緯31.2,東經121.4)
Uri uri = Uri.parse("http://maps.google.com/maps?f=d&saddr=39.9 116.3&daddr=31.2 121.4");
Intent intent = new Intent(Intent.ACTION_VIEW, uri);
startActivity(intent);
(6).播放多媒體
[java
Intent intent = new Intent(Intent.ACTION_VIEW);
Uri uri = Uri.parse("file:///sdcard/foo.mp3");
intent.setDataAndType(uri, "audio/mp3");
startActivity(intent);
Uri uri = Uri.withAppendedPath(MediaStore.Audio.Media.INTERNAL_CONTENT_URI, "1");
Intent intent = new Intent(Intent.ACTION_VIEW, uri);
startActivity(intent);
(7).拍照
[java]
// 打開拍照程序
Intent intent = new Intent(MediaStore.ACTION_IMAGE_CAPTURE);
startActivityForResult(intent, 0);
// 取出照片數據
Bundle extras = intent.getExtras();
Bitmap bitmap = (Bitmap) extras.get("data");
(8).獲取並剪切圖片
[java]
// 獲取並剪切圖片
Intent intent = new Intent(Intent.ACTION_GET_CONTENT);
intent.setType("image/*");
intent.putExtra("crop", "true"); // 開啟剪切
intent.putExtra("aspectX", 1); // 剪切的寬高比為1:2
intent.putExtra("aspectY", 2);
intent.putExtra("outputX", 20); // 保存圖片的寬和高
intent.putExtra("outputY", 40);
intent.putExtra("output", Uri.fromFile(new File("/mnt/sdcard/temp"))); // 保存路徑
intent.putExtra("outputFormat", "JPEG");// 返回格式
startActivityForResult(intent, 0);
// 剪切特定圖片
Intent intent = new Intent("com.android.camera.action.CROP");
intent.setClassName("com.android.camera", "com.android.camera.CropImage");
intent.setData(Uri.fromFile(new File("/mnt/sdcard/temp")));
intent.putExtra("outputX", 1); // 剪切的寬高比為1:2
intent.putExtra("outputY", 2);
intent.putExtra("aspectX", 20); // 保存圖片的寬和高
intent.putExtra("aspectY", 40);
intent.putExtra("scale", true);
intent.putExtra("noFaceDetection", true);
intent.putExtra("output", Uri.parse("file:///mnt/sdcard/temp"));
startActivityForResult(intent, 0);
(9).打開Google Market
[java]
// 打開Google Market直接進入該程序的詳細頁面
Uri uri = Uri.parse("market://details?id=" + "com.demo.app");
Intent intent = new Intent(Intent.ACTION_VIEW, uri);
startActivity(intent);
(10).安裝和卸載程序
[java]
Uri uri = Uri.fromParts("package", "com.demo.app", null);
Intent intent = new Intent(Intent.ACTION_DELETE, uri);
startActivity(intent);
(11).進入設置界面
[java]
// 進入無線網絡設置界面(其它可以舉一反三)
Intent intent = new Intent(android.provider.Settings.ACTION_WIRELESS_SETTINGS);
startActivityForResult(intent, 0)
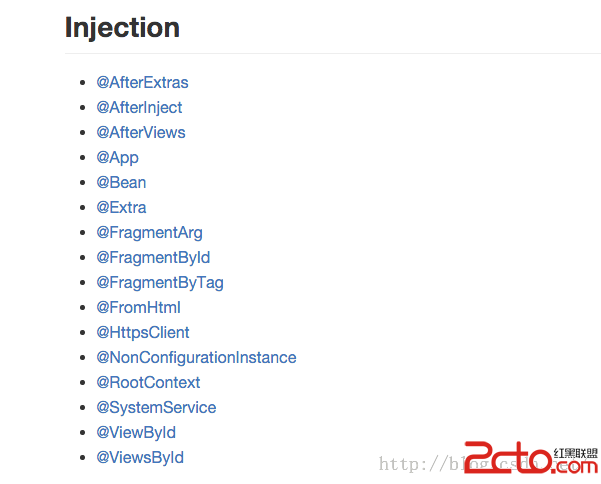 AndroidAnnnotations注入框架使用之Injection標簽詳解(十)
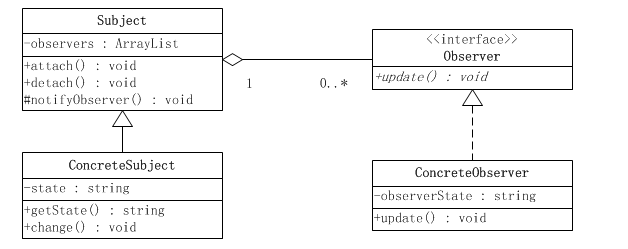 android適配器中的觀察者模式
 探究startActivityForResult在singleTop和singleTask啟動模式討論
 Android更改EditText下劃線顏色樣式的方法