編輯:關於Android編程
Zygote意為“受精卵”,即所有的Android進程都是由其“發育”而來的意思。本人試著把啃代碼學到的內容整理出來,希望會對自己以後有用。
Init進程是Linux系統上的第一個用戶進程,用戶為root,擁有系統中最高的權限。它會實現掛載文件系統,並啟動ServiceManager/Zygote兩大進程,正式這兩大進程構成了Android系統的基礎。
簡單來說,Init進程通過解析init.rc文件,然後執行自己的工作,其中,Zygote進程相關的配置如下(system/core/rootdir/init.rc):
service zygote /system/bin/app_process -Xzygote /system/bin --zygote --start-system-server
    class main
    socket zygote stream 660 root system
    onrestart write /sys/android_power/request_state wake
    onrestart write /sys/power/state on
    onrestart restart media
    onrestart restart netd
從上面,可以看到Zygote實際上執行的是/system/bin/app_process應用程序,參數中包含了--zygote和--start-system-server。 另外,
socket zygote stream 660 root system屬性的配置,說明Init進程在啟動zygote進程時,會為zygote進程創建一個stream型的domain socket,並保存到zygote系統變量中。(對這個過程涉及到init進程的實現,可以參考代碼system/core/init/init.c)
int main(int argc, const char* const argv[])
{
// These are global variables in ProcessState.cpp
mArgC = argc;
mArgV = argv;
mArgLen = 0;
for (int i=0; i
main函數首先分析參數,決定下一步要做什麼:
while (i < argc) {
const char* arg = argv[i++];
if (!parentDir) {
parentDir = arg;
} else if (strcmp(arg, "--zygote") == 0) {
zygote = true;
niceName = "zygote";
} else if (strcmp(arg, "--start-system-server") == 0) {
startSystemServer = true;
} else if (strcmp(arg, "--application") == 0) {
application = true;
} else if (strncmp(arg, "--nice-name=", 12) == 0) {
niceName = arg + 12;
} else {
className = arg;
break;
}
} 上一步中,我們知道Init進程啟動Zygote進程的時候,包含了--zygote參數和--start-system-server參數,所以,現在zygote和startSystemServer都為true,所以接下來執行:
if (zygote) {
runtime.start("com.android.internal.os.ZygoteInit",
startSystemServer ? "start-system-server" : "");
} else if (className) {
......
} else {
......
} 這次的參數分別為“com.android.internal.os.ZygoteInit”和“start-system-server”。
AndroidRunTime
runtime的類型為AppRunTime,AppRumTime的定義(frameworks/base/cmds/app_process/app_main.cpp):
class AppRuntime : public AndroidRuntime
{
public:
AppRuntime()
: mParentDir(NULL)
, mClassName(NULL)
, mClass(NULL)
, mArgC(0)
, mArgV(NULL)
{
}
#if 0
// this appears to be unused
const char* getParentDir() const
{
return mParentDir;
}
#endif
const char* getClassName() const
{
return mClassName;
}
virtual void onVmCreated(JNIEnv* env)
{
if (mClassName == NULL) {
return; // Zygote. Nothing to do here.
}
/*
* This is a little awkward because the JNI FindClass call uses the
* class loader associated with the native method we're executing in.
* If called in onStarted (from RuntimeInit.finishInit because we're
* launching "am", for example), FindClass would see that we're calling
* from a boot class' native method, and so wouldn't look for the class
* we're trying to look up in CLASSPATH. Unfortunately it needs to,
* because the "am" classes are not boot classes.
*
* The easiest fix is to call FindClass here, early on before we start
* executing boot class Java code and thereby deny ourselves access to
* non-boot classes.
*/
char* slashClassName = toSlashClassName(mClassName);
mClass = env->FindClass(slashClassName);
if (mClass == NULL) {
ALOGE("ERROR: could not find class '%s'\n", mClassName);
}
free(slashClassName);
mClass = reinterpret_cast(env->NewGlobalRef(mClass));
}
virtual void onStarted()
{
sp proc = ProcessState::self();
ALOGV("App process: starting thread pool.\n");
proc->startThreadPool();
AndroidRuntime* ar = AndroidRuntime::getRuntime();
ar->callMain(mClassName, mClass, mArgC, mArgV);
IPCThreadState::self()->stopProcess();
}
virtual void onZygoteInit()
{
sp proc = ProcessState::self();
ALOGV("App process: starting thread pool.\n");
proc->startThreadPool();
}
virtual void onExit(int code)
{
if (mClassName == NULL) {
// if zygote
IPCThreadState::self()->stopProcess();
}
AndroidRuntime::onExit(code);
}
const char* mParentDir;
const char* mClassName;
jclass mClass;
int mArgC;
const char* const* mArgV;
};
} 可以看到,AppRuntime並沒有重載start函數,所以,目前會執行其父類AndroidRuntime的start函數(frameworks/base/core/jni/AndroidRunTime.cpp):
/*
* Start the Android runtime. This involves starting the virtual machine
* and calling the "static void main(String[] args)" method in the class
* named by "className".
*
* Passes the main function two arguments, the class name and the specified
* options string.
*/
void AndroidRuntime::start(const char* className, const char* options)
{
ALOGD("\n>>>>>> AndroidRuntime START %s <<<<<<\n",
className != NULL ? className : "(unknown)");
blockSigpipe();
/*
* 'startSystemServer == true' means runtime is obsolete and not run from
* init.rc anymore, so we print out the boot start event here.
*/
if (strcmp(options, "start-system-server") == 0) {
/* track our progress through the boot sequence */
const int LOG_BOOT_PROGRESS_START = 3000;
LOG_EVENT_LONG(LOG_BOOT_PROGRESS_START,
ns2ms(systemTime(SYSTEM_TIME_MONOTONIC)));
}
const char* rootDir = getenv("ANDROID_ROOT");
if (rootDir == NULL) {
rootDir = "/system";
if (!hasDir("/system")) {
LOG_FATAL("No root directory specified, and /android does not exist.");
return;
}
setenv("ANDROID_ROOT", rootDir, 1);
}
//const char* kernelHack = getenv("LD_ASSUME_KERNEL");
//ALOGD("Found LD_ASSUME_KERNEL='%s'\n", kernelHack);
/* start the virtual machine */
JNIEnv* env;
if (startVm(&mJavaVM, &env) != 0) {
return;
}
onVmCreated(env);
/*
* Register android functions.
*/
if (startReg(env) < 0) {
ALOGE("Unable to register all android natives\n");
return;
}
/*
* We want to call main() with a String array with arguments in it.
* At present we have two arguments, the class name and an option string.
* Create an array to hold them.
*/
jclass stringClass;
jobjectArray strArray;
jstring classNameStr;
jstring optionsStr;
stringClass = env->FindClass("java/lang/String");
assert(stringClass != NULL);
strArray = env->NewObjectArray(2, stringClass, NULL);
assert(strArray != NULL);
classNameStr = env->NewStringUTF(className);
assert(classNameStr != NULL);
env->SetObjectArrayElement(strArray, 0, classNameStr);
optionsStr = env->NewStringUTF(options);
env->SetObjectArrayElement(strArray, 1, optionsStr);
/*
* Start VM. This thread becomes the main thread of the VM, and will
* not return until the VM exits.
*/
char* slashClassName = toSlashClassName(className);
jclass startClass = env->FindClass(slashClassName);
if (startClass == NULL) {
ALOGE("JavaVM unable to locate class '%s'\n", slashClassName);
/* keep going */
} else {
jmethodID startMeth = env->GetStaticMethodID(startClass, "main",
"([Ljava/lang/String;)V");
if (startMeth == NULL) {
ALOGE("JavaVM unable to find main() in '%s'\n", className);
/* keep going */
} else {
env->CallStaticVoidMethod(startClass, startMeth, strArray);
#if 0
if (env->ExceptionCheck())
threadExitUncaughtException(env);
#endif
}
}
free(slashClassName);
ALOGD("Shutting down VM\n");
if (mJavaVM->DetachCurrentThread() != JNI_OK)
ALOGW("Warning: unable to detach main thread\n");
if (mJavaVM->DestroyJavaVM() != 0)
ALOGW("Warning: VM did not shut down cleanly\n");
} AndroidRumTime.start主要做了三項工作:
startVM啟動Android虛擬機,並呼叫onVMCreate函數。前面,我們有看到AppRuntime有重載onVMCreated函數(不過,對於app_process作為Zygote進程啟動的情況,不做任何處理就返回)startReg注冊需要的Native函數,基本Android的每個模塊都有一些native實現需要和Java代碼關聯起來,事先注冊能夠提高性能,(另一種方案是第一次調用的時候查找實現函數並完成注冊)查找className指定的class的main函數,並以options為參數,調用main函數。這裡不對代碼做解釋,用java寫過反射調用的人應該基本能看懂。
runtime.start最後會調用ZygoteIni的.main函數,參數為--start-system-server。
因為已經啟動了java虛擬機,接下來可以執行Java代碼了,所以,我們將進入下一個世界。
ZygoteInit
ZygoteInit從類名看,從現在開始是真正的“Zygote”(frameworks/base/core/java/com/android/internal/os/ZygoteInit.java):
public static void main(String argv[]) {
try {
// Start profiling the zygote initialization.
SamplingProfilerIntegration.start();
registerZygoteSocket();
EventLog.writeEvent(LOG_BOOT_PROGRESS_PRELOAD_START,
SystemClock.uptimeMillis());
preload();
EventLog.writeEvent(LOG_BOOT_PROGRESS_PRELOAD_END,
SystemClock.uptimeMillis());
// Finish profiling the zygote initialization.
SamplingProfilerIntegration.writeZygoteSnapshot();
// Do an initial gc to clean up after startup
gc();
// If requested, start system server directly from Zygote
if (argv.length != 2) {
throw new RuntimeException(argv[0] + USAGE_STRING);
}
if (argv[1].equals("start-system-server")) {
startSystemServer();
} else if (!argv[1].equals("")) {
throw new RuntimeException(argv[0] + USAGE_STRING);
}
Log.i(TAG, "Accepting command socket connections");
if (ZYGOTE_FORK_MODE) {
runForkMode();
} else {
runSelectLoopMode();
}
closeServerSocket();
} catch (MethodAndArgsCaller caller) {
caller.run();
} catch (RuntimeException ex) {
Log.e(TAG, "Zygote died with exception", ex);
closeServerSocket();
throw ex;
}
} 從代碼看,main函數完成了四項工作:
registerZygoteSocketpreloadstartSystemServer,因為之前AndroidRuntime是以“start-system-server”為參數調用main函數的,所以這裡會執行startSystemServerrunSelectLoopMode,ZYGOTE_FORK_MODE常量恆定為false,所以會執行runSelectLoopMode
再繼續分析前,先要做點鋪墊。Zygote進程的作用是為了fork出新的Android進程,那Zygote是如何得知它需要fork一個進程的呢?
先看一段“客戶端“的代碼(frameworks/base/core/java/android/os/Process.java):
public static final ProcessStartResult start(final String processClass,
final String niceName,
int uid, int gid, int[] gids,
int debugFlags, int mountExternal,
int targetSdkVersion,
String seInfo,
String[] zygoteArgs) {
try {
return startViaZygote(processClass, niceName, uid, gid, gids,
debugFlags, mountExternal, targetSdkVersion, seInfo, zygoteArgs);
} catch (ZygoteStartFailedEx ex) {
Log.e(LOG_TAG,
"Starting VM process through Zygote failed");
throw new RuntimeException(
"Starting VM process through Zygote failed", ex);
}
}
private static void openZygoteSocketIfNeeded()
throws ZygoteStartFailedEx {
int retryCount;
if (sPreviousZygoteOpenFailed) {
/*
* If we've failed before, expect that we'll fail again and
* don't pause for retries.
*/
retryCount = 0;
} else {
retryCount = 10;
}
/*
* See bug #811181: Sometimes runtime can make it up before zygote.
* Really, we'd like to do something better to avoid this condition,
* but for now just wait a bit...
*/
for (int retry = 0
; (sZygoteSocket == null) && (retry < (retryCount + 1))
; retry++ ) {
if (retry > 0) {
try {
Log.i("Zygote", "Zygote not up yet, sleeping...");
Thread.sleep(ZYGOTE_RETRY_MILLIS);
} catch (InterruptedException ex) {
// should never happen
}
}
try {
sZygoteSocket = new LocalSocket();
sZygoteSocket.connect(new LocalSocketAddress(ZYGOTE_SOCKET,
LocalSocketAddress.Namespace.RESERVED));
sZygoteInputStream
= new DataInputStream(sZygoteSocket.getInputStream());
sZygoteWriter =
new BufferedWriter(
new OutputStreamWriter(
sZygoteSocket.getOutputStream()),
256);
Log.i("Zygote", "Process: zygote socket opened");
sPreviousZygoteOpenFailed = false;
break;
} catch (IOException ex) {
if (sZygoteSocket != null) {
try {
sZygoteSocket.close();
} catch (IOException ex2) {
Log.e(LOG_TAG,"I/O exception on close after exception",
ex2);
}
}
sZygoteSocket = null;
}
}
if (sZygoteSocket == null) {
sPreviousZygoteOpenFailed = true;
throw new ZygoteStartFailedEx("connect failed");
}
}
private static ProcessStartResult zygoteSendArgsAndGetResult(ArrayList args)
throws ZygoteStartFailedEx {
openZygoteSocketIfNeeded();
try {
sZygoteWriter.write(Integer.toString(args.size()));
sZygoteWriter.newLine();
int sz = args.size();
for (int i = 0; i < sz; i++) {
String arg = args.get(i);
if (arg.indexOf('\n') >= 0) {
throw new ZygoteStartFailedEx(
"embedded newlines not allowed");
}
sZygoteWriter.write(arg);
sZygoteWriter.newLine();
}
sZygoteWriter.flush();
// Should there be a timeout on this?
ProcessStartResult result = new ProcessStartResult();
result.pid = sZygoteInputStream.readInt();
if (result.pid < 0) {
throw new ZygoteStartFailedEx("fork() failed");
}
result.usingWrapper = sZygoteInputStream.readBoolean();
return result;
} catch (IOException ex) {
try {
if (sZygoteSocket != null) {
sZygoteSocket.close();
}
} catch (IOException ex2) {
// we're going to fail anyway
Log.e(LOG_TAG,"I/O exception on routine close", ex2);
}
sZygoteSocket = null;
throw new ZygoteStartFailedEx(ex);
}
} 這段代碼是framework層通知Zygote進程進行fork用的,代碼略長,也沒有必要仔細分析,只要看明白一點即可:
framework層會通過Unix domain socket連接到Zygote進程,並發送字符串型的參數。
registerZygoteSocket
剛才有看到Process會通過domain socket連接到Zygote進程,那Zygote進程理所當然的要監聽這個socket端口了,這就是registerZygoteSocket函數要做的(或者說它做了一半):
/**
* Registers a server socket for zygote command connections
*
* @throws RuntimeException when open fails
*/
private static void registerZygoteSocket() {
if (sServerSocket == null) {
int fileDesc;
try {
String env = System.getenv(ANDROID_SOCKET_ENV);
fileDesc = Integer.parseInt(env);
} catch (RuntimeException ex) {
throw new RuntimeException(
ANDROID_SOCKET_ENV + " unset or invalid", ex);
}
try {
sServerSocket = new LocalServerSocket(
createFileDescriptor(fileDesc));
} catch (IOException ex) {
throw new RuntimeException(
"Error binding to local socket '" + fileDesc + "'", ex);
}
}
} registerZygoteSocket函數中,先從
private static final String ANDROID_SOCKET_ENV = "ANDROID_SOCKET_zygote";
環境變量中,讀取一個int值作為文件描述父,創建文件描述符,為什麼呢?
如果還記得init.rc的配置到話,一切就可以解釋了:
socket zygote stream 660 root system
init進程在處理這一行屬性時,會先在dev/socket下創建一個名為zygote的設備文件,然後打開這個文件,並把文件描述符保存到環境變量中。環境變量名的規則為"ANDROID_SOCKET_"+第一參數(這裡為zygote)。所以,app_main就可以通過指定的環境變量來獲取這個文件描述符,並由此創建LocalServerSocket。
preload
因為所有的Android進程都是從Zygote進程fork出來的,而子進程會繼承Zygote的資源。換言之,如果Zygote進程持有了資源,所有android進程就都有了。所以,Zygote會預加載一些系統資源,以加速子進程的啟動速度(子進程以寫時復制的機制進行資源共享,所以不必擔心內存占用問題。另外Android系統的啟動時間可能有大概40%的時間耗費在這個preload函數上,但是從整體上來說,這是利大於弊的)。
static void preload() {
preloadClasses();//加載java類
preloadResources();//加載icon,字串等資源
}
startSystemServer
Zygote進程啟動以後,會由Zygote進程fork出SystemServer,繼續啟動系統:
/**
* Prepare the arguments and fork for the system server process.
*/
private static boolean startSystemServer()
throws MethodAndArgsCaller, RuntimeException {
/* Hardcoded command line to start the system server */
String args[] = {
"--setuid=1000",
"--setgid=1000",
"--setgroups=1001,1002,1003,1004,1005,1006,1007,1008,1009,1010,1018,3001,3002,3003,3006,3007",
"--capabilities=130104352,130104352",
"--runtime-init",
"--nice-name=system_server",
"com.android.server.SystemServer",
};
ZygoteConnection.Arguments parsedArgs = null;
int pid;
try {
parsedArgs = new ZygoteConnection.Arguments(args);
ZygoteConnection.applyDebuggerSystemProperty(parsedArgs);
ZygoteConnection.applyInvokeWithSystemProperty(parsedArgs);
/* Request to fork the system server process */
pid = Zygote.forkSystemServer(
parsedArgs.uid, parsedArgs.gid,
parsedArgs.gids,
parsedArgs.debugFlags,
null,
parsedArgs.permittedCapabilities,
parsedArgs.effectiveCapabilities);
} catch (IllegalArgumentException ex) {
throw new RuntimeException(ex);
}
/* For child process */
if (pid == 0) {
handleSystemServerProcess(parsedArgs);
}
return true;
} 首先,確定SystemServer的啟動參數,然後,調用Zygote.forkSysetmServer函數,開始執行fork操作。這一塊和SystemServer的啟動過程比較相關,留待後面的文章分析。暫時只需要記住SystemServer是在這個位置啟動的就好,其他的可以暫時忽略。
runSelectLoopMode
前面,我們已經得到LocalServerLocket了,現在需要開始監聽LocalServerScoket了:
/**
* Runs the zygote process's select loop. Accepts new connections as
* they happen, and reads commands from connections one spawn-request's
* worth at a time.
*
* @throws MethodAndArgsCaller in a child process when a main() should
* be executed.
*/
private static void runSelectLoopMode() throws MethodAndArgsCaller {
ArrayList fds = new ArrayList();
ArrayList peers = new ArrayList();
FileDescriptor[] fdArray = new FileDescriptor[4];
fds.add(sServerSocket.getFileDescriptor());
peers.add(null);
int loopCount = GC_LOOP_COUNT;
while (true) {
int index;
/*
* Call gc() before we block in select().
* It's work that has to be done anyway, and it's better
* to avoid making every child do it. It will also
* madvise() any free memory as a side-effect.
*
* Don't call it every time, because walking the entire
* heap is a lot of overhead to free a few hundred bytes.
*/
if (loopCount <= 0) {
gc();
loopCount = GC_LOOP_COUNT;
} else {
loopCount--;
}
try {
fdArray = fds.toArray(fdArray);
index = selectReadable(fdArray);
} catch (IOException ex) {
throw new RuntimeException("Error in select()", ex);
}
if (index < 0) {
throw new RuntimeException("Error in select()");
} else if (index == 0) {//index=0 為監聽端口
ZygoteConnection newPeer = acceptCommandPeer();
peers.add(newPeer);
fds.add(newPeer.getFileDesciptor());
} else {
boolean done;
done = peers.get(index).runOnce();
if (done) {
peers.remove(index);
fds.remove(index);
}
}
}
} 其中,selectReadable函數為native函數,實現了一個多連接的等待功能:
static jint com_android_internal_os_ZygoteInit_selectReadable (
JNIEnv *env, jobject clazz, jobjectArray fds)
{
if (fds == NULL) {
jniThrowNullPointerException(env, "fds == null");
return -1;
}
jsize length = env->GetArrayLength(fds);
fd_set fdset;//fdset為連接集合
if (env->ExceptionOccurred() != NULL) {
return -1;
}
FD_ZERO(&fdset);//清空fdset
int nfds = 0;
for (jsize i = 0; i < length; i++) {//把所有的連接保存到fdset中
jobject fdObj = env->GetObjectArrayElement(fds, i);
if (env->ExceptionOccurred() != NULL) {
return -1;
}
if (fdObj == NULL) {
continue;
}
int fd = jniGetFDFromFileDescriptor(env, fdObj);
if (env->ExceptionOccurred() != NULL) {
return -1;
}
FD_SET(fd, &fdset);//保存fd到fdset中
if (fd >= nfds) {
nfds = fd + 1;
}
}
int err;
do {
err = select (nfds, &fdset, NULL, NULL, NULL);//fdset中任何一個連接有數據可讀,則返回該連接在fdset的序號,否則等待
} while (err < 0 && errno == EINTR);
if (err < 0) {
jniThrowIOException(env, errno);
return -1;
}
for (jsize i = 0; i < length; i++) {
jobject fdObj = env->GetObjectArrayElement(fds, i);
if (env->ExceptionOccurred() != NULL) {
return -1;
}
if (fdObj == NULL) {
continue;
}
int fd = jniGetFDFromFileDescriptor(env, fdObj);
if (env->ExceptionOccurred() != NULL) {
return -1;
}
if (FD_ISSET(fd, &fdset)) {
return (jint)i;//返回有數據可讀到連接的序號
}
}
return -1;
} 有數據可讀的連接的序號為0,則為監聽端口,應該accept這個連接:
/**
* Waits for and accepts a single command connection. Throws
* RuntimeException on failure.
*/
private static ZygoteConnection acceptCommandPeer() {
try {
return new ZygoteConnection(sServerSocket.accept());
} catch (IOException ex) {
throw new RuntimeException(
"IOException during accept()", ex);
}
} 有數據可讀的連接的序號不為0,則說明有fork指令過來,執行ZygoteConnection.runOnce(),並視需要移除這個連接。這個過程和App進程的啟動相關,之後的文章會做進一步分析。
總結
Zygote進程由Init進程啟動Zygote進程的實體為app_processZygote初始化Android虛擬機以後,開始執行Java類ZygoteInitZygoteInit會啟動SystemServerZygoteInit會監聽domain socket “dev/socket/zygote”,以執行framework層指定的fork操作
 Android框架分析系列之Android traces.txt文件
Android的traces.txt文件記錄了進程的堆棧情況,對於分析應用響應慢,以及ANR的原因很有幫助。traces.txt文件的位置位於/data/anr/。1.
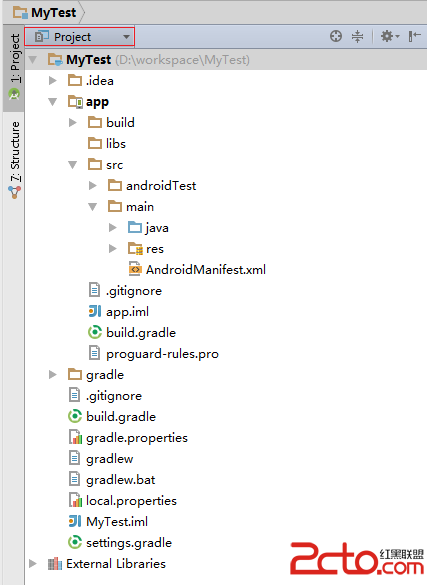 Android Studio使用小結
一 、搭建Android Studio 安裝環境 二、安裝版本控制工具搭建好Android Studio後,開發過程中我們通常會用到版本控制工具來管理我們的代碼
 Android Studio怎麼查看程序安全碼獲取SHA1值? Android Studio程序安全碼怎麼用?
Android Studio怎麼查看程序安全碼獲取SHA1值? Android Studio程序安全碼怎麼用?我們使用百度地圖SDK進行Android開發,
 android使用orm框架ormlite在控制台打印log日志信息
在默認情況下,在android下默認只打印info級別的日志信息,所以在默認情況只能打印ormlite中創建數據庫表的語句,而對於數據的插入和查詢等sql語句是不會打印出