編輯:關於Android編程
對話框以下四種:
AlertDialog:警告對話框。
ProgressDialog:進度條對話框。
DatePickerDialog:日期對話框。
TimePickerDialog:時間對話框。
下面分別給出了四種形式對話框的演示截圖以及代碼。
其中方法的定義為:


 1. setTitle設置標題
                 setIcon設置對話框圖標
                 setMessage簡單消息框
                 setItems設置要在對話框中顯示的項目列表
                 setView設置自定義的對話框樣式
                 setSingleChoiceItems設置對話框顯示一個單選框
                 setMultiChoiceItems設置對話框顯示一系列的復選框
                 setPositiveButton設置對話框顯示一個確定的按鈕
                 setNeutralButton設置對話框顯示一個退出按鈕
                 setNegativeButton 設置對話框顯示一個取消按鈕
                 create創建一個AlertDialog對話框
                 show顯示對話框
下面是8種AlertDialog實例,請看下面的演示圖和代碼:

main.xml(都是button)

public void dialog1(View v){

        new AlertDialog.Builder(MainActivity.this)
        .setIcon(R.drawable.ic_launcher)
        .setTitle(請選擇)
        .setMessage(請確認您的密碼!)
        .setPositiveButton(確定, new DialogInterface.OnClickListener() {
    @Override
    public void onClick(DialogInterface dialog, int which) {
    Toast.makeText(MainActivity.this, 你選擇了確定按鈕!, Toast.LENGTH_SHORT).show();
            }
        })
        .setNegativeButton(取消, new DialogInterface.OnClickListener() {
    @Override
    public void onClick(DialogInterface dialog, int which) {
    Toast.makeText(MainActivity.this, 你選擇了取消按鈕!, Toast.LENGTH_SHORT).show();
            }
        })
        .show();
    }

public void dialog2(View v){

        new AlertDialog.Builder(MainActivity.this)
        .setIcon(R.drawable.ic_launcher)
        .setTitle(請選擇)
        .setMessage(請確認保存個人信息!)
        .setPositiveButton(確定, new DialogInterface.OnClickListener() {
    @Override
    public void onClick(DialogInterface dialog, int which) {
    Toast.makeText(MainActivity.this, 你選擇了確定按鈕!, Toast.LENGTH_SHORT).show();
            }
        })
        .setNeutralButton(重新編輯, new DialogInterface.OnClickListener() {
    @Override
    public void onClick(DialogInterface dialog, int which) {
    Toast.makeText(MainActivity.this, 你選擇了重新編輯按鈕!, Toast.LENGTH_SHORT).show();
            }
        })
        .setNegativeButton(取消, new DialogInterface.OnClickListener() {
    @Override
    public void onClick(DialogInterface dialog, int which) {
    Toast.makeText(MainActivity.this, 你選擇了取消按鈕!, Toast.LENGTH_SHORT).show();
            }
        })
        .show();

    }

public void dialog3(View v){

        new AlertDialog.Builder(MainActivity.this)
        .setIcon(R.drawable.ic_launcher)
        .setTitle(請輸入您修改後...)
        //setView可以添加View進去,那就可以做很多風格的對話框了
        .setView(new EditText(MainActivity.this))
        .setPositiveButton(確定, new DialogInterface.OnClickListener() {
    @Override
    public void onClick(DialogInterface dialog, int which) {
    Toast.makeText(MainActivity.this, 你選擇了確定按鈕!, Toast.LENGTH_SHORT).show();
            }
        })
        .setNegativeButton(取消, new DialogInterface.OnClickListener() {
    @Override
    public void onClick(DialogInterface dialog, int which) {
    Toast.makeText(MainActivity.this, 你選擇了取消按鈕!, Toast.LENGTH_SHORT).show();
            }
        })
        .show();
    }

public void dialog4(View v){
        final String[]  s={北京,上海,深圳,廣州};
        new AlertDialog.Builder(MainActivity.this)
        .setIcon(R.drawable.ic_launcher)
        .setTitle(請選擇)
        .setSingleChoiceItems(s, 0,
    new DialogInterface.OnClickListener() {
    public void onClick(DialogInterface dialog, int which) {
    Toast.makeText(getApplicationContext(), s[which], Toast.LENGTH_LONG).show();
               dialog.dismiss();
                  }
                 }
           )
        .setNegativeButton(取消, null)
        .show();

    }

public void dialog5(View v){
        final String[]  s={北京,上海,深圳,廣州};
        final boolean[] boo=new boolean[] { true, false, false, false};
        new AlertDialog.Builder(MainActivity.this)
        .setIcon(R.drawable.ic_launcher)
        .setTitle(請選擇)
        .setMultiChoiceItems(s, boo, new OnMultiChoiceClickListener() {

    @Override
    public void onClick(DialogInterface dialog, int which, boolean isChecked) {
        // TODO Auto-generated method stub
            }
        })
        .setPositiveButton(確定, new OnClickListener() {

    public void onClick(DialogInterface dialog, int which) {
        // TODO Auto-generated method stub

        String str = 您選擇了:;

                for (int i = 0; i < boo.length; i++) {
                    if(boo[i]){
                        str=str+s[i]+    ;
                    }
                }
    Toast.makeText(getApplicationContext(), str, Toast.LENGTH_LONG).show();
            }
        })
        .setNegativeButton(取消, null)
        .show();
    }

public void dialog6(View v){

        new AlertDialog.Builder(MainActivity.this)
        .setIcon(R.drawable.ic_launcher)
        .setTitle(請確認)
        .setItems(new String[] {北京,上海,深圳}, null)
        .setNegativeButton(確定, null)
        .show();

    }

public void dialog7(View v){
        ImageView imageview=new ImageView(MainActivity.this);
        imageview.setImageResource(R.drawable.happy);
        new AlertDialog.Builder(MainActivity.this)
        .setIcon(R.drawable.ic_launcher)
        .setTitle(請選擇)
        .setView(imageview)
        .setPositiveButton(確定, null)
        .show();
    }

public void dialog8(View v){
        TextView textview=new TextView(MainActivity.this);
        textview.setText(請輸入內容:);
        EditText edittext= new EditText(MainActivity.this);
        LinearLayout  linearLayout=new LinearLayout(MainActivity.this);
        linearLayout.addView(textview);
        linearLayout.addView(edittext);
        new AlertDialog.Builder(MainActivity.this)
        .setIcon(R.drawable.ic_launcher)
        .setTitle(請選擇)
        //setView可以添加View進去,那就可以做很多風格的對話框了
        .setView(linearLayout)
        .setPositiveButton(確定, new DialogInterface.OnClickListener() {
        @Override
        public void onClick(DialogInterface dialog, int which) {
        Toast.makeText(MainActivity.this, 你選擇了確定按鈕!, Toast.LENGTH_SHORT).show();
            }
        })
        .setNegativeButton(取消, new DialogInterface.OnClickListener() {
        @Override
        public void onClick(DialogInterface dialog, int which) {
        Toast.makeText(MainActivity.this, 你選擇了取消按鈕!, Toast.LENGTH_SHORT).show();
            }
        })
        .show();
    }
下面是2種ProgressDialog實例,請看下面的演示圖和代碼:


//進度條窗口
    ProgressDialog processDia=null;
    public final static int MAX_READPROCESS = 100;
    public void dialog9(View v){
        processDia=new ProgressDialog(MainActivity.this);
        processDia.setProgress(0);
        processDia.setTitle(進度條);
        processDia.setProgressStyle(ProgressDialog.STYLE_HORIZONTAL);
        processDia.setMax(MAX_READPROCESS);
        processDia.show();
        new Thread(){
          public void run()
             {
                 int Progress= 0;
                  while(Progress < MAX_READPROCESS)
                    {
                     try {
                   Thread.sleep(100);
                   Progress++;
                   processDia.incrementProgressBy(1);
            } catch (InterruptedException e) {
           // TODO Auto-generated catch block
             e.printStackTrace();
                            }
                        }
                   //讀取完後窗口消失
                   processDia.cancel();
                    }
            }.start();
    }

public void dialog10(View v){
        ProgressDialog dialog=new ProgressDialog(MainActivity.this);
        dialog.setTitle(處理中...);
        dialog.setMessage(請等待...);
        dialog.show();
    }
TimePickerDialog:時間對話框。
下面是1種DatePickerDialog實例,請看下面的演示圖和代碼:


public class MainActivity extends Activity {
    private int year;
    private int month;
    private int day;
    TextView  textview;
    @Override
    protected void onCreate(Bundle savedInstanceState) {
        super.onCreate(savedInstanceState);
        setContentView(R.layout.main);
        textview=(TextView) findViewById(R.id.textview);
        //初始化Calendar日歷對象
        Calendar calendar=Calendar.getInstance(Locale.CHINA);
        Date date=new Date();
        calendar.setTime(date);//設置時間為當前日期

        year   =calendar.get(Calendar.YEAR); //獲取年
        month  =calendar.get(Calendar.MONTH);//獲取月
        day    =calendar.get(Calendar.DAY_OF_MONTH);//獲取天
        textview.setText(當前日期:+year+-+(month+1)+-+(day+1));
    }

    @Override
    public boolean onCreateOptionsMenu(Menu menu) {
        // Inflate the menu; this adds items to the action bar if it is present.
        getMenuInflater().inflate(R.menu.main, menu);
        return true;
    }

    public void dialog1(View v){
        /**
         * from  API
         * android.app.DatePickerDialog.DatePickerDialog(Context context, OnDateSetListener callBack, int year, int monthOfYear, int dayOfMonth)
            Parameters:
            context The context the dialog is to run in.
            callBack How the parent is notified that the date is set.
            year The initial year of the dialog.
            monthOfYear The initial month of the dialog.
            dayOfMonth The initial day of the dialog.
         */
        DatePickerDialog dialog=new DatePickerDialog(MainActivity.this,Datedialoglistener,year, month, day);
        dialog.setTitle(日期對話框);
        dialog.setMessage(請重置);
        dialog.show();
    }

    DatePickerDialog.OnDateSetListener Datedialoglistener=new DatePickerDialog.OnDateSetListener()
    {
        /**params:view:該事件關聯的組件
         * params:updateyear:當前選擇的年
         * params:updatemonth:當前選擇的月
         * params:updateday:當前選擇的日
         */
        @Override
        public void onDateSet(DatePicker view, int updateyear, int updatemonth,int updateday) {


            //修改year、month、day的變量值,單擊按鈕時,DatePickerDialog上顯示上一次修改後的值
            year=updateyear;
            month=updatemonth;
            day=updateday;
            updateDate();

        }
        //當DatePickerDialog關閉時,顯示重置後的日期
        private void updateDate()
        {
             textview.setText(重置後的日期:+year+-+(month+1)+-+day);
        }
    };

}
下面是1種TimePickerDialog實例,請看下面的演示圖和代碼:

public class MainActivity extends Activity {
    int hourOfDay;
    int minute;
    TextView  textview;
    @Override
    protected void onCreate(Bundle savedInstanceState) {
        super.onCreate(savedInstanceState);
        setContentView(R.layout.main);
        textview=(TextView) findViewById(R.id.textview);
        Calendar calendar=Calendar.getInstance(TimeZone.getDefault());
        hourOfDay=calendar.get(Calendar.HOUR_OF_DAY);
        minute=calendar.get(Calendar.MINUTE);
        textview.setText(當前時間為:+hourOfDay+時+minute+分);
    }

    @Override
    public boolean onCreateOptionsMenu(Menu menu) {
        // Inflate the menu; this adds items to the action bar if it is present.
        getMenuInflater().inflate(R.menu.main, menu);
        return true;
    }


    TimePickerDialog dialog;
    public void dialog1(View v){
        /**
         * From API
         * android.app.TimePickerDialog.TimePickerDialog(Context context, OnTimeSetListener callBack, int hourOfDay, int minute, boolean is24HourView)
           Parameters:
           context      Parent.
           callBack     How parent is notified.
           hourOfDay    The initial hour.
           minute       The initial minute.
           is24HourView Whether this is a 24 hour view, or AM/PM.
         *
         */
        dialog=new TimePickerDialog(MainActivity.this, onTimeSetListener, hourOfDay, minute, true);
        dialog.setTitle(時間對話框);
        dialog.setMessage(請重置);
        dialog.show();
    }

    TimePickerDialog.OnTimeSetListener onTimeSetListener=new TimePickerDialog.OnTimeSetListener(){
        public void onTimeSet(TimePicker view, int hourOfDay, int minute) {
            textview.setText(您重置了時間:+hourOfDay+時+minute+分);
        }
    };

}
關於彈出框Toast請看:Android:Toast 彈出信息框
關於ProgressBar 進度條 請看:Android:ProgressBar 進度條
 Android繪制一條寬度逐漸變大的路徑
1.介紹先看一下效果圖用過電腦版印象筆記演示功能的應該知道這個效果,現在想在手機上實現一下,當然這個是最終的目標,這篇只是介紹實現過程中的一步 —&mdash
 Android自定義水波紋動畫Layout實例代碼
話不多說,我們先來看看效果:Hi前輩搜索預覽這一張是《Hi前輩》的搜索預覽圖,你可以在這裡下載這個APP查看更多效果:http://www.wandoujia.com/a
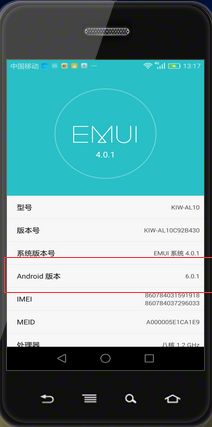
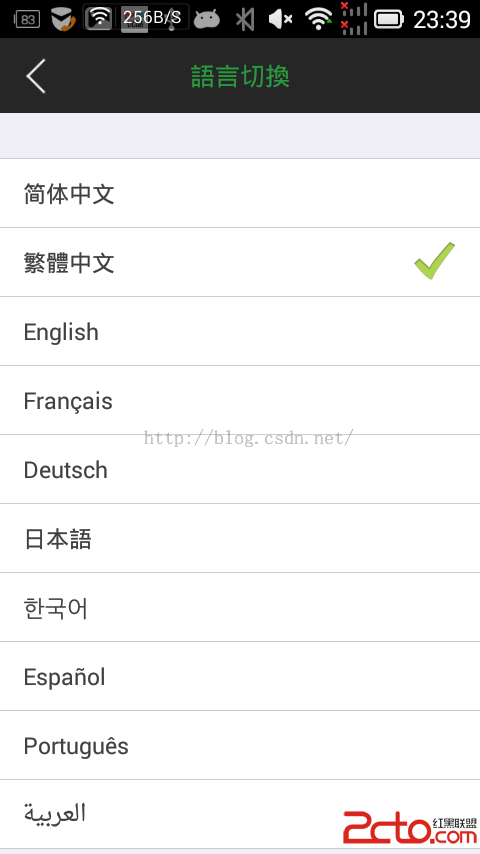 Android 史上最強多語言國際化,不僅第一次會跟隨系統,而且會保存用戶的語言設置
1.我等屌絲喜歡簡單粗暴,首先來一幅圖哥們我是大陸人,當然默認語言是 中文簡體,但是我剛剛切換成了繁體了 2.看下配置文件,按照這個格式 ,看圖吧,簡單粗暴,別
 Android編程下拉菜單spinner用法小結(附2則示例)
本文較為詳細的總結分析了Android編程下拉菜單spinner用法。分享給大家供大家參考,具體如下:Spinner控件也是一種列表類型的控件,它的繼承關系如下:java