編輯:關於Android編程
先看一個效果圖

 bitmapBackground = BitmapFactory.decodeResource(getResources(), R.mipmap.cc);

   //把背景圖 畫到底層,在底層摳圖全屏大小,將原圖放大後匹配到摳圖上面
        canvas.drawBitmap(bitmapBackground, new Rect(0, 0, bitmapBackground.getWidth(), bitmapBackground.getHeight()), new Rect(0, 0, width, height), null);
這一步驟涉及到自定義View屬性問題參考上一篇:
http://blog.csdn.net/taoolee/article/details/48547781:即背景圖可以在XML當中定義
//第二層為一個位圖的圖層;在此圖層上給圖片加上蒙版,
canvasBit.drawRect(0, 0, width, height, paintCircle);
這裡有個問題就是,當筆觸在屏幕上快速滑動的話,中間連接不起來所以解決這個問題
  private Path path;
    float x;
    float y;
    float old_x;
    float old_y;

    @Override
    public boolean onTouchEvent(MotionEvent event) {

        switch (event.getAction()) {
            case MotionEvent.ACTION_DOWN:
                x = event.getX();
                y = event.getY();
                path.moveTo(x, y);
                invalidate();
                old_x = x;
                old_y = y;
                return true;


            case MotionEvent.ACTION_MOVE:
                x = event.getX();
                y = event.getY();
                path.moveTo(old_x, old_y);
                path.lineTo(x, y);
                //也可以通過畫貝塞爾曲線實現
                // path.quadTo((x+old_x)/2,(y+old_y)/2,x,y);


                //畫圓的畫,快速滑動中間會不連貫
                //path.addCircle(x, y, 50, Path.Direction.CW);
                invalidate();
                old_x = x;
                old_y = y;
                return true;


        }


        return super.onTouchEvent(event);
    }
在這裡給講解一下圖層的問題,大體上算是我個人的理解,首先onDraw()方法自帶一個canvas,我理解為他是手機屏幕。最後我們都要使用這塊畫布
把其他的東西在這上面展示出來:在這裡我們新建了一個位圖圖層,它的作用就是先畫一層蒙版,再畫一個路徑,,是的重疊部分透明,我們就是為了得到這個透明的東西,然後把我們得到的這個透明的,最後也要畫在onDraw()方法裡面的canvas上面;
新建的Bitmap的畫布
//創建一個寬width高height的新位圖
        back = Bitmap.createBitmap(width, height, Bitmap.Config.ARGB_8888);
        canvasBit = new Canvas(back);//位圖傳遞給它的畫布
  //把背景圖 畫到底層,在底層摳圖全屏大小,將原圖放大後匹配到摳圖上面
        canvas.drawBitmap(bitmapBackground, new Rect(0, 0, bitmapBackground.getWidth(), bitmapBackground.getHeight()), new Rect(0, 0, width, height), null);
        //第二層為一個位圖的圖層;在此圖層上給圖片加上蒙版,
        canvasBit.drawRect(0, 0, width, height, paintCircle);

        canvasBit.drawPath(path, paintRect);//與上層重疊透明
        //最後都要在canvas上面畫上去
        canvas.drawBitmap(back, 0, 0, null);
實現將塗鴉的位圖保存到本地,格式比較固定,大家看一些
public class MainActivityBitmap2 extends Activity  {

    private MyBitmapView2 view2;
    private Button button;
    @Override
    protected void onCreate(Bundle savedInstanceState) {
        super.onCreate(savedInstanceState);
        setContentView(R.layout.activity_bitmapview2);
        view2= (MyBitmapView2) findViewById(R.id.view2);
        button= (Button) findViewById(R.id.button);
        button.setOnClickListener(new View.OnClickListener() {
            @Override
            public void onClick(View v) {

                view2.setDrawingCacheEnabled(true);
                Bitmap bit=view2.getDrawingCache(true);
                File file=new File(Environment.getExternalStorageDirectory(),System.currentTimeMillis()+.jpg);
                if(!file.exists()){
                    try {
                        file.createNewFile();
                    } catch (IOException e) {
                        e.printStackTrace();
                    }
                }
                try {
                    bit.compress(Bitmap.CompressFormat.JPEG,100,new FileOutputStream(file));
                } catch (FileNotFoundException e) {
                    e.printStackTrace();
                }


            }
        });

    }
}
 RecyclerView下拉刷新上拉加載
一 、前言最近實在太忙,一個多禮拜沒有更新文章了,於是今晚加班加點把demo寫出來,現在都12點了才開始寫文章。1.我們的目標把RecyclerView下拉刷新上拉加載更
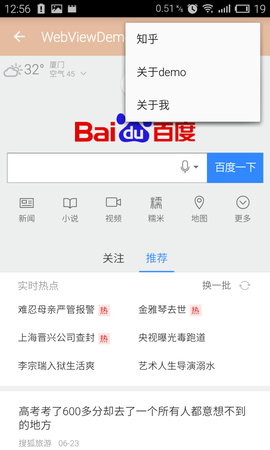 Android中WebView的一些簡單用法
Android中WebView的一些簡單用法一直想寫一個關於 WebView 控件的 一些簡單運用,都沒什麼時間,這次也是擠出時間寫的,裡面的一些基礎知識就等有時間再更新
 Android Studio使用JNI調用C代碼
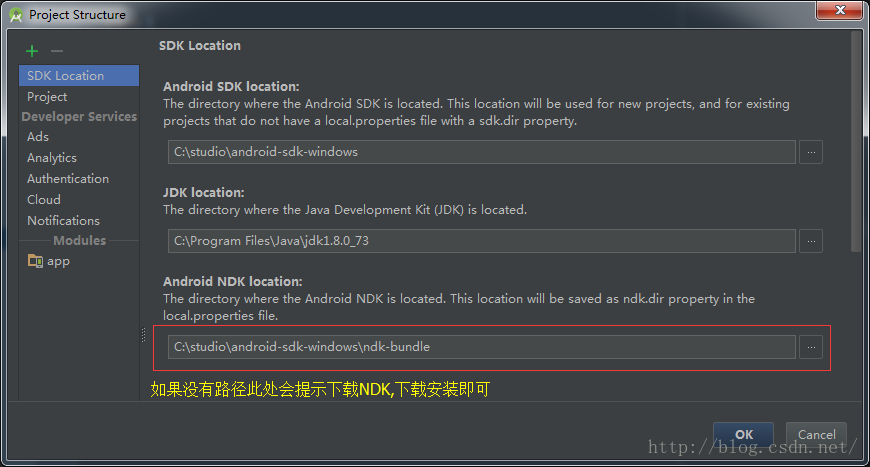
一、配置NDK環境第一步:在AndroidStudio中配置ndk環境需要下載ndk包,在AndroidStudio中File-->ProjectStructure
 微信怎麼搶紅包 微信紅包怎麼搶
微信紅包是騰訊旗下產品微信於2014年1月27日推出的一款應用,功能上可以實現發紅包、查收發記錄和提現。臨近春節了,新年發紅包是我們的傳統文化,現在微信紅包