編輯:關於Android編程
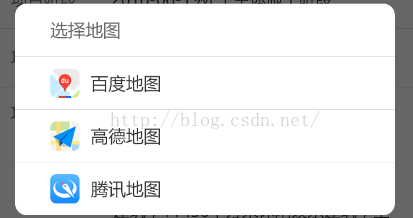 如下為各個地圖效果:
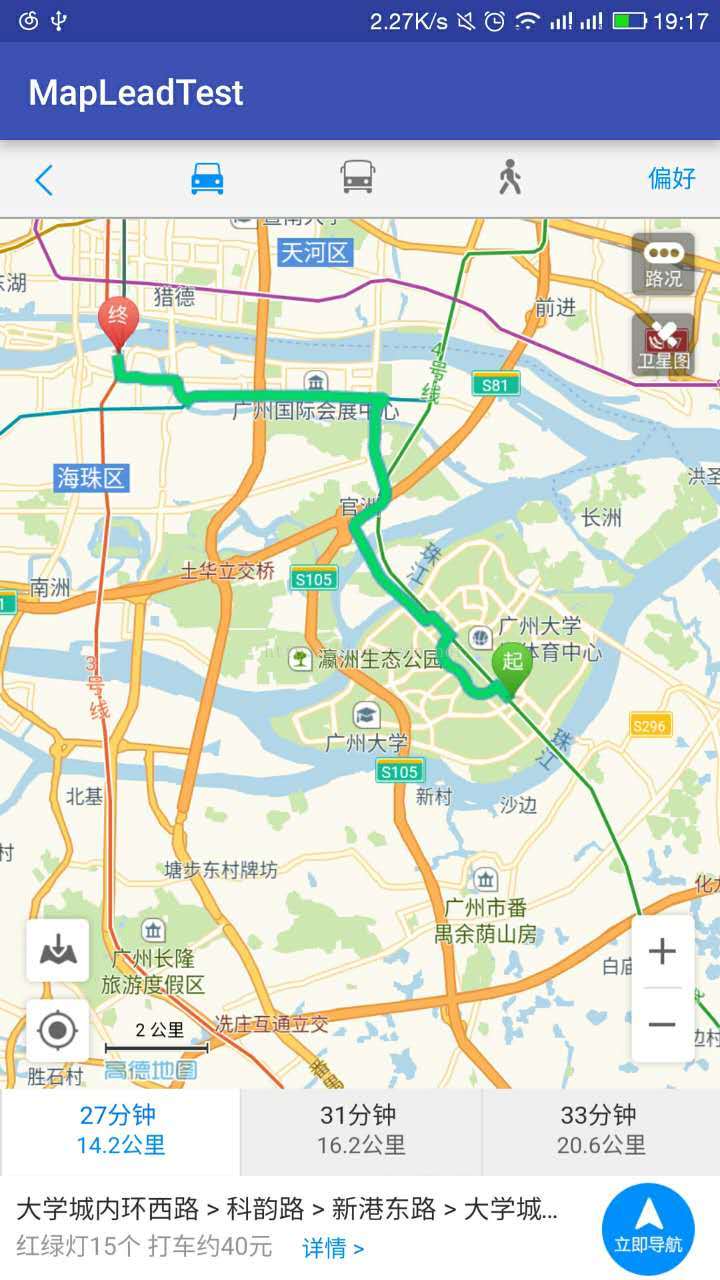
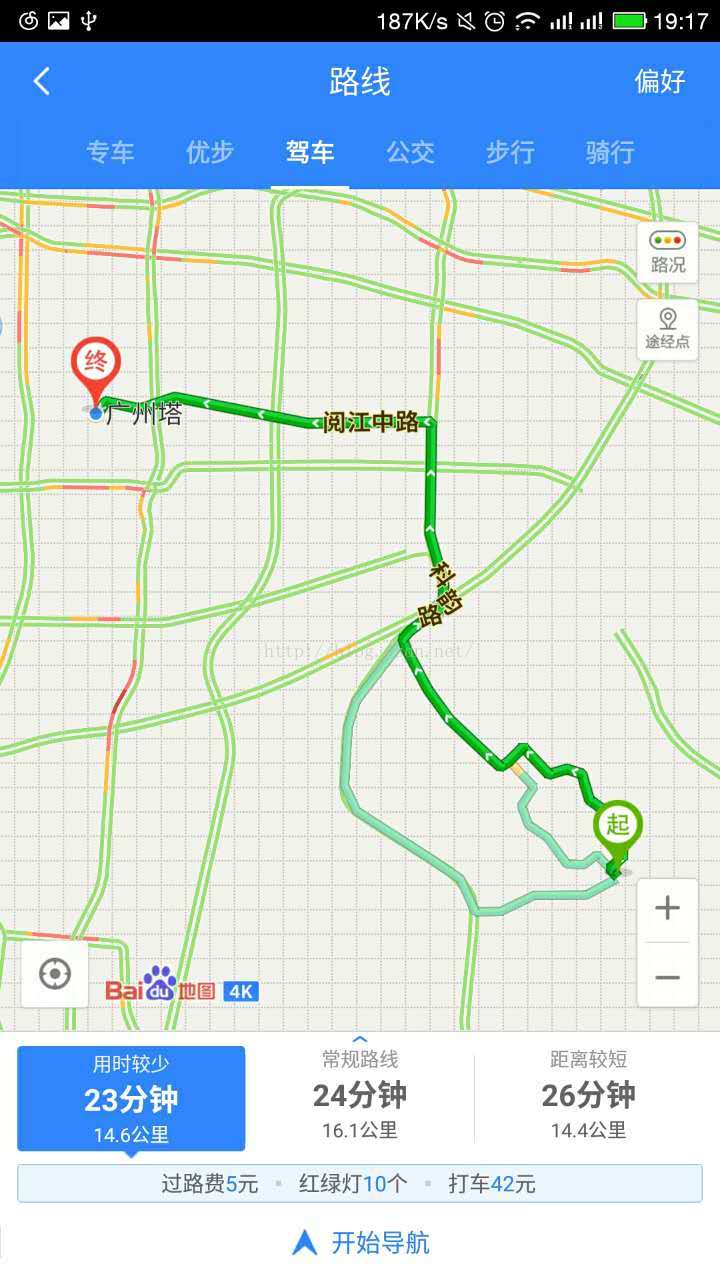 百度地圖高德地圖
 騰訊地圖
一開始做時,這不就簡單嗎,坐標嘛,都是一樣的,去各個地圖平台找到對應的URL api,傳入當前的坐標和目的地址的坐標(當前使用的是百度地圖的SDK)。利用Intent跳轉不就行了嘛。完成之後才發現,tooyoung too simple,原諒我對國家的安全知識了解有點少。坐標各地圖是不一定相同的,地址是有偏移的。
下面是我找弄度娘來的(為什麼不用google呢?):
我們平時用到的地球坐標系統,叫做WGS-84坐標,這個是國際通用的“准確”的坐標系統。國家保密插件,其實就是對真實坐標系統進行人為的加偏處理,即為GCJ-02坐標,戲稱“火星坐標”。於是,我們有了下面的東西:
-地球坐標:指WGS84坐標系統
-火星坐標:指使用國家保密插件人為偏移後的坐標
-地球地圖:指與地球坐標對應的客觀真實的地圖
-火星地圖:指經過加密偏移後的,與火星坐標對應的地圖
騰訊地圖
一開始做時,這不就簡單嗎,坐標嘛,都是一樣的,去各個地圖平台找到對應的URL api,傳入當前的坐標和目的地址的坐標(當前使用的是百度地圖的SDK)。利用Intent跳轉不就行了嘛。完成之後才發現,tooyoung too simple,原諒我對國家的安全知識了解有點少。坐標各地圖是不一定相同的,地址是有偏移的。
下面是我找弄度娘來的(為什麼不用google呢?):
我們平時用到的地球坐標系統,叫做WGS-84坐標,這個是國際通用的“准確”的坐標系統。國家保密插件,其實就是對真實坐標系統進行人為的加偏處理,即為GCJ-02坐標,戲稱“火星坐標”。於是,我們有了下面的東西:
-地球坐標:指WGS84坐標系統
-火星坐標:指使用國家保密插件人為偏移後的坐標
-地球地圖:指與地球坐標對應的客觀真實的地圖
-火星地圖:指經過加密偏移後的,與火星坐標對應的地圖
國內出版的各種地圖系統(包括電子形式),必須至少采用GCJ-02對地理位置進行首次加密。於是,
-谷歌地圖的大陸地圖、高德國內地圖采用GCJ-02對地圖進行加偏。 -百度地圖更是進一步發揮了天朝特色,除了GCJ-02加偏,自己又在此基礎上繼續進行加偏,相應的坐標稱為BD-09坐標。 各地圖廠商使用的坐標系: -火星坐標 GCJ02坐標系 -iOS 地圖 -Gogole地圖 -搜搜(騰訊)、阿裡雲、高德地圖 -地球坐標 WGS84坐標系 -Google 衛星地圖(國外地圖應該都是……) -百度坐標 BD09坐標系 -百度地圖 好了,弄懂了之後。也很簡單嘛,用的是百度地圖SDK,那手上的坐標當然也是百度的。那調用高德和騰訊地圖時, 只需把百度地圖的坐標轉換為火星坐標就行啊。
public class MapTranslateUtils {


    /**
     * 坐標轉換,騰訊地圖(火星坐標)轉換成百度地圖坐標
     * @param lat 騰訊緯度
     * @param lon 騰訊經度
     * @return 返回結果:經度,緯度
     */
    public static  double[] map_hx2bd(double lat, double lon){
        double bd_lat;
        double bd_lon;
        double x_pi=3.14159265358979324;
        double x = lon, y = lat;
        double z = Math.sqrt(x * x + y * y) + 0.00002 * Math.sin(y * x_pi);
        double theta = Math.atan2(y, x) + 0.000003 * Math.cos(x * x_pi);
        bd_lon = z * Math.cos(theta) + 0.0065;
        bd_lat = z * Math.sin(theta) + 0.006;
        double[] doubles = new double[]{bd_lat,bd_lon};
        System.out.println("bd_lat:"+bd_lat);
        System.out.println("bd_lon:"+bd_lon);
        return  doubles;
    }


    /**
     * 坐標轉換,百度地圖坐標轉換成騰訊地圖坐標
     * @param lat  百度坐標緯度
     * @param lon  百度坐標經度
     * @return 返回結果:緯度,經度
     */
    public static  double[] map_bd2hx(double lat, double lon){
        double tx_lat;
        double tx_lon;
        double x_pi=3.14159265358979324;
        double x = lon - 0.0065, y = lat - 0.006;
        double z = Math.sqrt(x * x + y * y) - 0.00002 * Math.sin(y * x_pi);
        double theta = Math.atan2(y, x) - 0.000003 * Math.cos(x * x_pi);
        tx_lon = z * Math.cos(theta);
        tx_lat = z * Math.sin(theta);

        double[] doubles = new double[]{tx_lat,tx_lon};
        return doubles;
    }

}
ok,現在百度地圖坐標系,火星坐標系都在手了。開干。那首先要創建 一個webView頁面:
<LinearLayout xmlns:android="http://schemas.android.com/apk/res/android"
android:layout_width="match_parent"
android:layout_height="match_parent"
android:background="#ffffff"
android:orientation="vertical">

<com.zk.common.TitleBarView
android:id="@+id/titleBar"
android:layout_width="fill_parent"
android:layout_height="wrap_content"
android:background="@color/title_bg"/>

<WebView
android:id="@+id/web_wv"
android:layout_width="fill_parent"
android:layout_height="fill_parent"/>

LinearLayout>
WebView的Activity:
public class WebViewActivity extends AppCompatActivity {

    private WebView detailsWebView;
    private String mUrl;
    private Handler handler;
    private ProgressDialog pd;
    private String mTitle;


    public static void launch(Activity activity, String url, String title) {

        Intent intent = new Intent(activity, WebViewActivity.class);
        intent.putExtra("url", url);
        intent.putExtra("title", title);
        activity.startActivity(intent);
    }

    @Override
    protected void onCreate(Bundle savedInstanceState) {
        super.onCreate(savedInstanceState);
        setContentView(R.layout.activity_web_view);

        mUrl = this.getIntent().getStringExtra("url");
        mTitle = this.getIntent().getStringExtra("title");
        detailsWebView = (WebView) findViewById(R.id.web_wv);
        detailsWebView.getSettings().setJavaScriptEnabled(true);
        detailsWebView.getSettings().setDomStorageEnabled(true);
        detailsWebView.requestFocus(View.FOCUS_DOWN);
        detailsWebView.getSettings().setUserAgentString("User-Agent");

        detailsWebView.setWebViewClient(new WebViewClient() {
            @Override
            public boolean shouldOverrideUrlLoading(WebView view, String url) {
                view.loadUrl(url);
                return false;
            }
        });
        // 設置web視圖客戶端
        detailsWebView.setWebChromeClient(new WebChromeClient() {
            @Override
            public void onProgressChanged(WebView view, int progress) {// 載入進度改變而觸發

                if (progress == 100) {
                    handler.sendEmptyMessage(1);// 如果全部載入,隱藏進度對話框 }
                    detailsWebView.setVisibility(View.VISIBLE);
                }
                super.onProgressChanged(view, progress);
            }

            @Override
            public void onReceivedTitle(WebView view, String title) {
                super.onReceivedTitle(view, title);

            }
        });

        detailsWebView.setVisibility(View.GONE);
        pd = new ProgressDialog(this);
        pd.setProgressStyle(ProgressDialog.STYLE_SPINNER);
        pd.setMessage("數據載入中,請稍候!");


        handler = new Handler() {

            public void handleMessage(Message msg) {// 定義一個Handler,用於處理下載線程與UI間通訊
                super.handleMessage(msg);
                if (!Thread.currentThread().isInterrupted()) {
                    switch (msg.what) {
                        case 0:
                            pd.show();// 顯示進度對話框
                            break;
                        case 1:
                            pd.hide();// 隱藏進度對話框,不可使用dismiss()、cancel(),否則再次調用show()時,顯示的對話框小圓圈不會動。
                            break;
                    }
                }

            }

        };
        loadurl(detailsWebView, mUrl);
    }

    public void loadurl(final WebView view, final String url) {
        handler.post(new Runnable() {

            @Override
            public void run() {
                handler.sendEmptyMessage(0);
                view.loadUrl(url);// 載入網頁
            }
        });
    }
}
首先,選擇判斷是否安裝對應地圖App時,有則啟動,沒有則轉網頁地圖。
1、百度地圖:開發平台URL地址:http://developer.baidu.com/map/wiki/index.php?title=uri/api/android
private void selectBaidu() {
    this.dismiss();
    try {
        //調起App
        if (isInstallByread("com.baidu.BaiduMap")) {
            Intent intent = Intent.getIntent("intent://map/direction?origin=latlng:"
                    + nowLat + "," + nowLng
                    + "|name:&destination=" + desAddress + "&mode=driving?ion=" + "我的位置"
                    + "&referer=Autohome|GasStation#Intent;scheme=bdapp;package=com.baidu.BaiduMap;end");
            mActivity.startActivity(intent);
        } else {
            /*String url = "http://api.map.baidu.com/direction?origin=latlng:" + mLatitude + ","
                            + mLongitude + "|name:&destination=" + mDestination
                            + "&mode=driving&output=html&src=天工項目共建";
                    WebViewActivity.launch(getActivity(), url, "網頁版地圖導航");*/
            Toast.makeText(mActivity, "如果您沒有安裝百度地圖APP," +
                    "可能無法正常使用導航,建議選擇其他地圖", Toast.LENGTH_SHORT).show();
        }
    } catch (URISyntaxException e) {
        e.printStackTrace();
    }

}
2、高德地圖 :
private void selectGaode() {
    this.dismiss();
    double[] txDesLatLng = MapTranslateUtils.map_bd2hx(desLat, desLng);
    double[] txNowLatLng = MapTranslateUtils.map_bd2hx(nowLat, nowLng);
    if (isInstallByread("com.autonavi.minimap")) {
        try {
            Intent intentOther = new Intent("android.intent.action.VIEW",
                    Uri.parse("androidamap://navi?sourceApplication=amap&lat="
                            + desLat + "&lon=" + desLng + "&dev=1&stype=0"));
            intentOther.setPackage("com.autonavi.minimap");
            intentOther.setFlags(Intent.FLAG_ACTIVITY_NEW_TASK | Intent.FLAG_ACTIVITY_CLEAR_TOP);
            mActivity.startActivity(intentOther);
        } catch (Exception e) {
            String url = "http://m.amap.com/?from="
                    + nowLat + "," + nowLng
                    + "(from)&to=" + desLat + "," + desLng + "(to)&type=0&opt=1&dev=0";
            WebViewActivity.launch(mActivity, url, "網頁版地圖導航");
        }

    } else {
        String url = "http://m.amap.com/?from="
                + txNowLatLng[0] + "," + txNowLatLng[1]
                + "(from)&to=" + txDesLatLng[0] + "," + txDesLatLng[1] + "(to)&type=0&opt=1&dev=0";
        WebViewActivity.launch(mActivity, url, "網頁版地圖導航");

    }

}
需要注意的是上面的dev參數,如果你傳入的已經是火星坐標,參數為0就行,如果你傳入的是高德坐標,則傳入1。這裡是個坑,要注意一下。
 3、騰訊地圖: 開發平台URL地址:http://lbs.qq.com/uri_v1/guide-route.html
看官方介紹目前騰訊還不支持直接啟動騰訊地圖App。
3、騰訊地圖: 開發平台URL地址:http://lbs.qq.com/uri_v1/guide-route.html
看官方介紹目前騰訊還不支持直接啟動騰訊地圖App。
 所以只能調用web的地圖:
private void selectTencent() {
    this.dismiss();
    double[] txDesLatLng = MapTranslateUtils.map_bd2hx(desLat, desLng);
    double[] txNowLatLng = MapTranslateUtils.map_bd2hx(nowLat, nowLng);
    String url = "http://apis.map.qq.com/uri/v1/routeplan?type=drive&from=&fromcoord="
            + txNowLatLng[0] + "," + txNowLatLng[1]
            + "&to=&tocoord=" + txDesLatLng[0] + "," + txDesLatLng[1] + "&policy=0&referer=myapp";
    WebViewActivity.launch(mActivity, url, "網頁版地圖導航");
}
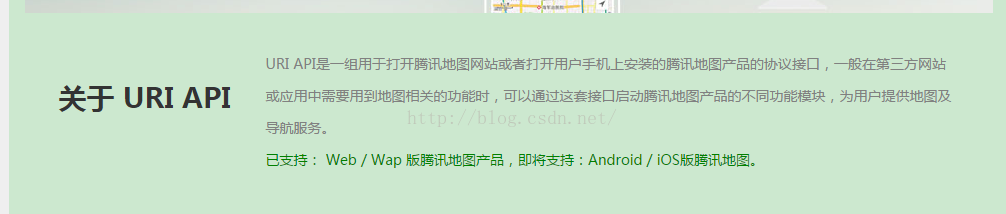
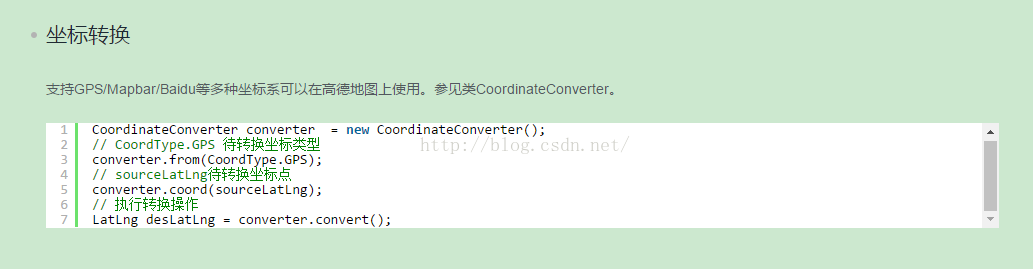
另外此處是高德地圖對其他坐標進行轉換的api:
 UC-Android逆向工程師面試第2題分析
一、簡介這個題目是別人面試UC優視集團Android逆向工程師一職位的面試題,相比較前面的面試題1,增加了一些難度。 二、題目分析1.使
 android加密解密算法之3DES算法用例
android加密算法很多:DES ,AES,3DES等等。詳情請google,baidu。des的使用安全行很低,再次我們詳細了解下3DES.3DES顧名思義,就是對d
 Android中資源文件的Shape使用總結
在Android程序開發中,我們經常會去用到Shape這個東西去定義各種各樣的形狀,首先我們了解一下Shape下面有哪些標簽,都代表什麼意思:solid:填充androi
 扣丁音樂(三)——UI框架的實現
一丶PagerSlidingTabStrp運用扣丁音樂1.0前部分(gif圖大小限制)演示:視頻教程中是直接將PagerSlidingTabStrp例子的主頁面拿來做主頁